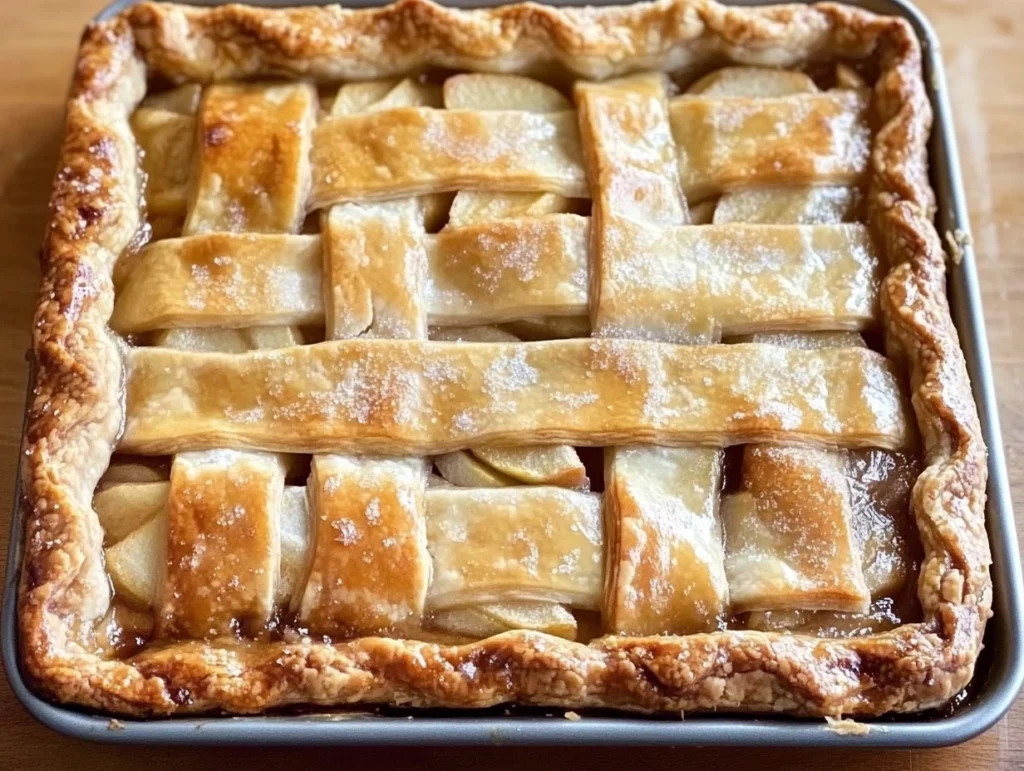
There’s just something about the scent of warm apples and cinnamon wafting through the house that makes everything feel cozy and calm. And when you need a dessert that’s equal parts homey and practical—especially one that can serve a small army—this Apple Slab Pie fits the bill perfectly.
Baked in a sheet pan with a double layer of golden, flaky crust and a juicy, spiced apple filling, this pie brings all the nostalgic flavors of a traditional apple pie, but in a format that’s ideal for feeding a crowd. Whether it’s a holiday get-together, a weekend potluck, or a casual dinner with friends, this dessert is a reliable go-to. And the best part? You don’t have to fuss over perfectly crimped edges or intricate lattice tops—this one’s all about rustic charm and delicious simplicity.
I first made this slab pie for a fall potluck where I knew a regular 9-inch pie just wasn’t going to cut it. I needed something that could stretch further without sacrificing that buttery, crisp crust and comforting apple center. Let me tell you—it was gone in minutes, and I had three people ask for the recipe before the night was over. That’s when I knew this one was a keeper.
Why You’ll Love This Apple Slab Pie
This dessert has all the classic apple pie goodness, but in an easier, more shareable form. It’s also a great recipe if you’re looking for something a little more relaxed than your typical picture-perfect pie. It’s forgiving, it travels well, and you can slice it into as many (or as few) pieces as you need.
Plus, the crust-to-filling ratio is kind of perfect. You get that satisfying crisp bite from the flaky crust on both the top and bottom, and the spiced apple filling isn’t too sweet—just cozy and balanced.
Ready to make it? Let’s walk through how to bring this slab pie to life.
INGREDIENTS YOU’LL NEED
For the crust:
1 double batch of your favorite pie crust dough (homemade or store-bought)
For the filling:
6 cups thinly sliced peeled apples (about 6 medium apples; use a mix of tart and sweet for best results)
3/4 cup granulated sugar (adjust to taste)
2 tablespoons all-purpose flour
1 teaspoon ground cinnamon
1/4 teaspoon ground nutmeg
1/8 teaspoon salt
1 tablespoon lemon juice (optional, but helps keep apples fresh and bright)
For assembly:
1 egg yolk, beaten with 1 tablespoon water (for egg wash)
Coarse sugar or turbinado sugar for sprinkling (optional)
STEP 1: Prep Your Apples
Start by peeling, coring, and thinly slicing your apples. Try to keep the slices uniform in size so they cook evenly. If you’re not using them immediately, toss them with a tablespoon of lemon juice to keep them from browning. In a large bowl, mix the sliced apples with granulated sugar, flour, cinnamon, nutmeg, and salt. Stir gently until the apples are evenly coated. Set the bowl aside while you prep your crust.
Tip: Using a mix of apples really adds depth of flavor here. I like to combine Granny Smith for tartness and Honeycrisp or Fuji for sweetness. It makes the filling taste more layered and complex.

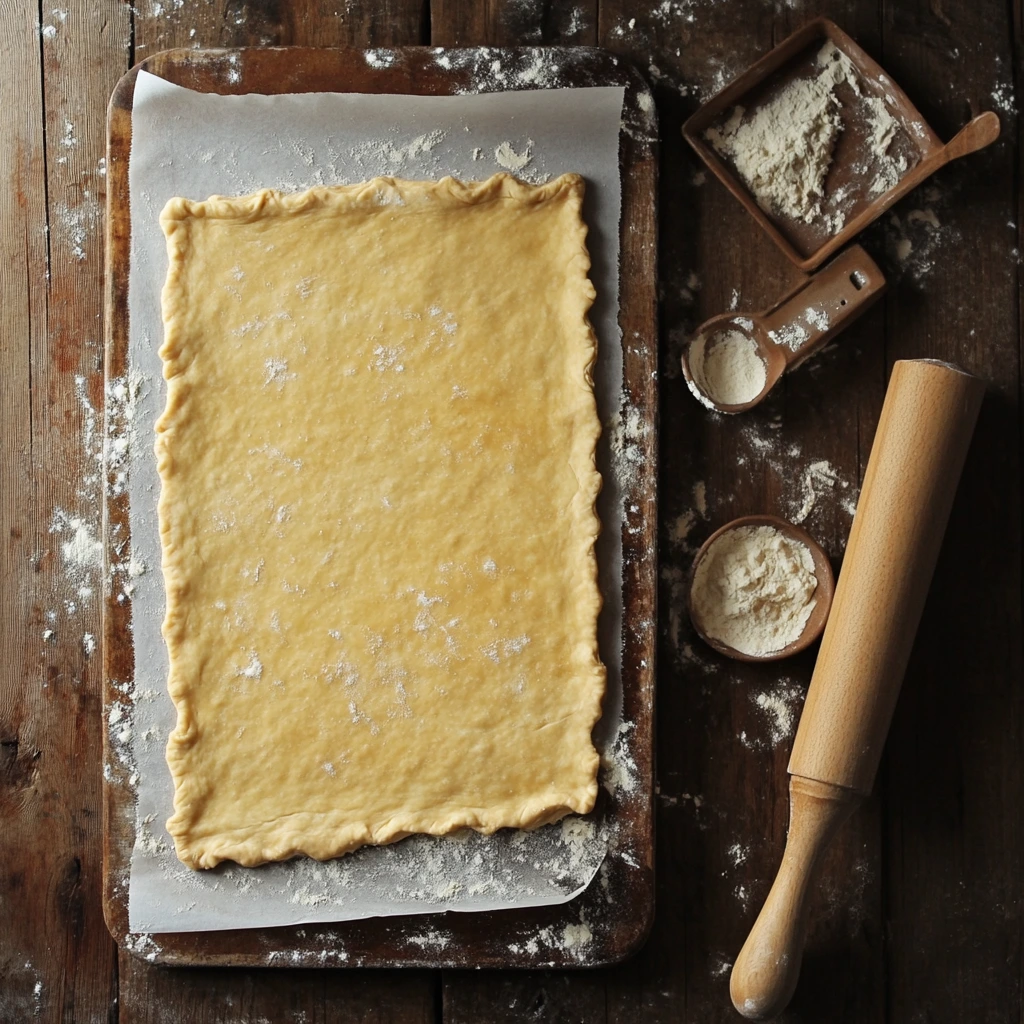
STEP 2: Roll Out the Bottom Crust
Preheat your oven to 400°F (200°C) and line a rimmed baking sheet with parchment paper. This makes cleanup a breeze and helps the crust bake up nice and crisp on the bottom.
On a floured surface, roll out half of your pie dough into a rectangle about 1/8 inch thick. It should be large enough to fit your baking sheet with a bit of overhang. Carefully transfer the dough to the prepared sheet. Don’t worry if it tears a little—you can patch it easily with extra dough.
STEP 3: Add the Filling and Shape the Edges
Spread the spiced apple mixture evenly over the crust, leaving about a 1 to 2-inch border around the edges. Once the filling is in place, fold the edges of the crust inward to create a rustic frame that will help hold everything in.
You don’t need to get fancy here—this pie is meant to look homemade and inviting. A few bumps and folds just add to its charm.
Apple Slab Pie: A Rustic Crowd-Pleasing Dessert with Classic Flavor
Alright, now that we’ve prepped our filling and laid down that gorgeous bottom crust, it’s time to move on to the fun part—sealing in all that spiced apple goodness with a flaky top crust and baking it into a golden masterpiece.
This next section is all about finishing touches and making sure your slab pie bakes up just right. Whether you’re a pie pro or giving this a go for the first time, I promise these steps are straightforward and doable. Let’s get back to it.
STEP 4: Roll Out and Add the Top Crust
Now, take the second half of your pie dough and roll it out on a floured surface into a rectangle slightly larger than the first. You want it to completely cover the apple filling with just a little extra room to press and seal the edges.
Carefully place the top crust over the apple filling. This is where you’ll gently press the edges of the top and bottom crusts together. You can do this with your fingers for a rustic look or use a fork to crimp around the edges if you want a bit more definition. Either way, the goal is to seal everything in so your filling doesn’t bubble out during baking.
Next, cut a few slits or small vents in the top crust with a sharp knife. This lets the steam escape while the pie bakes and keeps the crust from puffing up too much. It also gives you a little peek at that juicy filling underneath.
STEP 5: Brush and Sprinkle
For that beautiful, glossy golden top, brush the crust with the egg yolk wash (just one yolk beaten with a tablespoon of water). This simple step makes a big difference in the final look of the pie.
If you like a little extra crunch and sparkle, go ahead and sprinkle the top with coarse sugar or turbinado sugar. It’s optional, but I highly recommend it—it adds the perfect finishing touch and a hint of texture that contrasts beautifully with the soft apples inside.
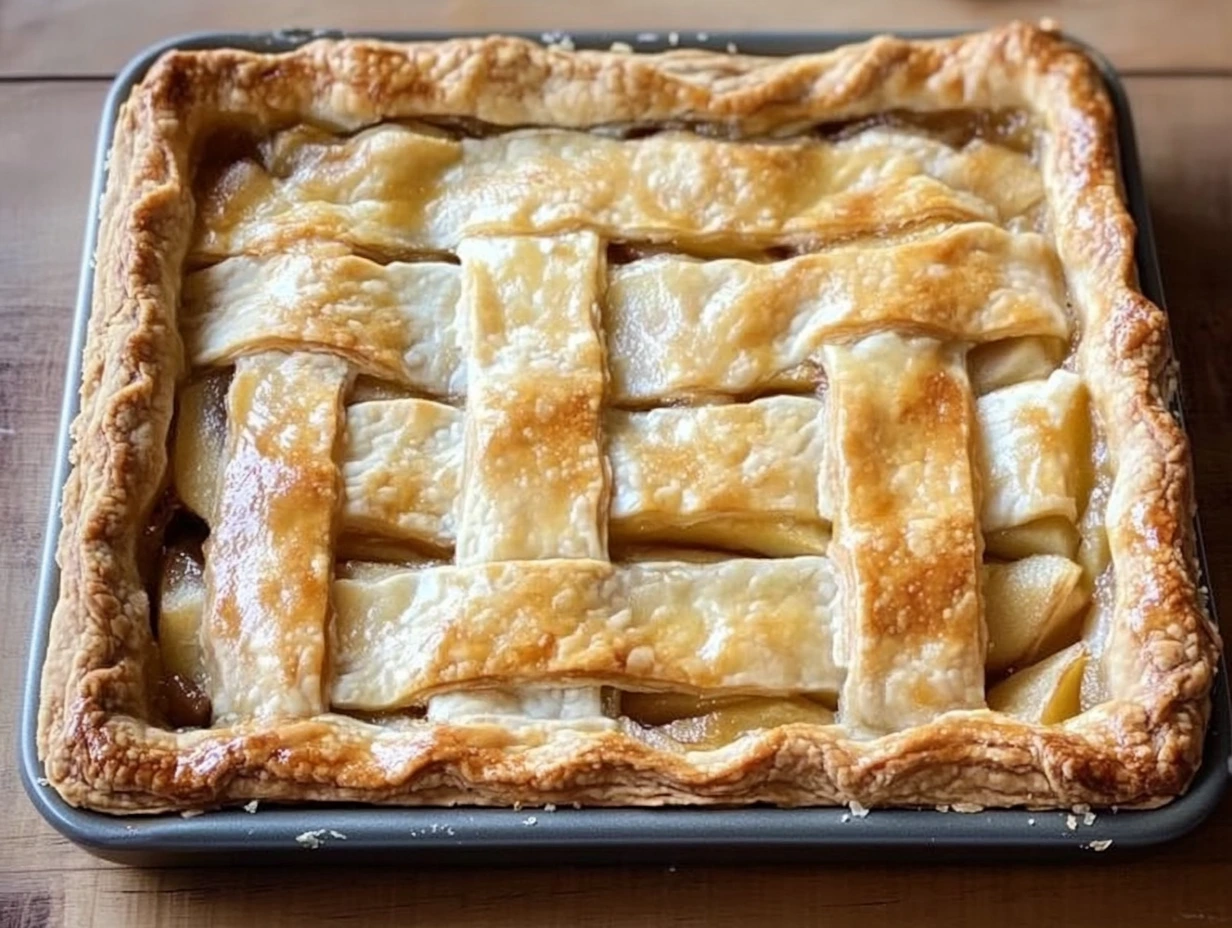
STEP 6: Bake to Golden Perfection
Place the pie in your preheated 400°F (200°C) oven and bake for 25 to 30 minutes. You’re looking for a golden brown crust and bubbling filling that peeks out through the vents. If you notice the edges of your crust are browning too quickly, just loosely cover them with foil partway through baking.
Keep in mind that baking times can vary slightly depending on your oven and the thickness of your crust, so don’t be afraid to give it an extra 5 minutes if it needs it. The visual cues—golden crust and bubbling filling—are your best indicators here.
STEP 7: Let It Rest Before Slicing
Once your pie is out of the oven, let it cool directly on the baking sheet for at least 30 minutes. This part is crucial because it gives the filling time to set. If you cut into it too soon, the filling may still be too runny. Letting it rest ensures nice, clean slices and helps all that apple flavor really come together.
When you’re ready to serve, slice the slab pie into squares or rectangles—whatever size works best for your gathering. It’s sturdy enough to pick up with your hands, but equally delicious plated with a scoop of vanilla ice cream, a drizzle of caramel sauce, or a dollop of whipped cream.
Helpful Tips for the Perfect Slab Pie
Chill your dough before baking: Whether you’re using homemade or store-bought pie dough, make sure it’s cold before going into the oven. Cold dough helps the fat stay solid longer, which results in a flakier crust.
Use a mix of apples: A combination of sweet and tart apples like Honeycrisp, Fuji, and Granny Smith creates a more balanced and flavorful filling.
Don’t skip the flour in the filling: That little bit of flour thickens the juices as the apples cook so your filling stays inside the pie, not running out onto your baking sheet.
Add lemon juice if you like a bit of brightness: It’s totally optional, but the lemon helps enhance the apple flavor and prevents the slices from browning while you prep.
Make it ahead: This pie holds up really well. You can bake it the night before and store it at room temperature, loosely covered. Reheat individual slices in the microwave or enjoy them as-is.
Apple Slab Pie: A Rustic Crowd-Pleasing Dessert with Classic Flavor
By now, your kitchen should be smelling like a dream—warm cinnamon, buttery crust, and sweet apples all coming together in one delicious, golden tray of comfort. This apple slab pie is truly one of those desserts that feels like a hug on a plate, whether you’re serving it for a holiday dinner, a backyard potluck, or just a cozy Sunday at home.
Before we wrap things up, I want to answer a few questions I often get about this recipe. Whether you’re a pie-making newbie or a seasoned baker, these little insights might help you feel even more confident the next time you make it.
FREQUENTLY ASKED QUESTIONS
1. Can I make this slab pie ahead of time?
Absolutely. In fact, it’s even better when made a few hours—or even a day—ahead. Just let it cool completely, then cover it loosely with foil or plastic wrap. You can store it at room temperature for up to two days, or refrigerate for longer freshness.
2. What’s the best way to reheat it?
If you want to serve slices warm, just pop them into the oven at 300°F for about 10–15 minutes. You can also microwave individual pieces for 20–30 seconds, but the crust stays flakier when reheated in the oven.
3. Can I freeze this pie?
Yes! Once baked and cooled, wrap the whole pie or individual pieces tightly in plastic wrap and then foil. Store in the freezer for up to 3 months. To serve, thaw in the fridge overnight and reheat in the oven for best results.
4. What kind of apples work best for this recipe?
A mix of tart and sweet apples gives the best flavor and texture. Granny Smith (tart), Fuji, and Honeycrisp (sweet) are a great combo. Using all one kind is fine too, but blending them gives a little more depth.
5. Do I have to use homemade pie crust?
Not at all. While homemade pie dough definitely delivers on flavor and texture, a good-quality store-bought crust works just fine and can save you time. Just make sure you have enough to cover both the bottom and top of your sheet pan.
6. Can I add other ingredients to the filling?
You can! Chopped walnuts or pecans, a handful of raisins, or even a splash of vanilla extract or bourbon can take the filling in a fun new direction. Just be mindful not to overload it, or the filling could get too wet.
7. What size baking sheet should I use?
A standard half-sheet pan (about 18×13 inches) works great. If you’re using a smaller sheet, you can scale down the recipe slightly or just expect a thicker pie with a shorter crust edge.
FINAL THOUGHTS
This apple slab pie has become a staple in my kitchen for so many reasons—it’s simple, satisfying, and endlessly adaptable. It takes the classic charm of a homemade apple pie and makes it shareable, portable, and easy to slice into crowd-pleasing squares. And let’s be honest: sometimes you just need more than eight slices of pie.
Whether you’re baking it for a festive gathering or just because you’ve got some apples that need using up, this recipe delivers every time. I love how unfussy it is—no lattice weaving or perfectly pinched edges required. It’s meant to be rustic and real, and that’s part of what makes it so special.
If you give this slab pie a try, I’d love to hear how it turns out! Drop a comment below and let me know if you added your own twist—maybe some caramel drizzle, a crumble topping, or even a different fruit entirely. There are so many ways to make it your own.
Happy baking, and don’t forget: sometimes the simplest desserts are the ones that stick with us the longest.
Would you like a printable version of the recipe? I can add that next!
Print
Apple Slab Pie
- Author: Andrew Recipes
Description
This apple slab pie is a rustic twist on a classic dessert, perfect for feeding a crowd. Baked on a sheet pan with a flaky double crust and a spiced apple filling, it’s ideal for potlucks, holidays, or whenever you’re craving a hearty slice of comfort. The blend of apple varieties and a sprinkle of coarse sugar gives it both complexity and crunch.
Ingredients
For the crust:
1 double batch of your favorite pie crust dough (homemade or store-bought)
For the filling:
6 cups thinly sliced peeled apples (about 6 medium apples; a mix of tart and sweet works best)
3/4 cup granulated sugar (adjust to taste)
2 tablespoons all-purpose flour
1 teaspoon ground cinnamon
1/4 teaspoon ground nutmeg
1/8 teaspoon salt
1 tablespoon lemon juice (optional, for brightness and to prevent browning)
For assembly:
1 egg yolk, beaten with 1 tablespoon water (for egg wash)
Coarse sugar or turbinado sugar for sprinkling (optional)
Instructions
1️⃣ Peel, core, and slice the apples into thin, uniform pieces. If using, toss with lemon juice to prevent browning. In a large bowl, combine the apples with sugar, flour, cinnamon, nutmeg, and salt. Mix gently until evenly coated and set aside.
2️⃣ Preheat the oven to 400°F (200°C). Line a rimmed baking sheet with parchment paper. On a floured surface, roll out one portion of the pie dough into a rectangle about 1/8 inch thick, large enough to fit the baking sheet. Carefully transfer the dough to the prepared sheet.
3️⃣ Spread the apple filling evenly over the crust, leaving a 1–2 inch border around the edges. Fold the edges of the bottom crust inward to create a rustic frame.
4️⃣ Roll out the second pie crust into a slightly larger rectangle and lay it over the filling. Press the edges of the top and bottom crusts together and crimp with a fork or your fingers. Cut a few slits in the top crust to allow steam to escape.
5️⃣ Brush the top crust with the egg wash, then sprinkle with coarse or turbinado sugar if using.
6️⃣ Bake the pie in the preheated oven for 25 to 30 minutes, or until the crust is golden brown and the filling is bubbling. If the edges brown too quickly, cover them loosely with foil.
7️⃣ Let the pie cool on the baking sheet for at least 30 minutes to allow the filling to set. Slice into squares or rectangles and serve warm, at room temperature, or chilled. Enjoy it plain or with a scoop of vanilla ice cream, a dollop of whipped cream, or a drizzle of caramel sauce.
Notes
Using a mix of apple varieties gives the pie more depth—combine tart apples like Granny Smith with sweeter ones like Fuji or Honeycrisp. For best results, chill your dough before baking to ensure a flaky crust. This pie is highly portable and easy to serve in pieces, making it great for gatherings or meal prep.

