
There’s something a little magical about recipes that do all the hard work for you—especially when the end result looks like you spent hours in the kitchen. That’s exactly what you get with these Baby Lemon Impossible Pies. They’re impossibly easy, irresistibly creamy, and packed with fresh lemon flavor. Perfect for spring brunches, Easter gatherings, baby showers, or those warm-weather days when you just want a light dessert that still feels special.
These mini pies get their fun name because of the way they bake—forming their own delicate crust right in the oven without any rolling, pressing, or layering involved. They may look fancy once they’re out of the oven and dusted with powdered sugar, but trust me, this recipe couldn’t be simpler. It’s a perfect go-to when you want to impress guests or just treat yourself without a lot of fuss.
I first stumbled upon this idea while looking for a quick dessert that used lemons from my neighbor’s tree (yes, lucky me!). I didn’t have a pie crust on hand and didn’t want to make one, so this recipe was the ideal fix. The result? Little lemony bites with creamy centers, soft edges, and just enough crisp on the outside to hold their shape. My family devoured them in minutes, and I’ve been making them on repeat ever since.
Let’s walk through how to make these sunny little pies, step by easy step.
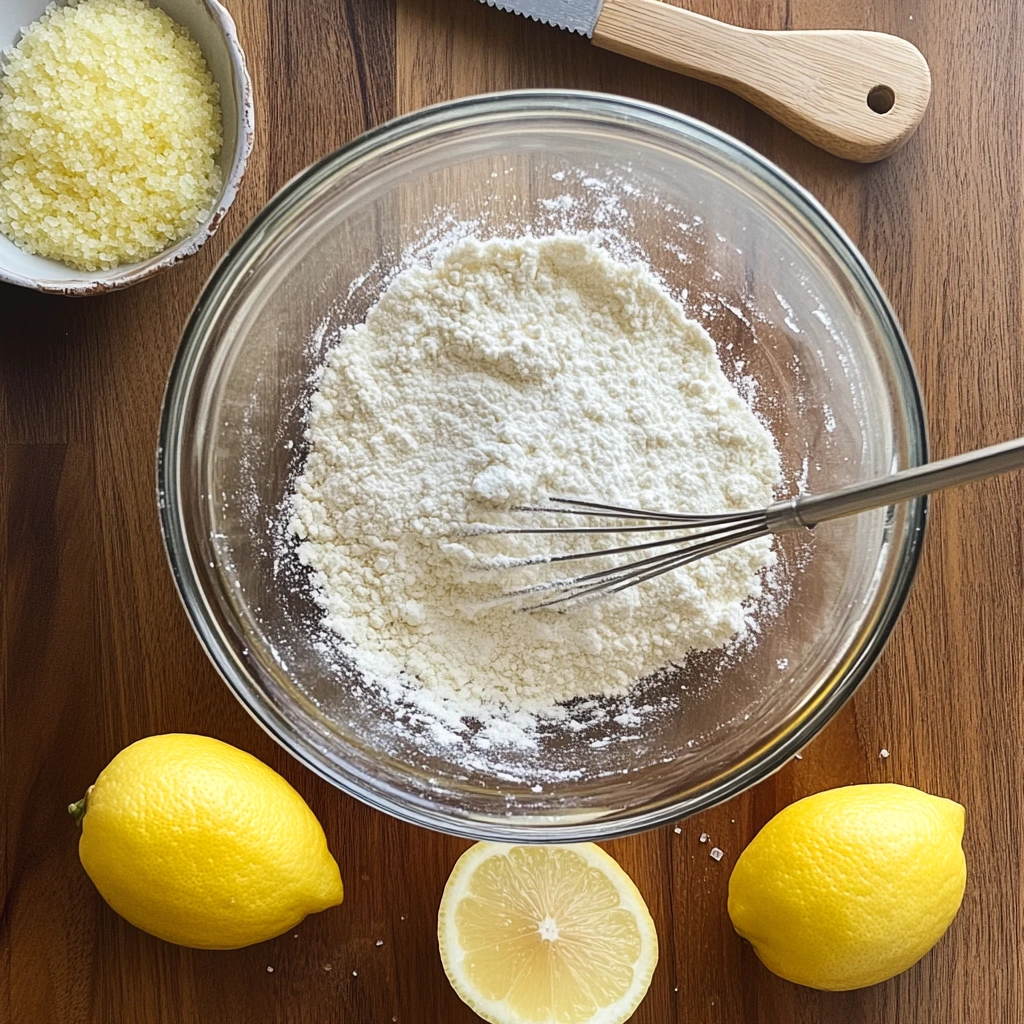
Ingredients You’ll Need
Makes 12 mini pies
For the Pies:
1 cup all-purpose flour
1 cup granulated sugar
1/2 teaspoon salt
1/2 cup melted butter
3 large eggs, beaten
1/2 cup milk
1/4 cup fresh lemon juice (about 1–2 lemons)
1 tablespoon lemon zest (from about 2 lemons)
1 teaspoon vanilla extract
Optional Garnish:
Powdered sugar
Whipped cream
Fresh berries
Step-by-Step Instructions
Step 1: Preheat the Oven
Start by preheating your oven to 350°F (175°C). Grease a 12-cup muffin tin well, or if you prefer an even easier cleanup, line each cup with paper liners. This step helps ensure your little pies come out cleanly and hold their shape once baked.
Step 2: Mix the Batter
In a large mixing bowl, whisk together the flour, sugar, and salt. These dry ingredients create the base of the batter. Then, add in the melted butter, beaten eggs, milk, fresh lemon juice, lemon zest, and vanilla extract.
Now here’s the part where it might feel a little different than most batters: the mixture will be quite thin. That’s totally normal! It’s what gives these pies their soft, custard-like center. Just keep whisking until everything is well combined and smooth.

How to Bake and Perfect Your Baby Lemon Impossible Pies
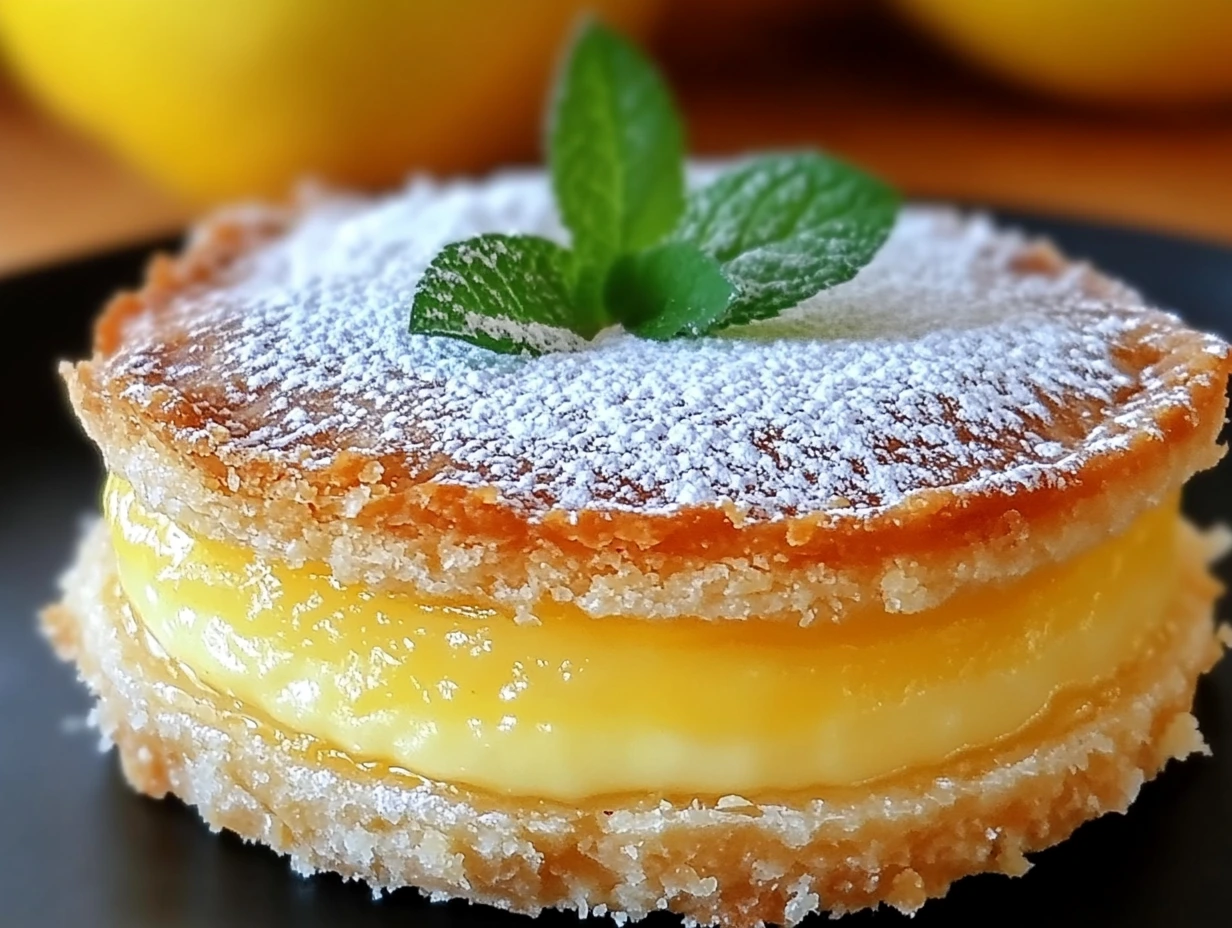
Now that you’ve got your bright and lemony batter ready to go, it’s time to let the oven do the rest of the work. And here’s where the “impossible” part of these pies really comes to life. As they bake, the thin batter separates slightly—forming a soft, lightly golden crust on the bottom and edges, while the center stays silky and smooth. It’s the kind of kitchen magic that never gets old.
I’ve found that these pies are almost foolproof, but a couple of small tricks can really make them shine. Let’s walk through the rest of the steps and talk about how to get that perfect finish every time.
Step 3: Fill the Muffin Tin
Once your batter is smooth, pour it evenly into the prepared muffin cups. You’ll want to fill each one about two-thirds full—this gives them just enough room to puff up while baking without spilling over.
The batter might settle quickly in the cups, which is totally fine. Just give the pan a little tap on the counter to even things out and release any bubbles.
Step 4: Bake
Place the muffin tin into the oven and bake for 20 to 25 minutes. You’re looking for lightly golden tops and centers that are set. A toothpick inserted in the middle of one should come out clean, though the inside will still be soft and creamy.
The pies will puff up a bit while baking, then gently settle as they cool—that’s part of their charm. Don’t worry if they sink slightly in the center; that’s where all that custardy goodness lives.
Once baked, let them cool in the pan for about five minutes before gently removing them to a wire rack. If you used liners, they’ll lift out easily. If not, you can run a butter knife around the edges to help loosen them.
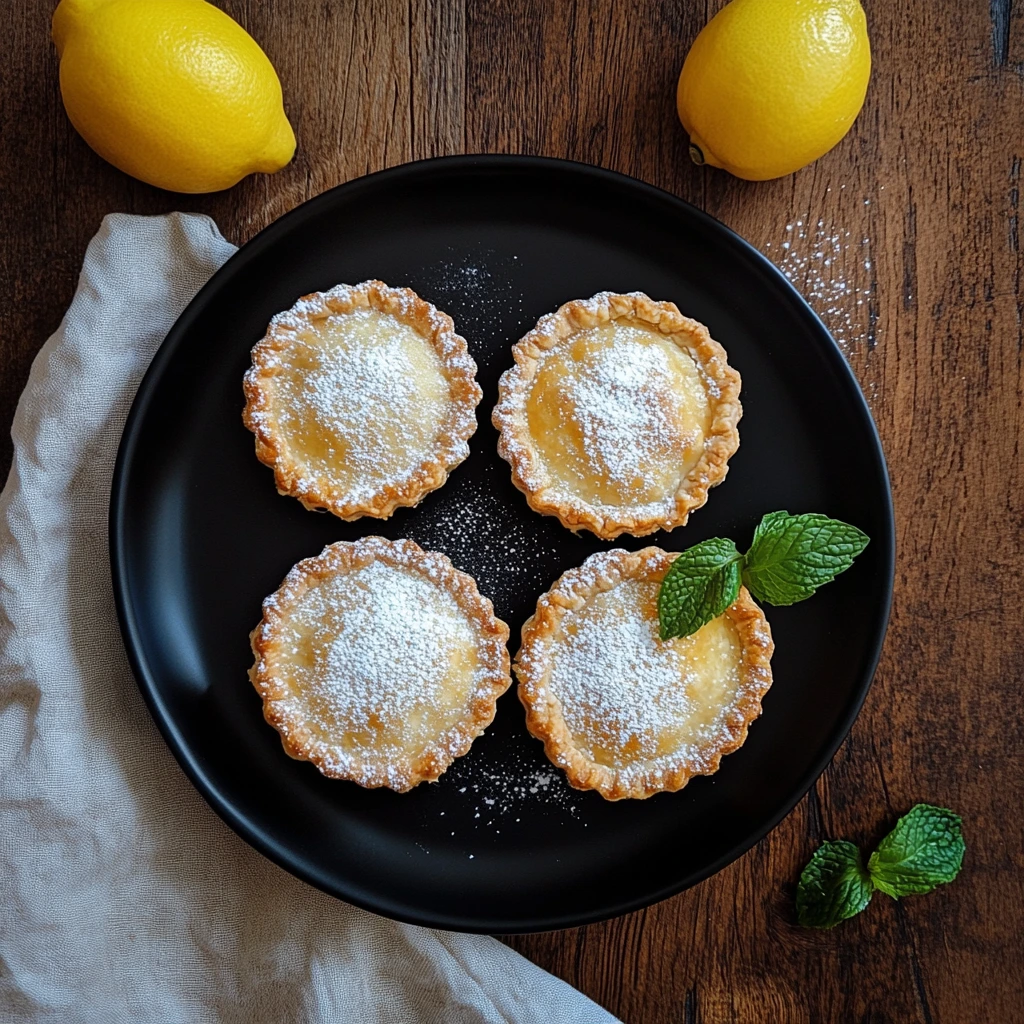
Step 5: Serve and Enjoy
After the pies have cooled, it’s time to dress them up! A simple dusting of powdered sugar goes a long way, but you can also add a dollop of whipped cream or a few fresh berries for an extra pop of color and texture.
These little pies are great served at room temperature or chilled, which makes them incredibly versatile for entertaining. I often make them the night before and pop them in the fridge—they taste even better the next day.
Tips for the Best Baby Lemon Impossible Pies
Use fresh lemons. Bottled juice just doesn’t bring the same brightness. The fresh lemon zest is what really sets the flavor apart.
Don’t skip the resting time. Letting the pies sit in the pan for a few minutes before transferring them helps them set and hold their shape.
Try variations! You can mix up the citrus by using lime or orange juice and zest instead. Or add a teaspoon of poppy seeds for a fun lemon-poppy twist.
Make it gluten-free. Swap the all-purpose flour for a gluten-free baking mix. The texture may vary slightly but will still be delicious.
These little pies are seriously one of the easiest desserts to master. Whether you’re baking them for a get-together or just craving something lemony and light, they never disappoint.
Baby Lemon Impossible Pies: FAQs and Final Thoughts
Before you head off to whip up a batch of these adorable mini pies, I wanted to answer some of the most common questions I’ve gotten about them. Whether it’s your first time making them or you’re already hooked, these tips and insights will help make your baking experience even smoother.
Frequently Asked Questions
Can I make these ahead of time?
Absolutely! These pies are actually better after a few hours in the fridge. You can make them up to 2–3 days in advance. Just store them in an airtight container and dust with powdered sugar just before serving.
Do they really form their own crust?
Yes, they do—and that’s the fun part! While it’s not a traditional pie crust, the outer layer becomes lightly golden and firm, giving you a subtle crust-like texture that holds the creamy filling together.
Can I freeze Baby Lemon Impossible Pies?
You can, though the texture may change slightly when thawed. If you do freeze them, wrap them tightly and thaw in the refrigerator before serving. They’re best enjoyed fresh or within a few days of baking.
What’s the best way to remove them from the pan?
Let them cool for about five minutes first, then gently loosen the edges with a butter knife if you didn’t use liners. A silicone muffin pan can also make removal much easier.
Can I double the recipe?
Definitely. You can double the ingredients and use two muffin tins, or bake them in batches. Just keep an eye on the baking time and test for doneness with a toothpick.
What type of milk works best?
Whole milk is ideal for that rich, custardy texture, but 2% works fine too. I wouldn’t recommend using skim milk or plant-based milks unless they are thicker, like oat or full-fat coconut milk.
Can I use bottled lemon juice instead of fresh?
You can, but fresh lemon juice and zest really make the flavor pop. The bottled version will work in a pinch, but the pies won’t have the same brightness or depth.
Final Thoughts: The Perfect Little Treat for Any Occasion
There’s just something about these Baby Lemon Impossible Pies that makes people smile. Maybe it’s their delicate size, the creamy lemon filling, or the fact that they look like they came straight from a bakery—but once you try them, you’ll understand the hype.
I love that this recipe uses basic pantry staples and fresh lemons, yet delivers such a beautiful and satisfying dessert. It’s easy enough for weeknight baking, but fancy enough for holidays and special events. And since they’re served individually, they’re perfect for parties or potlucks—no slicing required.
If you make these, I’d love to hear how they turn out! Drop a comment below, share your favorite toppings or variations, or tag me if you post them on social media. Recipes like this one are made to be shared—and once you taste these bright, zesty pies, I promise they’ll be making regular appearances in your kitchen, too.
Happy baking, and enjoy every lemony bite!
Print
Baby Lemon Impossible Pies
- Author: Andrew Recipes
Description
These delightful little pies are soft, creamy, and bursting with fresh lemon flavor. Named “impossible” because they magically form their own crust while baking, these mini treats are incredibly easy to make and perfect for spring or summer gatherings. The bright citrus notes, paired with a sweet, custard-like center, make them a light yet satisfying dessert.
Ingredients
For the Pies:
1 cup all-purpose flour
1 cup granulated sugar
1/2 teaspoon salt
1/2 cup melted butter
3 large eggs, beaten
1/2 cup milk
1/4 cup fresh lemon juice (about 1–2 lemons)
1 tablespoon lemon zest (from about 2 lemons)
1 teaspoon vanilla extract
Optional Garnish:
Powdered sugar, whipped cream, or fresh berries
Instructions
Step 1: Preheat the Oven
Preheat your oven to 350°F (175°C). Grease a 12-cup muffin tin or line it with paper liners for easy removal.
Step 2: Mix the Batter
In a large mixing bowl, whisk together the flour, sugar, and salt. Add the melted butter, beaten eggs, milk, lemon juice, lemon zest, and vanilla extract. Whisk until the mixture is smooth and fully combined. The batter will be thin—this is expected and helps create the pie’s creamy texture.
Step 3: Fill the Muffin Tin
Divide the batter evenly among the prepared muffin cups, filling each about two-thirds full. The pies will puff up slightly and settle as they cool.
Step 4: Bake
Bake for 20 to 25 minutes, or until the tops are golden brown and the centers are set. A toothpick inserted into the middle should come out clean. Allow the pies to cool in the pan for about five minutes before transferring them to a wire rack to cool completely.
Step 5: Serve and Enjoy
Once cooled, dust with powdered sugar or top with a dollop of whipped cream and a few fresh berries. These pies can be served at room temperature or chilled, making them a versatile treat for any occasion.
Notes
The pies will naturally form a light, tender crust while baking, giving them structure and a touch of crispiness on the outside. For best flavor, use fresh lemon juice and zest. These pies can be stored in an airtight container in the fridge for up to three days.

