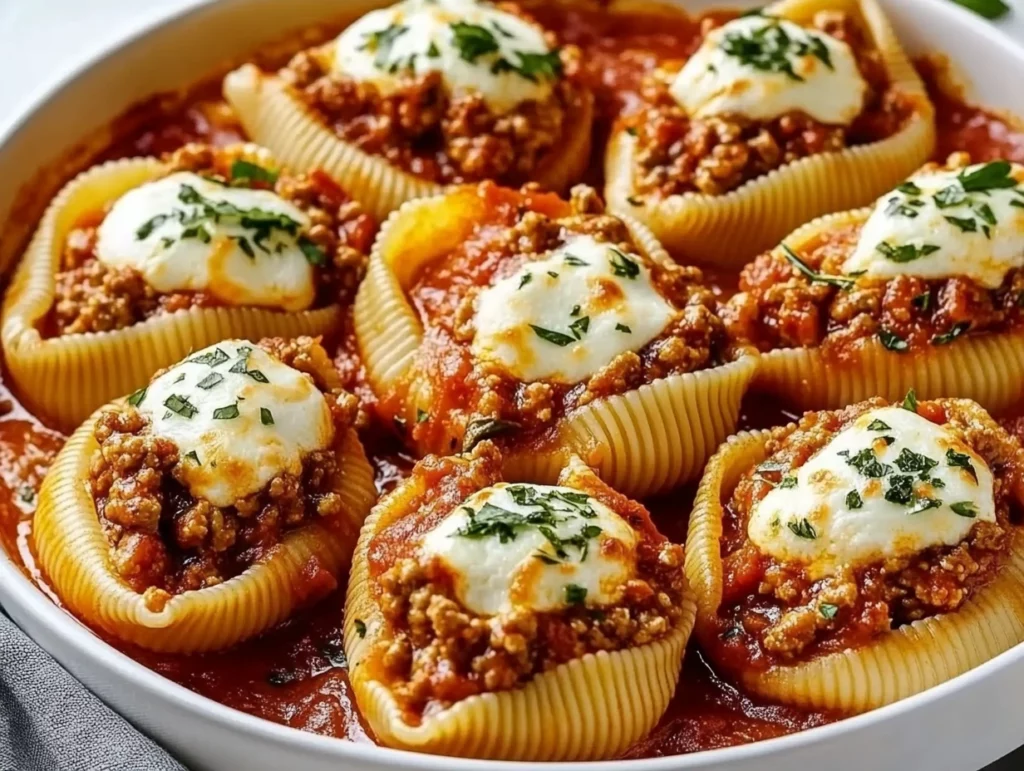
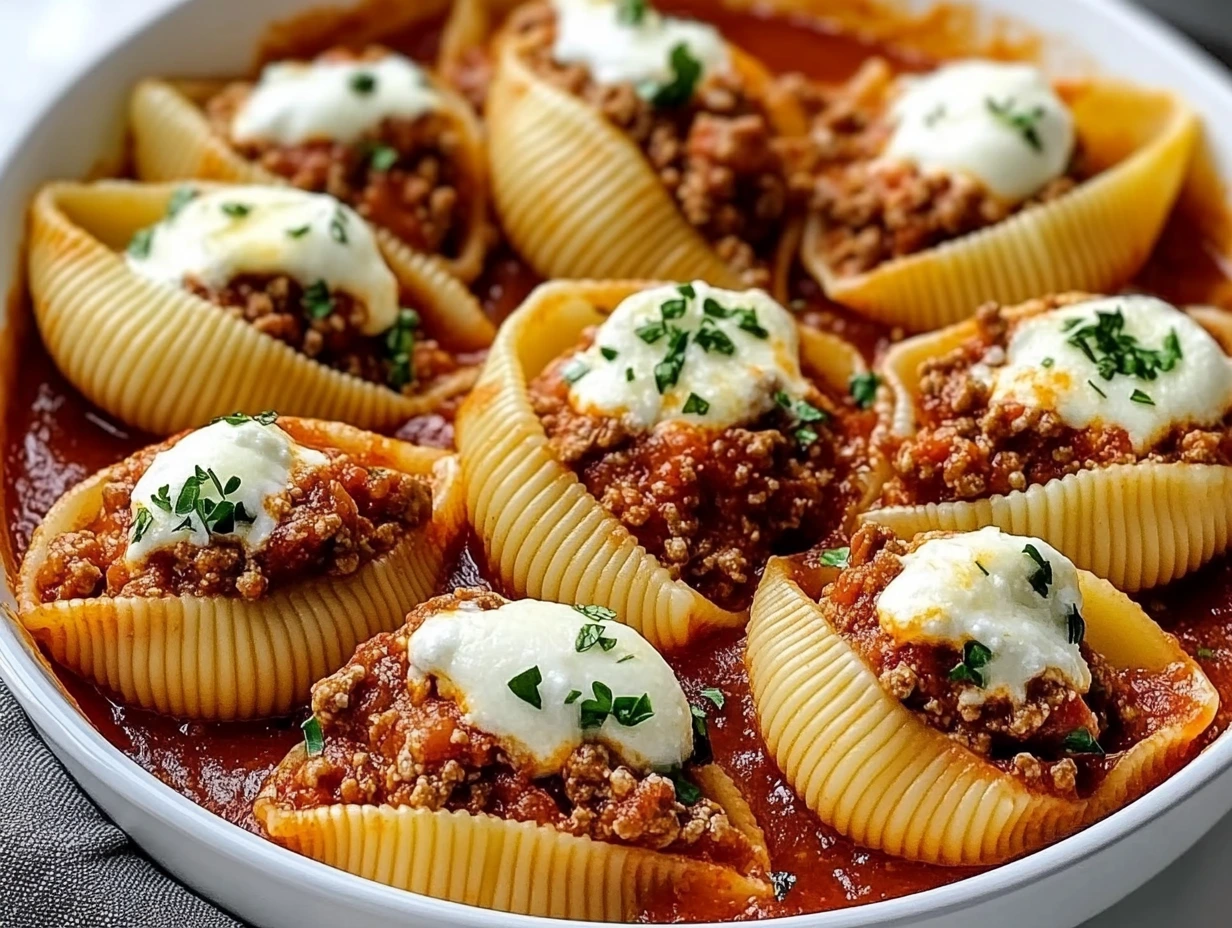
There’s something special about recipes that bring comfort straight from the oven to your plate—and this Beef Stuffed Shells with Ricotta dish is exactly that kind of meal. It’s warm, rich, and absolutely packed with flavor. Think tender jumbo pasta shells cradling a creamy, herbed ricotta filling, topped with savory beef marinara sauce and melted mozzarella. It’s like a hug in casserole form—and it just might become your new favorite weeknight staple.
If you’re anything like me, the idea of a one-dish meal that can please picky eaters, comfort a crowd, and double as leftovers is a win-win-win. This recipe is one of those gems I pull out when I want something that feels a little special, but is still easy enough to throw together on a busy evening.
We’ve made it more than a few times in our house, and every time it hits the table, it gets that quiet moment where everyone just digs in. That’s when you know you’ve got something good. Whether you’re cooking for your family, prepping meals ahead of time, or planning a cozy dinner with friends, these stuffed shells have your back.
Let’s jump right into how to make them!
Ingredients You’ll Need
Before we start cooking, let’s take a quick look at what you’ll need to pull this meal together. Most of these ingredients are pantry staples, which is another reason this dish is so great for weeknight dinners.
Pasta:
12 jumbo pasta shells
Proteins:
1 lb ground beef
1 egg
Dairy:
1 cup ricotta cheese
1 cup shredded mozzarella cheese
½ cup grated Parmesan cheese
Sauces & Seasonings:
1 cup marinara sauce
1 teaspoon Italian seasoning
Salt, to taste
Pepper, to taste
STEP 1: PREP AND COOK THE PASTA
Start by preheating your oven to 190°C (375°F)—you’ll want it ready when it’s time to bake everything together.
Now, bring a large pot of salted water to a boil and cook the jumbo pasta shells according to the package instructions. You’ll want them al dente so they hold up when stuffed and baked later. Once they’re done, drain and set them aside on a tray or baking sheet to cool. A little tip: drizzle just a bit of olive oil over them to keep them from sticking together while you work on the filling.

STEP 2: BROWN THE BEEF
While the pasta is cooling, grab a large skillet and place it over medium heat. Add in your ground beef and cook until it’s completely browned. Make sure to break it up into crumbles as it cooks so you get even flavor throughout.
Once the beef is fully cooked, drain off any excess fat to keep the dish from getting greasy. Stir in the 1 cup of marinara sauce, give it a quick mix, and then remove from heat. This meaty, saucy base is going to add so much flavor to every bite.
STEP 3: MAKE THE RICOTTA FILLING
Next, we’re mixing up that creamy, dreamy filling. In a medium bowl, combine:
1 cup ricotta cheese
1 egg
1 teaspoon Italian seasoning
Salt and pepper, to taste
Stir until everything is smooth and evenly blended. You want the texture to be spoonable, not runny, and nicely seasoned throughout.
If you’re feeling a little fancy or looking to sneak in some greens, you can toss in a handful of chopped spinach or fresh basil here too. It adds color, freshness, and an extra layer of flavor without complicating things.
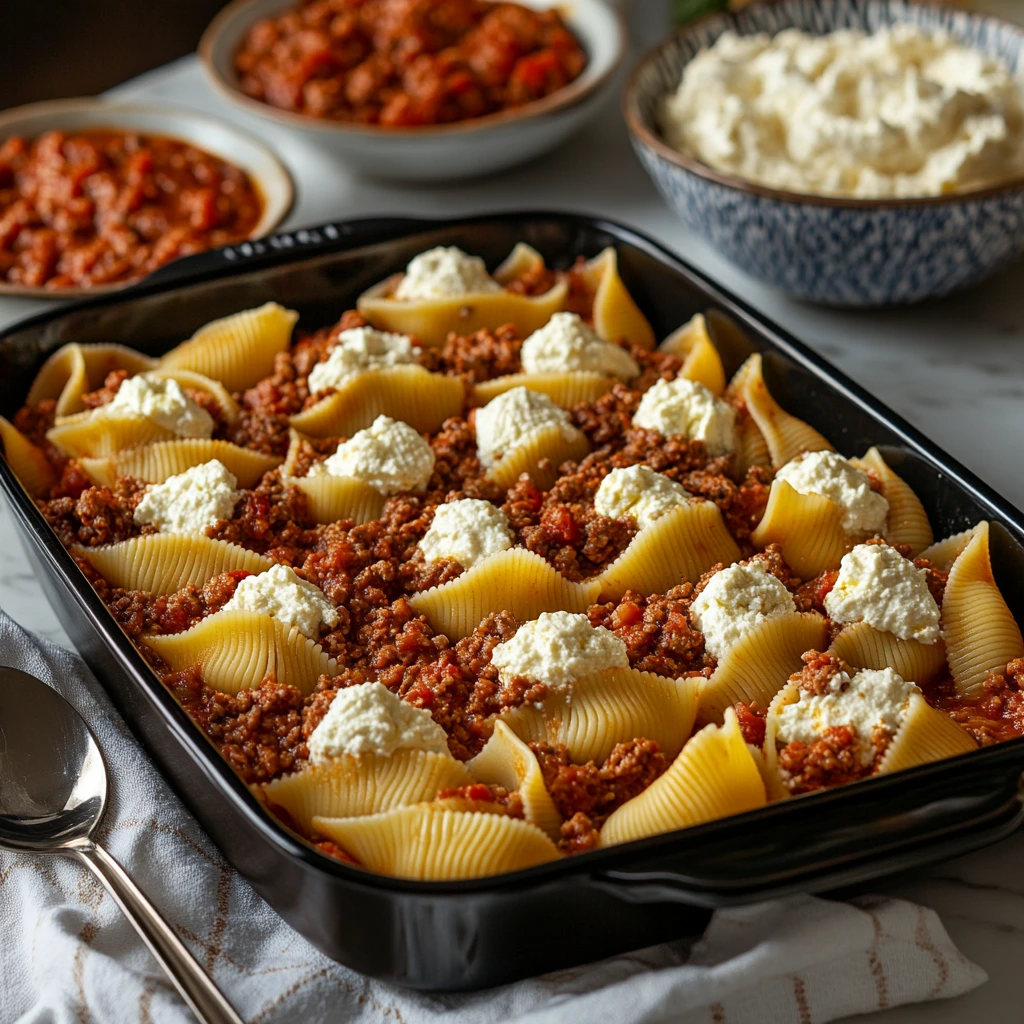
STEP 4: STUFF THE SHELLS
Now for the fun part: stuffing the shells! Take each cooled pasta shell and spoon in a generous amount of the ricotta filling. You don’t want them bursting, but a nice full shell is ideal.
Arrange each stuffed shell in a lightly greased baking dish, placing them in a single layer. Depending on the size of your dish, you might have to squeeze them in a bit, but that’s okay—they’ll bake up beautifully.
Bringing It All Together: Baked Beef Stuffed Shells That Deliver Comfort in Every Bite
Now that you’ve got your ricotta-stuffed shells nestled in the baking dish, it’s time for the magic to happen—layering on that rich beef marinara, topping everything with melty cheese, and baking it all to bubbly perfection. This is the moment when all those simple ingredients come together to create something cozy, flavorful, and completely satisfying.
Honestly, this is the kind of meal that turns a regular Tuesday night into something a little more special. Plus, it’s a great recipe to make ahead of time if you know the evening is going to be hectic. You can prep it in the morning (or even the night before), pop it in the fridge, and then just bake it when you’re ready.
Let’s keep going and finish up this delicious dish!
STEP 5: ADD THE BEEF AND MARINARA SAUCE
With your stuffed shells arranged in the dish, it’s time to spoon that meaty marinara mixture over the top. Make sure to spread it out evenly so each shell gets a good amount of sauce. This not only adds flavor but also helps keep the pasta moist while it bakes.
If you’re using a standard 9×13 inch baking dish, this amount of sauce should be just right to cover the shells without drowning them. You want that nice balance of moisture and structure so the shells don’t fall apart when served.
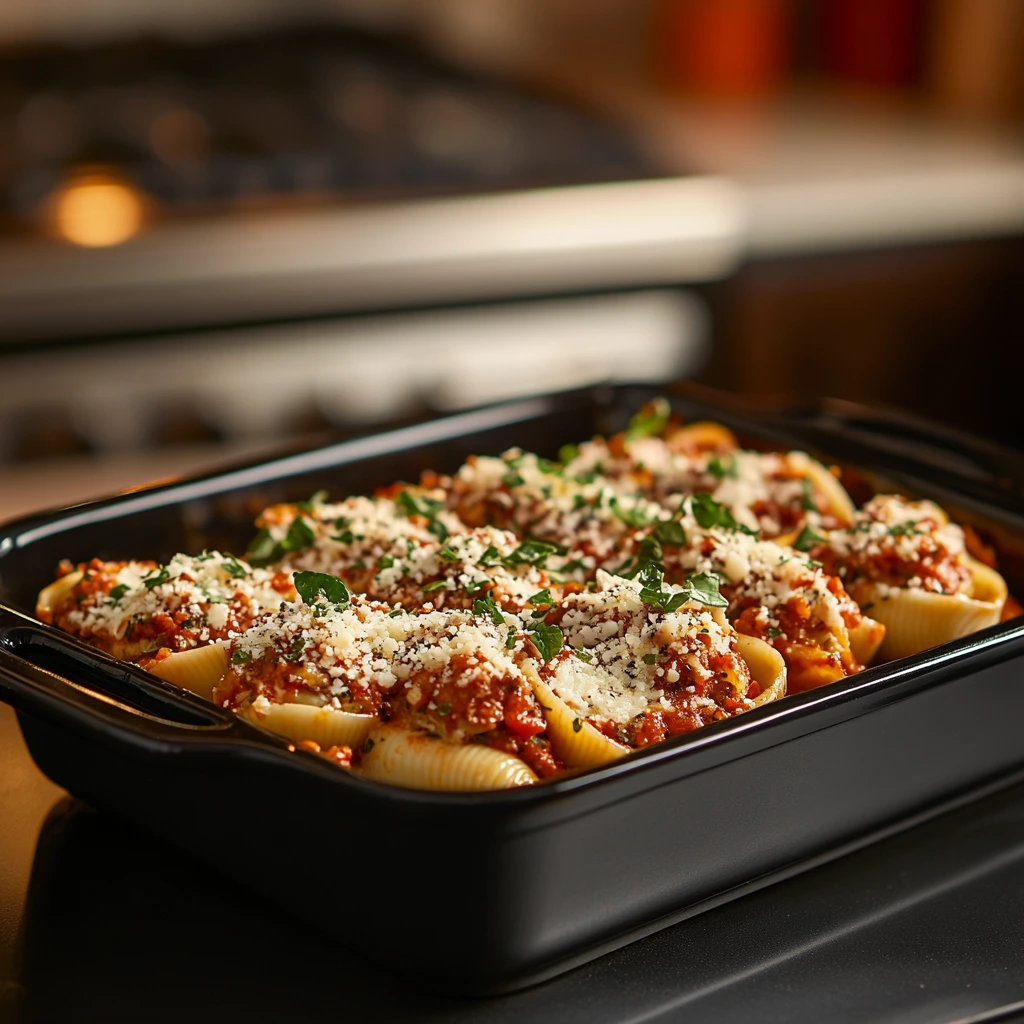
STEP 6: SPRINKLE ON THE CHEESE
Here comes the best part—the cheese! Sprinkle 1 cup of shredded mozzarella and ½ cup of grated Parmesan evenly over the top of the beef and shells. Don’t worry about making it perfect—once it bakes, the cheese melts down and blankets everything in that golden, bubbly goodness.
If you want to go a little extra here (and who doesn’t love extra cheese?), feel free to add a bit more mozzarella or even a sprinkle of Italian blend for more flavor and melt.
STEP 7: BAKE TO PERFECTION
Cover your baking dish with foil and place it in the preheated oven. Bake at 190°C (375°F) for 25 minutes. This allows everything to heat through and gives the cheese a chance to start melting.
After 25 minutes, remove the foil and bake uncovered for an additional 10 minutes, or until the cheese is fully melted, bubbling, and starting to turn a beautiful golden brown on top.
Let the dish sit for about 5 minutes before serving. This gives everything a chance to settle and makes it easier to scoop out those shells without them falling apart.
TIPS FOR BEST RESULTS
Here are a few tips I’ve picked up after making this dish more times than I can count:
Don’t overcook the pasta shells. You want them slightly firm so they hold their shape after baking. Overcooked shells can get too soft and fall apart when you try to stuff them.
Make it ahead. This is a great dish to assemble earlier in the day or even a day in advance. Just cover and refrigerate it, then bake when you’re ready (you may need to add a few extra minutes to the baking time if it’s going in cold).
Add greens if you like. Stirring in chopped spinach or basil to the ricotta mix is an easy way to sneak in some veggies and boost the flavor. It’s especially great if you’re serving picky eaters—they’ll barely notice!
Double it and freeze one. This recipe is freezer-friendly. Make a second batch, assemble it in a disposable foil pan, and freeze before baking. When you’re ready to enjoy it, thaw overnight in the fridge and bake as usual.
Serve with sides. This dish pairs perfectly with garlic bread, a crisp green salad, or even roasted veggies if you’re keeping it lighter.
Beef Stuffed Shells FAQ and Final Thoughts
Before we wrap things up, I want to make sure you feel completely confident in making these beef stuffed shells at home. Whether you’re a beginner in the kitchen or a seasoned home cook looking for a new family favorite, this recipe is easy to follow and delivers on flavor every single time.
Below, I’ve rounded up some of the most frequently asked questions I’ve heard about stuffed shells. From storing and reheating tips to swaps and make-ahead ideas, this FAQ section is here to help you get the best results every time you make this dish.
FREQUENTLY ASKED QUESTIONS
1. Can I make these stuffed shells ahead of time?
Absolutely! You can fully assemble the dish, cover it with foil, and refrigerate it for up to 24 hours before baking. When you’re ready to cook, just bake as directed—add 5-10 extra minutes if it’s coming straight from the fridge.
2. Can I freeze beef stuffed shells?
Yes! This dish freezes really well. Assemble the shells in a freezer-safe baking dish, cover tightly with plastic wrap and foil, and freeze for up to 3 months. To bake, let it thaw in the fridge overnight, then bake as usual.
3. What can I use instead of ricotta cheese?
If you’re not a fan of ricotta or don’t have any on hand, you can substitute with cottage cheese or even a mix of cream cheese and shredded mozzarella for a similar creamy texture.
4. How do I reheat leftovers?
Leftovers can be reheated in the oven at 180°C (350°F) for about 15–20 minutes or until heated through. You can also reheat individual portions in the microwave for 1–2 minutes.
5. Can I use ground turkey or sausage instead of beef?
Definitely! Ground turkey, chicken, or Italian sausage all work well in this recipe. Just be sure to cook and season them as you would the ground beef.
6. What if I don’t have jumbo shells?
If jumbo shells aren’t available, you can use manicotti or even lasagna noodles rolled up with the filling inside. The baking process and flavor will be similar, though the presentation will be a bit different.
7. How do I keep the shells from tearing while stuffing?
Cook the pasta just until al dente, and let it cool completely before handling. Gently open each shell with your fingers and use a small spoon to fill them—it’s much easier and less likely to tear when the pasta is firm and cool.
Wrapping It Up: A New Family Favorite
And there you have it—Beef Stuffed Shells with Ricotta, a hearty, cheesy, and deeply satisfying meal that’s as easy to make as it is delicious to eat. Whether you’re cooking it fresh for dinner or pulling it from the freezer for a quick weeknight meal, this dish truly delivers every time.
It’s one of those recipes that makes your kitchen smell amazing and brings everyone to the table with eager forks in hand. You can dress it up with a fancy salad and homemade bread or keep it super simple with store-bought sides—it’s totally flexible and always hits the spot.
Print
Beef Stuffed Shells with Ricotta
- Author: Andrew Recipes
Description
This Cheesy Garlic Butter Chicken is a rich, creamy, and irresistibly flavorful dish that’s perfect for a comforting dinner. Juicy chicken cutlets are pan-seared in garlic butter, then simmered in a cheesy cream sauce with a golden mozzarella topping. Serve it over pasta, rice, or vegetables for a satisfying, restaurant-style meal at home.
Ingredients
2 large chicken breasts, cut into cutlets
4 tablespoons unsalted butter
4 cloves garlic, minced
1 teaspoon Italian seasoning
½ teaspoon paprika
Salt and pepper, to taste
1 cup shredded mozzarella cheese
½ cup grated Parmesan cheese
½ cup heavy cream
Fresh parsley, for garnish
Instructions
Pat the chicken dry with paper towels. Season both sides with salt, pepper, paprika, and Italian seasoning.
In a large skillet over medium heat, melt the butter. Add the minced garlic and sauté for about 30 seconds until fragrant.
Place the seasoned chicken into the skillet and sear for 4 to 5 minutes per side until golden brown and nearly cooked through.
Lower the heat and pour in the heavy cream. Sprinkle the Parmesan cheese into the sauce and stir gently until it begins to thicken.
Top each chicken piece with shredded mozzarella cheese. Cover the skillet and cook for 3 to 5 more minutes, or until the cheese is fully melted and bubbly.
Garnish with freshly chopped parsley and serve hot. This dish pairs beautifully with pasta, mashed potatoes, steamed vegetables, or a crusty piece of bread.
Notes
For a richer sauce, add a bit more cream or a splash of chicken broth. This dish is flexible—add sautéed mushrooms or spinach for extra flavor. It’s best served immediately while the cheese is hot and gooey.

