If there’s one thing I’ve learned over the years, it’s that a simple wrap can easily become the hero of your weeknight dinner — especially when it’s stuffed with melty cheese and garlicky goodness. These Cheesy Garlic Chicken Wraps are exactly that kind of meal. They’re warm, crispy, packed with flavor, and honestly, they taste like something you’d get at your favorite cozy cafe… but you can whip them up right in your own kitchen with just a few ingredients.
I originally made these when I had some leftover shredded chicken from Sunday dinner, and let me tell you, they disappeared fast. Since then, they’ve become a go-to when I want something quick, comforting, and crowd-pleasing. The best part? You can totally customize them based on what you have in the fridge — but more on that later.
Whether you’re planning a family lunch, a game-day snack, or just want a warm handheld meal that’s got that cheesy pull we all love, this recipe checks every box. And that buttery garlic-parsley glaze? Pure magic. Let’s dive into the first steps so you can see how easy it is to bring these wraps to life.

Ingredients You’ll Need
For the Wraps:
480 grams cooked chicken breast, shredded or diced
110 grams shredded mozzarella cheese
60 grams shredded cheddar cheese
20 grams grated Parmesan cheese
4 large flour tortillas
For the Garlic Butter:
45 grams unsalted butter, melted
2 cloves garlic, minced
1 teaspoon dried parsley
STEPS: Let’s Get Cooking
Step 1: Prep Your Filling
Start by grabbing a large mixing bowl. Combine your shredded chicken, mozzarella, cheddar, and Parmesan together. Use a spoon (or your hands if you don’t mind a little mess) to mix it all until the cheese is evenly scattered throughout the chicken. This is going to be your creamy, savory filling — and trust me, it’s worth sneaking a little taste at this stage!
Pro Tip: If your chicken is a little dry (especially if it’s leftover from the fridge), you can stir in a teaspoon of mayo or a splash of olive oil to keep things moist.
Step 2: Wrap It Up
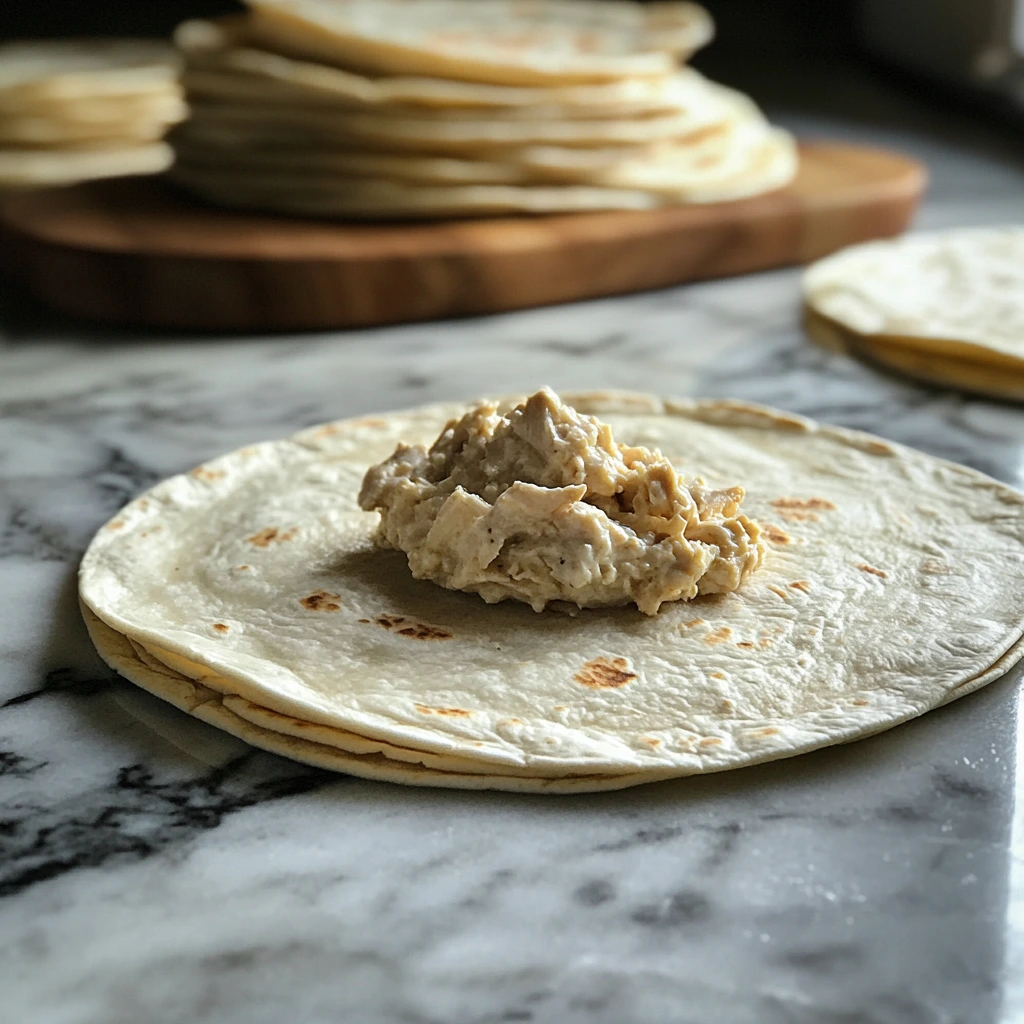
Lay one of your tortillas flat on a clean surface — a cutting board or clean countertop works great. Spoon about 120 grams of the chicken-cheese mixture into the center of the tortilla.
Now, fold in the left and right sides over the filling, then roll it up tightly from the bottom up. You want to keep the filling snug inside so it doesn’t spill out while cooking. Repeat this step for the rest of the tortillas until you have four plump, ready-to-toast wraps.
Little hack: If your tortillas are stiff and cracking, microwave them for 10 seconds with a damp paper towel to soften them up. It makes wrapping so much easier!
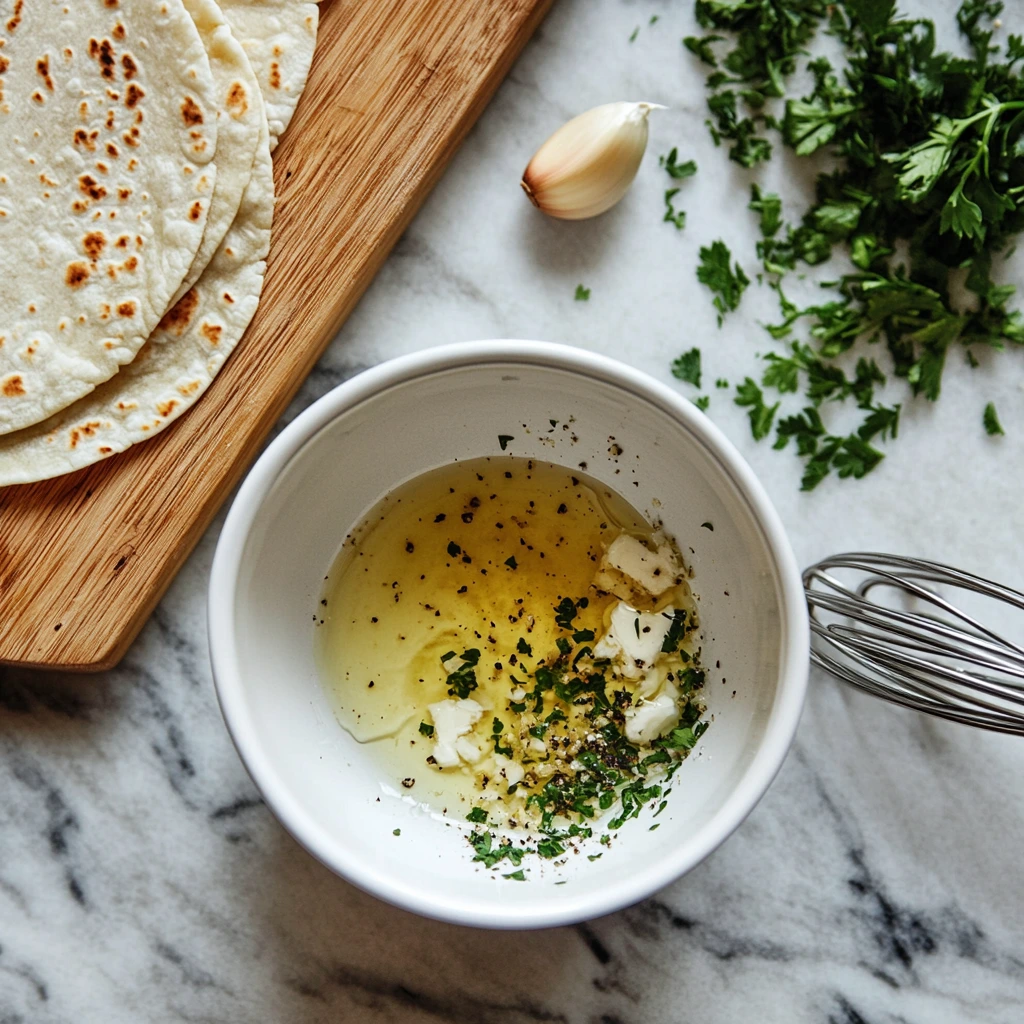
Step 3: Make the Garlic Butter
In a small bowl, whisk together the melted butter, minced garlic, and dried parsley. It should smell absolutely amazing already — this is the stuff that’s going to take these wraps from good to “oh wow” status.
This buttery mixture is what gets brushed on the outside of the wraps, giving them that gorgeous golden color and rich garlic flavor.
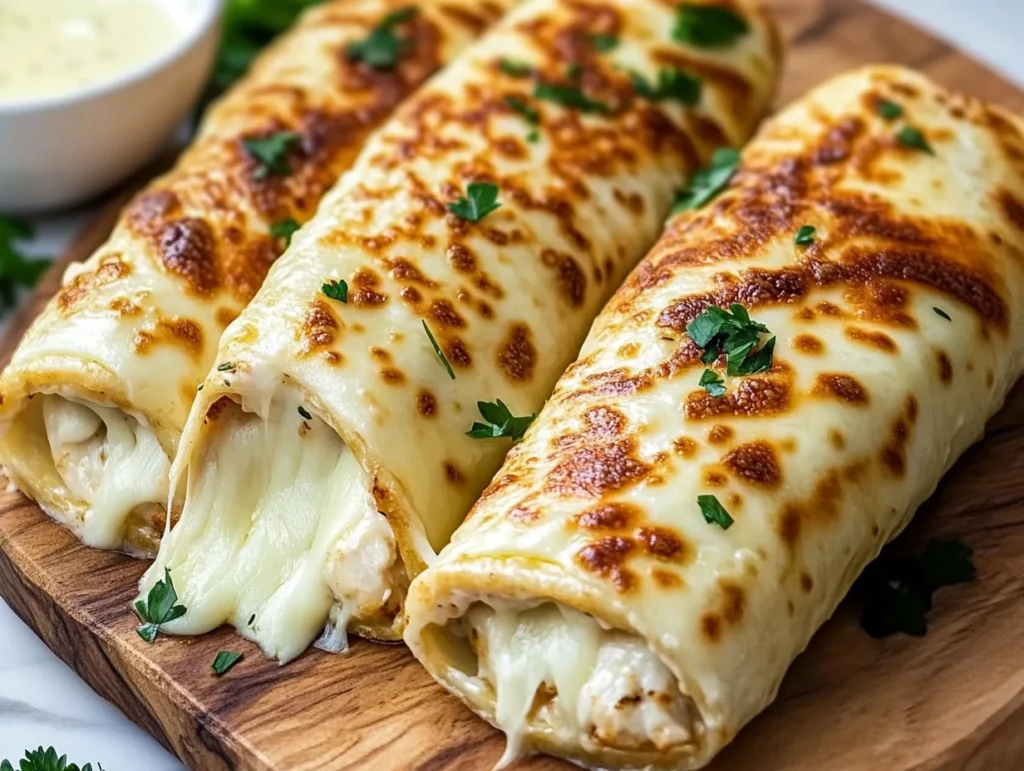
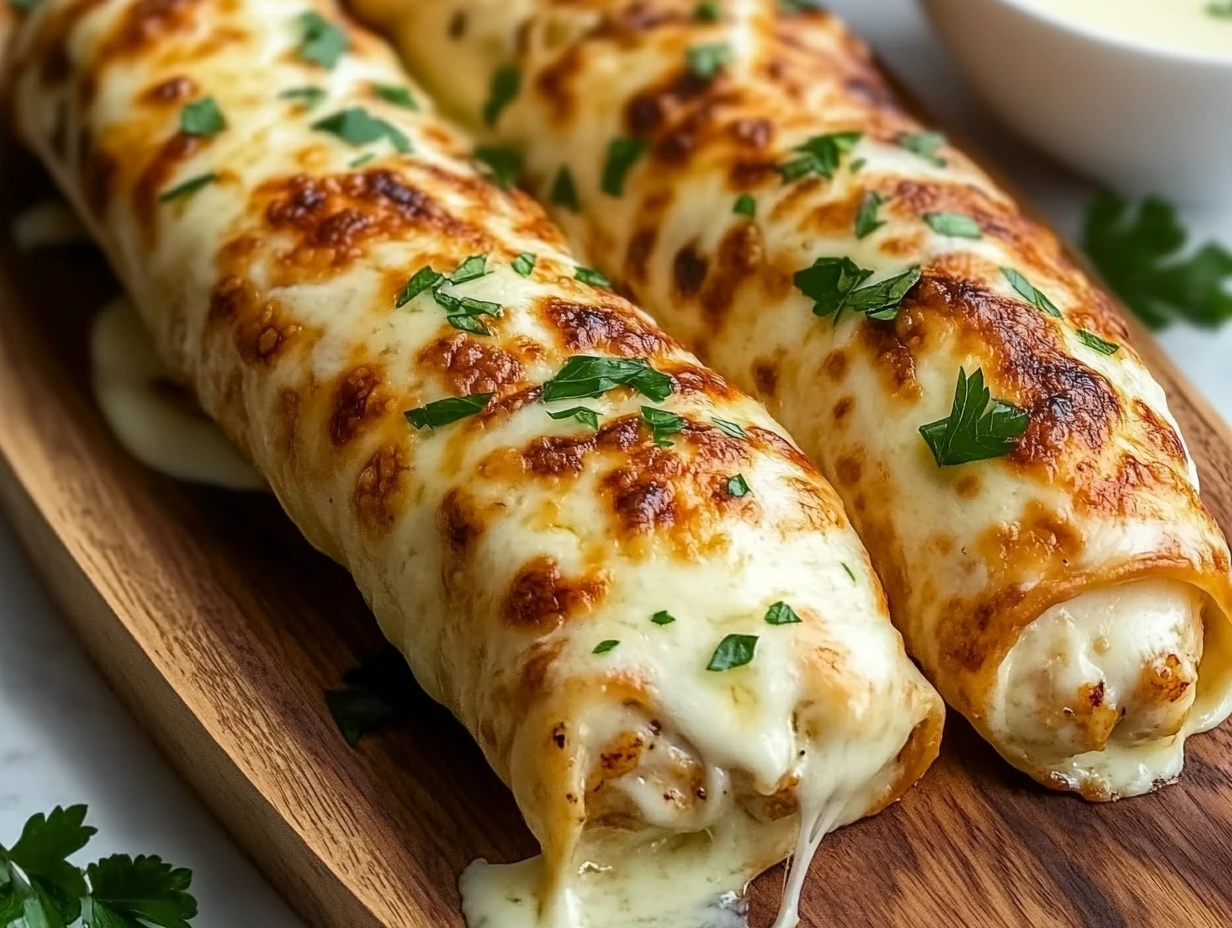
Cheesy Garlic Chicken Wraps: Crispy, Gooey, and Totally Irresistible
Alright, now that your wraps are prepped and that cheesy filling is snugly tucked inside those tortillas, it’s time to get things golden and crispy. This next part is where the wraps really come to life — and honestly, if you’re anything like me, this is the point where you’re hovering near the skillet just waiting to sneak a bite.
We’re going to give them a quick pan-toast to get that irresistible outer crunch, then finish them off in the oven to make sure the cheese is perfectly melted and the wraps are warmed all the way through. Trust me, the extra step in the oven is 100% worth it. So let’s jump right into the next few steps to bring these wraps to their full, crispy-cheesy potential.
Step 4: Crisp Them Up in a Skillet
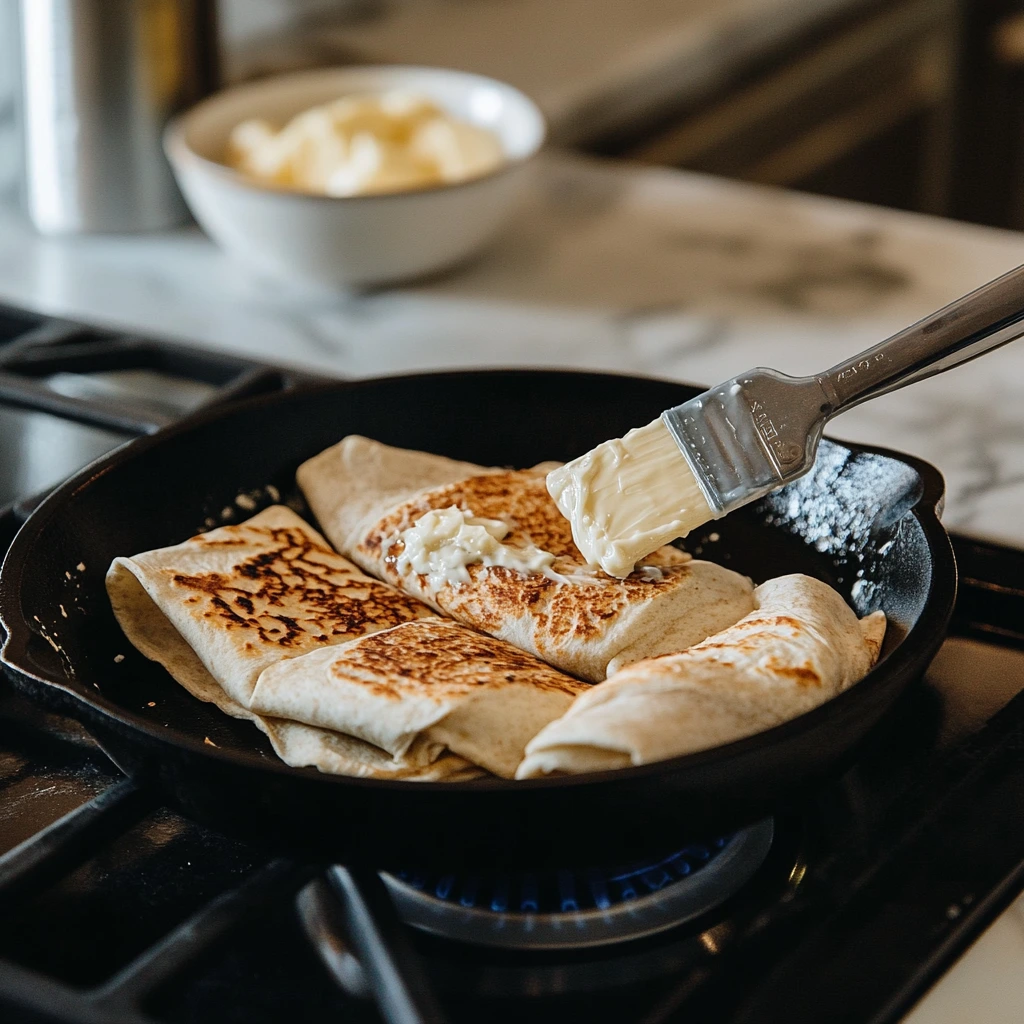
Set a large nonstick skillet or flat griddle over medium heat. You don’t need to grease the pan since the wraps will be brushed with that dreamy garlic butter — that’s going to do the work for us.
Take your prepared wraps and generously brush the outside of each one with the garlic-parsley butter. Be sure to coat both sides so you get even browning and loads of flavor.
Place the wraps seam-side down in the hot skillet. Cook each wrap for 2 to 3 minutes per side, or until the outside is golden brown and slightly crispy. Don’t rush this part — you want that perfect crust.
Tip: You may need to cook them in batches depending on the size of your pan. If that’s the case, keep the first batch warm on a plate covered with foil while you finish the rest.
Step 5: Finish in the Oven
Preheat your oven to 190°C (375°F) while your wraps are getting that crispy sear on the stovetop.
Once all the wraps are golden on both sides, place them seam-side down on a baking sheet lined with parchment paper. Give them one last brush of garlic butter on top for good measure.
Bake for 10 to 12 minutes, flipping once halfway through, until they’re fully heated and lightly crisp all over. You’ll notice the cheese bubbling slightly near the edges — that’s your cue that they’re ready to serve.
Bonus Flavor Tip: If you want a slightly smoky twist, try adding a dash of smoked paprika to your garlic butter before brushing it on. It’s a subtle addition, but it brings a rich depth that pairs so well with the cheeses and chicken.
Tips, Swaps & Serving Suggestions
These wraps are already super satisfying on their own, but if you’re in the mood to mix things up, here are a few easy ways to make them your own:
Add Some Veggies: Finely chopped bell peppers, spinach, or even caramelized onions can be mixed right into the filling. Not only does it add flavor, but you get that bonus veggie boost.
Try Different Cheeses: Mozzarella and cheddar are classic here, but feel free to swap in smoked gouda, provolone, or pepper jack for a little extra kick.
Use Rotisserie Chicken: No time to cook chicken from scratch? Rotisserie chicken works like a charm and makes this recipe even quicker.
Dipping Sauces: Don’t forget the sauces! These wraps are amazing dipped in ranch, marinara, or garlic aioli. You could even serve them with a spicy buffalo sauce if you like a little heat.
Make It a Meal: Pair these with a crisp green salad or some roasted veggies for a full, balanced dinner. They also work great as part of a lunch spread or game day platter.
Cheesy Garlic Chicken Wraps: Crispy, Gooey, and Totally Irresistible
You’ve made it to the final stretch — and if your wraps are already out of the oven, I’d be willing to bet they didn’t last long! These Cheesy Garlic Chicken Wraps have that perfect combination of crispiness, creaminess, and rich garlicky flavor that just makes them impossible to resist.
Before we wrap up (pun intended), I wanted to go over a few of the most common questions I get when sharing this recipe. Whether you’re planning to make these ahead, freeze them, or switch up the ingredients, this FAQ section should help you feel totally confident making them your own.
FAQ: Your Cheesy Garlic Chicken Wrap Questions Answered
1. Can I make these wraps ahead of time?
Absolutely. You can prep the wraps all the way up to the skillet step, then store them in the fridge for up to 24 hours. When you’re ready to eat, just follow the skillet and oven instructions as usual.
2. Can I freeze them?
Yes! Let the wraps cool completely, then wrap each one tightly in foil and place in a freezer-safe bag. To reheat, bake from frozen at 180°C (350°F) for about 20–25 minutes or until hot and crispy.
3. What’s the best way to reheat leftovers?
Reheat in the oven at 180°C for 8–10 minutes. You’ll get the best texture this way — the wraps stay crisp on the outside without getting soggy like they might in the microwave.
4. Can I use a different kind of protein?
Definitely. Cooked turkey, rotisserie chicken, or even shredded pork would all work. If you’re vegetarian, try swapping in sautéed mushrooms or roasted chickpeas for a delicious meat-free version.
5. Are these wraps spicy?
Not at all! The base recipe is mild and family-friendly. If you want to add heat, toss in a bit of chili flakes or use a spicier cheese like pepper jack.
6. What kind of tortillas work best?
Large flour tortillas are ideal because they’re soft, easy to roll, and hold up well to the skillet and oven steps. Avoid smaller or thinner wraps, as they may tear or dry out.
7. Can I skip the oven step?
Technically, yes — if your wraps are already hot and the cheese is melted after pan-searing, you can serve them straight from the skillet. But baking adds a final layer of crispiness and ensures the inside is evenly heated, especially if you’re cooking for a crowd.
Conclusion: Time to Dig In
There’s just something so satisfying about a warm, cheesy wrap — and this recipe delivers every single time. Whether you’re feeding your family on a busy weeknight, prepping lunch for the week, or serving up something comforting for a casual get-together, these Cheesy Garlic Chicken Wraps always come through.
They’re easy to make, packed with flavor, and totally customizable. Plus, that garlic butter glaze? Game changer. I’ve made these countless times and they’re still a hit, even with the pickiest eaters.
If you give this recipe a try, I’d love to hear how it turns out! Leave a comment, let me know if you added your own twist (veggies, sauces, different cheeses — I’m always curious!), and share with anyone who could use a simple, cozy recipe in their life.
Print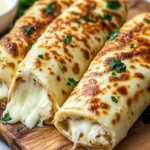
Cheesy Garlic Chicken Wraps
- Author: Andrew Recipes
Description
These Cheesy Garlic Chicken Wraps combine tender, shredded chicken with a blend of three cheeses, all wrapped in a warm flour tortilla and brushed with a fragrant garlic-butter glaze. Crispy on the outside and oozy on the inside, they make a satisfying meal or snack that’s easy to customize and perfect for sharing.
Ingredients
For the Wraps
480 grams cooked chicken breast, shredded or diced
110 grams shredded mozzarella cheese
60 grams shredded cheddar cheese
20 grams grated Parmesan cheese
4 large flour tortillas
For the Garlic Butter
45 grams unsalted butter, melted
2 cloves garlic, minced
1 teaspoon dried parsley
Instructions
Combine the shredded chicken breast with mozzarella, cheddar and Parmesan in a large mixing bowl until the cheeses are evenly distributed throughout the chicken.
Lay one flour tortilla on a clean work surface and spoon approximately 120 grams of the chicken-cheese mixture into its center. Fold the left and right edges over the filling, then roll from the bottom up into a tight wrap. Repeat with remaining tortillas and filling.
In a small bowl whisk together melted butter, minced garlic and dried parsley until the mixture is smooth and fragrant.
Heat a skillet or griddle over medium heat. Brush the outside of each wrap generously with the garlic butter. Place wraps seam-side down in the skillet and cook for 2 to 3 minutes per side, brushing with additional butter as needed, until the tortillas are golden brown and crispy.
Preheat the oven to 190°C. Arrange the cooked wraps seam-side down on a baking sheet lined with parchment paper. Brush the tops with remaining garlic butter and bake for 10 to 12 minutes, flipping once halfway through, until the wraps are heated through and lightly crisp.
Serve the wraps immediately while hot, accompanied by dipping sauces such as ranch, marinara or garlic aioli.
Notes
For extra veggie crunch, add thinly sliced bell peppers or spinach to the chicken-cheese mixture before rolling.
If you prefer a smokier flavor, swap out cheddar for smoked gouda or add a pinch of smoked paprika to the garlic butter.
To store leftovers, wrap each cooled wrap tightly in foil and refrigerate for up to 2 days. Reheat in a 180°C oven for 8 to 10 minutes or until warmed through and crisp.

