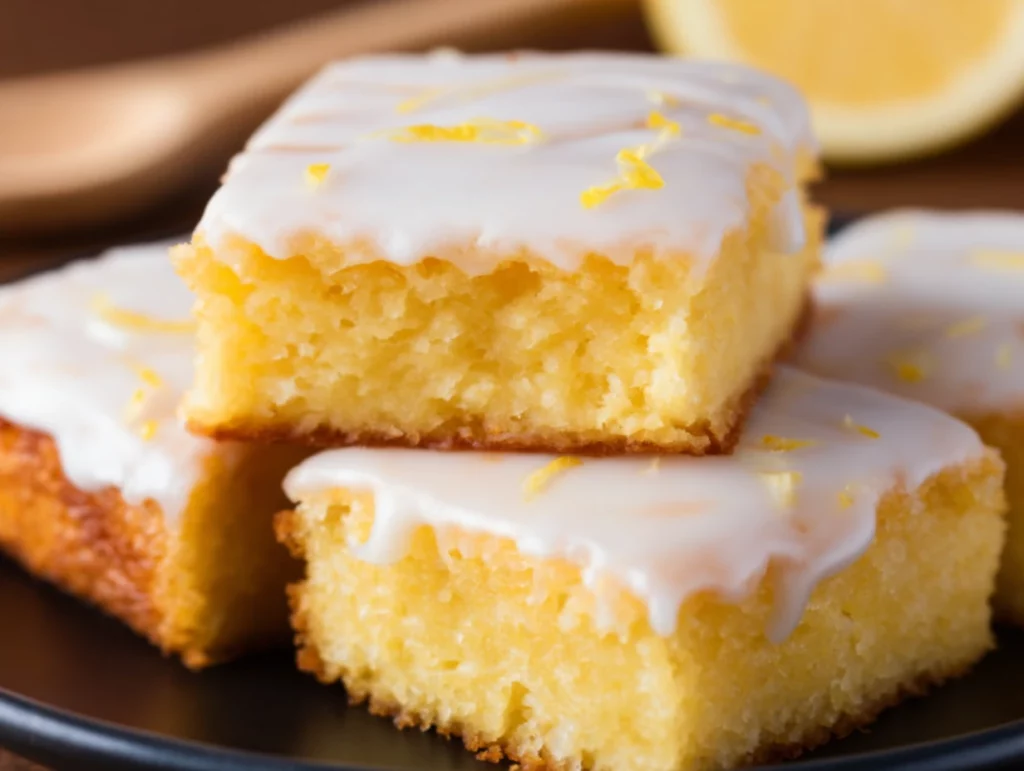
If you’re a lemon lover like me, then you’re in for a real treat today. These Lemon Brownies are what dessert dreams are made of—soft, chewy, full of bright citrus flavor, and topped with the most deliciously tangy glaze. They’re not your typical brownie (no chocolate here!), but they still have that same dense, fudgy texture we all know and love—just with a sunny, lemony twist!
I first whipped up a batch of these on a warm spring afternoon when I had a few extra lemons lying around and a serious craving for something sweet but refreshing. I didn’t expect them to be so addictive—seriously, they didn’t even last a full day in our kitchen. Now, they’re a staple recipe for picnics, brunches, and honestly, just about any gathering that needs a burst of sunshine on the dessert table.
These bars have the perfect balance between sweet and tart, and they’re so simple to make. Plus, that glossy lemon glaze? It’s the cherry on top (or should I say lemon on top?).
Let’s dive into the recipe together, and I’ll walk you through how to make the perfect Lemon Brownies from scratch.

Ingredients You’ll Need
Here’s everything you’ll need to make the brownies and glaze:
For the Brownies:
1 cup all-purpose flour
1 cup granulated sugar
½ cup unsalted butter, softened
2 large eggs
2 tablespoons lemon zest
2 tablespoons fresh lemon juice
½ teaspoon baking powder
¼ teaspoon salt
For the Lemon Glaze:
1 cup powdered sugar
2 tablespoons lemon juice
1 teaspoon lemon zest
STEP 1: Preheat and Prep the Pan
Start by preheating your oven to 350°F (175°C). Grease an 8×8-inch baking pan, then line it with parchment paper. The parchment will make it easy to lift the brownies out once they’re done, and you’ll thank yourself later for the easy cleanup.
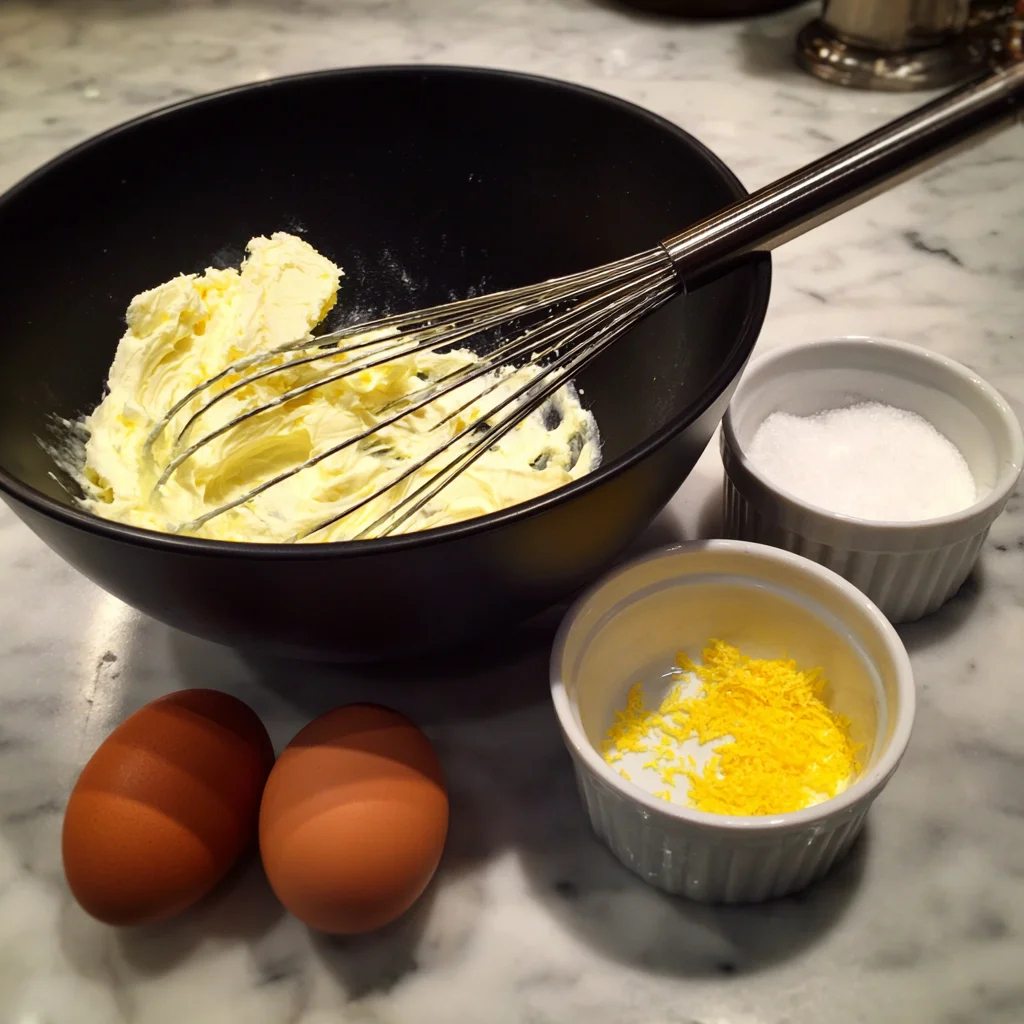
STEP 2: Cream the Butter and Sugar
In a large mixing bowl, cream together the softened butter and granulated sugar. You want to beat them until they’re light and fluffy—this helps create that soft, chewy texture. I usually use a hand mixer for this step, but you can do it by hand with a little elbow grease.
STEP 3: Add the Eggs and Citrus
Now it’s time to mix in the good stuff! Add your eggs, lemon zest, and fresh lemon juice to the creamed butter and sugar. Beat until everything is fully incorporated. You should already start smelling that amazing lemon aroma—that’s when you know it’s going to be good.
Quick Tip: Fresh lemon juice is a must here. Bottled lemon juice just doesn’t bring the same brightness to the table.
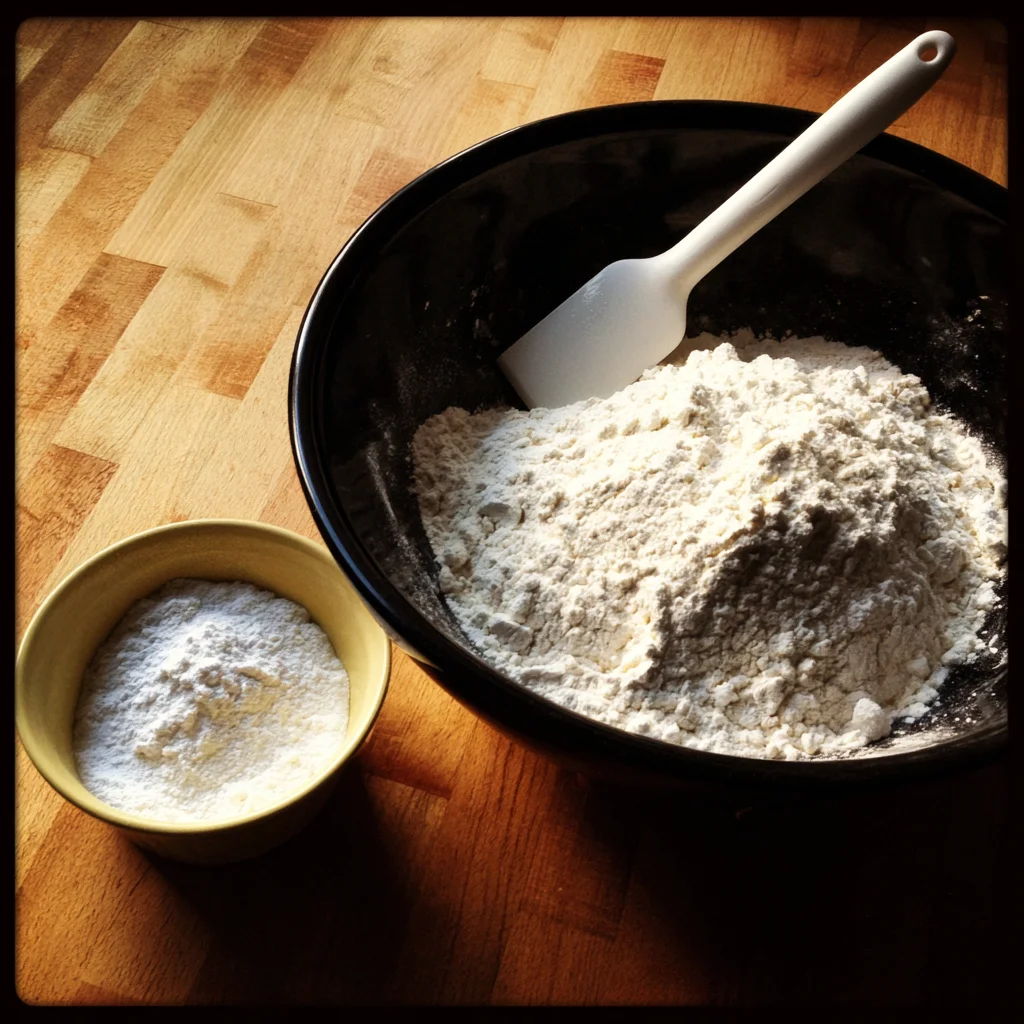
STEP 4: Mix the Dry Ingredients
In a separate bowl, whisk together the flour, baking powder, and salt. Don’t skip this step—mixing the dry ingredients before combining helps make sure the leavening is evenly distributed.
Slowly add the dry ingredients to the wet mixture, stirring gently just until everything is combined. Don’t overmix here—just enough so there are no more streaks of flour.
STEP 5: Bake to Golden Perfection
Pour your batter into the prepared baking pan and spread it out evenly. The batter will be thick, almost like a cookie dough consistency, but that’s what gives these bars their amazing dense texture.
Bake for 22 to 25 minutes, or until the edges are slightly golden and a toothpick inserted in the center comes out clean. Be careful not to overbake—these brownies are best when they’re soft and a little fudgy in the middle.
Let the brownies cool completely in the pan before adding the glaze. I know it’s hard to wait, but trust me—it’s worth it.
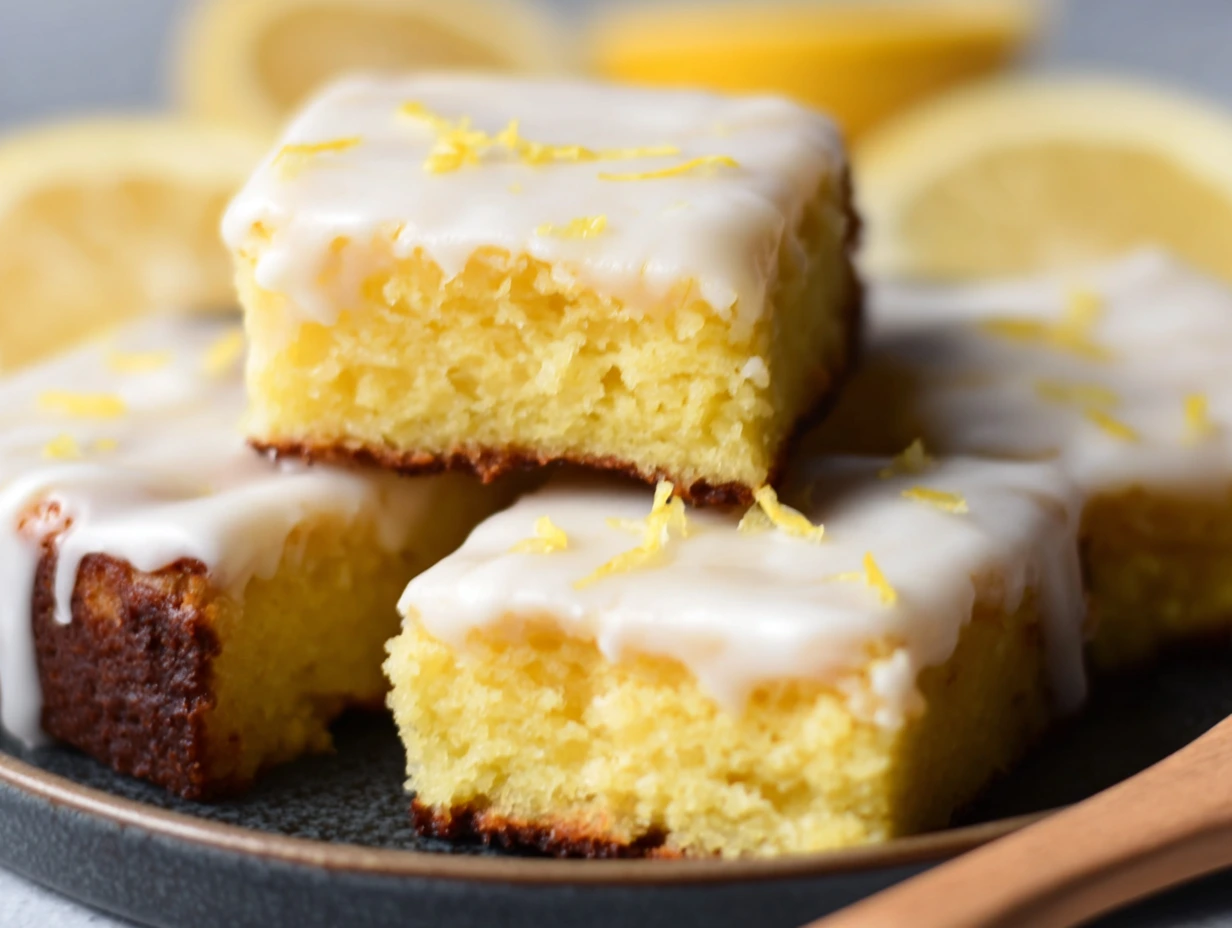
Lemon Brownies Recipe – Glaze and Tips for Perfect Results
Welcome to Part 2 of our lemony adventure! By now, your kitchen probably smells like a citrus grove, and your brownies are cooling off on the counter. And while those soft, golden bars are already delicious on their own, we’re about to take them to the next level with a glossy lemon glaze that’s sweet, tangy, and totally irresistible.
The glaze not only adds a beautiful finish but also soaks slightly into the top layer of the brownies, giving them a little extra moisture and a punch of citrus flavor in every bite. Plus, it comes together in minutes with just a few simple ingredients.
Let’s finish up these lemon brownies and go over some helpful tips and variations to make sure yours turn out just right every time.
STEP 6: Mix the Lemon Glaze
While your brownies are cooling completely in the pan (yes, they need to be totally cool before you glaze them!), it’s time to make the glaze.
In a small mixing bowl, whisk together:
1 cup powdered sugar
2 tablespoons lemon juice
1 teaspoon lemon zest
Whisk until the glaze is completely smooth and lump-free. It should be pourable but not runny—more like the consistency of a thick syrup.
Tip: If you want an extra-smooth glaze, strain your lemon juice before adding it to the powdered sugar. It helps remove any pulp or seeds and gives the glaze a nice, clean texture.
STEP 7: Glaze and Set
Once the brownies are cool, pour the glaze evenly over the top, using a spatula or the back of a spoon to spread it all the way to the edges. The glaze should form a shiny, even layer.
Let the glaze set for at least 30 minutes before cutting the brownies. This gives it time to firm up and develop that slightly crackly finish on top that looks just as good as it tastes.
STEP 8: Slice and Serve
Once the glaze is fully set, lift the brownies out of the pan using the parchment paper. Use a sharp knife to cut them into 16 squares (or larger if you want big pieces—no judgment here).
They’re ready to serve immediately, or you can store them for later (more on that below).
Helpful Tips for Perfect Lemon Brownies
Making these lemon brownies is pretty foolproof, but here are a few tried-and-true tips to make sure they turn out perfectly every time:
Use fresh lemons. Both the juice and zest really make a difference in flavor. Skip the bottled stuff—it’s just not the same.
Soften your butter ahead of time. Room-temperature butter helps create that light and fluffy texture when creamed with the sugar.
Don’t overbake. Check your brownies at the 22-minute mark. They’re done when the edges are lightly golden and a toothpick comes out with a few moist crumbs (not wet batter, though!).
Customize your glaze. Want it thicker? Use a little less lemon juice. Want it even tangier? Add a few drops of lemon extract. It’s easy to adjust to your taste.
Chill for clean cuts. If you’re aiming for picture-perfect slices, chill the glazed brownies in the fridge for 15-20 minutes before cutting.
Fun Variations to Try
Once you’ve made these lemon brownies once, you might want to experiment with different versions! Here are a few fun ideas:
Add white chocolate chips to the batter for an extra pop of sweetness that pairs beautifully with lemon.
Make it gluten-free by swapping the all-purpose flour with a 1:1 gluten-free baking blend.
Try a lime version by swapping all the lemon juice and zest for lime. It’s a little more tropical and just as refreshing.
Top with berries like raspberries or blueberries before baking for a fruity twist.
Lemon Brownies FAQ and Final Thoughts
We’ve gone through all the steps, tips, and even some fun variations to make these Lemon Brownies your new go-to dessert. But before we wrap up, I know there are always a few questions that pop up when making a new recipe—so let’s dive into some of the most frequently asked ones. These answers will help you troubleshoot, adapt, or just feel more confident when it’s time to bake!
Frequently Asked Questions
1. Can I double this recipe?
Absolutely! If you’re baking for a crowd, simply double the ingredients and use a 9×13-inch baking pan. The baking time will be slightly longer—check around the 28-30 minute mark and use the toothpick test to be sure they’re done.
2. Can I freeze lemon brownies?
Yes, lemon brownies freeze very well. Just be sure to cool them completely, slice them, and store in an airtight container. You can freeze them with or without the glaze, but I recommend adding the glaze after thawing for the freshest look and texture.
3. How can I make the lemon flavor even stronger?
If you’re someone who can’t get enough citrus, you can add a few drops of lemon extract to either the batter or the glaze. Just be careful—lemon extract is strong, so start small and taste as you go.
4. Can I make these brownies dairy-free?
Yes, you can substitute the butter with a dairy-free butter alternative. Just make sure it’s one that behaves similarly to regular butter when creamed (like Earth Balance or another baking-friendly option). The texture may be slightly different, but the flavor will still shine.
5. Why are my brownies dry or crumbly?
Overbaking is usually the culprit. Keep a close eye on the baking time, and take them out when the edges are just golden and the center is set. Using fresh, soft butter and not overmixing the batter also helps prevent dryness.
6. How long will these lemon brownies stay fresh?
These brownies keep well at room temperature for up to 3 days, or you can store them in the refrigerator for up to 5 days. Just make sure they’re in an airtight container to prevent the glaze from getting sticky or the brownies from drying out.
7. Can I use bottled lemon juice instead of fresh?
Technically yes, but it’s not recommended. Fresh lemon juice and zest provide a brightness that bottled juice just doesn’t match. It’s worth the extra minute or two to squeeze a lemon—you’ll taste the difference.
Final Thoughts: Why You’ll Love These Lemon Brownies
These Lemon Brownies are truly something special—bright, refreshing, and a perfect change from the usual chocolate desserts. Whether you’re making them for a spring brunch, a summer picnic, or just because you’ve got a citrus craving that won’t quit, they’re bound to become a favorite.
One of the things I love most about this recipe is how easy it is to make. There’s no need for fancy equipment, the ingredients are simple pantry staples, and the whole process—from mixing to baking to glazing—takes under an hour. And let’s not forget how they taste: soft and chewy with that perfect balance of sweet and tangy.
Print
Best Lemon Brownies Recipe
- Author: Andrew Recipes
Description
These Lemon Brownies are soft, chewy, and bursting with bright citrus flavor. Unlike traditional chocolate brownies, these lemon-infused treats offer a zesty twist with a dense, fudgy texture and a sweet-tart lemon glaze on top. Perfect for spring and summer gatherings, they strike the perfect balance between tangy and sweet.
Ingredients
1 cup all-purpose flour
1 cup granulated sugar
½ cup unsalted butter, softened
2 large eggs
2 tablespoons lemon zest
2 tablespoons fresh lemon juice
½ teaspoon baking powder
¼ teaspoon salt
Ingredients for the Lemon Glaze
1 cup powdered sugar
2 tablespoons lemon juice
1 teaspoon lemon zest
Instructions
Preheat the oven to 350°F (175°C). Grease and line an 8×8-inch baking pan with parchment paper.
In a large mixing bowl, cream together the softened butter and granulated sugar until light and fluffy. Add the eggs, lemon zest, and lemon juice, mixing until fully incorporated.
In a separate bowl, whisk together the flour, baking powder, and salt. Gradually add the dry ingredients to the wet mixture, stirring just until combined.
Pour the batter into the prepared baking pan and spread evenly.
Bake for 22 to 25 minutes or until the edges are lightly golden and a toothpick inserted in the center comes out clean. Let the brownies cool completely in the pan.
While the brownies are cooling, prepare the glaze by whisking together the powdered sugar, lemon juice, and lemon zest until smooth.
Once cooled, pour the glaze over the top of the brownies and spread evenly. Allow the glaze to set before slicing into squares.
Notes
For extra lemon flavor, add a drop of lemon extract to the batter or the glaze.
These brownies keep well at room temperature for up to three days or in the refrigerator for up to five days.
For a smoother glaze, strain the lemon juice before mixing.
If you prefer a thicker glaze, reduce the lemon juice slightly or add more powdered sugar.

