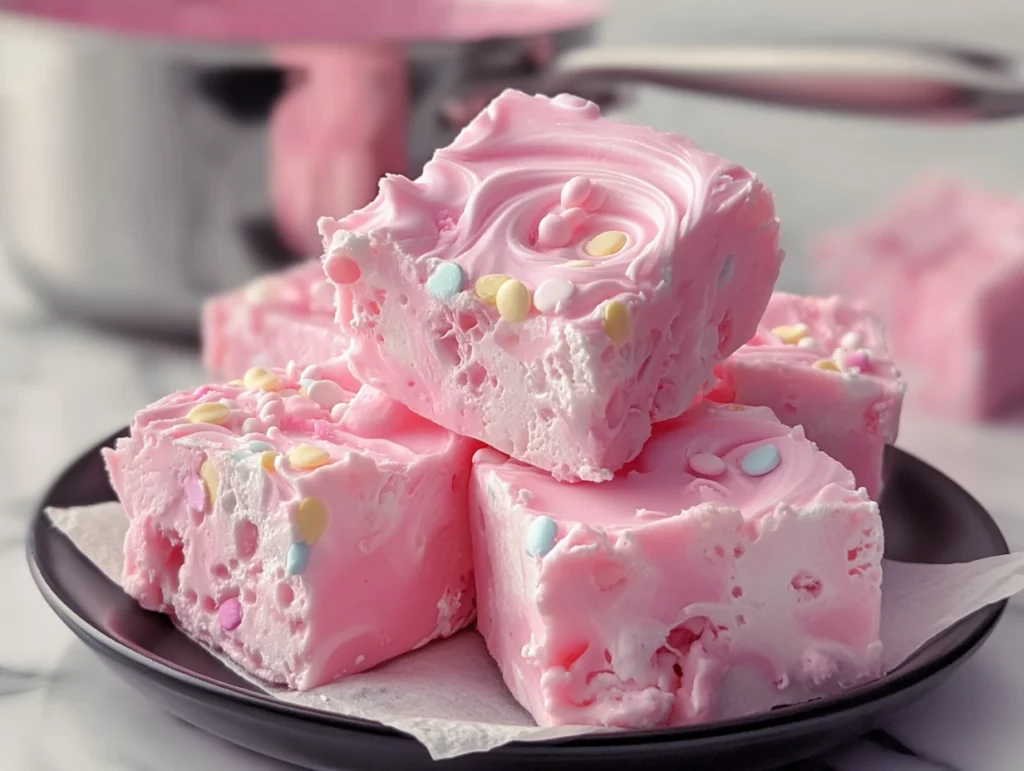
Some recipes just have a way of sparking joy the moment you see them—this Bubblegum Cloud Fudge is one of those. It’s pastel, it’s playful, and it tastes exactly like a bite-sized piece of childhood. Think of it as the kind of treat that could sit proudly in a candy shop window, calling your name as you walk by.
I first made this fudge for my niece’s birthday party, thinking it would be a fun “extra” on the dessert table. Turns out, it was the first thing to disappear—little hands (and quite a few grown-up ones) kept coming back for seconds. There’s just something magical about that creamy texture paired with the sweet, nostalgic bubblegum flavor. Plus, the pastel colors and sprinkle-topped finish make it look like something straight out of a fairy tale.
What’s even better? This fudge is incredibly easy to make. No candy thermometers, no complicated sugar stages—just a handful of ingredients and a few minutes on the stove. In under 15 minutes of prep, you can have this dreamy dessert chilling in the fridge, ready to wow your guests.

Why You’ll Love This Bubblegum Cloud Fudge
Eye-catching presentation: Soft pastel tones and sprinkles make it perfect for parties.
Nostalgic flavor: Brings back memories of bubblegum ice cream and childhood treats.
Quick and easy: Minimal prep time and no fancy equipment required.
Customizable: Change the colors, swirl them together, or skip sprinkles for a cleaner look.
Ingredients You’ll Need
3 cups white chocolate chips
1 can (14 oz) sweetened condensed milk
1 teaspoon bubblegum flavoring extract
Pink or pastel food coloring (optional, for a vibrant look)
Sprinkles for garnish (optional)
Getting Started
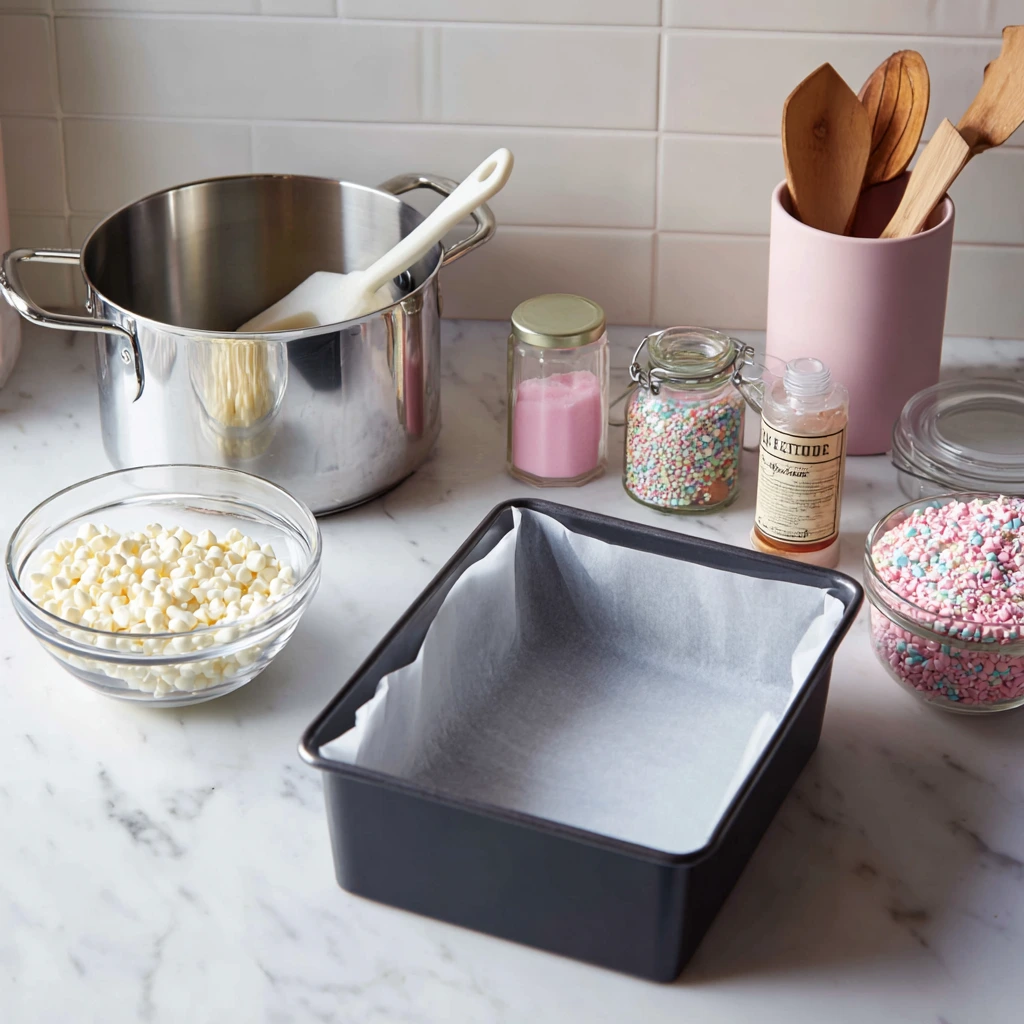
Before we dive into the actual cooking, here’s a quick tip—have everything measured and ready before you start. This recipe moves quickly once the chocolate starts melting, and you don’t want to be scrambling for your food coloring while the mixture sets up.
Step 1: Prepare Your Pan
Line an 8×8-inch baking dish with parchment paper, leaving a bit of overhang on the sides. This makes removing the fudge a breeze later on—you can just lift the whole block out before cutting.
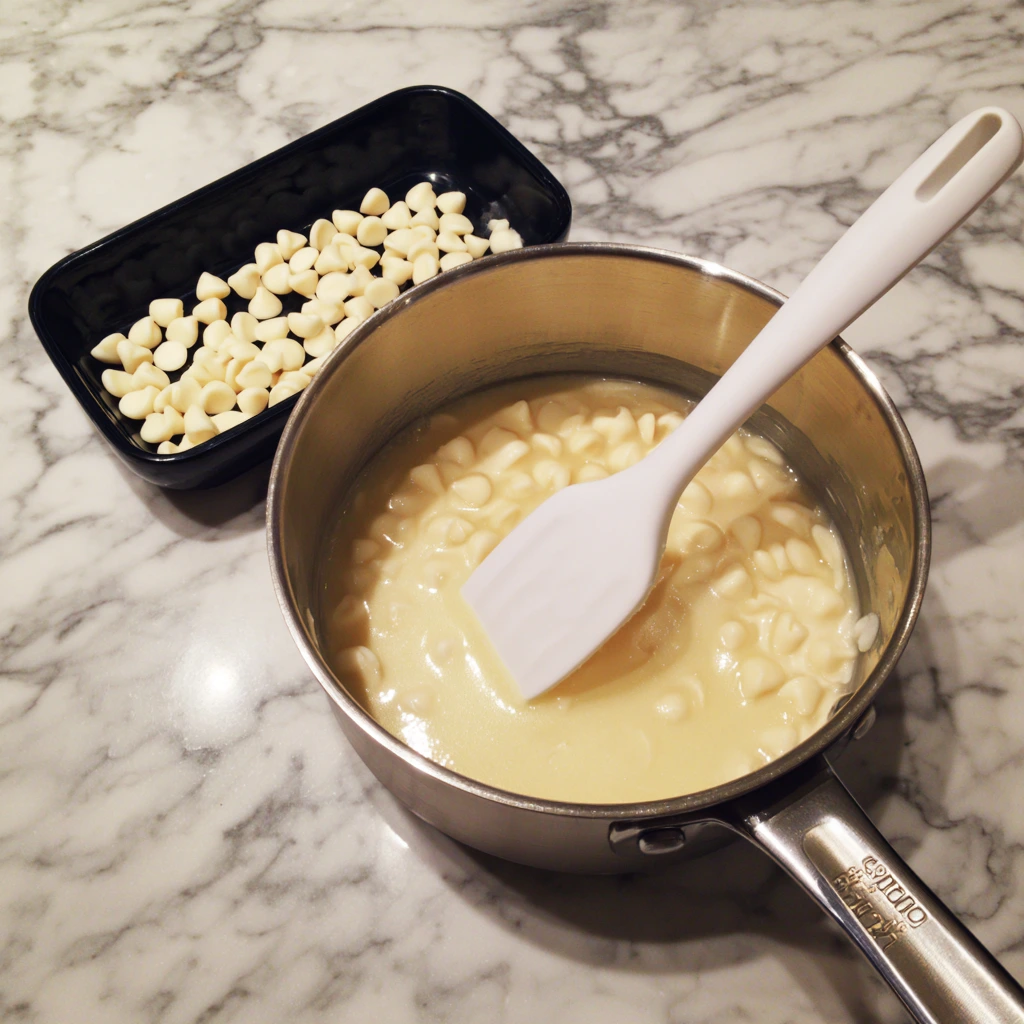
Step 2: Melt the Chocolate and Milk
In a medium saucepan over low heat, combine the white chocolate chips and the sweetened condensed milk. Stir continuously to avoid scorching, and keep going until the chocolate is completely melted and the mixture is smooth and glossy.
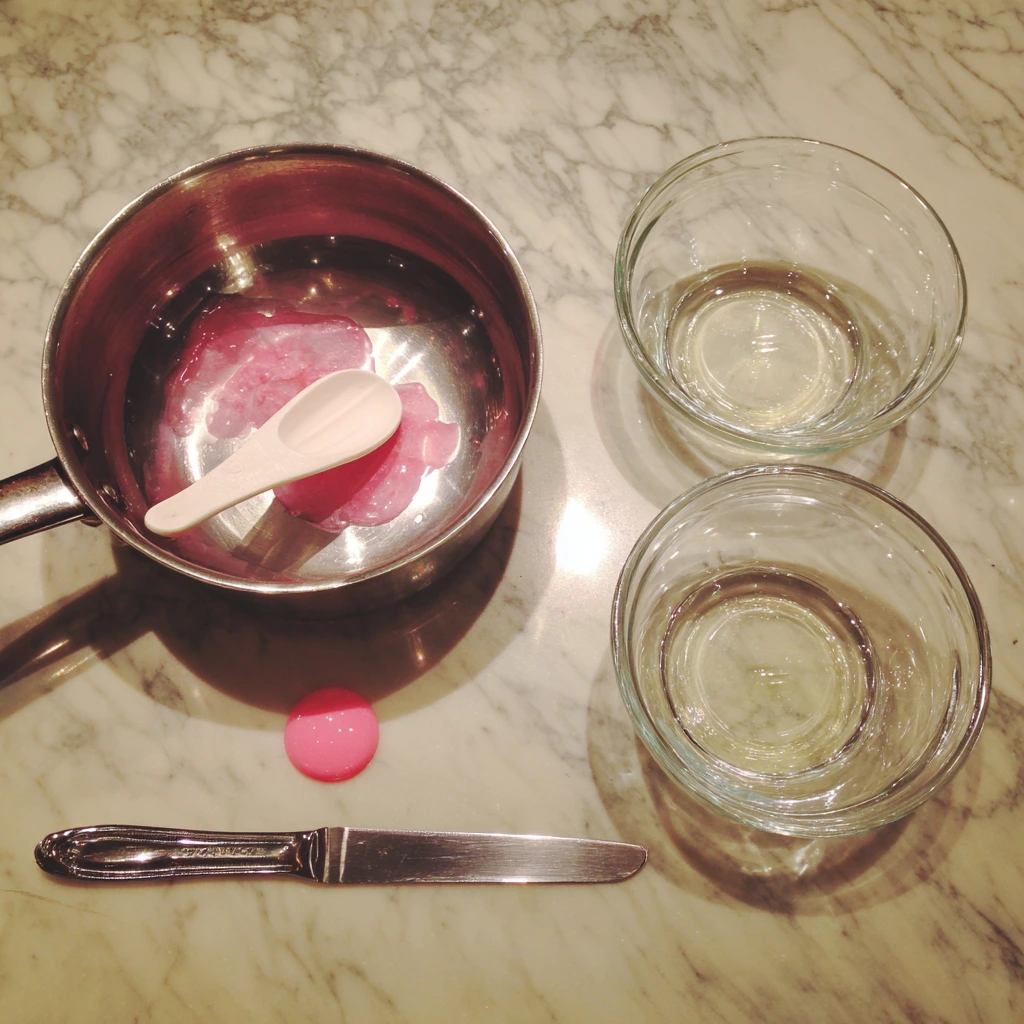
Step 3: Add the Flavor and Color
Remove the saucepan from the heat, then stir in the bubblegum flavoring extract. If you want that whimsical pastel look, add a few drops of food coloring at this stage. Gel coloring works best for a bold pastel without making the mixture runny. Stir until the color is evenly distributed.
Bubblegum Cloud Fudge Recipe – Finishing Touches and Pro Tips
Now that your fudge mixture is flavored and tinted, it’s time to give it its signature cloud-like finish. This part is where you can really make it your own—whether you want a perfectly smooth pastel block or a swirled, whimsical masterpiece.
I like to think of this stage as the “dress-up” portion of the recipe. It’s already delicious at this point, but now we’re making it party-ready.
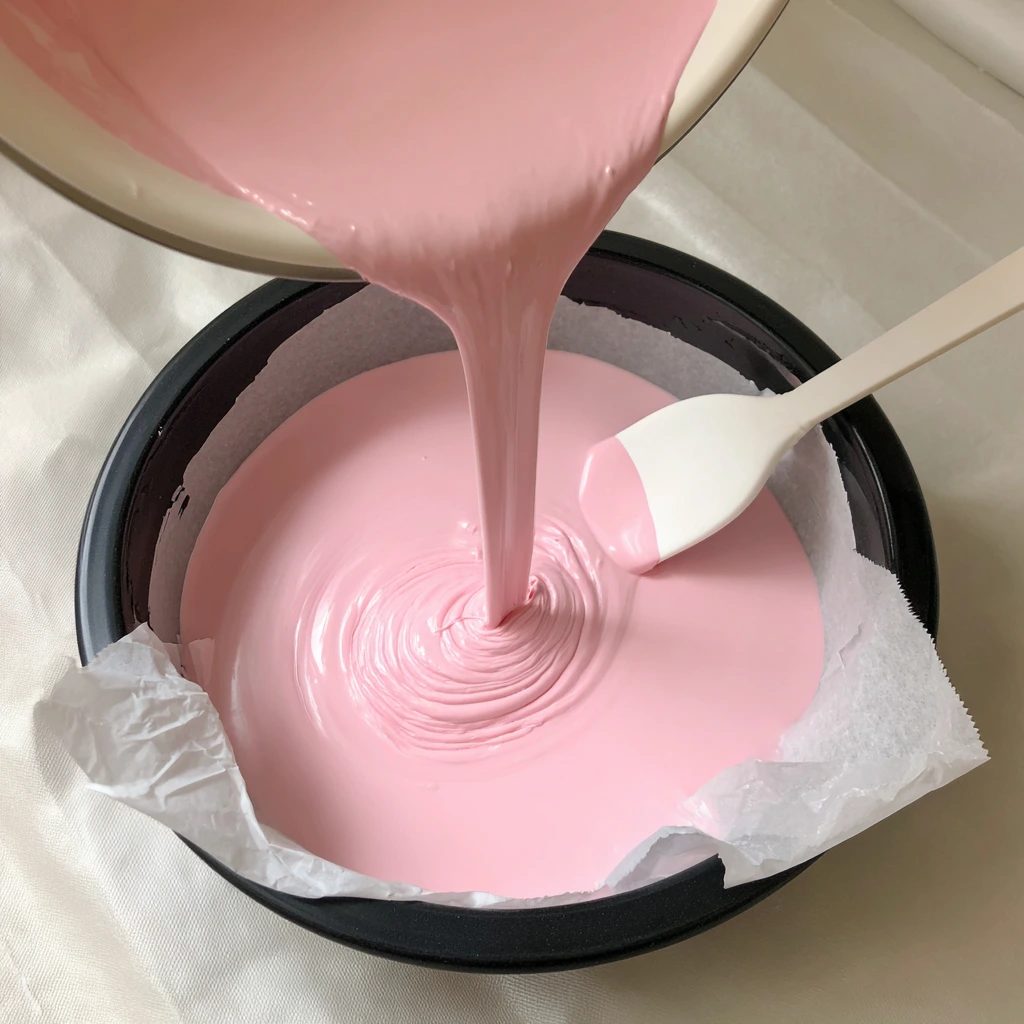
Step 4: Pour and Smooth the Mixture
Carefully pour the warm fudge mixture into your prepared pan. Use a spatula to spread it evenly, smoothing out the top so it looks neat. If you want to go for a swirled effect, you can divide your mixture into two bowls before pouring, tint each bowl a different pastel shade, and gently swirl them together in the pan using a butter knife.
Step 5: Add the Sprinkle Magic
If you’re going for that candy-shop charm, now’s the moment to sprinkle on your decorations. Scatter them lightly over the top while the fudge is still warm so they stick. You can go with rainbow sprinkles for a fun, playful vibe or stick with color-coordinated ones for a themed look—think pale pink for a baby shower or soft blue for a birthday party.
Step 6: Chill Until Set
Place the pan in the refrigerator for at least 2 hours, or until the fudge is firm to the touch. This is the hardest part—waiting—but it’s worth it. Chilling allows the flavors to fully develop and gives the fudge that perfect, sliceable texture.
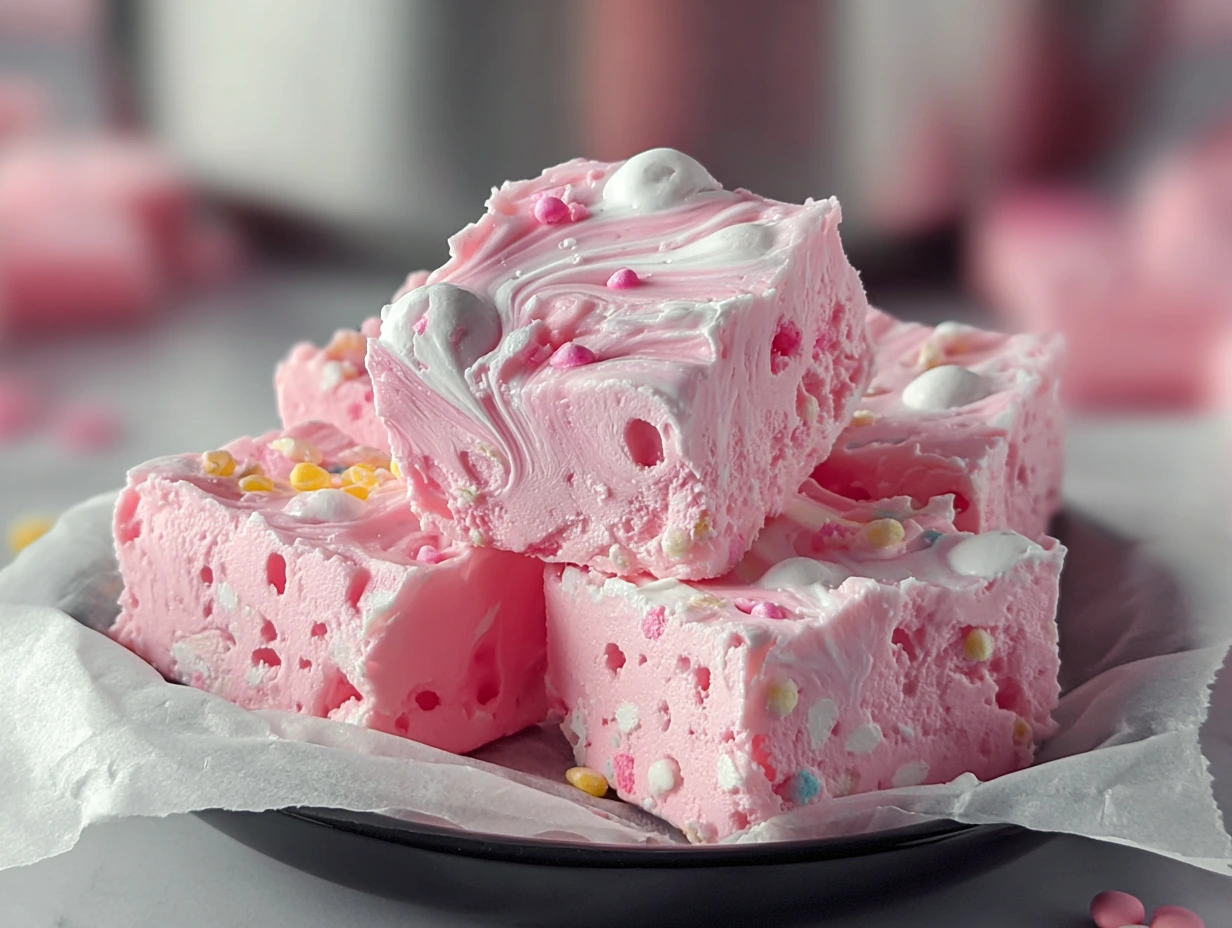
Step 7: Slice and Serve
Once set, lift the fudge out of the pan using the parchment paper overhang. Place it on a cutting board and slice into small squares with a sharp knife. Wipe the blade clean between cuts for those neat, bakery-style edges.
Pro Tips for Perfect Bubblegum Cloud Fudge
Use low heat: White chocolate can scorch easily, so be patient when melting.
Flavor carefully: Bubblegum extract is strong—start with 1 teaspoon, and taste before adding more.
Get creative with colors: Pastel purples, blues, or even a two-tone swirl can make it extra whimsical.
Storage: Keep the fudge in an airtight container in the refrigerator for up to two weeks, or freeze for longer storage.
Fun Variations to Try
Marbled Magic: Swirl two or three pastel shades for a dreamy, tie-dye look.
Birthday Surprise: Add colorful confetti sprinkles into the fudge itself before chilling.
Cotton Candy Twist: Swap bubblegum extract for cotton candy extract for a different nostalgic flavor.
Glitter Glam: Sprinkle with edible glitter for a shimmery finish at weddings or fancy parties.
Bubblegum Cloud Fudge – FAQs and Final Thoughts
You’ve made it through the easy, dreamy process of creating your own Bubblegum Cloud Fudge, but if you’re like most readers, you might still have a few questions. Let’s clear those up so your fudge turns out perfectly every single time.
Frequently Asked Questions
1. Can I make this fudge without bubblegum extract?
Yes! You can substitute with other extracts like cotton candy, strawberry, or even vanilla if you prefer. Just keep in mind that the flavor profile will change.
2. My fudge turned out grainy—what happened?
Graininess usually happens if the white chocolate gets overheated. Keep your heat low and stir constantly to ensure a smooth, creamy texture.
3. Can I make this ahead of time?
Absolutely. This fudge stores well in the refrigerator for up to two weeks, so you can make it days in advance for parties or events.
4. How do I get a swirl effect?
Divide your mixture into separate bowls, color each batch differently, then pour them into the pan in alternating spoonfuls. Swirl gently with a butter knife before chilling.
5. Can I double the recipe?
Yes, just use a larger pan (such as a 9×13-inch) and make sure your saucepan can hold the increased volume without overflowing.
6. Is this fudge freezer-friendly?
It is! Wrap individual pieces in wax paper, store in an airtight container, and freeze for up to three months. Thaw in the fridge before serving.
7. What’s the best way to cut clean squares?
Use a sharp knife dipped in hot water and wiped dry between cuts. This gives those perfect, smooth edges you see in bakery displays.
Final Thoughts
Bubblegum Cloud Fudge is one of those recipes that looks like you spent hours perfecting it—but in reality, it’s quick, simple, and almost foolproof. The combination of creamy white chocolate, pastel colors, and nostalgic bubblegum flavor makes it perfect for birthdays, baby showers, or just as a fun weekend baking project.
What I love most is how versatile it is. You can make it exactly as written for a classic version, or get creative with colors, flavors, and garnishes to suit your theme. Every batch feels a little different, and that’s part of the fun.
If you’ve never made fudge before, this is the perfect beginner’s recipe—it’s forgiving, requires no special equipment, and delivers that “wow” factor without stress. Just be prepared for it to disappear quickly once it hits the table.
Print
Bubblegum Cloud Fudge
- Author: Andrew Recipes
Description
Bubblegum Cloud Fudge is a whimsical, pastel-colored treat with a creamy, melt-in-your-mouth texture and a nostalgic bubblegum flavor. Perfect for birthdays, baby showers, or any celebration that calls for a touch of playful sweetness, this fudge not only tastes delicious but also looks like it belongs in a candy shop window. Its soft, cloud-like appearance and fun color make it as eye-catching as it is tasty.
Ingredients
3 cups white chocolate chips
1 can (14 oz) sweetened condensed milk
1 teaspoon bubblegum flavoring extract
Pink or pastel food coloring (optional, for a vibrant look)
Sprinkles for garnish (optional)
Instructions
Line an 8×8-inch baking dish with parchment paper, leaving some overhang for easy removal.
In a medium saucepan over low heat, combine the white chocolate chips and sweetened condensed milk. Stir continuously until the chocolate is fully melted and the mixture is smooth.
Remove from heat and stir in the bubblegum flavoring extract. If desired, add a few drops of food coloring and mix until evenly tinted.
Pour the mixture into the prepared pan, smoothing the top with a spatula.
If using, sprinkle decorative sprinkles on top for extra fun.
Refrigerate for at least 2 hours, or until set.
Lift the fudge from the pan using the parchment paper and cut it into squares.
Notes
Use gel food coloring for a more vibrant pastel without altering the texture.
If you want a swirled cloud effect, divide the fudge mixture into two bowls, color them differently, then swirl them together before setting.
Store fudge in an airtight container in the refrigerator for up to two weeks.

