There’s just something magical about no-bake desserts, isn’t there? Especially when they bring together some of the most indulgent flavors known to dessert lovers everywhere: chocolate, peanut butter, and Butterfingers. That’s exactly what makes this Butterfinger Lush so special. It’s rich, creamy, and layered with everything you could possibly want in a dessert—plus, it’s incredibly easy to put together.
This is one of those recipes that has become a staple at my family gatherings. I still remember the first time I brought it to a summer barbecue. It disappeared before most people even got to the dessert table! Ever since then, I’ve been the designated “Butterfinger Lush person” at every event. And honestly? I don’t mind one bit.
Today, I’m going to walk you through exactly how to make this show-stopping dessert. Trust me, even if you’re not a seasoned baker, you’ll nail it on your first try.
Why You’ll Love This Butterfinger Lush
No baking required: Perfect for hot days when you don’t want to turn on the oven.
Crowd-pleaser: The combination of flavors is a universal favorite.
Make-ahead friendly: Actually tastes even better after chilling overnight.
Simple ingredients: You probably have most of these in your pantry already.
Now, let’s get started!
Ingredients You’ll Need
Before we dive into the steps, here’s everything you’ll need to gather:
40 Oreo cookies
½ cup (1 stick) salted butter, melted and cooled
8 ounce block cream cheese, softened to room temperature
½ cup powdered sugar
½ cup creamy peanut butter
10.2 ounce bag mini Butterfingers, divided use (or 5 regular size bars)
16 ounces whipped topping, divided use (Cool Whip)
3 cups cold milk
2 (3.4 ounce) boxes instant chocolate pudding
STEPS: Preparing the Perfect Butterfinger Lush
Step 1: Make the Oreo Cookie Crust
First things first: let’s tackle that delicious Oreo cookie crust.
You can either use a food processor to crumble the Oreos into fine crumbs, or if you don’t have one handy, just place the cookies in a zip-top plastic bag and crush them with a rolling pin. I’ve done it both ways, and honestly, there’s something oddly satisfying about smashing them by hand.
Once your Oreos are finely crushed, transfer them to a large mixing bowl. Pour in the cooled, melted butter and stir until the mixture is fully combined and looks like wet sand.
Press this mixture evenly into the bottom of a 9×13-inch baking dish. I like to use the back of a spatula to make sure it’s firmly packed down—this helps create a sturdy base for the layers we’re about to build. Pop the dish into the refrigerator while you work on the next layer to let it chill and firm up.

Step 2: Crush the Butterfingers
Unwrap the mini Butterfingers and place them in another zip-top bag. Crush them gently using a rolling pin. Set them aside for later use. You’ll be using some for the filling and saving the rest for the topping.
Step 3: Create the Cream Cheese Layer
In a large mixing bowl, beat together the softened cream cheese, powdered sugar, and creamy peanut butter. I highly recommend using an electric mixer here to get a super smooth and creamy consistency.
Once everything is well blended, stir in about three-fourths of the crushed Butterfingers and one cup of the whipped topping. Mix gently to combine, making sure not to deflate the whipped topping too much. This layer is where that signature Butterfinger crunch starts to shine through.
Retrieve your chilled Oreo crust from the refrigerator and spread this creamy Butterfinger mixture evenly over the top. Use a spatula to smooth it out, then return the dish to the refrigerator while you prepare the next layer.
Building the Layers: Bringing the Butterfinger Lush to Life
Now that we’ve got that rich Oreo crust and creamy Butterfinger layer chilling away, it’s time to keep the momentum going. The next layers are just as easy and add even more decadent flavor to this already amazing dessert.
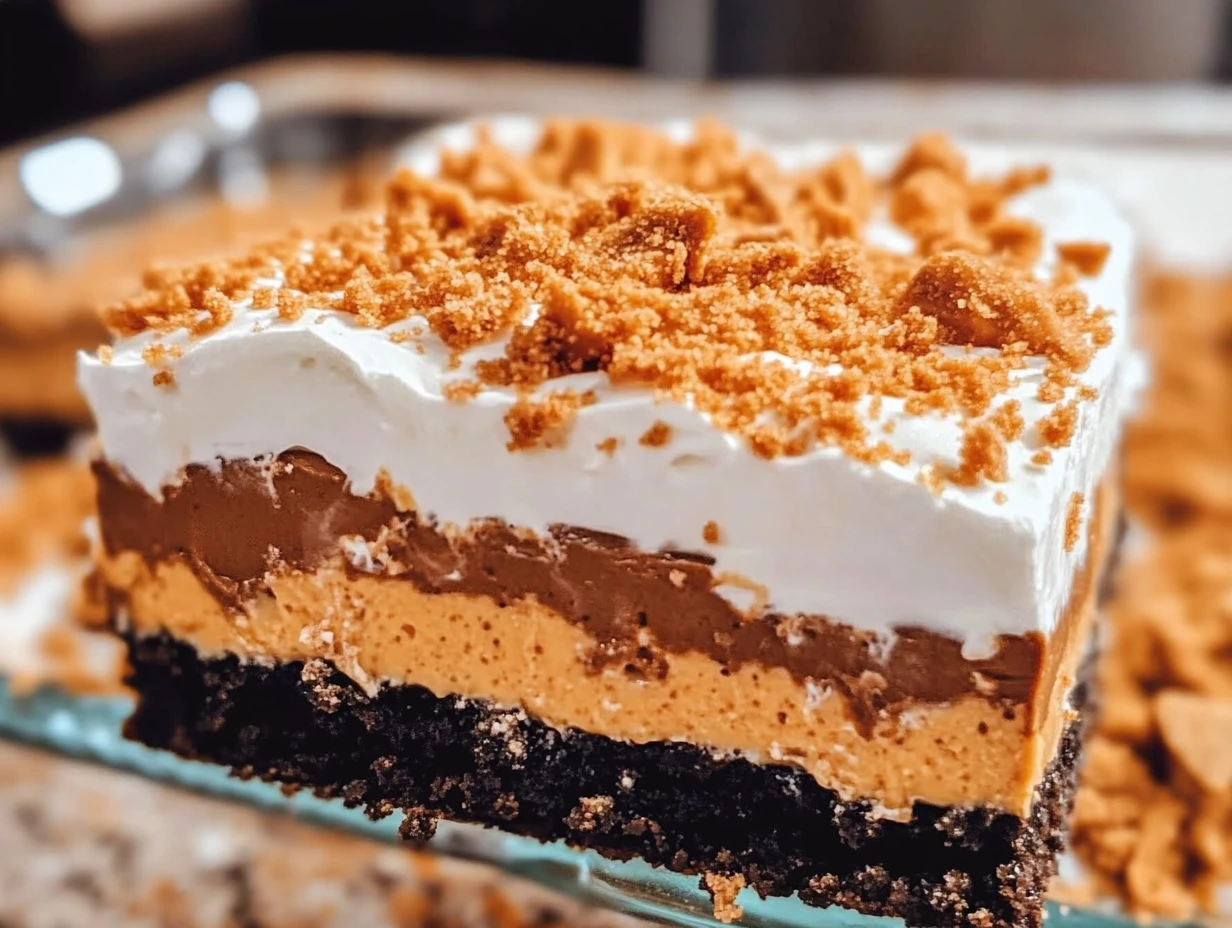
One thing I absolutely love about this Butterfinger Lush is how each layer balances the others. The creamy peanut butter layer is rich and slightly salty, the chocolate pudding adds a smooth, bittersweet note, and the whipped topping lightens everything up perfectly. And of course, the crushed Butterfingers sprinkled throughout add that irresistible crunch.
Let’s dive right into the next steps.
STEPS: Completing the Butterfinger Lush
Step 4: Prepare the Chocolate Pudding Layer
Grab a medium-sized mixing bowl and whisk together the instant chocolate pudding mix with the cold milk. You want to whisk this vigorously for a couple of minutes until it thickens up nicely. The instant pudding sets pretty quickly, so you’ll see it coming together as you stir.
This chocolate layer is so simple but adds a beautiful, smooth contrast to the crunchy Butterfinger bits and creamy peanut butter mixture.
Step 5: Spread the Chocolate Pudding Over the Cream Cheese Layer
Once the pudding is thickened, take your baking dish out of the refrigerator. Gently spread the chocolate pudding evenly over the cream cheese and Butterfinger layer. I like to spoon the pudding over in small dollops first, then carefully smooth it out with a spatula to avoid disturbing the layer underneath.
The key here is to work gently. You want those beautiful, distinct layers when you slice into the dessert later!
Step 6: Add the Whipped Topping
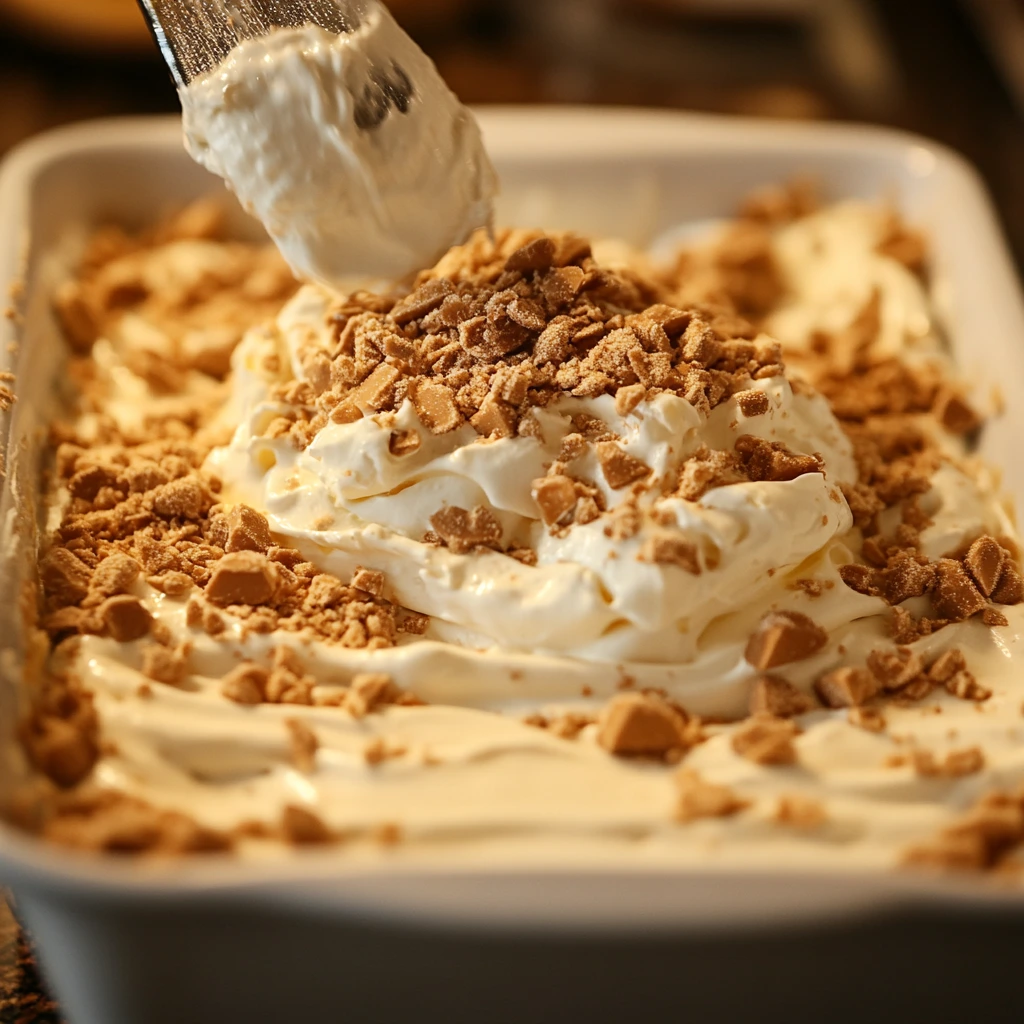
Next, spread the remaining whipped topping evenly over the pudding layer. Just like before, dollop the whipped topping over the pudding, then gently smooth it out with a spatula or the back of a spoon. This gives the dessert a nice, polished look and adds a light, fluffy finish on top of all that richness.
Step 7: Garnish with Crushed Butterfingers
Now comes my favorite part—the final Butterfinger topping. Sprinkle the remaining crushed Butterfingers evenly over the whipped topping layer. This not only makes the dessert look gorgeous but also gives you that extra crunch and pop of Butterfinger flavor in every bite.
Helpful Tips for the Perfect Butterfinger Lush
Chill Time Is Key: While the dessert will technically be ready to eat after a couple of hours in the fridge, I always recommend letting it chill overnight. The flavors meld together beautifully, and the layers set up firmly, giving you clean, picture-perfect slices.
Soften Your Cream Cheese: Make sure your cream cheese is fully softened before mixing. This will help you achieve that perfectly smooth, lump-free texture in the filling.
Crush Butterfingers Just Right: Don’t pulverize the Butterfingers into dust—leave some small chunks for that satisfying crunch.
Use Cold Milk: When making the pudding, ensure your milk is cold so the instant pudding sets up properly.
Layer Gently: Take your time when spreading each layer to maintain those distinct, beautiful layers. An offset spatula works wonders here.
Variations You Can Try
The beauty of Butterfinger Lush is how customizable it is. Here are a few variations to mix things up:
Swap the Pudding Flavor: While chocolate pudding is a classic choice, you can easily switch it out for vanilla, butterscotch, or even peanut butter flavored pudding for a fun twist.
Try Different Candy Bars: Not a Butterfinger fan? Use chopped Reese’s, Snickers, or Heath bars instead for a completely different flavor profile.
Homemade Whipped Cream: If you prefer, you can substitute the store-bought whipped topping with homemade whipped cream for an extra touch of freshness.
Add a Chocolate Ganache: For an extra layer of decadence, drizzle a simple chocolate ganache over the top before adding the final crushed Butterfingers.
Butterfinger Lush FAQ: Your Top Questions Answered
Whenever I share this Butterfinger Lush recipe, I always get a few questions from friends and readers who are eager to make it but want to make sure they’re doing everything just right. Here are some of the most common questions, along with simple, helpful answers to guide you.
FAQ
1. Can I make Butterfinger Lush ahead of time?
Absolutely! In fact, I recommend making it at least the day before you plan to serve it. The longer chill time allows the layers to set perfectly and the flavors to meld together. It holds up beautifully for several days in the refrigerator.
2. Can I freeze Butterfinger Lush?
While you technically can freeze it, I don’t usually recommend it. The texture of the whipped topping and pudding may change slightly once thawed. If you do freeze it, let it thaw slowly in the fridge before serving.
3. What’s the best way to crush Butterfingers without making a mess?
Place the Butterfingers in a zip-top bag and gently crush them with a rolling pin or a meat mallet. This keeps the mess contained and gives you control over how finely you crush them. Remember, a few chunks add great texture.
4. Can I use homemade whipped cream instead of Cool Whip?
Yes! Homemade whipped cream can definitely be used if you prefer a fresher option. Just make sure it’s stabilized (using a bit of gelatin or cornstarch) so it holds up well in the layers.
5. What if I can’t find mini Butterfingers?
No problem. You can substitute 5 full-size Butterfinger bars. Just chop or crush them into small pieces as you would with the minis.
6. Can I make this dessert gluten-free?
Yes, with a few modifications. Use gluten-free chocolate sandwich cookies instead of Oreos and double-check that your pudding mix and candy bars are gluten-free as well.
7. How do I get clean slices when serving?
Use a sharp knife dipped in hot water and wiped clean between slices. This helps cut cleanly through the layers and keeps your presentation neat.
Conclusion: Time to Make Your Own Butterfinger Lush
And there you have it—a step-by-step guide to creating the ultimate Butterfinger Lush. This dessert has earned a permanent spot in my recipe collection for good reason. It’s easy to make, incredibly delicious, and always a hit at any gathering. Whether you’re serving it at a holiday dinner, a summer cookout, or just as a special treat for your family, it never fails to impress.
I can’t wait for you to try this recipe yourself. If you do, be sure to come back and let me know how it turned out. Feel free to share any variations you’ve tried or little twists you added to make it your own. After all, the best recipes are the ones we make our own over time.
Happy no-baking, and enjoy every single bite of your Butterfinger Lush!
Print
Butterfinger Lush
- Author: Andrew Recipes
Description
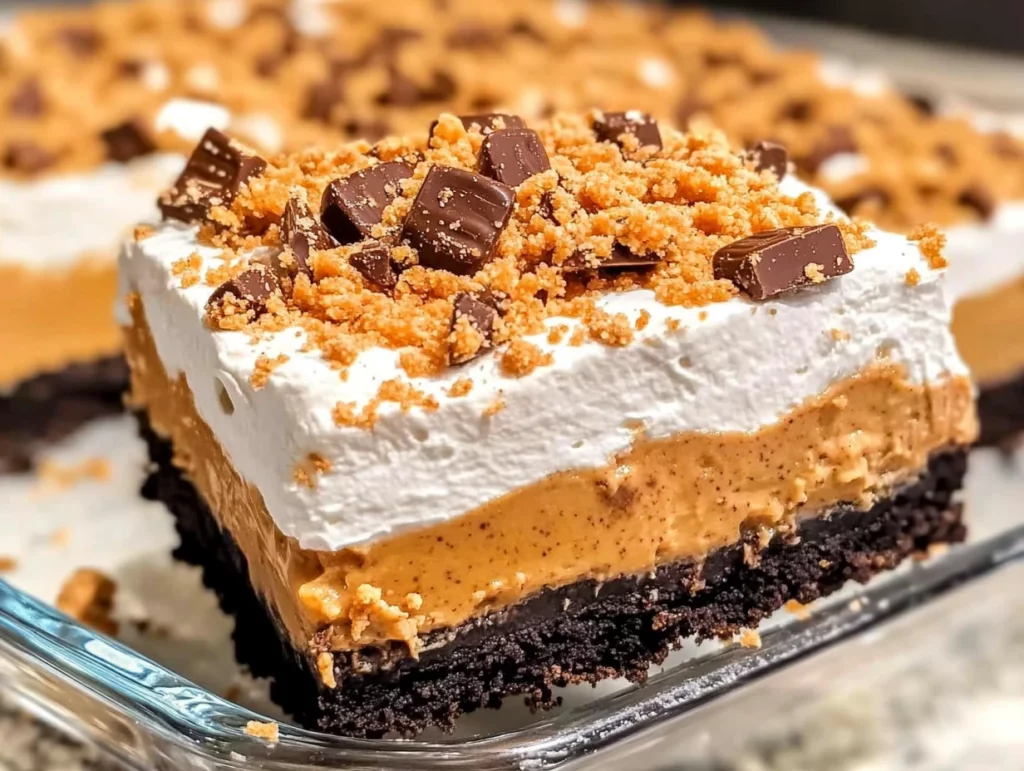
Butterfinger Lush is a rich, layered dessert that combines the flavors of chocolate, peanut butter, and Butterfinger candy bars into a creamy, decadent treat. With an Oreo cookie crust, smooth cream cheese layer, chocolate pudding, and a generous topping of whipped cream and crushed Butterfingers, this no-bake dessert is perfect for parties, potlucks, or anytime you need an easy, crowd-pleasing sweet.
Ingredients
40 Oreo cookies
½ cup (1 stick) salted butter, melted and cooled
8 ounce block cream cheese, softened to room temperature
½ cup powdered sugar
½ cup creamy peanut butter
10.2 ounce bag mini Butterfingers, divided use (or 5 regular size bars)
16 ounces whipped topping, divided use (Cool Whip)
3 cups cold milk
2 (3.4 ounce) boxes instant chocolate pudding
Instructions
Crumble the Oreo cookies using a food processor or by placing them in a plastic zip-top bag and crushing them with a rolling pin.
In a large mixing bowl, combine the crushed Oreos and cooled melted butter, stirring until the mixture is fully combined.
Press the Oreo mixture evenly into the bottom of a 9×13-inch baking dish to form the crust. Use your hands or the back of a spatula to press it down firmly. Place the crust in the refrigerator to chill and firm up while preparing the remaining layers.
Unwrap and crush the mini Butterfingers in a zip-top bag. Set aside for later use.
In a large mixing bowl, beat together the softened cream cheese, powdered sugar, and creamy peanut butter using an electric mixer until smooth and well blended.
Stir in three-fourths of the crushed Butterfingers and one cup of the whipped topping, mixing gently to combine.
Spread the cream cheese and Butterfinger mixture evenly over the chilled Oreo crust. Return the baking dish to the refrigerator while preparing the pudding layer.
In a medium mixing bowl, whisk together the instant chocolate pudding mix and cold milk until smooth and thickened.
Spread the pudding mixture evenly over the cream cheese layer.
Spread the remaining whipped topping evenly over the pudding layer, smoothing it out with a spatula.
Sprinkle the remaining crushed Butterfingers evenly over the top as a garnish.
Refrigerate the dessert for at least 1-2 hours, or overnight, to allow it to fully set. Slice and serve chilled.
Notes
For best results, allow the Butterfinger Lush to chill overnight to ensure clean slices and well-set layers. Make sure the cream cheese is fully softened before mixing to avoid lumps. You can adjust the amount of Butterfingers based on how rich and crunchy you want the dessert. This dish holds up well for several days in the refrigerator, making it a great make-ahead option for gatherings.

