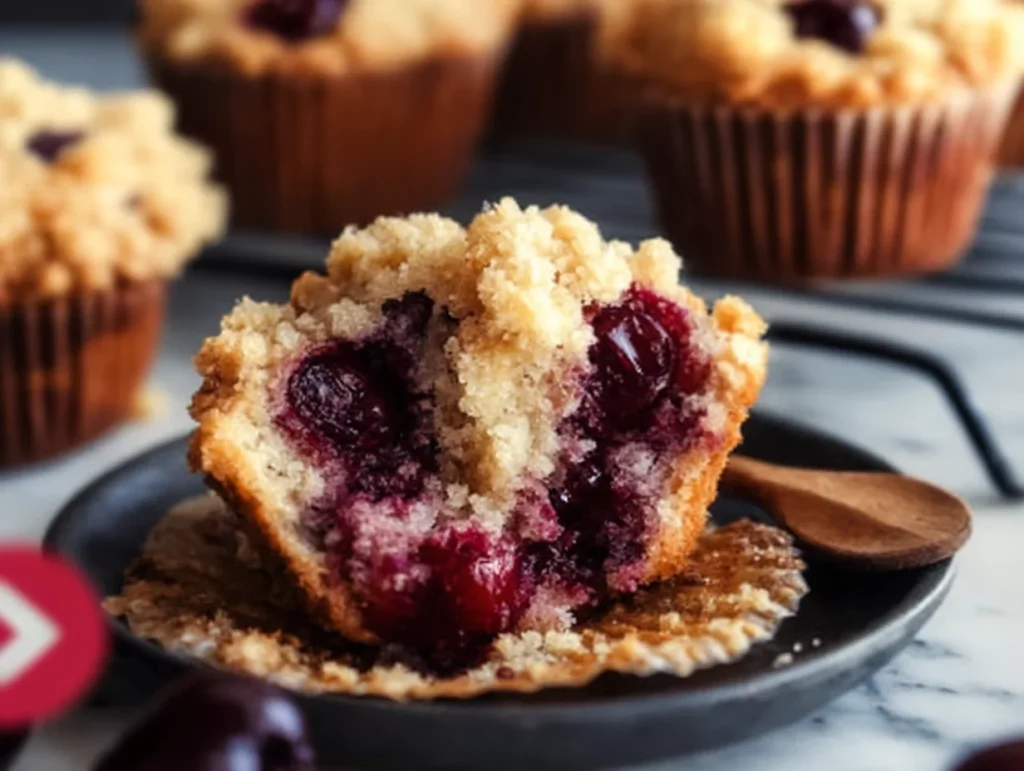
There’s something about cherry cobbler that just screams comfort. Maybe it’s the warm, syrupy cherries or the buttery topping that always feels like a hug from the inside out. And then there are muffins—those portable, single-serving baked goods we all reach for during busy mornings or lazy brunches. Now, imagine the two coming together in the most delicious way possible. That’s exactly what you get with these Cherry Cobbler Muffins—a cozy, fruit-filled bite of nostalgia you can enjoy anywhere.
I remember the first time I made a version of these muffins. I had a bowl of cherries that were just about to turn, and I wasn’t in the mood for pie-making. So, I grabbed my favorite muffin base, played around with a crumb topping, and hoped for the best. What came out of the oven was even better than I imagined: soft, fluffy muffins bursting with tart cherries and topped with that golden, buttery crumble we all secretly (or not-so-secretly) love. My family devoured them within hours, and they’ve been a staple in my kitchen ever since.
These muffins are more than just a treat—they’re a mood. Whether you’re enjoying them warm with a cup of coffee, packing them in lunchboxes, or serving them as part of a weekend brunch spread, they bring that little spark of homemade comfort to any moment.
Let’s dive into how to bring these beauties to life in your own kitchen.
Ingredients You’ll Need
For the Muffins:
1 ¾ cups all-purpose flour
½ cup granulated sugar
¼ cup brown sugar
2 teaspoons baking powder
½ teaspoon baking soda
½ teaspoon salt
1 teaspoon vanilla extract
⅓ cup vegetable oil
1 cup buttermilk
1 large egg
1 ½ cups fresh or frozen cherries, pitted and halved
For the Crumb Topping:
½ cup all-purpose flour
¼ cup granulated sugar
¼ cup brown sugar
½ teaspoon cinnamon
¼ cup unsalted butter, melted
STEP 1: Prep Your Muffin Tin and Oven
Start by preheating your oven to 375°F. Line a standard 12-cup muffin tin with paper liners or lightly grease each cup if you prefer to go liner-free. This keeps your muffins from sticking and helps with easy cleanup later (and let’s be honest, we’re all about making life easier in the kitchen).

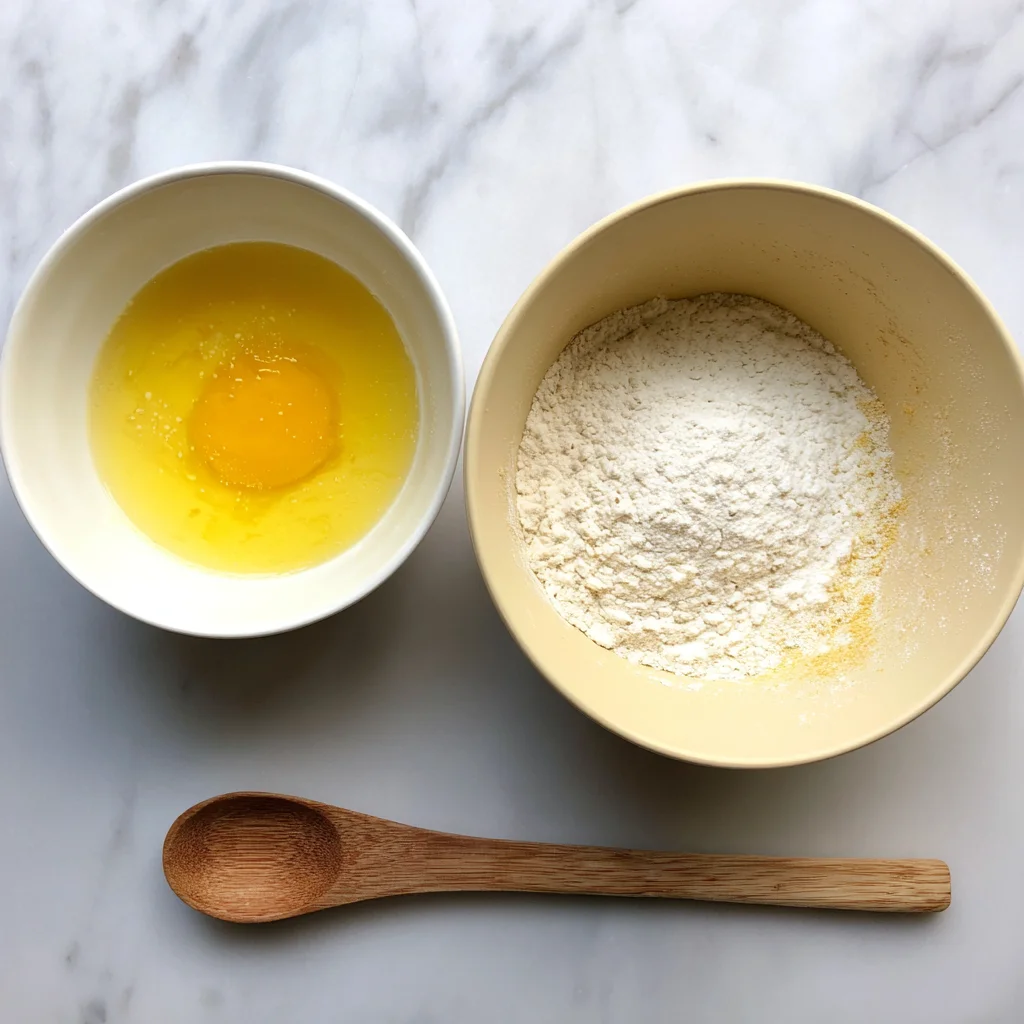
STEP 2: Mix the Dry Ingredients
In a large bowl, whisk together:
1 ¾ cups flour
½ cup granulated sugar
¼ cup brown sugar
2 teaspoons baking powder
½ teaspoon baking soda
½ teaspoon salt
Mix until everything is well combined. This dry mix forms the base of your muffin batter and gives them that nice fluffy texture.
STEP 3: Combine the Wet Ingredients
In a separate medium bowl, whisk together:
⅓ cup vegetable oil
1 cup buttermilk
1 large egg
1 teaspoon vanilla extract
Whisk until everything is smooth and fully incorporated. The buttermilk is key here—it adds a tangy flavor and helps keep the muffins super moist.
STEP 4: Bring the Batter Together
Now pour the wet mixture into the bowl with the dry ingredients. Gently stir until the batter just comes together—don’t overmix. A few lumps are totally fine and actually help keep the muffins tender instead of tough.
Once the batter is mixed, fold in 1 ½ cups of pitted and halved cherries. If you’re using frozen cherries, don’t thaw them beforehand—this helps avoid excess moisture in the batter.
STEP 5: Fill the Muffin Tin
Spoon the batter into your prepared muffin cups, filling each one about three-quarters full. You want to leave enough room for the crumb topping and a little rise in the oven.
Crumble Topping, Baking, and Tips for Success
Now that your muffin batter is ready and your muffin tin is filled, it’s time to take these cherry cobbler muffins to the next level with that irresistible crumb topping. This buttery, cinnamon-scented layer is what gives these muffins their cobbler-inspired flair. If you’re anything like me, you might just find yourself sneaking a few extra spoonfuls of the topping before it even hits the oven (guilty!).
Let’s get into the rest of the recipe, and I’ll also share some helpful baking tips to make sure your muffins come out perfectly every single time.
STEP 6: Make the Crumb Topping
In a small mixing bowl, combine the following:
½ cup all-purpose flour
¼ cup granulated sugar
¼ cup brown sugar
½ teaspoon cinnamon
¼ cup unsalted butter, melted
Use a fork to mix everything together until it forms a crumbly texture. The key is to not overmix here—you want clumps! Those little chunks of buttery goodness will crisp up in the oven and give you that classic cobbler crunch.
Tip: If you like a thicker topping layer (and who doesn’t?), feel free to double the crumble recipe. It adds even more texture and sweetness to each bite.
STEP 7: Add the Crumb Topping
Generously sprinkle the crumb topping over each muffin, making sure to cover the tops completely. You’ll want to press the crumbs down ever so slightly so they stick to the batter, but not too much—they should still sit on top and bake into a golden, delicious crust.
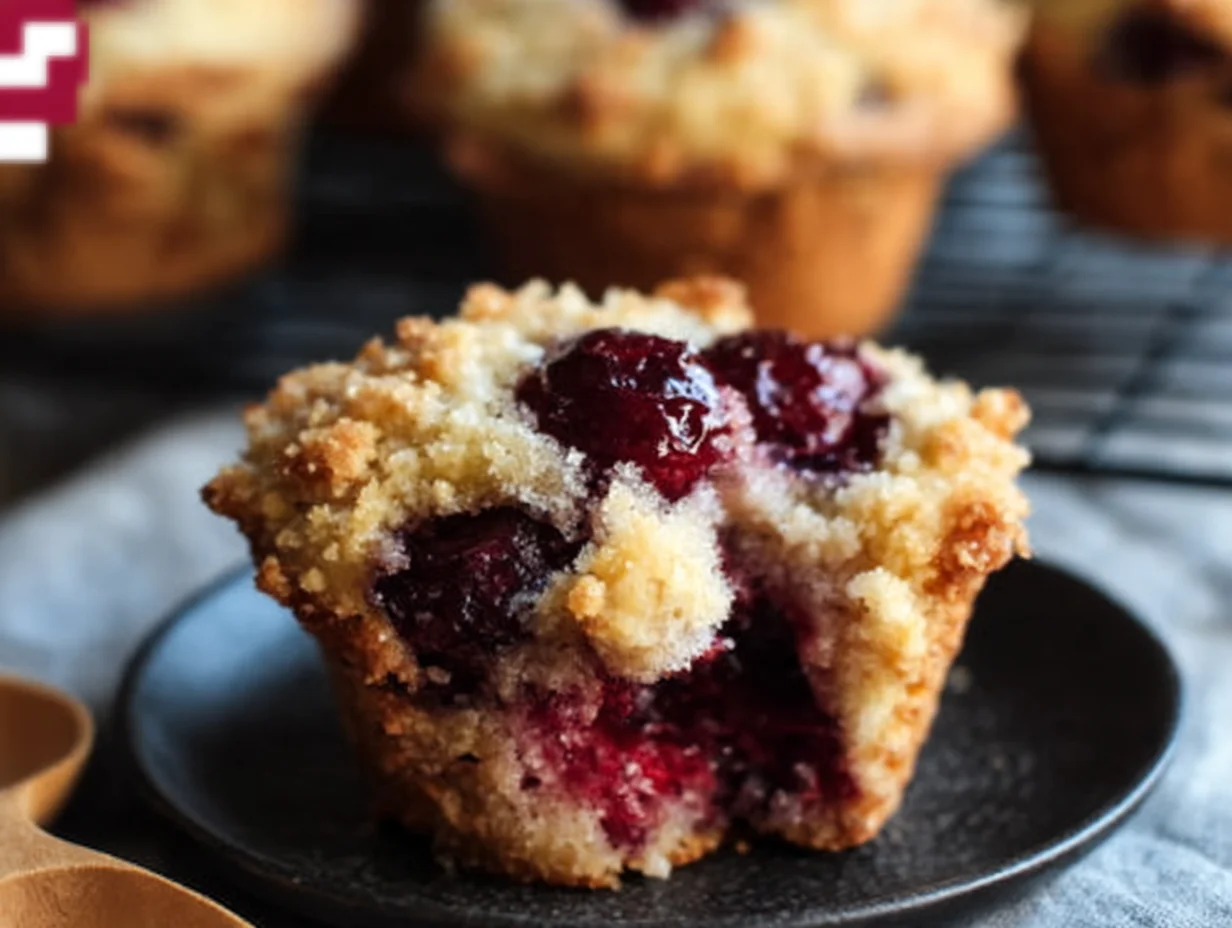
This step is where the muffins really start to look and feel like cherry cobbler in muffin form.
STEP 8: Bake to Perfection
Place your muffin tin in the preheated 375°F oven and bake for 18 to 22 minutes, or until the tops are golden brown and a toothpick inserted into the center of a muffin comes out clean.
Pro Tip: Every oven runs a little differently, so start checking around the 18-minute mark. If your muffins are looking golden but not quite set in the center, give them another minute or two.
Once baked, let the muffins cool in the pan for about 5 minutes, then transfer them to a wire rack to cool completely. This resting time helps them firm up just enough to handle without falling apart, while still keeping that soft, fluffy texture inside.
Tips for Best Results
1. Don’t Overmix the Batter
Seriously, this one’s important. Overmixing can lead to dense, chewy muffins instead of the light, tender ones we’re going for. Mix just until everything is combined—lumps are totally fine.
2. Use Buttermilk for Moisture
The acidity in buttermilk helps activate the baking soda and keeps the crumb super soft and moist. If you don’t have buttermilk on hand, you can make a quick substitute by combining 1 cup of milk with 1 tablespoon of lemon juice or white vinegar. Let it sit for 5 minutes before using.
3. Frozen Cherries Work Too
No fresh cherries? No problem. Frozen cherries work beautifully in this recipe. Just make sure not to thaw them before mixing into the batter—this keeps them from bleeding too much color and moisture into the muffins.
4. Customize the Crumb Topping
Want to add a bit more texture? Try tossing in some chopped pecans, walnuts, or even rolled oats into the crumb topping. It adds a hearty crunch and some extra flavor.
5. Storage Tips
These muffins are best the day they’re made, when the crumble is still crisp and the inside is soft and fresh. But if you have leftovers, store them in an airtight container at room temperature for up to 3 days. You can also freeze them for up to 2 months—just thaw and warm slightly before serving.
Serving Suggestions
These cherry cobbler muffins are perfect on their own, but if you really want to dress them up, here are a few ideas:
Dust with powdered sugar just before serving for a pretty finish.
Serve warm with a pat of butter or a drizzle of honey for a little extra indulgence.
Pair with coffee or tea for the ultimate mid-morning or afternoon break.
And honestly? These make a great dessert, too. A little whipped cream or vanilla ice cream on the side, and you’ve got yourself a shortcut cherry cobbler in muffin form.
FAQs and Final Thoughts
By now, your kitchen is probably smelling amazing, and those cherry cobbler muffins are cooling (or already half gone). Before we wrap up, let’s go over a few common questions people have when making these muffins. Whether you’re a seasoned baker or trying this for the first time, these quick answers will help you troubleshoot and customize with confidence.
Frequently Asked Questions
1. Can I use canned cherries instead of fresh or frozen?
Yes, you can use canned cherries, but be sure to drain them well and pat them dry with a paper towel to remove excess moisture. Avoid cherry pie filling—it’s too syrupy and will throw off the batter consistency.
2. What’s the best way to pit fresh cherries?
A cherry pitter is the quickest tool, but if you don’t have one, use a metal straw or a chopstick to push the pit through. It’s a little messy, but it works in a pinch!
3. How do I keep the crumb topping from sinking into the batter?
Make sure your topping is crumbly (not too wet), and sprinkle it gently over the filled muffin cups right before baking. Press it down very lightly so it sticks without sinking.
4. Can I make these muffins dairy-free?
Yes! You can substitute the buttermilk with a dairy-free version: mix 1 cup of almond or oat milk with 1 tablespoon of lemon juice or vinegar and let it sit for 5 minutes. Use a dairy-free butter alternative for the topping.
5. Why are my muffins turning out dense or flat?
This is usually caused by overmixing the batter or using expired leavening agents (baking powder/soda). Stir until just combined, and always check the freshness of your baking ingredients.
6. Can I make these muffins gluten-free?
You can try swapping the all-purpose flour for a gluten-free 1:1 baking blend. Just be sure it contains xanthan gum or a binding agent for best texture.
7. What’s the best way to store leftovers?
Store cooled muffins in an airtight container at room temperature for up to 3 days. For longer storage, freeze them in a sealed bag for up to 2 months. Reheat in the microwave or oven before serving.
Final Thoughts: Why These Cherry Cobbler Muffins Are Worth Making Again and Again
There’s just something special about these muffins. They’re the kind of baked good that feels a little extra without being complicated. You get the sweet-tart cherry flavor, a buttery crumb topping, and a fluffy, moist muffin all in one bite-sized package. They’re easy enough to whip up on a weekday morning but special enough to serve for brunch or dessert when you’ve got guests.
What I love most is how adaptable they are. Got blueberries or raspberries instead? Go for it. Want to add some almond extract or a drizzle of glaze? Sounds delicious. This recipe is a solid base for all kinds of fruity, crumbly muffin adventures.
Print
Cherry Cobbler Muffins
- Author: Andrew Recipes
Description
Cherry Cobbler Muffins are the perfect fusion of a classic fruit cobbler and a soft, fluffy muffin. Bursting with sweet-tart cherries and topped with a buttery crumble, these muffins offer a nostalgic taste of homemade cherry cobbler in a convenient, handheld form. They’re ideal for breakfast, brunch, or an afternoon treat with coffee or tea.
Ingredients
For the muffins:
1 ¾ cups all-purpose flour
½ cup granulated sugar
¼ cup brown sugar
2 teaspoons baking powder
½ teaspoon baking soda
½ teaspoon salt
1 teaspoon vanilla extract
⅓ cup vegetable oil
1 cup buttermilk
1 large egg
1 ½ cups fresh or frozen cherries, pitted and halved
For the crumb topping:
½ cup all-purpose flour
¼ cup granulated sugar
¼ cup brown sugar
½ teaspoon cinnamon
¼ cup unsalted butter, melted
Instructions
Preheat the oven to 375°F and line a 12-cup muffin tin with paper liners or grease it lightly.
In a large mixing bowl, whisk together the flour, granulated sugar, brown sugar, baking powder, baking soda, and salt.
In a separate bowl, whisk together the oil, buttermilk, egg, and vanilla extract until well combined.
Pour the wet ingredients into the dry ingredients and stir until just combined. Do not overmix. Gently fold in the cherries.
Spoon the batter into the prepared muffin tin, filling each cup about three-quarters full.
To make the crumb topping, combine the flour, sugars, cinnamon, and melted butter in a small bowl. Mix with a fork until crumbly.
Sprinkle the crumb topping generously over each muffin.
Bake for 18 to 22 minutes, or until a toothpick inserted in the center comes out clean and the tops are golden brown.
Allow the muffins to cool in the pan for 5 minutes, then transfer to a wire rack to cool completely.
Notes
If using frozen cherries, do not thaw them before folding into the batter to prevent excess moisture. For extra texture, add chopped nuts or oats to the crumble topping. These muffins taste best the day they’re made but can be stored in an airtight container for up to 3 days or frozen for longer storage. A light dusting of powdered sugar before serving adds a lovely touch.

