If you’re like me, there’s something about the warm, comforting flavors of a cinnamon roll that instantly makes everything feel better. But let’s be real, while cinnamon rolls are delicious, sometimes we just don’t have the time (or patience) to wait for the dough to rise and bake from scratch. That’s where these Cinnamon Roll Bliss Bars come in—they bring all the rich, spiced goodness of a cinnamon roll, but in a fraction of the time and with way less effort.
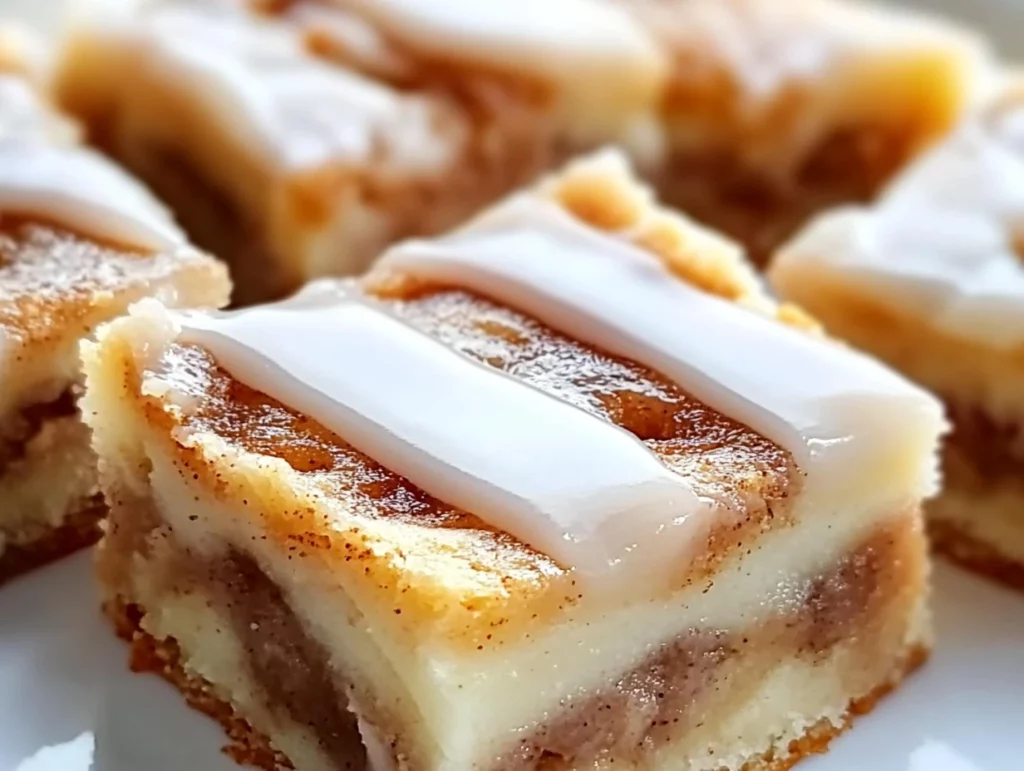
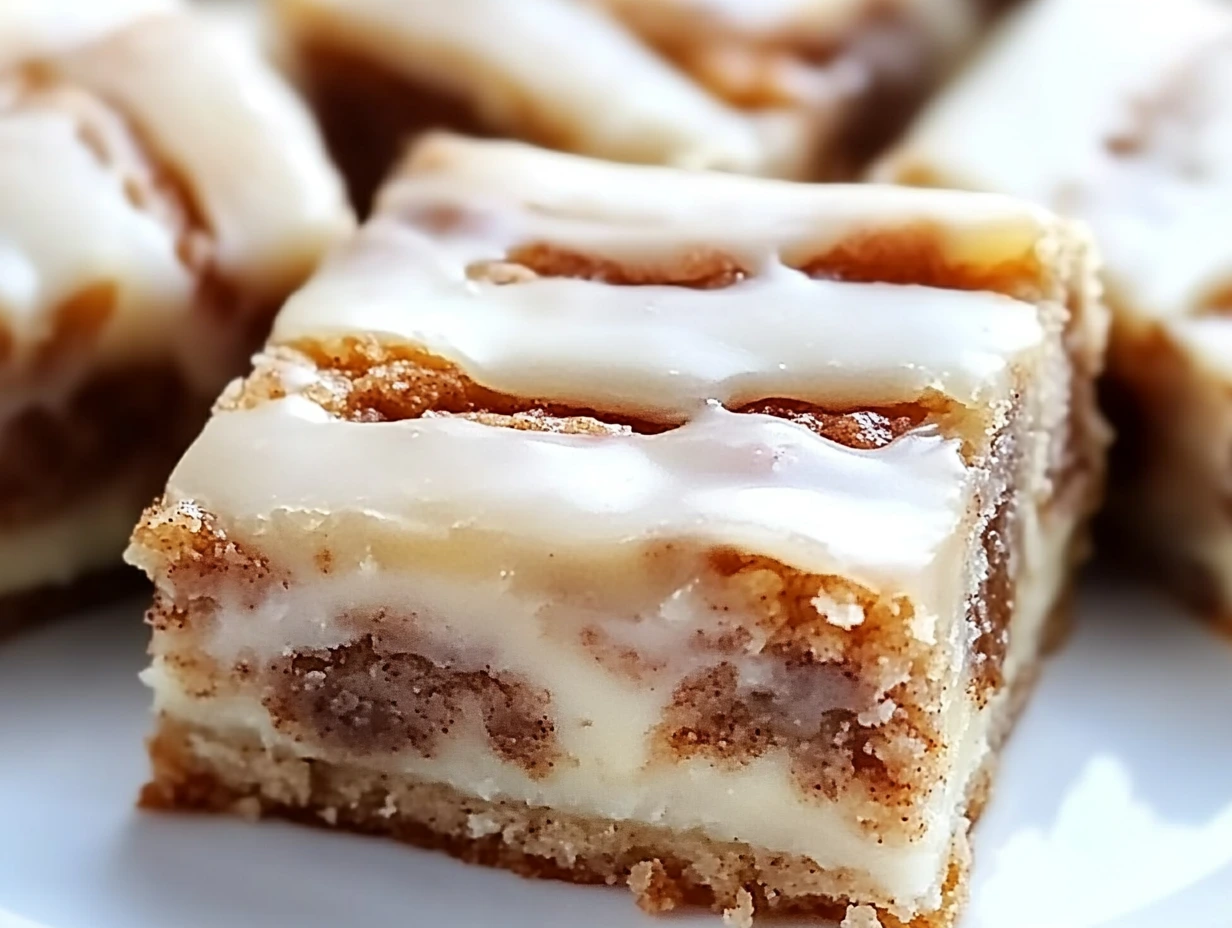
These bars are a game-changer. They’ve got that soft, cake-like base that’s reminiscent of a cinnamon roll, topped with a swirl of cinnamon-sugar filling, and finished off with a luscious cream cheese glaze. Plus, you can customize them with add-ins like nuts, chocolate chips, or even raisins for an extra touch of deliciousness. Whether you’re craving a sweet breakfast treat, a fun brunch option, or a satisfying dessert, these Cinnamon Roll Bliss Bars will hit the spot every time.
In this post, I’ll walk you through the simple steps to make these bars and show you just how easy it is to enjoy the flavors of cinnamon rolls without all the fuss. Let’s dive in!
Ingredients You’ll Need
Before we get started, let’s talk about the ingredients. The beauty of these Cinnamon Roll Bliss Bars is how simple they are to make. Here’s everything you’ll need:
For the Dough:
1 box (16.5 oz) yellow cake mix
8 tablespoons unsalted butter (melted)
1 large egg
For the Filling:
½ cup unsalted butter (melted)
1 cup packed brown sugar
2 ½ teaspoons ground cinnamon
For the Cream Cheese Glaze:
4 oz cream cheese (softened)
½ cup powdered sugar
¼ teaspoon vanilla extract
2–3 tablespoons milk
Optional Add-Ins:
Chopped pecans or walnuts
Mini chocolate chips
Raisins or dried cranberries
As you can see, this recipe is made with pantry staples and a few key ingredients, so you won’t have to run to the store for anything special. And the best part? The entire process comes together in less than an hour. So, let’s get to baking!
Step-by-Step Instructions
Step 1: Preheat Your Oven
First things first, preheat your oven to 350°F (175°C). This will ensure that your bars bake evenly and at the right temperature. Don’t forget to grease a 9×13-inch baking pan or line it with parchment paper—this will make it super easy to remove the bars once they’re done baking.

Step 2: Make the Dough
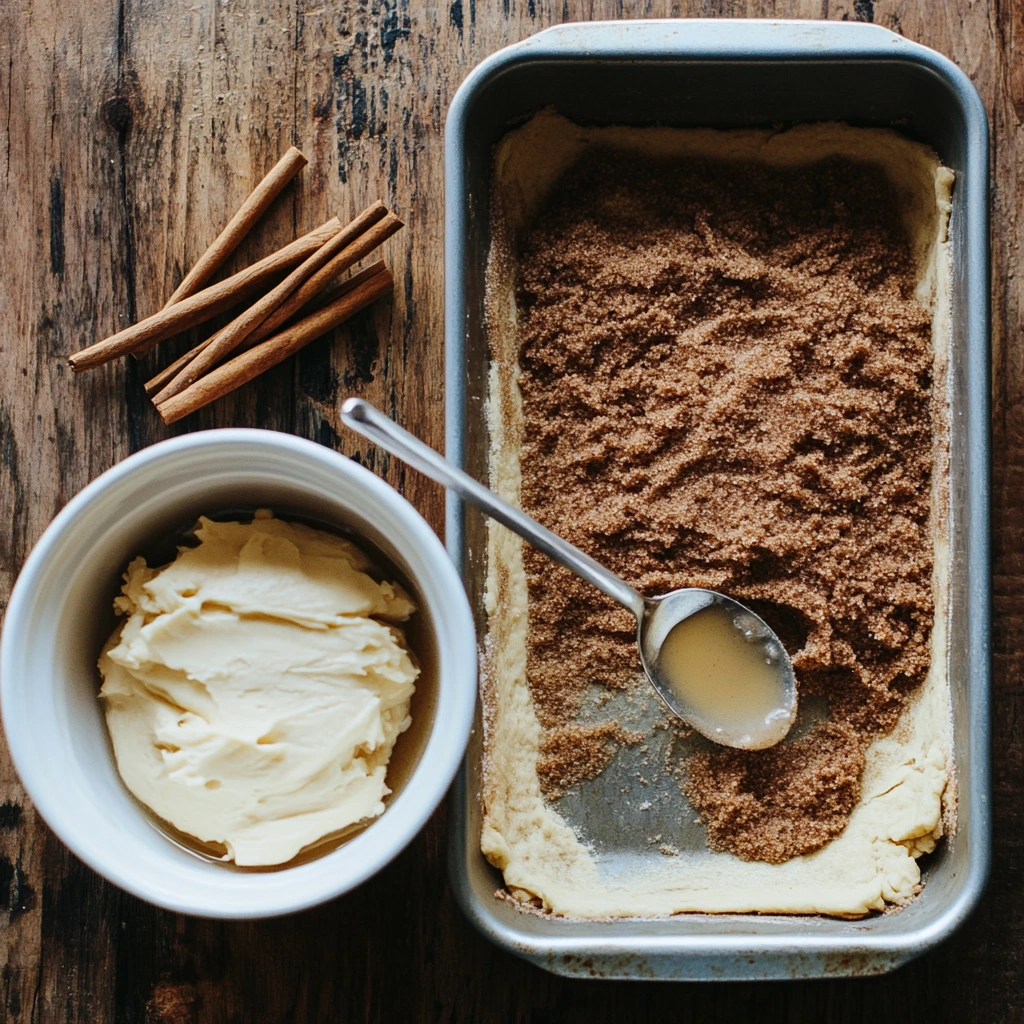
Now, in a large mixing bowl, combine the yellow cake mix, melted butter, and egg. Mix everything together until a soft dough forms. The dough will be slightly sticky, but that’s exactly what you want. Once it’s ready, press the dough evenly into the bottom of your prepared baking pan, making sure to cover the whole surface. This will be your base layer, so make sure it’s as even as possible.
Step 3: Prepare the Filling
Next, it’s time for that cinnamon-sugar filling that makes these bars taste just like cinnamon rolls. In a small bowl, mix together the melted butter, brown sugar, and ground cinnamon until it’s nice and smooth. This will be the sweet, spiced swirl that gives the bars their signature flavor.
Once your filling is ready, spread the cinnamon-sugar mixture evenly over the dough. I like to use the back of a spoon or an offset spatula to do this, but you can also use your hands if that’s easier. Just make sure to cover the dough completely with the cinnamon-sugar goodness.
Step 4: Swirl the Layers
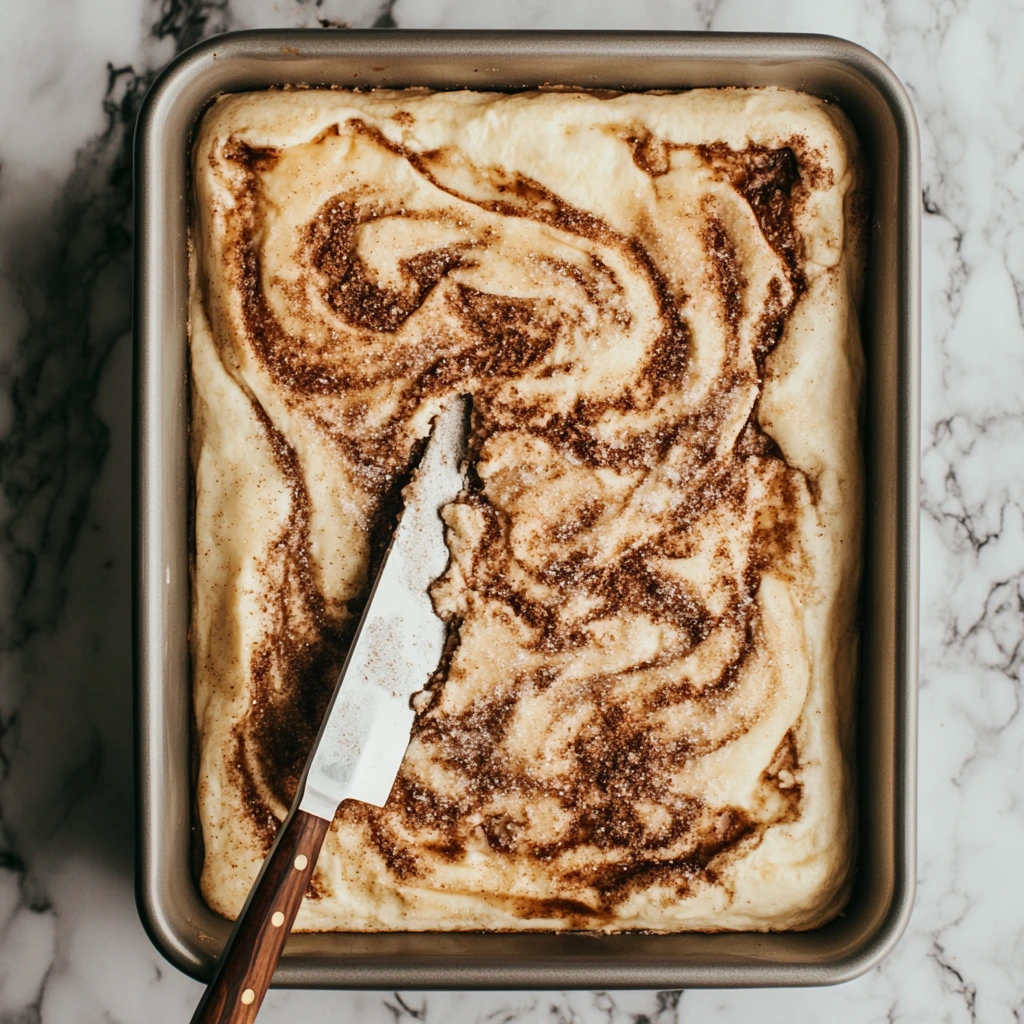
Here comes the fun part! Use a knife or skewer to gently swirl the cinnamon-sugar mixture into the dough. The goal here is to create a marbled effect, so don’t overdo it—just a few swirls will do. You want to keep those beautiful cinnamon swirls visible, just like you would see in a classic cinnamon roll. If you’re adding optional mix-ins, like chopped nuts, mini chocolate chips, or dried fruit, now’s the time to sprinkle them evenly over the top.
These optional add-ins aren’t required, but they can add an extra layer of texture and flavor. If you’re feeling adventurous, go ahead and get creative with them!
Step 5: Bake the Bars
Now it’s time to bake! Place the pan in the preheated oven and bake for 25–30 minutes, or until the edges are golden brown and the center is set. You’ll know they’re done when they puff up and turn a beautiful golden color.
Once baked, remove the bars from the oven and let them cool completely in the pan. I know it’s tempting to dive right in, but trust me—waiting a few minutes will make slicing them so much easier.
Step 6: Make the Cream Cheese Glaze
While the bars are cooling, it’s time to prepare the cream cheese glaze that will drizzle over the top. In a small mixing bowl, beat the softened cream cheese, powdered sugar, and vanilla extract together until it’s smooth and creamy. Gradually add the milk, one tablespoon at a time, until the glaze reaches your desired consistency. It should be pourable but thick enough to stick to the bars.
Step 7: Glaze and Serve
Once the bars have cooled, drizzle the cream cheese glaze generously over the top. The glaze will melt into the warm bars, creating a rich, creamy finish that’s totally irresistible. Slice the bars into squares, and you’re ready to serve!
How to Customize Your Cinnamon Roll Bliss Bars and Expert Tips
Now that you’ve got the basics down, let’s dive into some ways to make your Cinnamon Roll Bliss Bars even more amazing. These bars are already super versatile, but if you’re looking to mix things up a bit or get creative, there are plenty of fun variations and expert tips to take them to the next level.
Customizing the Bars with Add-Ins
One of the best things about this recipe is how easy it is to customize based on what you like or have on hand. If you’ve got a sweet tooth that leans toward chocolate, consider adding mini chocolate chips into the dough or sprinkle them over the top before baking. The creamy chocolate pairs beautifully with the cinnamon filling and the sweet cream cheese glaze.
If you’re a fan of nuts, chopped pecans or walnuts are perfect choices. They add a wonderful crunch that contrasts nicely with the soft texture of the bars. I personally love adding chopped pecans because they bring a rich, nutty flavor that complements the cinnamon so well.
For a more fruity twist, you could toss in raisins, dried cranberries, or even dried apricots for a little pop of tartness. These fruits give the bars a slightly chewy texture and a burst of natural sweetness that pairs so well with the cinnamon and glaze.
And don’t forget, if you want to make your bars a little extra indulgent, you could add a handful of mini chocolate chips and nuts. The more, the merrier, right?
Tips for Perfect Cinnamon Roll Bliss Bars
Even though this recipe is simple, there are still a few things to keep in mind to ensure your bars come out perfectly every time. Here are some of my best tips:
1. Make sure the dough is evenly pressed into the pan.
It can be tempting to rush through this step, but pressing the dough evenly into the bottom of the pan will help ensure that your bars bake uniformly. If you leave areas thicker than others, they might bake unevenly, so take a little extra time to get it right.
2. Don’t overmix the cinnamon-sugar filling.
When spreading the cinnamon-sugar mixture over the dough, be careful not to stir or overmix the filling once it’s on the dough. You want that swirl effect, so just gently spread it out to cover the surface, and then swirl it lightly. The key to a perfect cinnamon roll bar is having those distinct cinnamon swirls!
3. Don’t skip the cooling step.
While it may be tempting to cut into the bars as soon as they come out of the oven, I highly recommend letting them cool completely in the pan before slicing. The bars set better as they cool, and the glaze will melt into them just right if you give them a bit of time. Trust me, it’s worth the wait!
4. Get creative with the glaze consistency.
The cream cheese glaze is already amazing, but depending on your preferences, you can adjust its consistency. If you want a thicker glaze that stays put on top of the bars, use less milk. If you like a more runny glaze that soaks into the bars, add a bit more milk. You can also play around with adding a pinch of cinnamon to the glaze for an extra layer of flavor!
5. Use parchment paper for easy removal.
If you’re worried about getting the bars out of the pan in one piece, I recommend lining your baking dish with parchment paper. This makes removal a breeze and also helps with cleaning up afterward. Plus, it keeps the bars from sticking to the pan, so you get nice, clean slices every time.
Can You Make These Bars in Advance?
Absolutely! These Cinnamon Roll Bliss Bars are perfect for making ahead. They actually taste even better the next day after the flavors have had time to meld together. Just be sure to store them in an airtight container at room temperature for up to 3 days. If you want to keep them fresh for longer, you can store them in the fridge for up to a week.
If you’re planning to serve them at a party or brunch, you can also prepare them the night before, glaze them in the morning, and then slice them up for a crowd-pleasing treat. And if you’re someone who likes to bake in bulk, these bars can be frozen for up to 2 months. Just be sure to wrap them tightly in plastic wrap and foil, and thaw them at room temperature when you’re ready to enjoy them.
Could You Make These Bars with a Different Cake Mix?
While yellow cake mix is the base for this recipe, you could certainly experiment with other types of cake mixes to create different flavor profiles. For instance, a spice cake mix would enhance the cinnamon flavor and add some extra warmth. A white cake mix would keep the flavor more neutral, allowing the cinnamon filling and glaze to really shine.
If you want to play around with different cake mixes, just keep in mind that the texture of the dough might change slightly depending on the flavor you choose. However, the general instructions will still apply, so don’t be afraid to get creative with your cake mix choices!
Are These Bars Gluten-Free?
Unfortunately, this recipe isn’t gluten-free as it uses yellow cake mix, which contains gluten. However, you can easily make it gluten-free by swapping out the cake mix for a gluten-free variety. There are several gluten-free cake mixes available at most grocery stores that would work perfectly in this recipe. Be sure to check the ingredients and adjust the baking time if necessary, as gluten-free cake mixes sometimes require slight modifications to the process.
These bars are a great treat for those who don’t have dietary restrictions, but with a simple swap, they can be just as tasty for those on a gluten-free diet!
Can You Skip the Glaze?
While the cream cheese glaze is one of the key elements that makes these Cinnamon Roll Bliss Bars so indulgent, it’s completely optional. If you’re in a rush or prefer a less sweet option, feel free to skip the glaze altogether. The bars are still delicious on their own, with the soft dough and cinnamon swirl providing plenty of flavor.
That said, the glaze really does take these bars to the next level and adds that perfect creamy finish. But hey, it’s your choice! If you like things a bit lighter, you can also serve them with just a dusting of powdered sugar for a more classic cinnamon roll vibe.
Conclusion
Whether you’re looking for a quick breakfast treat, a fun dessert, or something to share with friends at a brunch, these Cinnamon Roll Bliss Bars have got you covered. With their soft dough, rich cinnamon-sugar filling, and luscious cream cheese glaze, they’ve got all the flavors you love about cinnamon rolls—but in an easy-to-make, bar form. Plus, they’re so customizable, so you can add your favorite mix-ins to make them uniquely yours.
Frequently Asked Questions About Cinnamon Roll Bliss Bars
I know you might have a few more questions about these Cinnamon Roll Bliss Bars before you get baking, so let’s tackle some of the most common ones. Whether you’re wondering about substitutions, storage tips, or how to make them even more decadent, I’ve got you covered with answers to your burning questions.
1. Can I use a different type of cake mix?
Absolutely! While the yellow cake mix creates a nice, neutral base that pairs well with the cinnamon filling, you can definitely get creative with other cake mixes. If you prefer a spicier flavor, try using a spice cake mix. It will enhance the cinnamon and give the bars an even warmer, cozy flavor. A white cake mix will give you a lighter, fluffier texture, which is great if you want the filling and glaze to really stand out. Just keep in mind that the texture might change slightly depending on which cake mix you choose, but the recipe should still work well.
2. Can I make these bars without the glaze?
Yes, you can skip the cream cheese glaze if you want a simpler version of the bars. The cinnamon-sugar filling already provides a good amount of sweetness, so they’ll still taste delicious without it. However, the glaze adds a rich, creamy finish that really takes these bars to the next level. If you prefer to keep it lighter, you can simply dust the bars with powdered sugar for a more subtle sweetness.
3. How can I make these Cinnamon Roll Bliss Bars gluten-free?
To make these bars gluten-free, all you need to do is swap the yellow cake mix for a gluten-free cake mix. Many stores offer gluten-free cake mixes that should work just as well in this recipe. Keep in mind that gluten-free cake mixes sometimes require slight adjustments in baking time, so be sure to check the instructions on the cake mix box for any modifications. With this simple swap, you’ll have a gluten-free version of these delicious bars in no time.
4. How do I store Cinnamon Roll Bliss Bars?
If you somehow have leftovers (which, let’s be honest, might be rare), you can store your Cinnamon Roll Bliss Bars in an airtight container at room temperature for up to 3 days. For longer storage, keep them in the fridge for up to a week. If you want to keep them fresh for even longer, you can freeze them. Wrap the bars tightly in plastic wrap and foil, then store them in a freezer-safe container. They’ll stay fresh for up to 2 months. When you’re ready to enjoy them, simply thaw them at room temperature for a few hours.
5. Can I make these bars ahead of time?
Yes, these bars are perfect for making ahead! You can prepare the bars the day before you plan to serve them. Simply bake the bars and let them cool completely, then store them in an airtight container. When you’re ready to serve, drizzle the cream cheese glaze on top and slice them up. The bars actually taste even better the next day after the flavors have had time to meld, so they’re perfect for prepping in advance, especially for parties or brunches.
6. Can I add more mix-ins to the recipe?
Definitely! One of the best parts about this recipe is its versatility. You can add mini chocolate chips, chopped nuts (like pecans or walnuts), dried fruits (raisins or cranberries), or even a handful of toffee bits for an extra layer of sweetness. The key is to evenly distribute your mix-ins so every bite gets a bit of that extra flavor and texture. Just be mindful not to overload the dough, as too many mix-ins can make it harder for the bars to hold together.
7. How do I know when my bars are done baking?
The best way to check if your Cinnamon Roll Bliss Bars are done is to look for golden brown edges and a set center. The bars will rise slightly and the top will be golden. You can also do a quick toothpick test—insert a toothpick into the center of the bars, and if it comes out clean or with just a few moist crumbs, they’re done. If the toothpick comes out with wet batter, bake them for a few more minutes and check again. Just be careful not to overbake, as this could dry them out.
Conclusion: Time to Enjoy These Sweet Cinnamon Roll Bliss Bars
There you have it—everything you need to know to make these Cinnamon Roll Bliss Bars a new favorite in your recipe rotation. From simple swaps to tips on making them ahead of time, you’ve got all the tools to create a sweet, satisfying treat that’s perfect for breakfast, dessert, or anytime you need a little indulgence.
The best part about this recipe is how easy it is to customize to your own taste. Whether you prefer them with chocolate chips, nuts, or just the classic cinnamon swirl, these bars are a breeze to make and impossible to resist. So, gather your ingredients, preheat your oven, and get ready to enjoy these cinnamon-filled, cream cheese-glazed treats that will have everyone coming back for more.
I hope you’ll give these Cinnamon Roll Bliss Bars a try and let me know how they turn out. Are you a fan of the classic version, or did you add your own special twist? Drop a comment below and share your experience—I love hearing from fellow bakers!
Print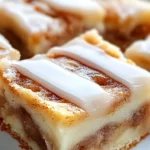
Cinnamon Roll Bliss Bars
- Author: Andrew Recipes
Description
Cinnamon Roll Bliss Bars bring all the sweet, comforting flavors of a cinnamon roll into a simple, delicious bar form. The combination of yellow cake mix, cinnamon-sugar filling, and a creamy glaze creates a decadent treat that’s perfect for breakfast, dessert, or any time you need a sweet indulgence. These bars are easy to make, customizable with optional mix-ins like nuts or chocolate chips, and guaranteed to satisfy your cravings for cinnamon rolls in a fraction of the time!
Ingredients
For the Dough:
1 box (16.5 oz) yellow cake mix
8 tablespoons unsalted butter (melted)
1 large egg
For the Filling:
½ cup unsalted butter (melted)
1 cup packed brown sugar
2 ½ teaspoons ground cinnamon
For the Cream Cheese Glaze:
4 oz cream cheese (softened)
½ cup powdered sugar
¼ teaspoon vanilla extract
2–3 tablespoons milk
Optional Add-Ins:
Chopped pecans or walnuts
Mini chocolate chips
Raisins or dried cranberries
Instructions
Preheat Your Oven
Preheat your oven to 350°F (175°C). Grease a 9×13-inch baking pan or line it with parchment paper for easy cleanup.
Make the Dough
In a large mixing bowl, combine the yellow cake mix, melted butter, and egg. Mix until a soft dough forms. Press the dough evenly into the bottom of the prepared baking pan to create a base layer.
Prepare the Filling
In a small bowl, mix together the melted butter, brown sugar, and ground cinnamon until smooth and well combined. Spread the cinnamon-sugar mixture evenly over the dough, using the back of a spoon or an offset spatula to create an even layer.
Swirl the Layers
Use a knife or skewer to gently swirl the cinnamon-sugar mixture into the dough, creating a marbled effect. Be careful not to overmix—you want distinct swirls for that classic cinnamon roll look. If you’re adding optional mix-ins like chopped nuts, mini chocolate chips, or dried fruit, sprinkle them evenly over the top before baking.
Bake the Bars
Bake in the preheated oven for 25–30 minutes, or until the edges are golden brown and the center is set. Once baked, remove the bars from the oven and let them cool completely in the pan.
Make the Cream Cheese Glaze
In a small mixing bowl, beat the softened cream cheese, powdered sugar, and vanilla extract until smooth and creamy. Gradually add milk, one tablespoon at a time, until the glaze reaches your desired consistency.
Glaze and Serve
Drizzle the cream cheese glaze generously over the cooled bars. Slice into squares and serve, enjoying the sweet, spiced flavors in every bite.
Notes
These Cinnamon Roll Bliss Bars are a quick and easy way to satisfy your cinnamon roll cravings with minimal effort. The soft, cake-like dough paired with the rich cinnamon-sugar filling and creamy glaze makes each bite a delightful experience. The optional add-ins like chopped nuts or chocolate chips bring an extra dimension to the bars, making them customizable to your taste. These bars are perfect for a crowd, whether you’re serving them at a brunch, as a snack, or at a party. Enjoy them fresh out of the oven or at room temperature—either way, they’re bound to be a hit!

