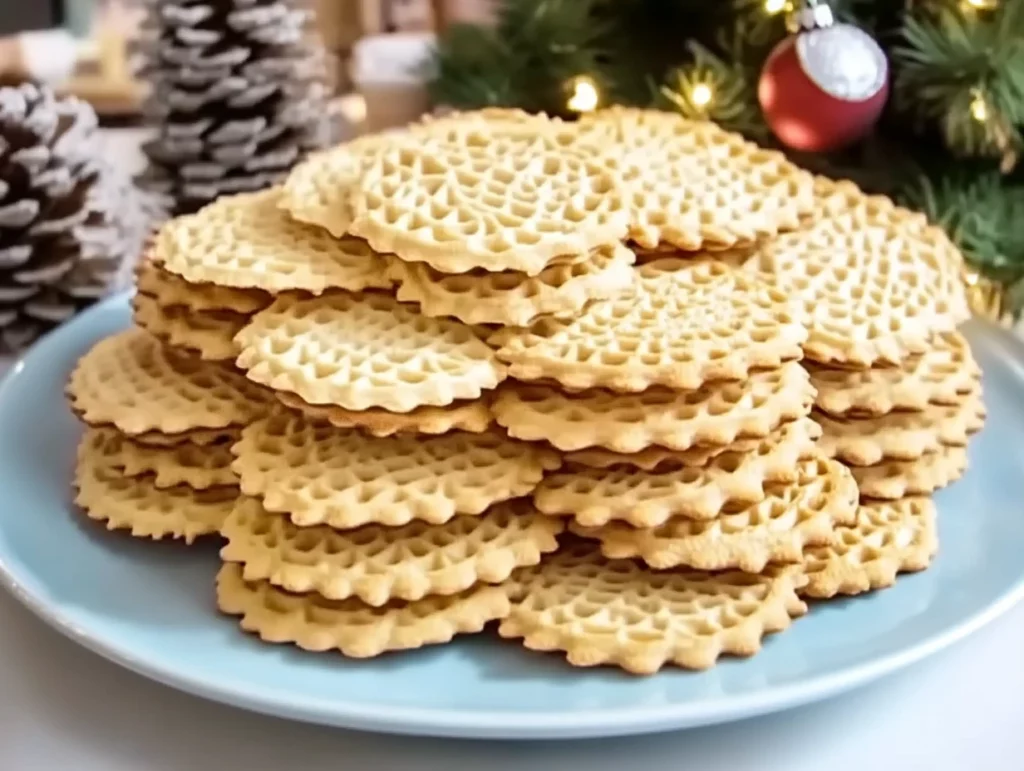
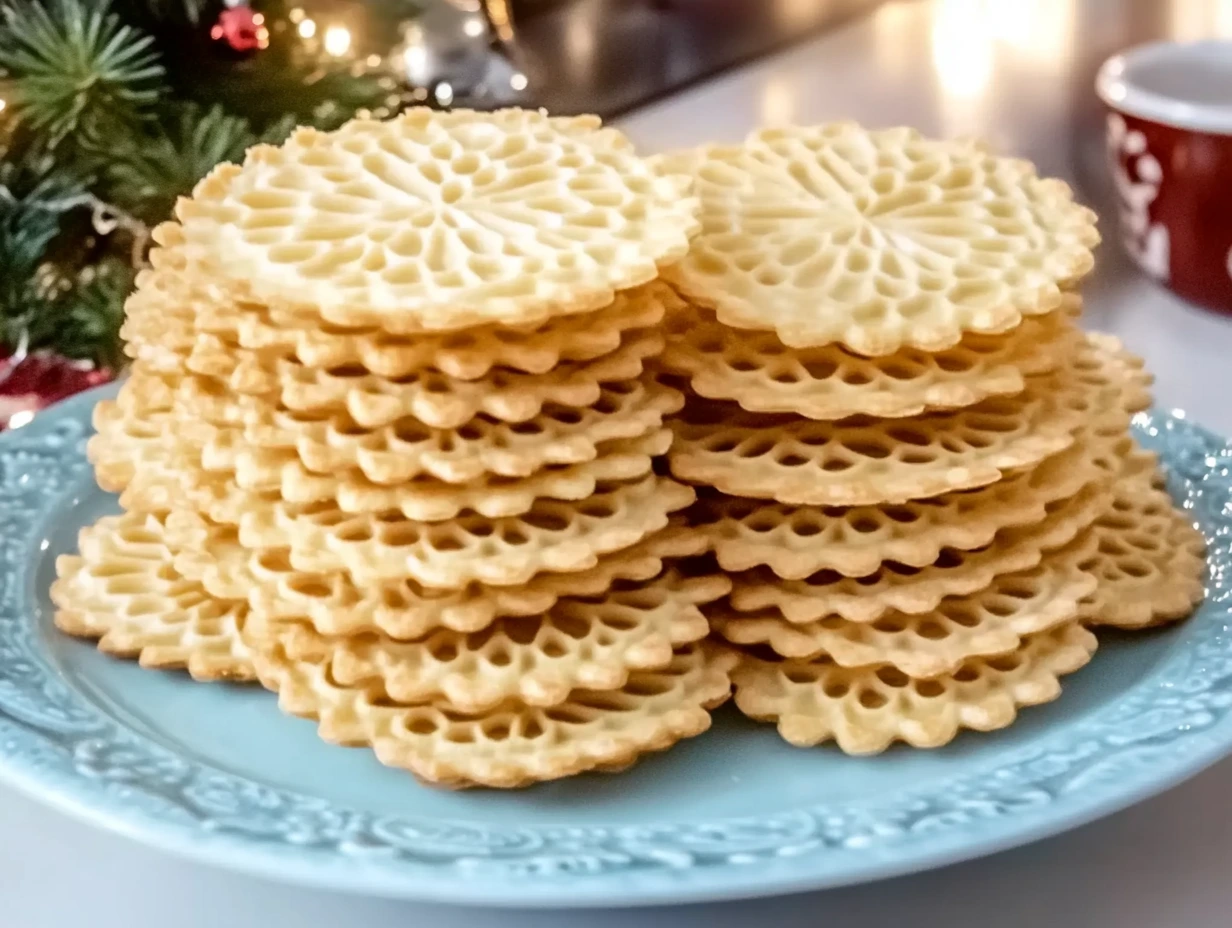
If you’ve never had a pizzelle before, oh my goodness—you’re in for a treat. These delicate Italian waffle cookies are the kind of sweet that sneaks up on you. Light, crisp, and just sweet enough, they’re the perfect little treat to enjoy with coffee, layer into a dessert, or munch straight off the cooling rack. Traditionally made during holidays like Christmas and Easter, pizzelle are one of those timeless recipes that truly deserve a spot in your everyday baking lineup.
Growing up, there was always a container of pizzelle on the counter during the holidays. My grandma made hers with anise (which I didn’t appreciate as a kid but love now), and she’d wrap them in wax paper like they were tiny treasures. They were so perfectly crisp, I can still hear the snap they made when you bit into one. That sound still means “home” to me.
What I love most about these classic pizzelle is their versatility. Keep them simple with vanilla, switch things up with lemon or almond extract, or go full traditional with anise. You can even shape them into cones or bowls while they’re warm and fill them with cream or ice cream for an easy, impressive dessert. And the best part? They come together with just a few pantry staples and a pizzelle iron.
Alright, ready to make a batch of crisp, golden pizzelle that’ll have everyone asking for the recipe?
Ingredients You’ll Need
3 large eggs
3/4 cup granulated sugar
1/2 cup unsalted butter, melted and cooled
1 teaspoon vanilla extract (or almond, anise, or lemon extract for variation)
1 3/4 cups all-purpose flour
2 teaspoons baking powder
1/4 teaspoon salt
You can already see how simple this is—nothing fancy or fussy, just the basics, which is exactly what makes pizzelle so charming.
STEP 1: Make the Batter
Grab a large mixing bowl and start by whisking the eggs and sugar together. You want to beat them until they’re well combined and just a little frothy—this adds some lightness to the final cookie. Slowly pour in the cooled melted butter and your extract of choice (I usually go with vanilla, but almond is so good if you’re making these for a springtime brunch).
In a separate bowl, whisk together the flour, baking powder, and salt. This helps distribute everything evenly so you don’t get a clump of baking powder in one cookie and none in the others. Then, gradually fold the dry ingredients into the wet mixture. You’ll end up with a thick, spoonable batter—almost like a soft drop cookie dough.
Tip: Don’t overmix here. Just combine until everything is incorporated. Overmixing can make the pizzelle a little too dense, and we want that perfect crisp bite.

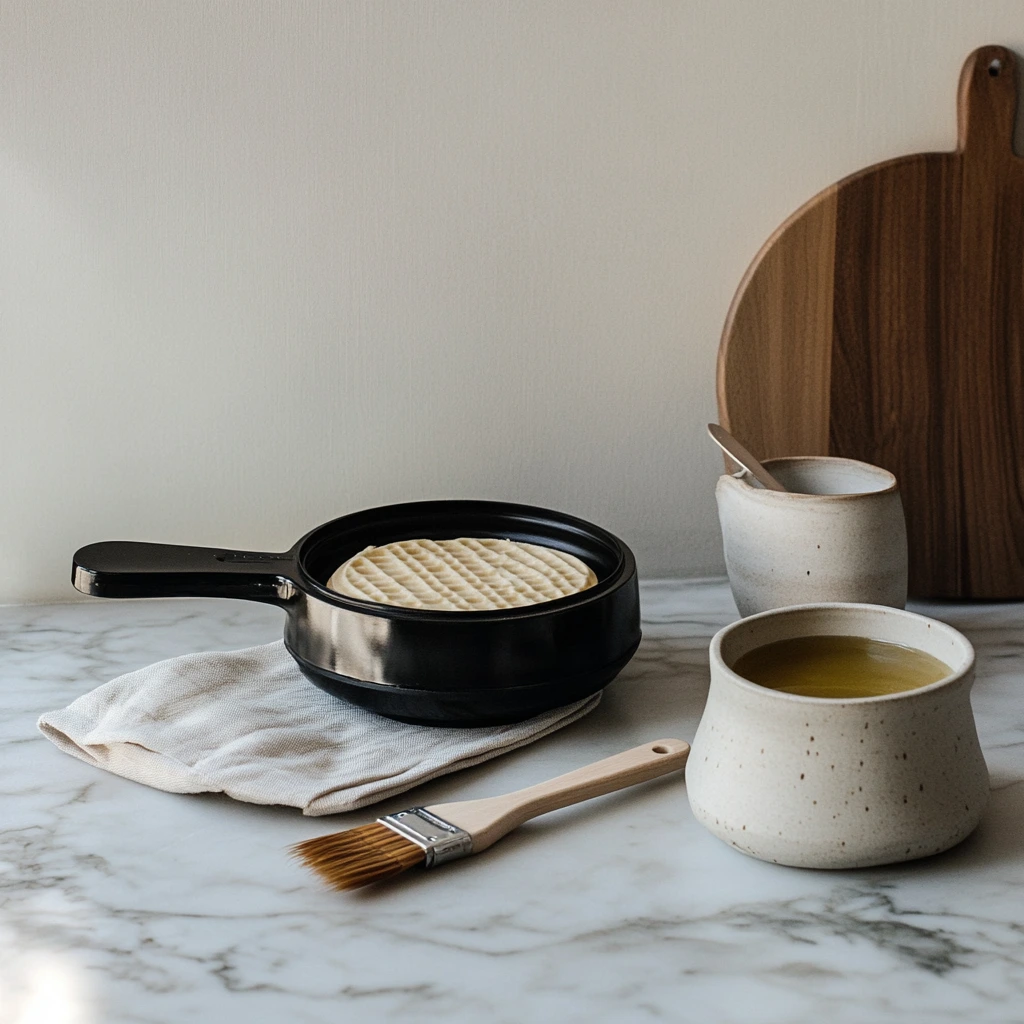
STEP 2: Heat the Pizzelle Iron
Now for the fun part—bring out your pizzelle iron. Preheat it according to your manufacturer’s directions. Most modern irons are non-stick, but if yours needs a little help, give the plates a light greasing to keep things from sticking. I usually use a pastry brush and a tiny bit of melted butter or neutral oil.
While it heats, I like to set up a wire rack nearby for cooling, plus a small cookie scoop or tablespoon to portion the batter.
STEP 3: Cook Your Pizzelle
Once your iron is hot, drop about 1 tablespoon of batter onto the center of each plate. Then, gently close the lid and let the magic happen. Depending on your iron, pizzelle usually cook in about 30 to 60 seconds. They should be golden brown—just watch them closely, because they can go from perfect to too dark pretty quickly.
Use a small spatula or fork to carefully lift each one out of the iron and transfer it to your wire rack. Don’t worry if they’re still a bit soft when you first pull them off—they’ll crisp up beautifully as they cool.
How to Perfect Your Pizzelle: Tips, Variations, and Serving Ideas
Once you’ve got the hang of making pizzelle, it’s hard to stop at just one batch. There’s something incredibly satisfying about the process—the sizzle when the batter hits the iron, the smell of warm vanilla (or almond or anise!) wafting through the kitchen, and the satisfying crispness once they cool. In Part 1, we covered the basics: mixing the batter and using the pizzelle iron. Now it’s time to talk about all the ways you can elevate these classic cookies and get them just right every time.
STEP 4: Cool and Store the Pizzelle
Once your pizzelle are off the iron, give them a few minutes on a wire rack to cool completely. This is when they really crisp up. If you stack them before they’ve cooled, you might end up with soft, slightly chewy cookies—which isn’t bad, but it’s not that signature pizzelle texture we’re aiming for.
Storage Tip: Keep them in an airtight container at room temperature. They’ll stay crisp for about a week. If you live in a humid climate, toss in a small packet of food-safe silica or a few uncooked grains of rice wrapped in cheesecloth to absorb moisture. Trust me, it helps.
Flavor Variations to Try
The base recipe is wonderfully simple, which makes it the perfect canvas for experimenting with different flavors. Here are a few of my favorites:
Anise Extract: The most traditional Italian flavor, with a subtle licorice note. This is the pizzelle flavor I grew up with.
Almond Extract: A little goes a long way—just a half teaspoon adds a beautiful nutty aroma.
Lemon Zest or Extract: For a bright, fresh twist. These are especially great for spring and summer.
Cocoa Powder: Swap out about 1/4 cup of the flour for unsweetened cocoa powder to make chocolate pizzelle.
You can also add a tiny pinch of cinnamon or nutmeg for warmth, or even a tablespoon of finely ground espresso if you want to make a cookie that pairs beautifully with your morning latte.
Creative Serving Ideas
Pizzelle are lovely on their own, but they’re also incredibly versatile. Here are a few fun ways to serve them:
Ice Cream Sandwiches: Sandwich a scoop of vanilla or pistachio ice cream between two pizzelle for the ultimate summer dessert.
Pizzelle Cannoli: Shape them into tubes while warm and fill with sweetened ricotta, mascarpone, or a mix of cream cheese and powdered sugar.
Dipped in Chocolate: Dip half of each cookie into melted dark or white chocolate, then sprinkle with chopped nuts, crushed peppermint, or sprinkles.
Pizzelle Bowls: While still warm, press pizzelle over an inverted muffin tin or small bowls to form little dessert cups. Fill with fruit, whipped cream, or custard.
Layered Dessert: Use them like you would ladyfingers in a tiramisu-style dessert—layer with mascarpone cream and fruit for a no-bake treat.
Pizzelle Troubleshooting Tips
If it’s your first time making pizzelle—or even your tenth—here are a few common issues and how to fix them:
Sticking to the Iron: Make sure your iron is properly preheated. A light brushing of oil or butter can help too, especially if it’s an older model.
Too Pale or Too Dark: Adjust your cooking time. Every iron is different, and even a few seconds can make a difference. The sweet spot is golden brown.
Not Crisping Up: Let them cool completely on a wire rack. If they’re still soft, try baking them for a couple minutes at 250°F to dry them out slightly.
Uneven Shapes: Try to drop the batter right in the center of the iron plate and don’t overfill. A level tablespoon is usually the perfect amount.
Make-Ahead and Freezer Tips
If you want to make pizzelle ahead of time, you’re in luck—they freeze beautifully. Once they’re completely cool, stack them between layers of parchment or wax paper and seal in a freezer-safe container. They’ll keep for up to 2 months. To refresh them, just let them sit at room temp for about 15 minutes. You can even pop them in a warm (not hot!) oven for a couple of minutes to revive that crispy texture.
Pizzelle FAQ and Final Thoughts
By now, you’ve got the full rundown on how to whip up a batch of these delicate, crisp pizzelle cookies. Whether you’re making them for a holiday gathering, a homemade gift, or just because you want something sweet and simple, this recipe is one you’ll reach for again and again.
Before we wrap up, let’s go over a few of the most common questions readers ask about pizzelle. These quick answers can help troubleshoot issues or give you ideas for your next batch.
Frequently Asked Questions
1. Do I need a pizzelle iron, or can I use something else?
Yes, a pizzelle iron is essential for making traditional pizzelle. It’s what gives them that signature pattern and perfect crispness. You can find both electric and stovetop versions online or at kitchenware stores.
2. Can I make pizzelle without eggs?
Eggs are a key part of the texture in this recipe, giving the pizzelle structure and a light crispness. However, some readers have had success using egg substitutes like flax eggs or commercial egg replacers, though the texture may be slightly different.
3. Why are my pizzelle soft instead of crisp?
There are a few reasons this can happen. First, make sure they’re cooked long enough to turn golden brown. Second, allow them to cool completely on a wire rack before stacking or storing. And lastly, be sure they’re stored in an airtight container in a cool, dry place.
4. Can I double the recipe?
Absolutely. This recipe doubles (and even triples) beautifully, which is great for holidays or when you’re making pizzelle as gifts. Just make sure to stir the batter occasionally if it sits out for a long time, as it can thicken slightly over time.
5. How do I shape pizzelle into cones or bowls?
Right after they come off the iron—and while they’re still warm and pliable—you can mold them around a cone form, a rolling pin, or press them over the bottom of a small bowl. They’ll harden quickly, so work fast!
6. Are pizzelle supposed to be sweet?
Pizzelle are lightly sweet, not overly sugary. That’s part of their charm—they’re delicate and crisp with just enough sweetness to satisfy. You can dust them with powdered sugar or dip in chocolate for an extra treat.
7. Can I freeze pizzelle?
Yes! Pizzelle freeze really well. Stack them between sheets of parchment paper and seal in an airtight container or freezer bag. When you’re ready to serve, just bring them to room temperature—no need to reheat.
Final Thoughts: A Cookie That’s More Than Just a Treat
Pizzelle are more than just a cookie—they’re a little bite of tradition, a nostalgic nod to holidays past, and a creative base for countless dessert ideas. What I love most about them is how versatile they are. One day you’re making classic vanilla pizzelle for an afternoon snack, and the next, you’re shaping them into cones and filling them with mascarpone cream for a dinner party dessert.
They’re also the kind of recipe that gets passed down—something your kids or grandkids might remember helping you make, standing on a stool, dropping batter onto the hot iron and waiting for that golden brown magic. And once you’ve made a batch or two, you’ll find it’s one of the easiest cookie recipes to master.
So if you’ve been on the fence about trying pizzelle, consider this your sign to go for it. Dig out (or pick up) a pizzelle iron, mix up a quick batter, and enjoy the process. And don’t forget to experiment—try that almond extract, dip a few in chocolate, or mold a couple into sweet little dessert bowls.
Once you’ve made them, I’d love to hear how it went. Did you go classic with vanilla or try something different? Any fun serving ideas you came up with? Drop a comment, share your experience, and let’s keep the pizzelle love going.
Print
Classic Pizzelle
- Author: Andrew Recipes
Description
Crisp, delicate, and lightly sweet, these Classic Pizzelle are a beloved Italian cookie traditionally made during the holidays—but they’re too good not to enjoy year-round. With a hint of vanilla (or your favorite extract), they’re perfect on their own or as a base for desserts like cannoli or ice cream sandwiches.
Ingredients
3 large eggs
3/4 cup granulated sugar
1/2 cup unsalted butter, melted and cooled
1 teaspoon vanilla extract (or almond, anise, or lemon extract for variation)
1 3/4 cups all-purpose flour
2 teaspoons baking powder
1/4 teaspoon salt
Instructions
In a large mixing bowl, whisk together the eggs and sugar until well combined and slightly frothy. Gradually mix in the melted butter and vanilla extract until smooth. In a separate bowl, whisk the flour, baking powder, and salt. Slowly fold the dry ingredients into the wet mixture until a thick, spoonable batter forms.
Preheat your pizzelle iron according to the manufacturer’s instructions. Lightly grease the plates if required to prevent sticking.
Drop about 1 tablespoon of batter onto the center of each pizzelle plate. Close the iron and cook for 30 to 60 seconds, or until the pizzelle are golden brown. Watch closely to avoid overcooking. Gently remove with a spatula and transfer to a wire rack to cool and crisp.
While still warm and pliable, shape the pizzelle into cones, bowls, or rolls if desired. Let them cool completely to hold their shape.
Notes
These pizzelle can be stored in an airtight container for up to a week and stay wonderfully crisp. For extra flair, dust with powdered sugar before serving. Try experimenting with different extracts to match the occasion—anise for tradition, almond for nuttiness, or lemon for brightness. They’re also excellent dipped in chocolate or sandwiched with sweetened ricotta or Nutella.

