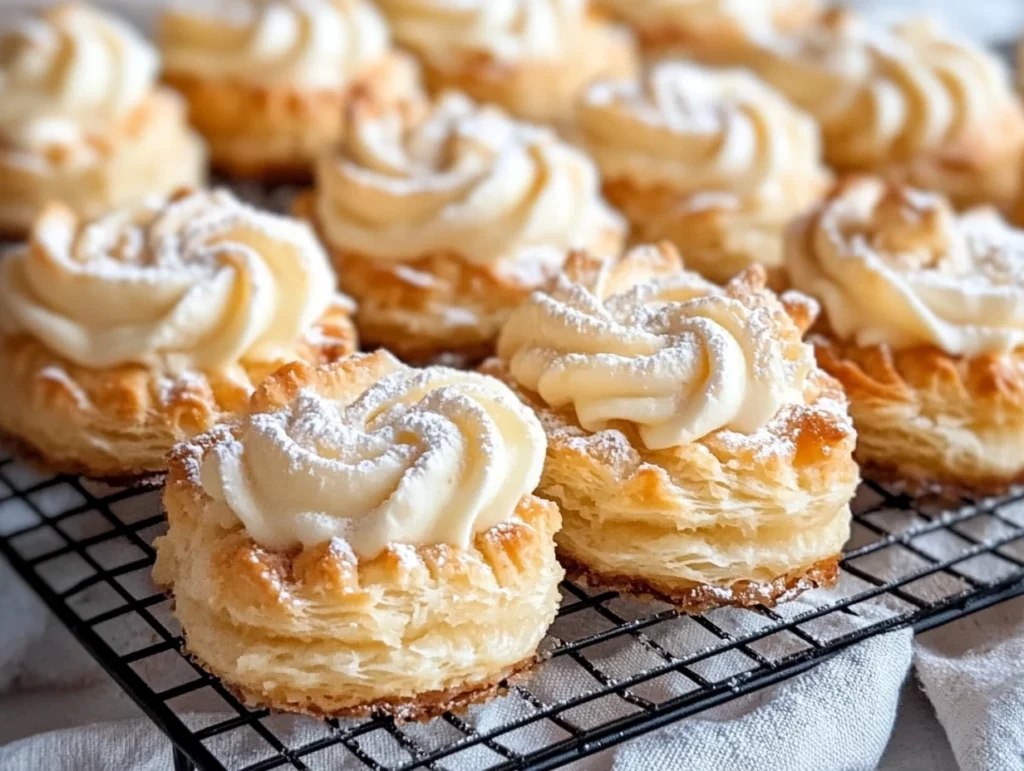
If you’ve never tried Clothespin Cookies, you’re in for a delightful surprise. These delicate, buttery pastries wrapped around a light, airy whipped cream filling are an old-fashioned favorite. They have a crisp outer shell that crumbles in your mouth, followed by a creamy sweetness that melts on your tongue. Whether you’re making them for a holiday party, a family gathering, or just a cozy afternoon treat, these cookies bring back the charm of vintage baking with every bite.
Let’s dive into making these nostalgic cookies step by step!
WHAT MAKES CLOTHESPIN COOKIES SPECIAL?
Clothespin Cookies, also known as Ladylocks, are a time-honored tradition in many families. They’re often served at weddings, Christmas celebrations, or other festive occasions. Their signature shape comes from wrapping dough around clothespins (or metal molds), creating a hollow shell perfect for filling. The combination of flaky pastry and smooth cream filling makes them a unique and irresistible treat.
One of the best parts? They’re easier to make than they look! Sure, they require a bit of patience, but the result is more than worth the effort.
INGREDIENTS YOU’LL NEED
Before we start, gather all your ingredients. Having everything prepped makes the process smooth and enjoyable.
For the Dough:
- 1 cup all-purpose flour
- 1/2 cup unsalted butter, chilled and diced
- 1/4 cup sour cream
For the Filling:
- 1 cup heavy cream
- 1/4 cup confectioners’ sugar
- 1 teaspoon vanilla extract
For Garnishing:
- 1/2 cup granulated sugar (for dusting)
STEP 1: PREPARING THE DOUGH
A good Clothespin Cookie starts with a tender, buttery dough. Since this dough has high-fat content (thanks to the butter and sour cream), it needs to chill properly before rolling out.
1️⃣ Mix the Dry Ingredients: In a large mixing bowl, combine the all-purpose flour and diced butter. If you have a pastry cutter, use it to blend the butter into the flour until the mixture resembles coarse crumbs. If not, just use your hands to rub the butter into the flour. The key is to avoid overworking the dough—you want small butter pockets to remain for flakiness.
2️⃣ Add the Sour Cream: Stir in the sour cream and mix until the dough starts coming together. The sour cream helps to keep the dough tender while also adding a subtle tang that balances the sweetness of the filling.
3️⃣ Chill the Dough: Form the dough into a ball, wrap it tightly in plastic wrap, and refrigerate for at least one hour. Chilling is essential because it firms up the butter, making the dough easier to roll out later.

STEP 2: ROLLING AND SHAPING THE COOKIES
Once your dough is properly chilled, it’s time to roll and shape the cookies into their signature tubes!
1️⃣ Flour Your Surface: Lightly flour your work surface and rolling pin to prevent sticking.
2️⃣ Roll Out the Dough: Roll the dough out to about 1/8 inch thickness. Keeping it thin ensures the cookies bake up crisp and delicate.
3️⃣ Cut Into Strips: Use a sharp knife or pizza cutter to cut the dough into 1/2-inch-wide strips. Each strip will be wrapped around a mold to create the tubular shape.
4️⃣ Wrap Around Molds: Take each strip and carefully wrap it around a greased clothespin mold or metal cannoli tube. Slightly overlap the edges as you wrap to create a seamless tube. Be gentle—you don’t want to stretch the dough too much, or it might break during baking.
At this point, you should have beautifully shaped, hollow pastry tubes ready for baking.

CLOTHESPIN COOKIES: BAKING, FILLING, AND FINAL TOUCHES
Now that we’ve prepped and shaped our delicate dough strips around molds, it’s time to bring these beautiful Clothespin Cookies to life! In this section, we’ll bake the cookie shells, prepare the luscious whipped cream filling, and assemble the final masterpiece.
If you’ve made it this far, you’re in for a treat—these cookies may look fancy, but once you master the steps, they’ll quickly become one of your favorite homemade delights.
STEP 3: BAKING THE COOKIE SHELLS
Baking is where the magic happens. When done right, the shells turn a gorgeous golden brown, crisp on the outside yet tender enough to crumble at first bite.
1️⃣ Preheat Your Oven: Set your oven to 375°F (190°C). Ensuring the oven is properly heated before baking helps the cookies puff up beautifully.
2️⃣ Arrange on a Baking Sheet: Place the wrapped molds on a parchment-lined baking sheet, leaving a little space between each one. This prevents them from sticking together and allows even browning.
3️⃣ Bake Until Golden: Bake for 10-12 minutes, or until the cookie shells turn a light golden brown. Keep an eye on them—since the dough is thin, they can go from perfectly golden to overbaked quickly.
4️⃣ Cool Before Removing Molds: Once baked, let the cookies rest for a couple of minutes before carefully sliding them off the molds. If they resist, gently twist the molds while pulling them out. Let the shells cool completely before filling.
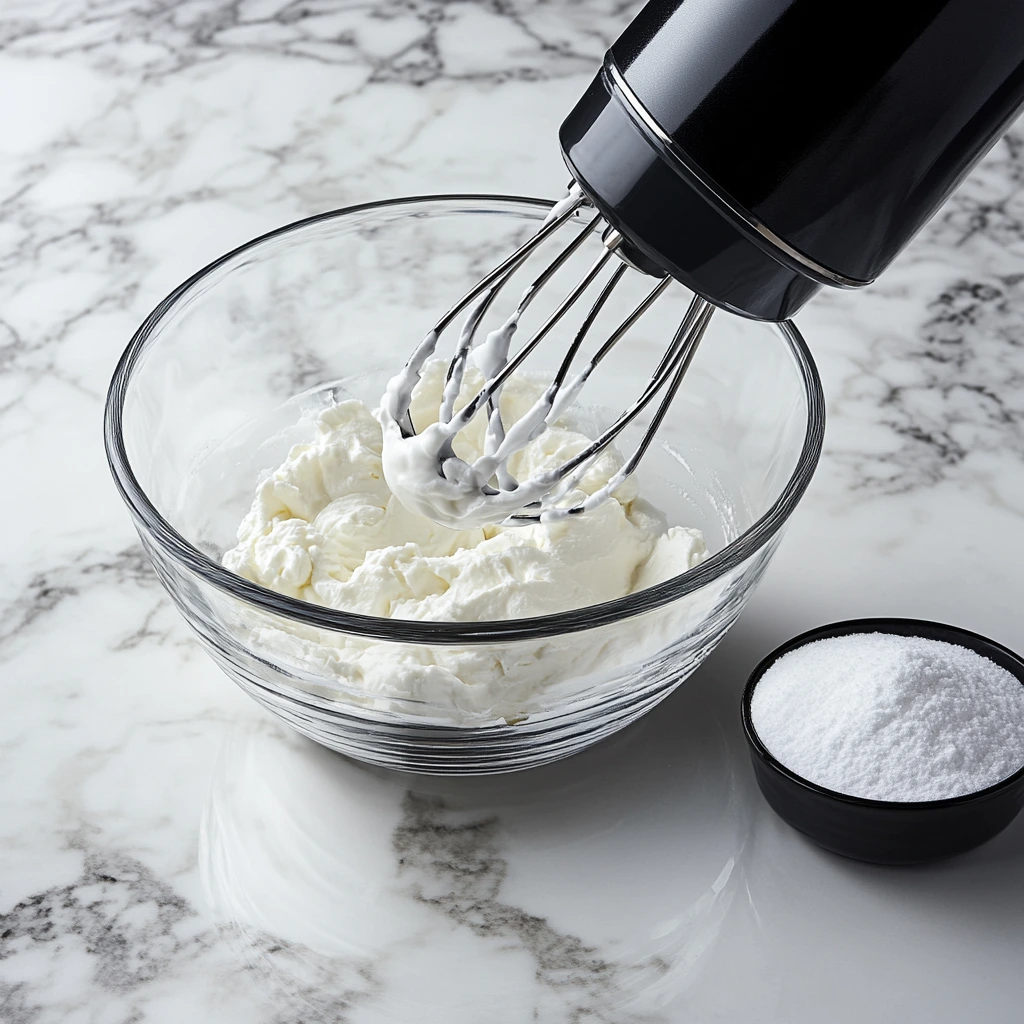
STEP 4: MAKING THE WHIPPED CREAM FILLING
The filling is what gives these cookies their irresistible melt-in-your-mouth quality. A simple combination of heavy cream, confectioners’ sugar, and vanilla extract creates a light and airy texture that pairs perfectly with the crisp shells.
1️⃣ Chill Your Bowl and Whisk: For the best results, place your mixing bowl and whisk attachment (or beaters) in the refrigerator for about 15 minutes before whipping. Cold equipment helps the cream whip up faster and hold its shape longer.
2️⃣ Whip the Cream: Pour 1 cup of heavy cream into the chilled bowl and begin whipping on medium speed.
3️⃣ Add Sweetness and Flavor: Once the cream starts to thicken, gradually add 1/4 cup confectioners’ sugar and 1 teaspoon vanilla extract. Continue whipping until stiff peaks form—this means the cream holds its shape when you lift the whisk. Be careful not to overwhip, or the cream may turn grainy.
4️⃣ Transfer to a Piping Bag: Scoop the whipped cream into a piping bag fitted with a small nozzle. This makes it easy to pipe the filling neatly into the hollow cookie shells.
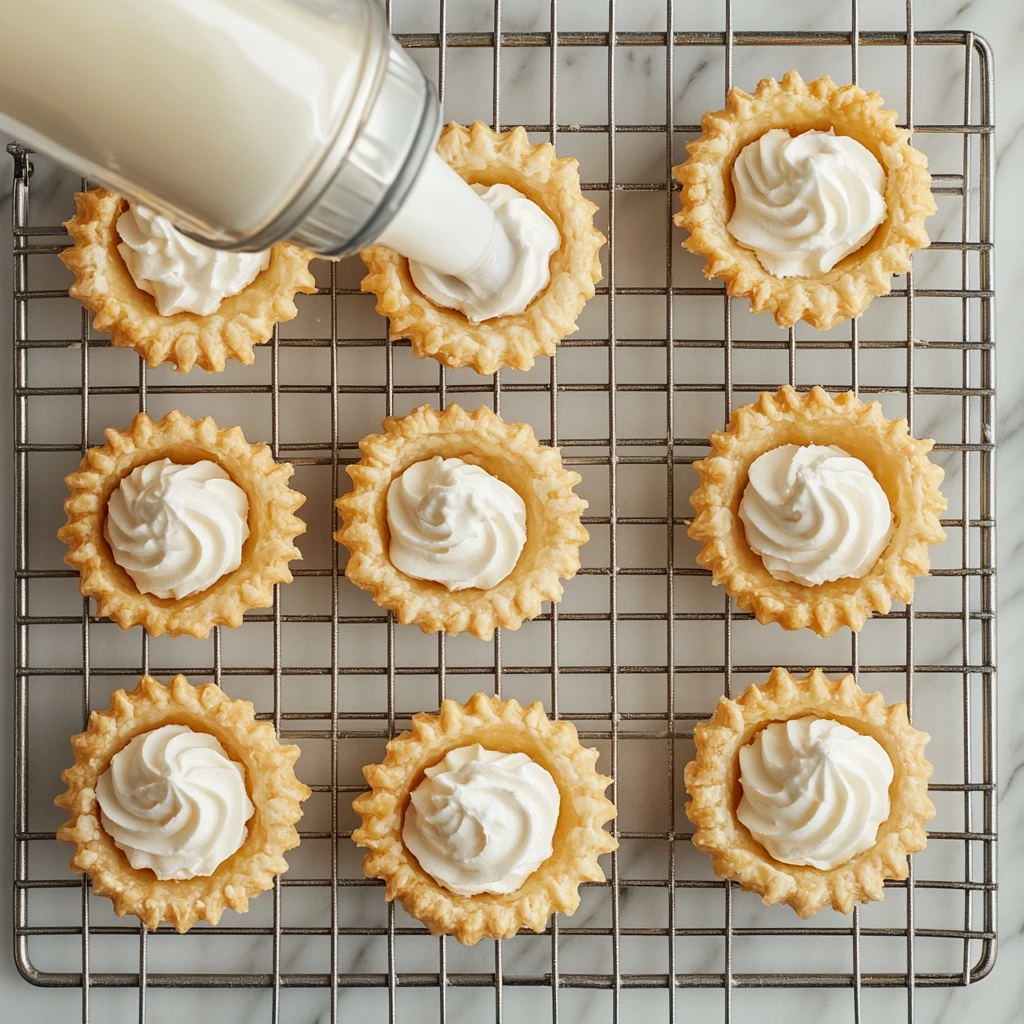
STEP 5: FILLING THE COOKIES
Now for the fun part—filling the cookies!
1️⃣ Pipe the Cream Into Each Shell: Hold each cooled shell upright and carefully pipe the whipped cream into both ends until completely filled. The goal is to have a smooth, even distribution of cream throughout.
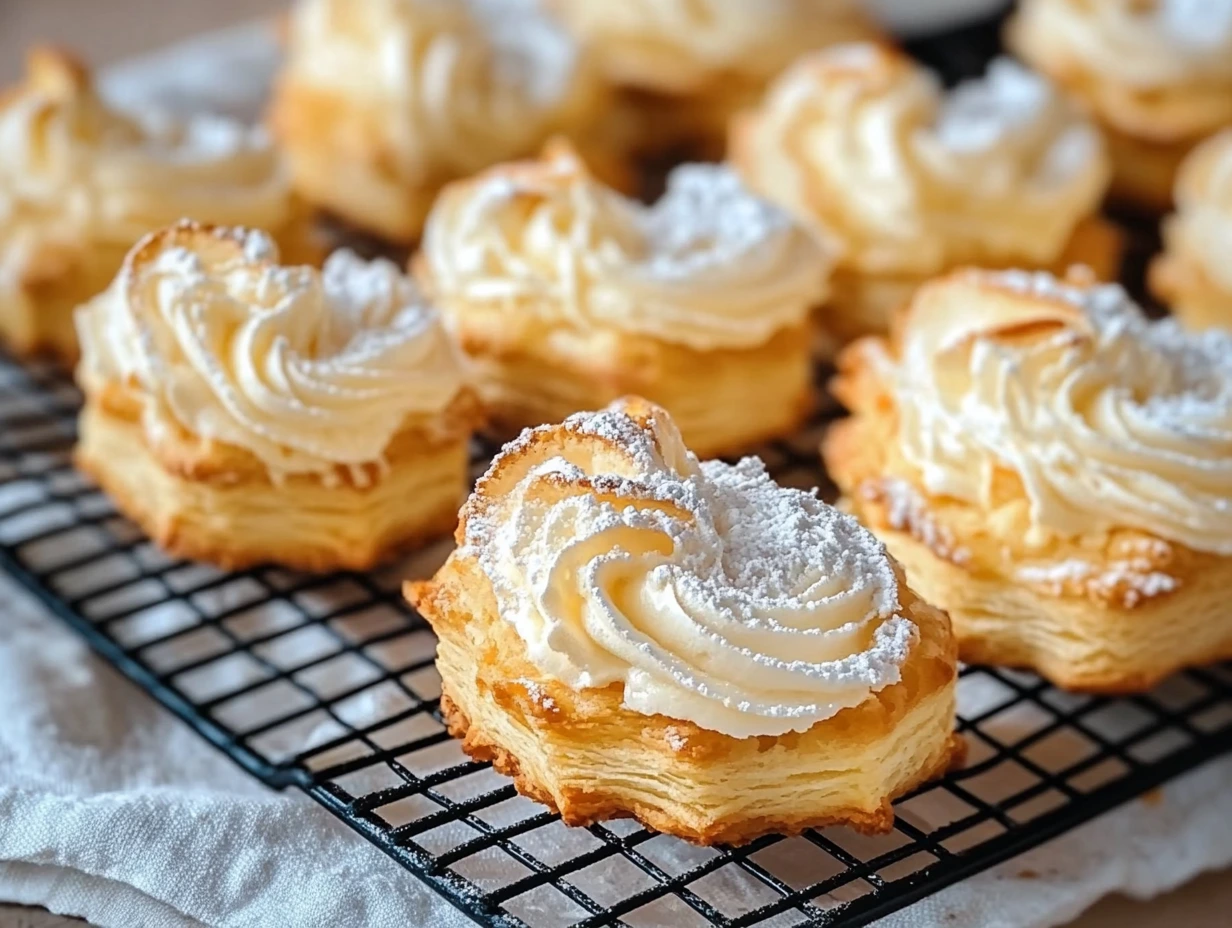
2️⃣ Dust with Sugar: For a classic finish, lightly sprinkle granulated sugar over the cookies. This adds a subtle crunch and a touch of sparkle. If you prefer, you can also dust them with confectioners’ sugar for a more delicate look.
3️⃣ Chill Before Serving: For the best texture, let the cookies chill in the refrigerator for about 30 minutes before serving. This allows the flavors to meld and the filling to set slightly.
TIPS FOR PERFECT CLOTHESPIN COOKIES
✔ Use Cold Butter: Keeping the butter cold when mixing the dough helps create a flakier texture. Work quickly to avoid softening the butter too much.
✔ Grease the Molds: A light coating of butter or non-stick spray ensures the cookies slide off easily after baking.
✔ Don’t Overfill: Pipe just enough filling to reach the edges of the shell—overfilling can cause the cream to spill out and make the cookies messy.
✔ Store Properly: These cookies are best enjoyed fresh, but they can be stored in an airtight container in the refrigerator for up to 2 days.
CLOTHESPIN COOKIES: FAQ AND FINAL THOUGHTS
By now, you’ve rolled, baked, filled, and dusted your beautiful Clothespin Cookies. These delicate, buttery pastries filled with sweet whipped cream are a true labor of love—and absolutely worth every step!
But if you’re making them for the first time, you might have a few lingering questions. That’s why we’re covering the most frequently asked questions about these nostalgic cookies to ensure your baking experience is smooth and stress-free.
FREQUENTLY ASKED QUESTIONS
1. CAN I MAKE THE DOUGH AHEAD OF TIME?
Yes! The dough can be made up to 2 days in advance and stored in the refrigerator. Just be sure to wrap it tightly in plastic wrap to prevent it from drying out. If it becomes too firm, let it sit at room temperature for 10-15 minutes before rolling it out.
2. WHAT CAN I USE IF I DON’T HAVE CLOTHESPIN MOLDS?
If you don’t have traditional clothespin molds, you can use metal cannoli tubes or even make your own molds by wrapping small wooden dowels with parchment paper. Just be sure whatever you use is oven-safe and greased well so the cookies slide off easily.
3. HOW CAN I MAKE THE FILLING MORE STABLE FOR LONGER STORAGE?
If you want the whipped cream filling to hold up longer without deflating, you can stabilize it by adding 1 tablespoon of instant vanilla pudding mix or 1 teaspoon of cornstarch while whipping the cream. This helps maintain the fluffy texture for a longer period, especially if serving the cookies at a later time.
4. CAN I USE A DIFFERENT FILLING?
Absolutely! While the classic version is filled with sweet whipped cream, you can experiment with other fillings like:
- Buttercream frosting (for a richer texture)
- Custard or pastry cream (for a creamier bite)
- Chocolate mousse (for a decadent twist)
- Jam or fruit preserves (for a tangy contrast)
5. HOW DO I KEEP CLOTHESPIN COOKIES FROM GETTING SOGGY?
To keep your cookies crisp, store them unfilled in an airtight container at room temperature. Fill them just before serving, or store filled cookies in the refrigerator and enjoy them within 24-48 hours for the best texture.
6. CAN I FREEZE CLOTHESPIN COOKIES?
Yes, but it’s best to freeze the shells separately before filling them. Place them in a single layer inside an airtight container, and they will keep for up to 3 months. When ready to serve, thaw at room temperature, then fill with whipped cream. Freezing filled cookies is not recommended, as the whipped cream may become watery when thawed.
7. HOW CAN I MAKE THEM EXTRA FESTIVE?
For special occasions, try these fun variations:
- Dip the ends in melted chocolate and sprinkle with crushed nuts or sprinkles.
- Tint the whipped cream filling with food coloring to match holiday themes.
- Add a hint of citrus zest (lemon or orange) to the dough for a refreshing twist.
FINAL THOUGHTS: THE JOY OF MAKING CLOTHESPIN COOKIES
Clothespin Cookies may take a bit of patience, but the result is a show-stopping treat that’s as beautiful as it is delicious. The crisp, flaky shell combined with the light, airy filling makes them truly irresistible.
Print
Clothespin Cookies
- Author: Andrew Recipes
- Total Time: 1 hour 32 minutes
Description
Delicate, buttery, and filled with sweet whipped cream, these nostalgic Clothespin Cookies are a delightful treat for any occasion. They have a crisp outer shell and a light, airy filling that melts in your mouth!
Ingredients
For the Dough:
- 1 cup all-purpose flour
- 1/2 cup unsalted butter, chilled and diced
- 1/4 cup sour cream
For the Filling:
- 1 cup heavy cream
- 1/4 cup confectioners’ sugar
- 1 teaspoon vanilla extract
For Garnishing:
- 1/2 cup granulated sugar (for dusting)
Instructions
1️⃣ Prepare the Dough: In a mixing bowl, combine the flour and diced butter. Use a pastry cutter or your hands to blend until the mixture resembles coarse crumbs. Stir in the sour cream until the dough comes together. Wrap in plastic wrap and refrigerate for at least 1 hour to chill.
2️⃣ Roll and Shape the Cookies: Lightly flour a surface and roll out the dough to about 1/8 inch thickness. Cut into strips (about ½ inch wide) and carefully wrap each strip around greased clothespin molds (or metal cannoli tubes), slightly overlapping as you wrap.
3️⃣ Bake the Cookie Shells: Preheat your oven to 375°F (190°C). Arrange the wrapped molds on a baking sheet and bake for 10-12 minutes or until golden brown. Remove from the oven and allow them to cool completely before gently sliding them off the molds.
4️⃣ Make the Filling: In a mixing bowl, whip the heavy cream, confectioners’ sugar, and vanilla extract until stiff peaks form. Transfer the whipped cream into a piping bag fitted with a small nozzle.
5️⃣ Fill the Cookies: Pipe the whipped cream into the hollow centers of the cooled cookie shells, ensuring they are fully filled.
6️⃣ Finish and Serve: Lightly dust the cookies with granulated sugar before serving. Enjoy these delicate and creamy treats!
Notes
✅ Chill the Dough – Letting the dough rest in the refrigerator helps create flakier cookies.
✅ Use Metal Tubes or Clothespins – If you don’t have traditional clothespin molds, metal cannoli tubes work just as well!
✅ Experiment with Fillings – Instead of whipped cream, try custard, cream cheese frosting, or chocolate ganache for a fun twist.
✅ Storage – Store the cookies in an airtight container in the fridge for up to 3 days.
- Prep Time: 20 minutes
- Cook Time: 1 hour
Nutrition
- Serving Size: 12 cookies

