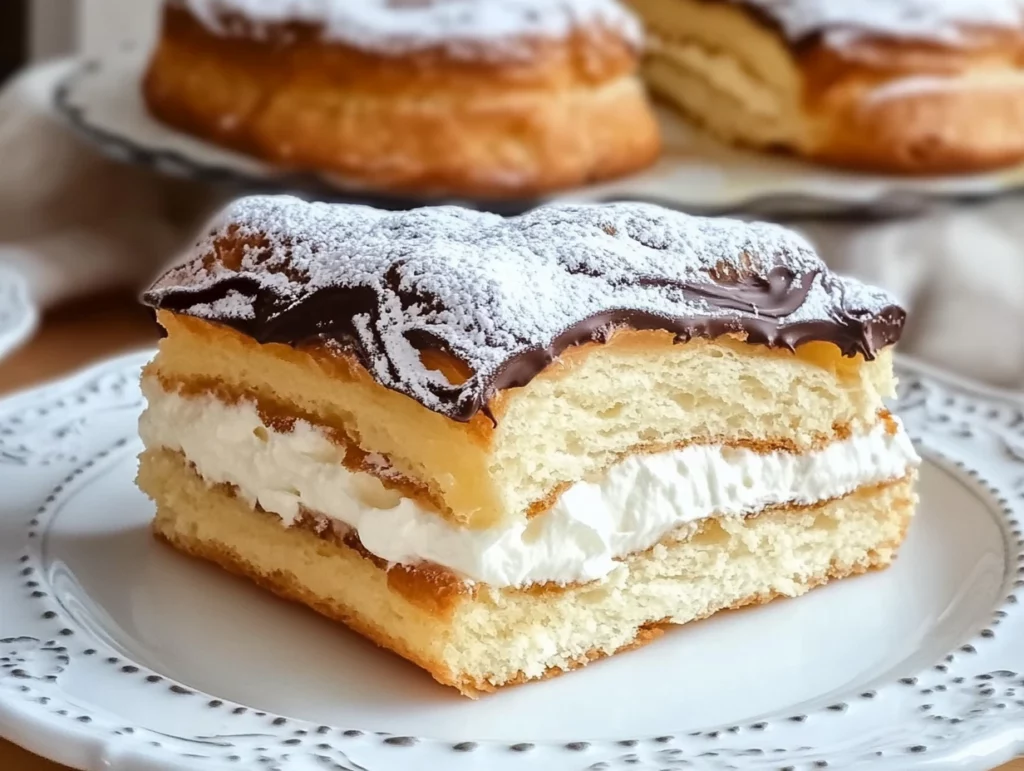
If you’re looking for a dessert that will truly wow a crowd, let me introduce you to Cream Puff Cake—a show-stopping treat that brings together the best of French pastry and homemade indulgence. Think layers of airy choux pastry, silky vanilla pastry cream, and generous swirls of whipped cream, all stacked into a dreamy, cloud-like cake that’s perfect for birthdays, holidays, or whenever you want to pull out all the stops.
I first made this recipe for a family gathering, and let me tell you—there wasn’t a crumb left on the platter. It has this elegant look, almost like something you’d find in a bakery window, but it’s surprisingly achievable at home. The best part? It tastes just as good as it looks, with a perfect balance of rich creaminess and light pastry crunch.
This is the kind of dessert that’s not only delicious, but also fun to make. Each step feels a little magical—watching the pastry puff up in the oven, the creamy custard coming together on the stove, and finally layering it all into one epic dessert masterpiece. So if you’re up for a little kitchen project that delivers big flavor and even bigger compliments, this one’s for you.
Ingredients You’ll Need
Serves: 10–12
For the Choux Pastry:
1 cup water
1/2 cup unsalted butter, cut into pieces
1/4 teaspoon salt
1 cup all-purpose flour
4 large eggs, room temperature
For the Pastry Cream:
2 cups whole milk
1 vanilla bean (or 1 teaspoon vanilla extract)
4 large egg yolks
1/2 cup granulated sugar
1/4 cup cornstarch
2 tablespoons unsalted butter
1 teaspoon vanilla extract
For the Whipped Cream:
2 cups heavy whipping cream
2 tablespoons powdered sugar
1 teaspoon vanilla extract
Optional Toppings:
Powdered sugar
Fresh berries
Chocolate shavings
Caramel drizzle
STEPS
Step 1: Make the Choux Pastry Layers
Preheat your oven to 400°F (200°C) and line two baking sheets with parchment paper. This is where the magic begins.
In a medium saucepan over medium heat, combine 1 cup of water, 1/2 cup butter, and 1/4 teaspoon salt. Let everything come to a full boil—this step helps the butter melt completely and infuse the water with flavor.
Once it reaches a boil, remove it from the heat and stir in 1 cup of all-purpose flour all at once. Stir vigorously until the mixture comes together into a smooth ball of dough.
Now return the pan to low heat and cook for 1 to 2 minutes, stirring constantly. This step dries out the dough just enough to get that perfect puff later on. You’ll know it’s ready when the dough pulls cleanly away from the sides of the pan.
Transfer the dough to a mixing bowl and let it cool for about 5 minutes. You don’t want to scramble your eggs when you add them!
Once slightly cooled, beat in the eggs one at a time, mixing well after each addition. The dough should look glossy, thick, and smooth by the time you’re done. It might feel like it won’t come together at first, but keep mixing—it’ll get there.

Step 2: Pipe and Bake the Choux Circles
Spoon the choux dough into a piping bag fitted with a large round tip. On your prepared baking sheets, pipe three 8-inch circles—these will become the “cake layers” of your cream puff masterpiece.
Bake the choux rounds for 25 to 30 minutes, or until they’re puffed up and golden brown. Resist the urge to open the oven early—they need all that steam to rise properly.
Once baked, transfer the pastry rounds to a wire rack to cool completely. Cooling is key because any trapped steam can make the layers soggy if they’re assembled too soon.
Cream Puff Cake Recipe: Building Layers of Flavor and Creamy Perfection
Now that our light and crispy choux pastry rounds are cooling, it’s time to bring in the creamy, dreamy heart of this dessert—the pastry cream and whipped topping. This is where the Cream Puff Cake really starts to feel like something special. Between the silky vanilla custard and soft peaks of whipped cream, every layer adds richness without being overly heavy.
And the best part? Both components are surprisingly simple to whip up with just a few pantry staples. Once you’ve made homemade pastry cream, you’ll never want to go back to boxed pudding again—it’s thick, luxurious, and carries that warm vanilla flavor like nothing else.
Let’s dive in and finish building this stunning dessert!
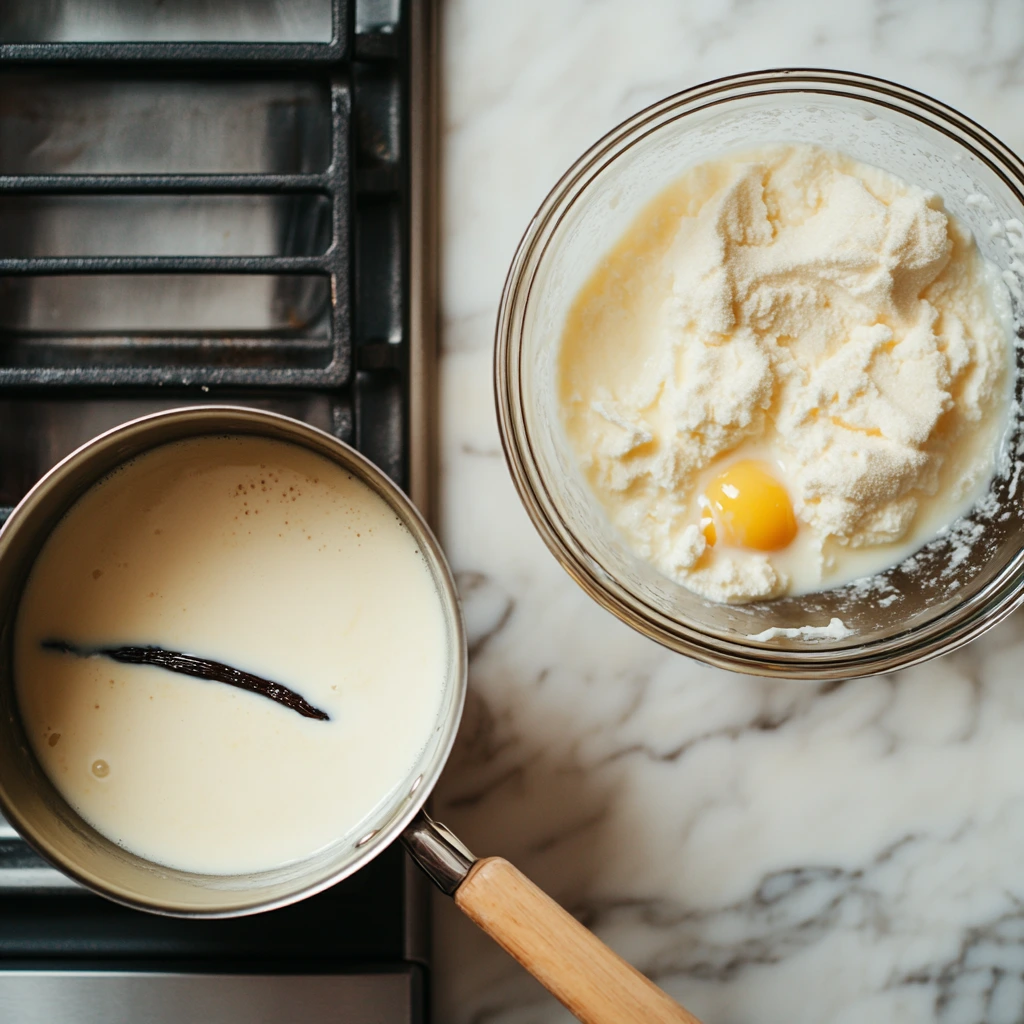
Step 3: Make the Vanilla Pastry Cream
Start by heating 2 cups of whole milk in a medium saucepan. If you’re using a vanilla bean, split it down the middle and scrape out the seeds, adding both seeds and pod to the milk. Bring the mixture just to a simmer, then remove from heat and let it steep for 5 to 10 minutes. This gives the milk time to soak up all that lovely vanilla flavor.
While the milk is steeping, whisk together 4 large egg yolks, 1/2 cup granulated sugar, and 1/4 cup cornstarch in a heatproof bowl. Whisk until the mixture becomes pale and thick—it should look almost like a thick cake batter.
Now, slowly drizzle the warm milk into the egg mixture, whisking constantly to temper the eggs. Don’t rush this step! Adding the hot milk too quickly can scramble your yolks. Once combined, return everything to the saucepan and cook over medium heat, stirring constantly.
Within a few minutes, the mixture will begin to thicken into a rich custard. When it reaches a pudding-like consistency and starts to bubble slightly, take it off the heat and stir in 2 tablespoons of butter and 1 teaspoon vanilla extract (if you didn’t use the bean earlier).
To prevent a skin from forming, press a piece of plastic wrap directly onto the surface of the cream, then chill it in the refrigerator until fully cooled. This step can be done ahead of time, and actually benefits from a longer chill.
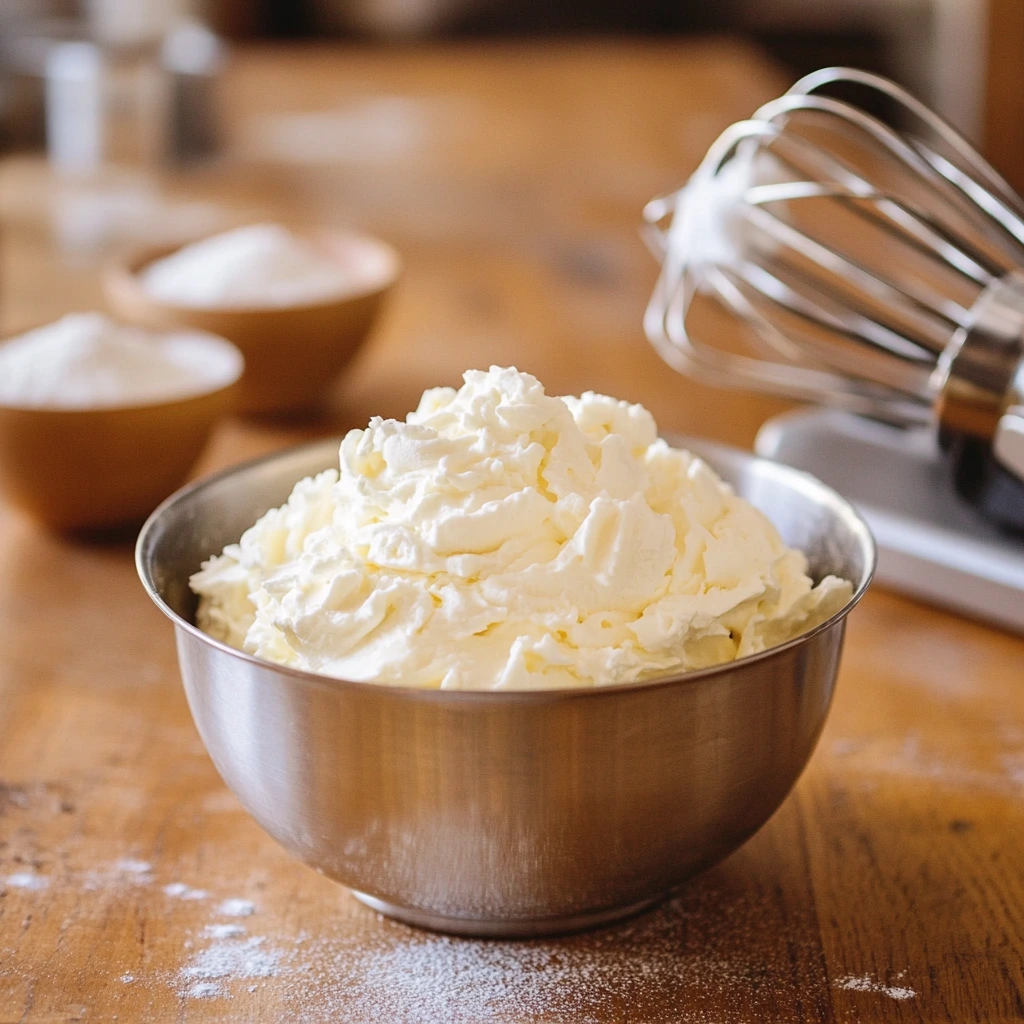
Step 4: Whip the Cream to Fluffy Perfection
In a large mixing bowl (chilled if possible), add 2 cups heavy whipping cream, 2 tablespoons powdered sugar, and 1 teaspoon vanilla extract. Beat on medium-high speed until stiff peaks form. You’re aiming for a whipped cream that holds its shape well but isn’t over-whipped—keep an eye on it, as it can go from fluffy to grainy quickly.
You can use this whipped cream as both a filling and a frosting, which makes assembly quick and easy.
Step 5: Assemble the Cream Puff Cake
Now comes the fun part—putting it all together.
Start by carefully slicing one of the cooled choux pastry rounds horizontally to create two thinner disks. These will form your bottom two layers.
Place the bottom half on a serving plate or cake stand. Spread half of the chilled pastry cream evenly over the surface. Then, gently dollop or pipe on a layer of the freshly whipped cream. Try to keep everything level for neat layering.
Add the second thin choux disk and repeat with the remaining pastry cream and another layer of whipped cream.
Top everything with the second full choux circle (the one you didn’t slice). This will act as the cake’s crown.
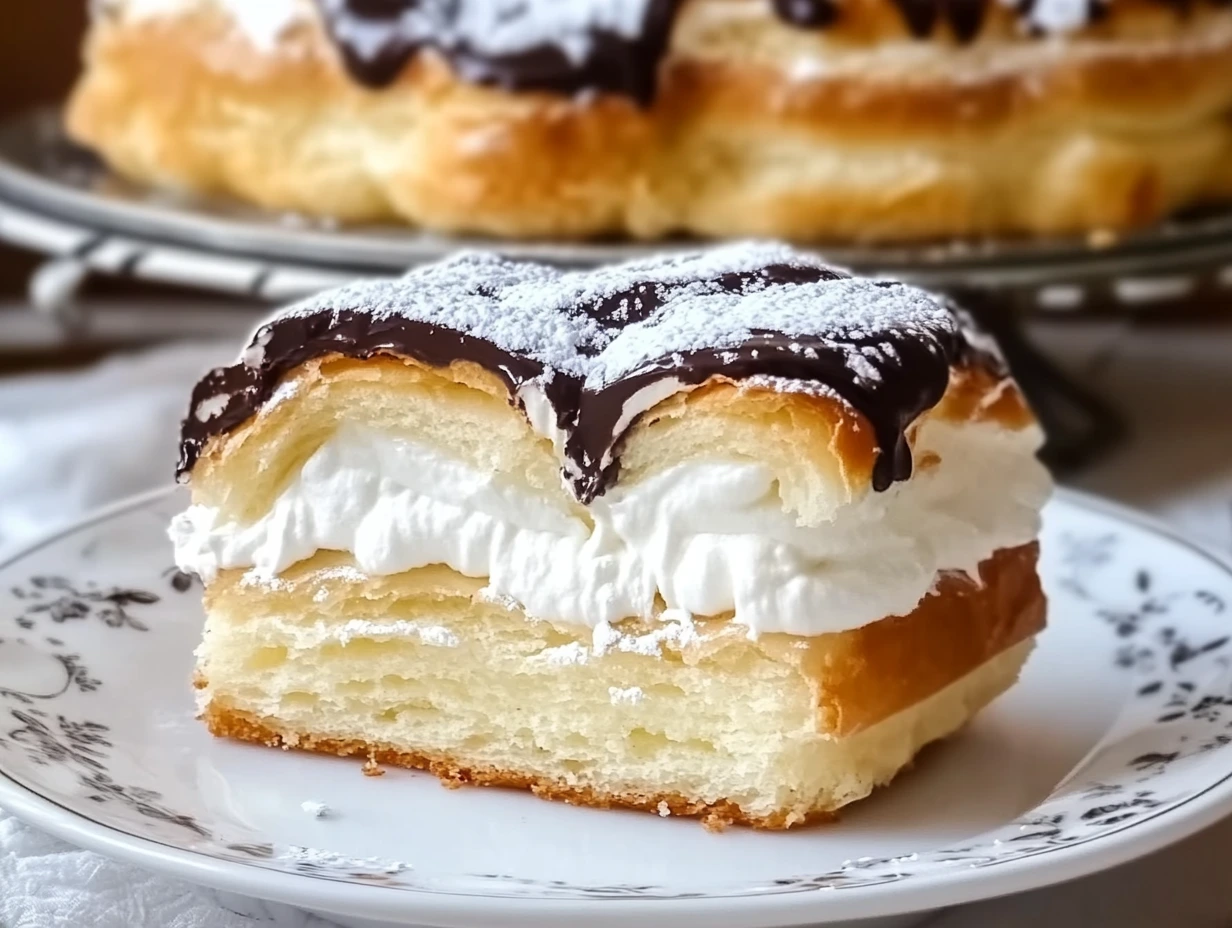
Use the rest of the whipped cream to frost the top and sides of the cake. You don’t need to be too precise here—it actually looks beautiful with a slightly rustic, swirled finish.
Finally, take the third choux circle and crumble it into small pieces. Press these crispy bits gently onto the top and sides of the cake. Not only does this add texture, but it also gives that classic cream puff vibe in the most satisfying way.
For finishing touches, you can dust the top with powdered sugar, or add fresh berries, chocolate shavings, or a drizzle of caramel for extra flair. I love serving it with a handful of raspberries on the side—they cut through the sweetness in the best way.
Cream Puff Cake Recipe: FAQs and Final Tips
You’ve made it to the final stretch of this Cream Puff Cake journey! By now, your kitchen probably smells amazing, and you’ve got a stunning dessert ready to chill or serve. Whether you’re prepping this for a party or just treating yourself and your loved ones to something special, this recipe is all about indulgence with a homemade touch.
Before we wrap things up, I want to answer a few of the most common questions that pop up when it comes to making Cream Puff Cake. These tips will help you avoid a few pitfalls and make sure your cake turns out just as beautiful and delicious as you’re imagining.
FAQ: Cream Puff Cake
1. Can I make the cream puff layers ahead of time?
Yes! The choux pastry layers can be baked and stored up to 1 day in advance. Just make sure they’re completely cool before storing them in an airtight container at room temperature. You can also freeze them—just thaw at room temp before assembling.
2. Is there a shortcut if I don’t want to make pastry cream from scratch?
While homemade pastry cream gives the best flavor and texture, you can use instant vanilla pudding as a time-saver. Just make it a little thicker by using slightly less milk than the box calls for. It won’t have quite the same depth, but it works in a pinch.
3. How do I keep the whipped cream from deflating?
To keep it stable, use cold heavy cream, and don’t overwhip it. If you want to make it a little more stable for longer storage, you can add a teaspoon of cornstarch or unflavored gelatin dissolved in a bit of warm water before whipping.
4. Can this cake be frozen?
Freezing isn’t ideal once the cake is fully assembled. The cream layers may separate or become watery when thawed. However, you can freeze the individual choux rings before assembling and make the fillings fresh.
5. How long will the assembled cake keep?
Cream Puff Cake is best served within 24 hours. The pastry will start to soften from the cream over time, so for the best texture, assemble it close to serving time and keep it chilled until ready.
6. What toppings go best with this cake?
It’s delicious as-is with just powdered sugar, but I love adding fresh berries, shaved chocolate, or a light caramel drizzle for extra flair. You could even use crushed toffee bits or toasted almonds for a little crunch.
7. Can I turn this into a smaller dessert, like mini cream puff cakes?
Absolutely! You can pipe smaller rounds of choux pastry to make individual-sized portions. Just reduce the baking time slightly and keep an eye on them—they’re ready when puffed and golden.
Conclusion: Give This Cream Puff Cake a Try!
There’s something really satisfying about turning simple ingredients—eggs, flour, milk, butter—into a dessert that looks straight out of a pastry shop. This Cream Puff Cake is one of those recipes that might feel fancy, but it’s totally doable at home with a little patience and love.
If you’ve never worked with choux pastry before, don’t worry—it’s more forgiving than it seems. And once you see those layers puff up in the oven and start spreading on that rich, vanilla-specked pastry cream, you’ll know it’s all worth it.
This cake is a crowd-pleaser that’s perfect for special occasions, birthdays, or any time you want to make dessert the main event. I’d love to hear how it goes if you give it a try—did you stick with the classic version, or add your own twist with toppings or flavor variations?
Drop a comment with your results or any questions you still have—I always love hearing from you. And if you snap a photo before it disappears (it won’t last long on the table!), be sure to share it!
Print
Cream Puff Cake
- Author: Andrew Recipes
Description
Cream Puff Cake is a stunning, decadent dessert that transforms the classic French choux pastry into a layered masterpiece. With airy pastry layers, silky vanilla pastry cream, and fluffy whipped cream, each bite is rich, light, and irresistibly indulgent. Perfect for special occasions, it’s a show-stopping treat that tastes just as good as it looks.
Ingredients
For the Choux Pastry
1 cup water
1/2 cup unsalted butter, cut into pieces
1/4 teaspoon salt
1 cup all-purpose flour
4 large eggs, room temperature
For the Pastry Cream
2 cups whole milk
1 vanilla bean (or 1 teaspoon vanilla extract)
4 large egg yolks
1/2 cup granulated sugar
1/4 cup cornstarch
2 tablespoons unsalted butter
1 teaspoon vanilla extract
For the Whipped Cream
2 cups heavy whipping cream
2 tablespoons powdered sugar
1 teaspoon vanilla extract
Optional Toppings
Powdered sugar
Fresh berries
Chocolate shavings
Caramel drizzle
Instructions
1️⃣ Preheat your oven to 400°F (200°C) and line two baking sheets with parchment paper. In a medium saucepan over medium heat, combine water, butter, and salt. Bring to a boil, then remove from heat and stir in flour all at once until a smooth ball forms. Return to low heat and cook for 1 to 2 minutes, stirring constantly. Transfer to a bowl and let cool for 5 minutes. Beat in eggs one at a time until the dough is smooth and glossy.
2️⃣ Transfer the dough to a piping bag fitted with a round tip. Pipe three 8-inch circles on the baking sheets. Bake for 25 to 30 minutes until puffed and golden. Cool completely on a wire rack.
3️⃣ Heat the milk with the split vanilla bean in a saucepan until just simmering. Remove from heat and steep for 5 to 10 minutes. In a bowl, whisk egg yolks, sugar, and cornstarch until pale and thick. Gradually add warm milk while whisking. Return to saucepan and cook over medium heat, stirring constantly until thick. Remove from heat and stir in butter and vanilla. Chill with plastic wrap pressed onto the surface.
4️⃣ In a mixing bowl, beat heavy cream, powdered sugar, and vanilla until stiff peaks form.
5️⃣ Slice one of the choux layers horizontally to create two thin disks. Spread half the pastry cream on the bottom disk, followed by a layer of whipped cream. Repeat with the next pastry layer. Top with the whole second choux circle. Cover the entire cake with whipped cream. Crumble the third pastry ring and press the crumbs onto the top and sides. Finish with powdered sugar, berries, or chocolate shavings if desired.
Notes
For a time-saving option, the choux layers and pastry cream can be made a day in advance. Make sure the pastry layers are completely cool before assembling to prevent melting the cream. This cake is best served chilled and consumed within 24 hours for optimal texture.

