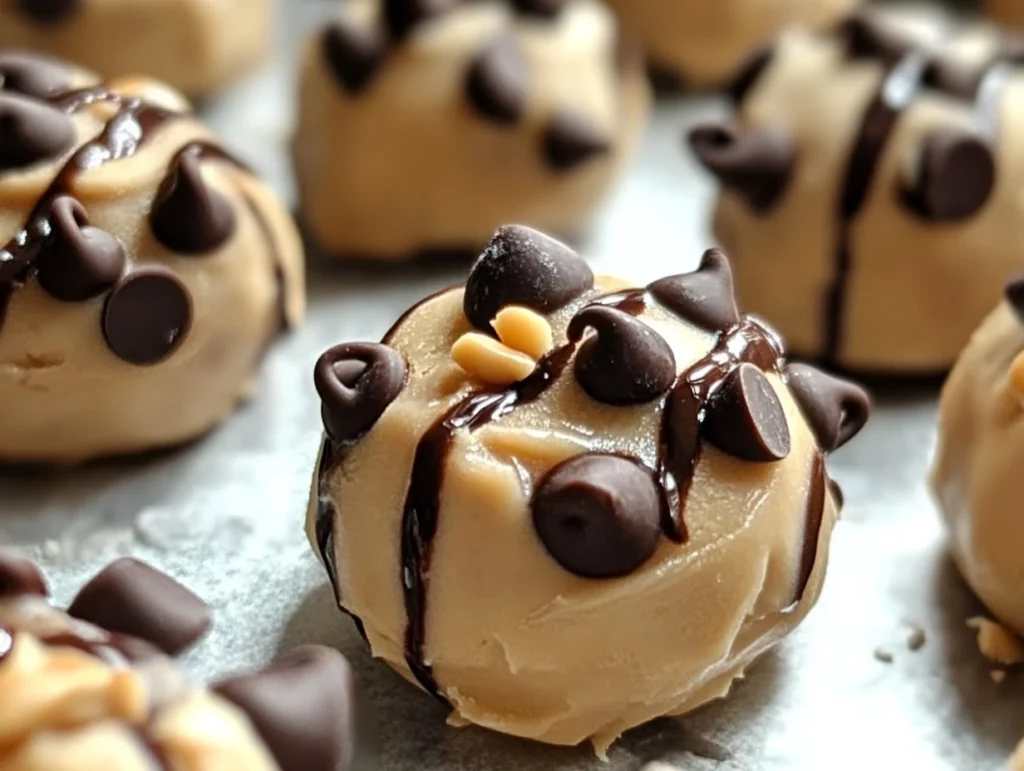
If there’s one thing I’ve learned in my kitchen, it’s that healthy doesn’t have to mean boring. These Frozen Greek Yogurt Peanut Butter Bites are the perfect example. They’re creamy, nutty, lightly sweetened, and packed with just enough chocolate to make you feel like you’re indulging—without the sugar crash later. Whether you’re reaching for a post-workout treat or just want something satisfying to curb your sweet tooth, these little bites are seriously hard to beat.
I started making these as a quick after-school snack for the kids, but let’s be honest—now I make a double batch just to keep up with how fast they disappear. What’s even better is how customizable they are. You can go full peanut butter or swap in almond butter, sprinkle on some shredded coconut or sea salt, or even roll them in crushed peanuts for extra crunch. It’s like a snack bar met a frozen dessert and they had the most delicious little baby.
This recipe uses real, simple ingredients you probably already have in your pantry—Greek yogurt, peanut butter, honey, and chocolate chips. That’s it! No baking required, and everything comes together in just a few easy steps. Ready to dive in?
Ingredients You’ll Need
For the Bites (Makes 12–15):
1 cup plain Greek yogurt (nonfat or full-fat)
1/4 cup creamy peanut butter (or almond butter for a twist)
2 tablespoons honey (or maple syrup for a vegan option)
1/2 teaspoon vanilla extract
1/4 cup mini chocolate chips (plus a few extra for topping)
For the Chocolate Coating:
1 cup dark chocolate chips (or semi-sweet if you prefer)
1 teaspoon coconut oil (optional, but helps make the chocolate silky smooth)
Optional Toppings:
Crushed peanuts
Sea salt flakes
Shredded coconut
STEP 1: Mix Your Base
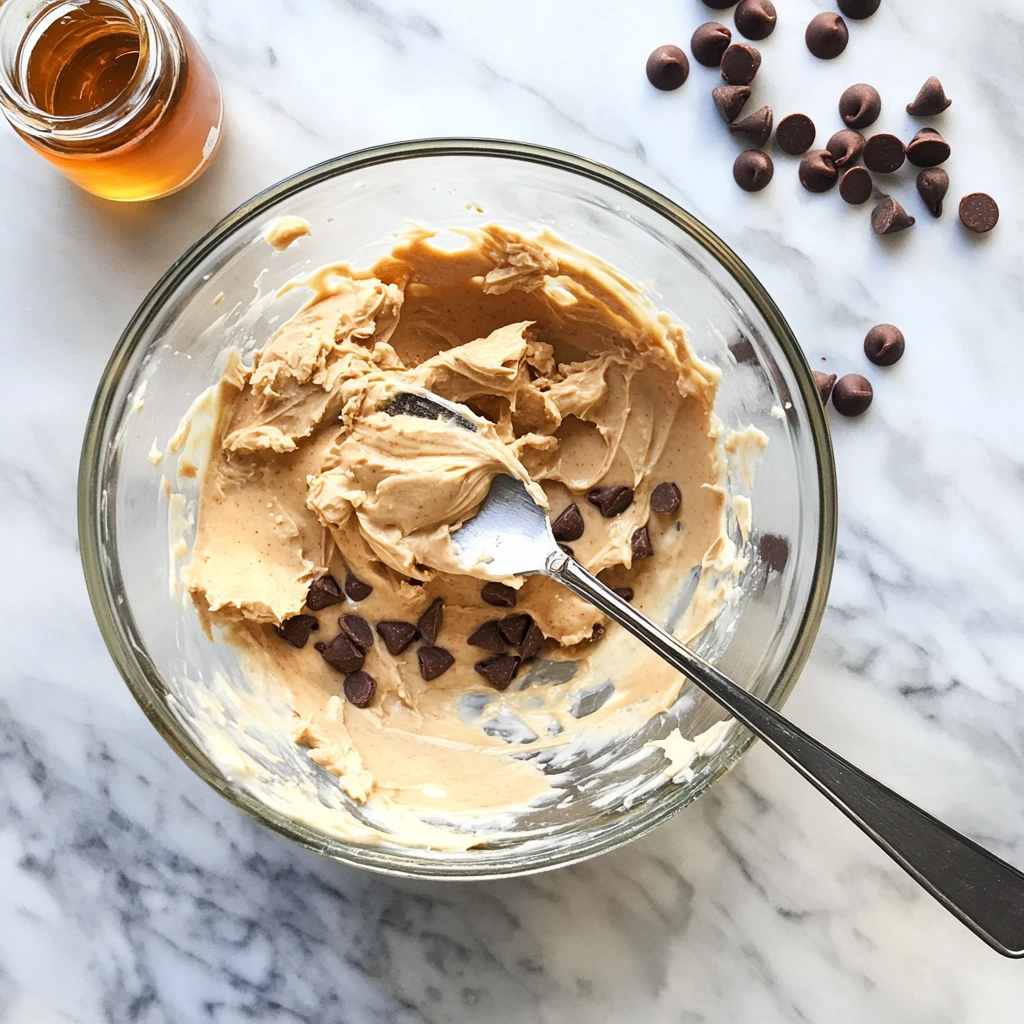
Grab a medium mixing bowl and stir together the Greek yogurt, peanut butter, honey, and vanilla extract. You’re looking for a smooth, creamy mixture here—almost like a thick, dreamy yogurt mousse. Once it’s all combined, gently fold in the mini chocolate chips. Save a few to sprinkle on top later if you want to get fancy (and trust me, you do).
Tip: If your peanut butter is super thick, try microwaving it for 10–15 seconds first so it stirs in easier.

STEP 2: Shape and Freeze
Now, line a baking sheet with parchment paper. Using a small cookie scoop or a tablespoon, drop the mixture onto the sheet in evenly sized portions. I like to flatten them just slightly into disc shapes so they’re easier to coat in chocolate later, but you can leave them round if you prefer.
Pop the tray into the freezer for 1 to 2 hours, or until the bites are firm to the touch. Don’t skip this part—it helps everything hold together during the chocolate dip later.
Note: If you’re short on freezer space, you can place the bites on a plate lined with parchment instead, but make sure they’re not touching or they’ll freeze into one big clump.
STEP 3: Prepare the Chocolate Coating
Once your bites are frozen solid, it’s time for the fun part—chocolate! In a microwave-safe bowl, combine the dark chocolate chips and coconut oil (if using). Microwave in 30-second bursts, stirring in between, until the chocolate is completely melted and smooth. If you prefer, you can use a double boiler over the stovetop.
This is when the magic starts to happen. Trust me, the creamy peanut butter center with that snap of chocolate on the outside is a game-changer.
How to Dip, Top, and Freeze Your Greek Yogurt Peanut Butter Bites Like a Pro
Now that your yogurt bites are frozen solid and your chocolate is melted and silky, it’s time for the step that takes these from “snack” to “how are these this good?”—the chocolate coating. This is where the magic really happens. You get that smooth, creamy center wrapped in a crisp chocolate shell, with just the right balance of texture and sweetness.
This part can get a little messy (in the best kind of way), so I usually set up a little dipping station at the kitchen counter: melted chocolate, toppings nearby, and a parchment-lined tray ready to catch the finished bites. It’s a fun project if you’ve got little helpers around, or even a good excuse to take a quiet moment and enjoy the process.
Let’s finish strong!
STEP 4: Dip and Decorate
Take your frozen yogurt bites out of the freezer. Working quickly, use a fork or dipping tool to gently lower each bite into the melted chocolate. Roll or spoon the chocolate over the top to coat, then lift it out and gently tap the fork on the edge of the bowl to let the excess chocolate drip off.
Place each coated bite back on the parchment-lined baking sheet. While the chocolate is still glossy and soft, sprinkle your favorite toppings right on top. A pinch of crushed peanuts, a dash of sea salt flakes, or a dusting of shredded coconut all add a little something extra. If you saved a few of those mini chocolate chips from earlier, now’s a great time to scatter them on top too.
Pro Tip: Don’t wait too long to add your toppings—the chocolate sets quickly, especially if your bites are still really cold.
STEP 5: Freeze Again Until Set
Once all of your bites are dipped and decorated, slide the baking sheet back into the freezer for about 15 to 20 minutes. This final freeze is what sets the chocolate and locks in that perfect snap when you take a bite.
After that, they’re officially ready! You can eat one straight from the freezer (no judgment), but I like to let mine sit at room temperature for about 2–3 minutes before serving. That little bit of thaw time makes the center extra creamy and delicious.
STEP 6: Store for Snack Time Anytime
Transfer the frozen bites into an airtight container and keep them in the freezer. They’ll stay fresh for a few weeks (if they last that long). I like to layer them between sheets of parchment paper to keep them from sticking together.
These are such a handy treat to have on hand. Whether you need a quick protein boost, a post-dinner treat, or a healthier dessert option for the whole family, these frozen bites are a total win.
Flavor Variations to Try
Once you get the hang of the basic recipe, it’s easy to switch things up. Here are a few fun twists you can try:
Almond Joy-Inspired: Use almond butter, mix in shredded coconut, and top with chopped almonds.
Cookie Dough Bites: Add a pinch of salt and a few spoonfuls of mini chocolate chips—skip the chocolate coating if you want to keep it super simple.
Vegan Version: Use maple syrup instead of honey, plant-based yogurt, and vegan chocolate chips. Still every bit as delicious.
Extra Protein Kick: Stir in a scoop of vanilla or chocolate protein powder into the base mixture before scooping. You might need a tiny splash of milk to keep the texture right.
Helpful Tips for Success
Chill Your Chocolate: If your chocolate starts to thicken while you’re dipping, pop it back in the microwave for a few seconds to smooth it out again.
Go Small: Keeping your bites small helps them freeze faster and makes them easier to coat in chocolate.
Don’t Rush the Freezing Steps: The firmer your bites are before dipping, the better the chocolate sticks—and the less messy your kitchen gets.
Work in Batches: If your kitchen is warm or you’re working slowly, keep half of the bites in the freezer while you dip the rest to avoid melting.
Frozen Yogurt Bites FAQ + Final Thoughts
We’ve gone through each step of creating these creamy, chocolatey, peanut buttery frozen bites, and by now you should have a tray (or maybe just a few leftovers) of your new favorite healthy treat chilling in the freezer. Before we wrap up, let’s talk through some common questions I get about this recipe—from substitutions to storage, and everything in between.

Frequently Asked Questions
1. Can I make these dairy-free or vegan?
Absolutely! Just use a plant-based yogurt (like coconut or almond yogurt), swap the honey for maple syrup, and choose dairy-free chocolate chips. They still freeze beautifully and taste amazing.
2. How long do these bites keep in the freezer?
Stored in an airtight container, they’ll stay fresh in the freezer for up to 3 weeks. You can eat them straight out of the freezer or let them sit for a couple of minutes to soften.
3. My mixture was too runny—what did I do wrong?
If your yogurt is on the thinner side (some brands are more watery than others), the mixture may need a little extra time in the freezer before dipping. You can also stir in a tablespoon of quick oats or protein powder to thicken it up a bit.
4. Can I skip the chocolate coating?
Yes! If you want to keep things lighter or just don’t feel like dealing with melted chocolate, you can skip the coating altogether. The bites are still delicious without it—just freeze and enjoy as-is.
5. Do these work with flavored yogurt?
They can, but I recommend sticking to plain or lightly sweetened vanilla. Flavored yogurts tend to be higher in sugar and may overpower the peanut butter and honey.
6. Can I use crunchy peanut butter?
You sure can! It adds a nice little texture and works well in this recipe. Just make sure to stir it well so the oil is fully blended before mixing.
7. What if I don’t have mini chocolate chips?
No problem—regular chocolate chips work fine, or you can chop up a chocolate bar. Just keep the pieces small so they mix in evenly.
Final Thoughts: Why You’ll Keep Coming Back to These Bites
If you’re anything like me, these Frozen Greek Yogurt Peanut Butter Bites are going to become one of those recipes you keep on repeat. They’re easy, make-ahead friendly, and satisfy all those snack-time cravings without going overboard. Plus, they’re so easy to customize that you’ll never get bored—switch up the nut butter, play with toppings, or add your favorite mix-ins to make them totally your own.
And let’s not forget how kid-friendly they are. My little ones call them “ice cream buttons,” and I honestly can’t think of a better name. Whether you’re sneaking one after a workout or grabbing two after dinner, they hit the spot every single time.
If you give this recipe a try, I’d love to hear how it turns out! Leave a comment below and let me know your favorite variation—or better yet, what toppings you tried. These bites are too good not to share.
Happy snacking, and enjoy every creamy, crunchy, chocolatey bite!
Print
Frozen Greek Yogurt Peanut Butter Bites with Chocolate Chips
- Author: Andrew Recipes
Description
These frozen bites are the perfect balance of creamy, nutty, and sweet. Made with wholesome ingredients like Greek yogurt, peanut butter, and a touch of honey, they make for a refreshing and satisfying treat. The chocolate coating adds a rich, indulgent touch, making these bites ideal for a healthy dessert or protein-packed snack.
Ingredients
For the Bites
1 cup plain Greek yogurt (nonfat or full-fat, depending on preference)
1/4 cup creamy peanut butter (or almond butter for a variation)
2 tablespoons honey (or maple syrup for a vegan option)
1/2 teaspoon vanilla extract
1/4 cup mini chocolate chips (plus extra for topping, optional)
For Coating
1 cup dark chocolate chips (or semi-sweet chocolate chips)
1 teaspoon coconut oil (optional, for smoother melting)
Optional Toppings
Crushed peanuts
Sea salt flakes
Shredded coconut
Instructions
1️⃣ In a mixing bowl, stir together the Greek yogurt, peanut butter, honey, and vanilla extract until smooth and fully blended. Fold in the mini chocolate chips, saving a few for topping if desired.
2️⃣ Line a baking sheet with parchment paper. Use a small cookie scoop or spoon to portion the mixture into tablespoon-sized balls. Place them on the baking sheet and gently flatten into disc shapes. Freeze for 1 to 2 hours until firm.
3️⃣ Melt the dark chocolate chips with the coconut oil (if using) in a microwave-safe bowl in 30-second intervals, stirring until smooth. You can also use a double boiler on the stovetop.
4️⃣ Remove the frozen discs from the freezer and dip each one into the melted chocolate using a fork or dipping tool. Tap off the excess chocolate and return each coated bite to the parchment-lined baking sheet. While the chocolate is still wet, sprinkle with your choice of toppings such as crushed peanuts, sea salt flakes, or shredded coconut.
5️⃣ Freeze the coated bites again for 15 to 20 minutes until the chocolate is fully set.
6️⃣ Transfer the frozen bites to an airtight container and store them in the freezer. Let them sit at room temperature for 2 to 3 minutes before serving for a creamy, delicious texture.
Notes
You can swap out the peanut butter for almond or cashew butter to switch up the flavor. These bites make a great grab-and-go snack and can be customized with your favorite toppings. For a dairy-free version, use a plant-based yogurt and vegan chocolate chips.

