If you’ve ever sat around a hibachi grill, mesmerized by the rhythmic clang of spatulas and the perfectly timed egg toss, then you know just how irresistible hibachi fried rice can be. That buttery, garlicky aroma? It’s basically edible magic. The good news is—you don’t need a fancy flat-top grill or a teppanyaki chef flipping shrimp into hats to recreate that iconic flavor at home. This Hibachi Fried Rice recipe delivers all the savory, comforting goodness of your favorite Japanese steakhouse side—right from your own kitchen.
Honestly, I started making this dish because I was tired of paying extra for an extra scoop of fried rice. And I always seem to have leftover rice sitting in the fridge just begging for a second life. This recipe is my go-to, and it’s now a regular part of our weeknight rotation. Whether you’re pairing it with grilled chicken, teriyaki beef, or just enjoying it solo in a big ol’ bowl, it hits all the right notes—salty, buttery, a little sweet from the onions, and so satisfying.
So grab your skillet and let’s get cooking!
Ingredients You’ll Need
2 tablespoons vegetable oil
2 large eggs, well beaten
2 tablespoons salted butter
½ cup small diced sweet onion
3 cloves garlic, minced
2 cups cooked and cooled leftover long-grain white rice
2 tablespoons soy sauce
2 green onions (green part only), thinly sliced
STEP-BY-STEP COOKING INSTRUCTIONS
Step 1: Scramble the Eggs
Start by heating 2 tablespoons of vegetable oil in a large skillet or wok over medium-high heat. Once the oil is shimmering (but not smoking), pour in the beaten eggs. Stir them continuously with a spatula or wooden spoon. You’re not looking for fluffy breakfast-style eggs here—just a light scramble. After about 30 seconds to 1 minute, once the eggs are mostly cooked but still slightly soft, go ahead and remove them from the pan and set them aside. They’ll finish cooking when we toss everything together later.

Step 2: Sauté the Onions and Garlic
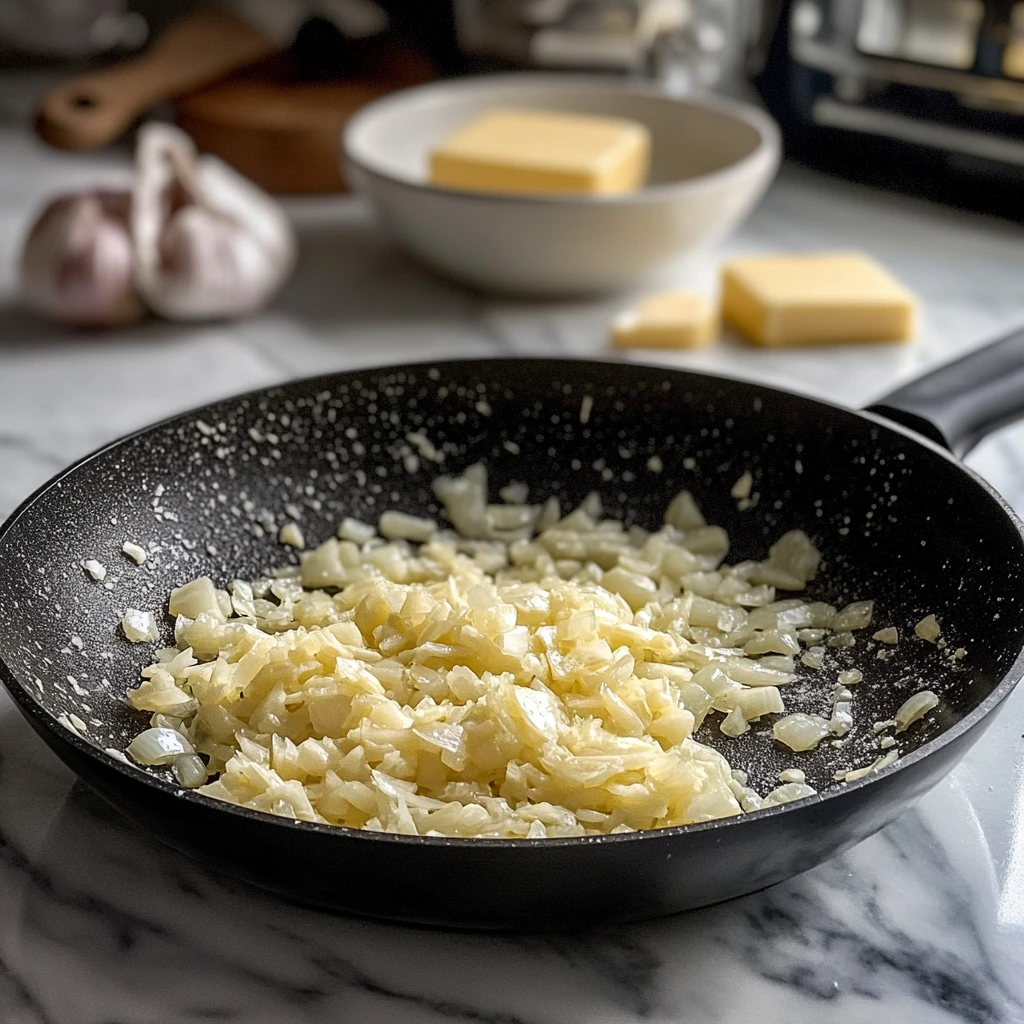
In that same skillet (no need to wipe it clean), add 2 tablespoons of salted butter and the diced sweet onion. Let those onions sizzle for 3 to 5 minutes, stirring occasionally, until they turn translucent and soft. This step builds that signature hibachi flavor, so don’t rush it.
Next, stir in the minced garlic and cook it for about 30 seconds. Keep a close eye here—garlic can go from fragrant to burnt quickly. Stir it constantly to bring out all that rich, garlicky goodness without letting it brown too much.
Step 3: Add the Rice
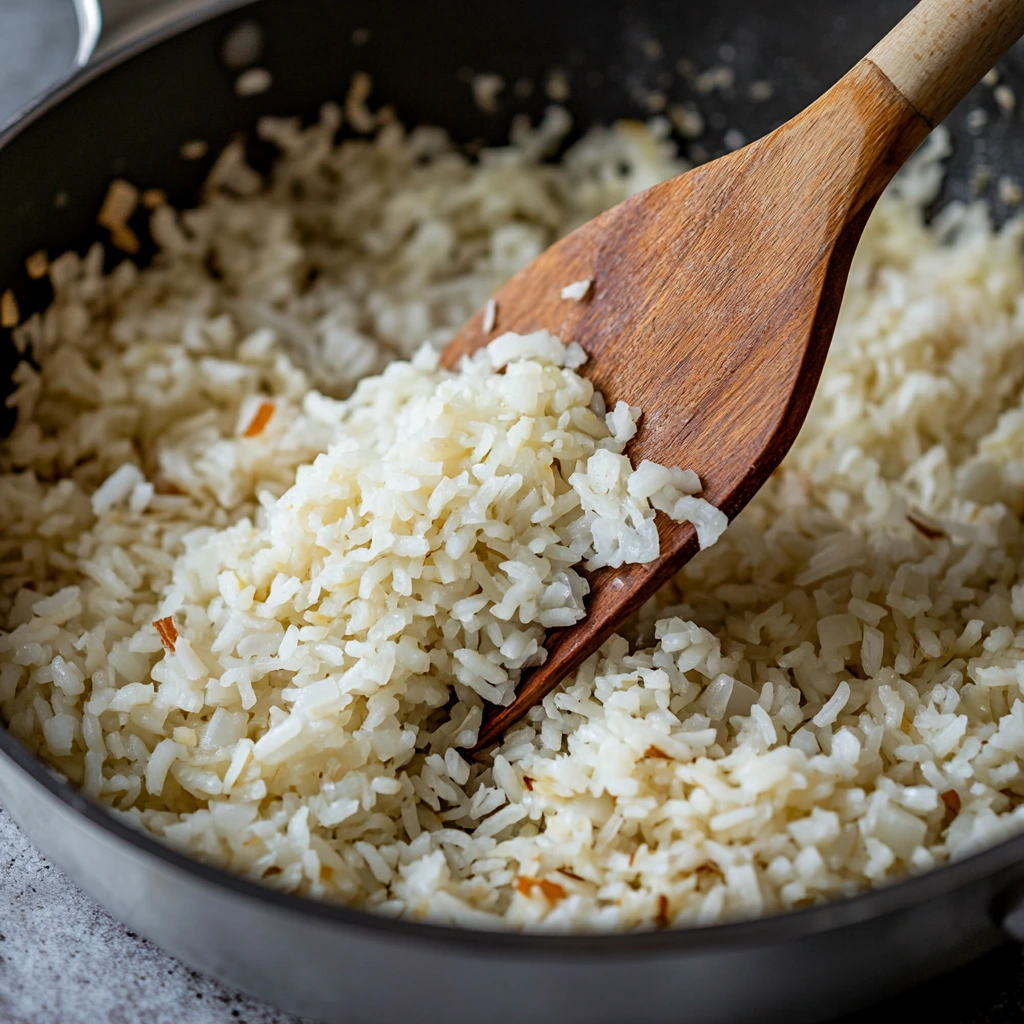
Now comes the star of the show—cold, day-old rice. Dump your 2 cups of cooked and cooled long-grain white rice right into the skillet with the buttery onions and garlic. Stir everything together, breaking up any clumps as you go. The cold rice helps it fry up nicely without getting mushy. Cook for about 3 to 5 minutes, stirring every so often, until the rice is warmed through and starting to get those little golden bits that make fried rice so irresistible.
Finishing Touches & Tips for the Best Hibachi Fried Rice
So, your kitchen probably smells amazing right about now—that combo of butter, garlic, and lightly toasted rice is hard to beat. We’ve already laid the foundation with sautéed onions, fragrant garlic, and perfectly warmed rice. Now it’s time to finish this dish off with the signature flavors and textures that make hibachi fried rice so crave-worthy.
What I love most about this recipe is how versatile it is. You can enjoy it exactly as written, or tweak it depending on what you have in your fridge. Got leftover grilled chicken or shrimp? Toss it in. Want a little extra kick? A dash of sesame oil or white pepper can really elevate the flavor.
But first, let’s bring those eggs back into the mix and make this rice sing.
STEP-BY-STEP CONTINUED
Step 4: Return the Eggs & Add Soy Sauce
Remember those scrambled eggs you set aside earlier? It’s time to bring them back to the party. Slide them into the skillet with the rice and veggies. As you stir them in, break up any large chunks so the egg is evenly distributed throughout the rice.
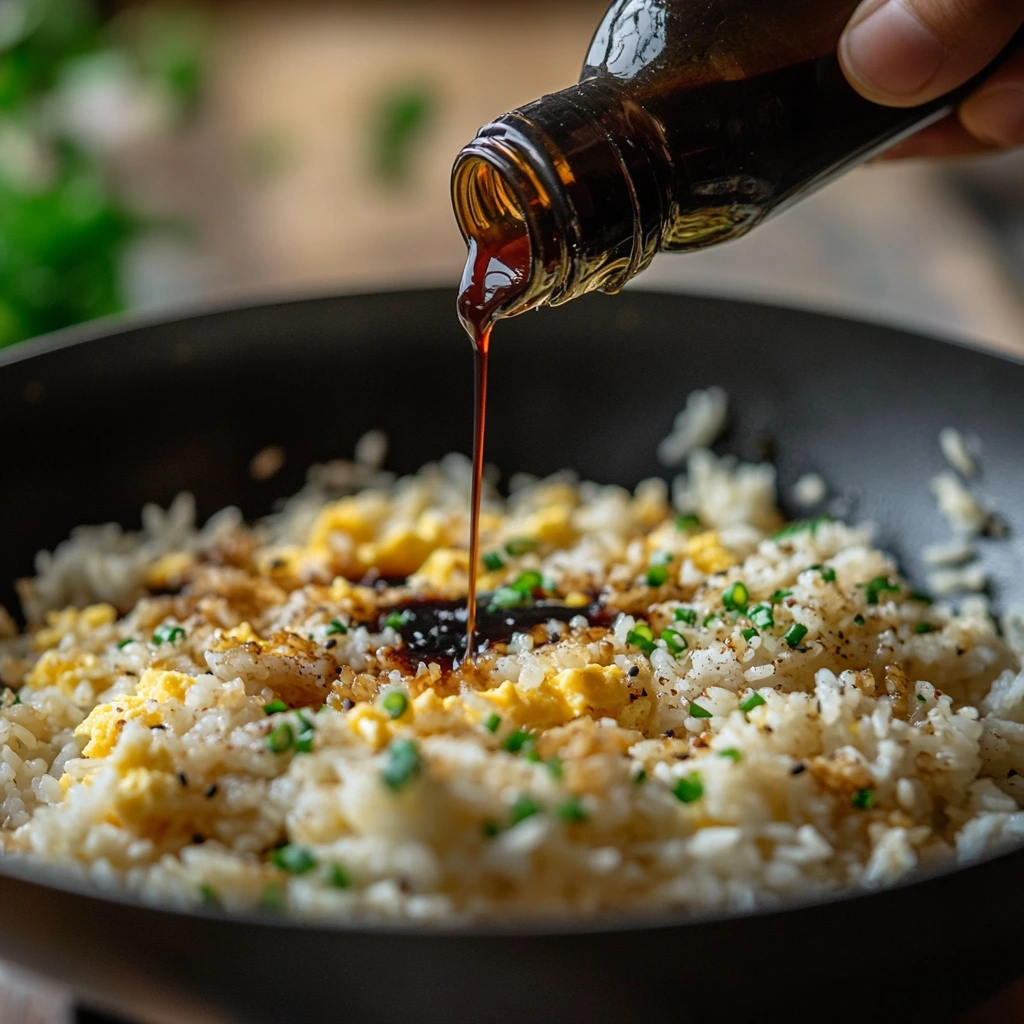
Now drizzle in 2 tablespoons of soy sauce. Stir everything together well, making sure the soy sauce coats the rice evenly. You’ll notice the color deepen and the aroma intensify—this is what really gives hibachi fried rice its signature savory umami flavor.
Cook for another 2 minutes or so, just enough to blend the flavors and finish cooking the eggs.
Step 5: Finish with Green Onions
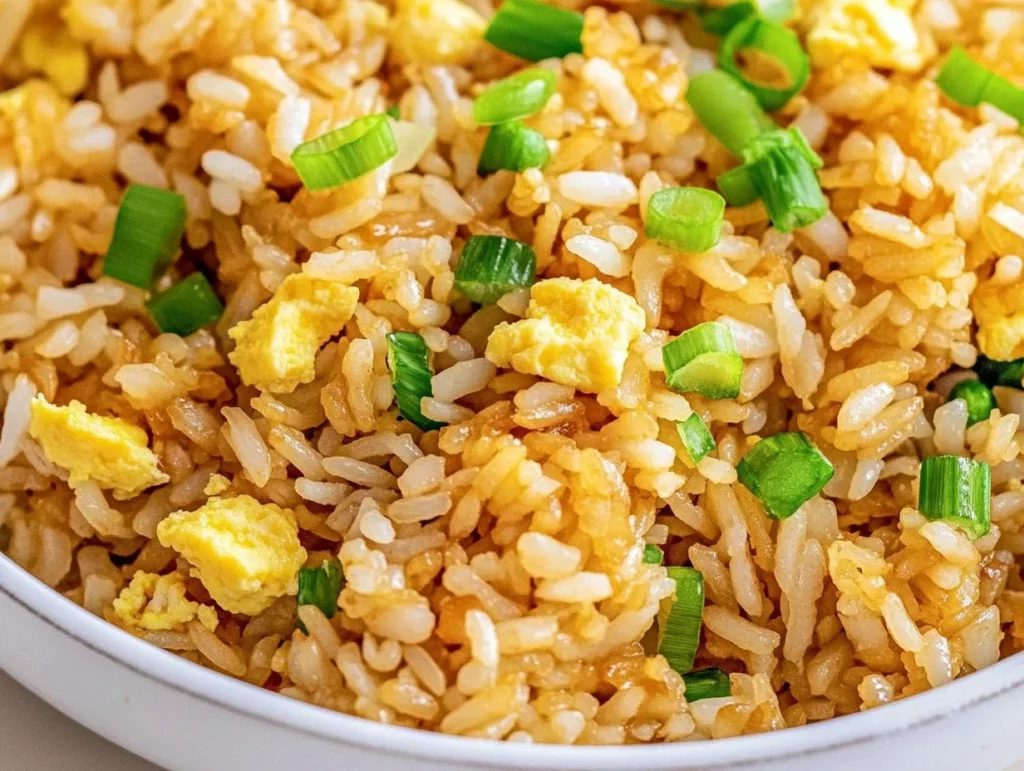
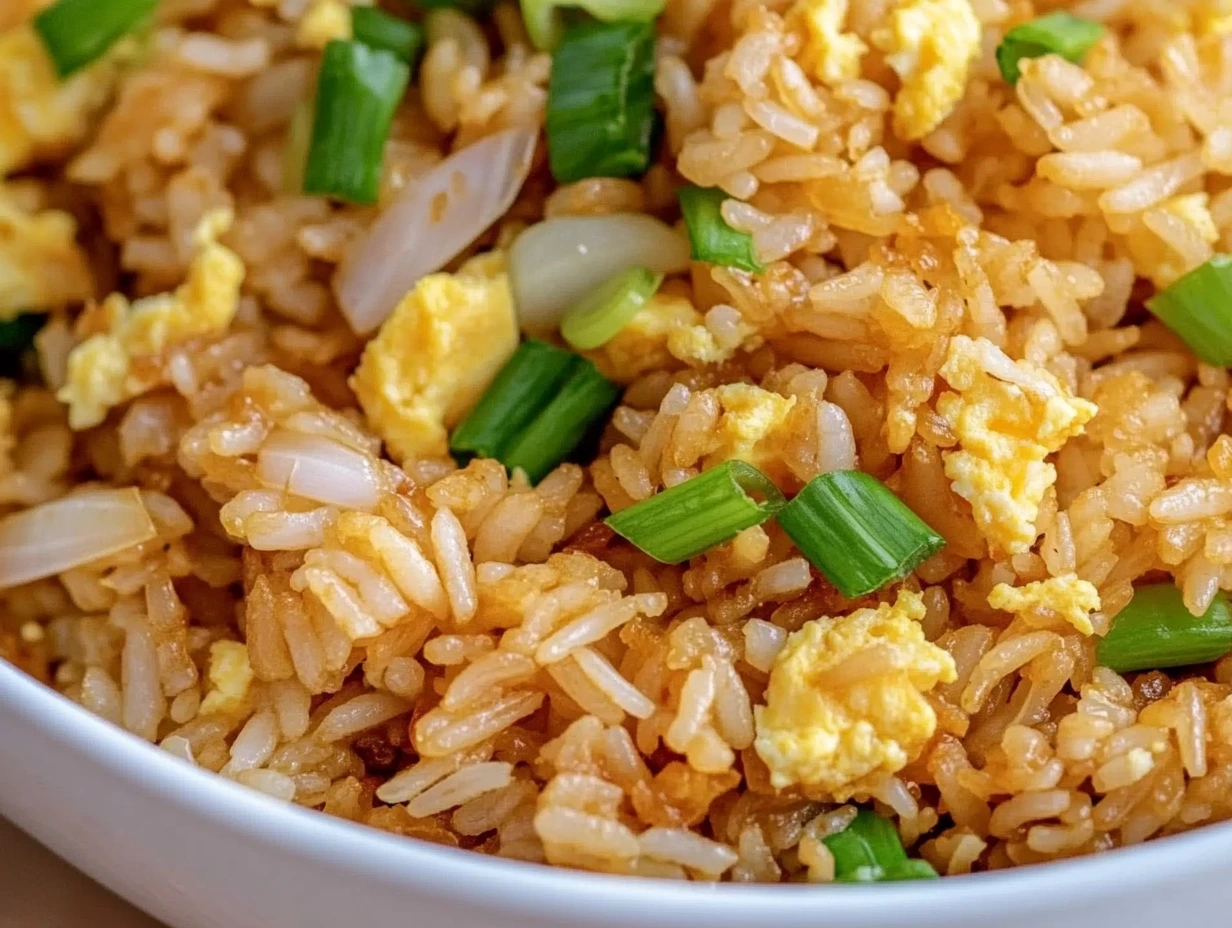
Last but not least, toss in the sliced green onions. They add a burst of color and a fresh, slightly sharp flavor that balances out the richness of the butter and soy sauce. Stir them in, then take the skillet off the heat. And just like that, you’ve got homemade hibachi fried rice, ready to serve.
Tips for Perfect Hibachi Fried Rice Every Time
Use cold, day-old rice:
This is probably the most important tip. Freshly cooked rice is too soft and steamy, which makes it more likely to get mushy when fried. Cold rice, on the other hand, is firm and dry—perfect for achieving those golden, toasty grains.
Don’t skimp on the butter:
Butter is what sets hibachi-style rice apart from your typical takeout fried rice. It gives the dish a rich, smooth flavor and that slightly indulgent feel. Using salted butter adds a layer of seasoning that balances beautifully with the soy sauce.
High heat is key:
Use medium-high to high heat to get that signature fried texture. You want a bit of caramelization on the rice and onions—it adds depth and complexity. Just be sure to stir often enough that nothing burns.
Make it a meal:
This rice is an excellent side dish, but it can absolutely be the main event. Add diced chicken, steak strips, shrimp, or even tofu to bulk it up. Just cook your protein ahead of time and stir it in when you add the eggs and soy sauce.
Add-ins and extras:
Feel like experimenting? A few drops of sesame oil can add a nutty undertone. White pepper gives it a mild heat. Or go bold with a splash of mirin or a sprinkle of furikake (a Japanese rice seasoning) for an extra layer of flavor.
Frequently Asked Questions & Final Thoughts
By now, your skillet is probably scraped clean, and you’re wondering how something so simple could taste this good. That’s the magic of hibachi fried rice—minimal ingredients, maximum flavor. But if you’re new to making fried rice at home (or just want to level up your game), I’ve pulled together some frequently asked questions that might help you out.
FREQUENTLY ASKED QUESTIONS
1. Can I use freshly cooked rice instead of day-old rice?
Technically yes, but it’s not ideal. Freshly cooked rice is soft and moist, which often leads to clumping and a mushy texture. If you must use fresh rice, spread it out on a baking sheet and let it cool uncovered for 30 minutes to dry out a bit before frying.
2. What’s the best type of rice to use for hibachi fried rice?
Long-grain white rice is best because it stays fluffy and separates easily. Jasmine or Basmati rice also work well. Short-grain varieties like sushi rice can get sticky, which changes the texture.
3. Can I make this dish vegetarian or vegan?
Absolutely! Just skip the eggs and use a plant-based butter or neutral oil in place of the dairy butter. You can also bulk it up with veggies like peas, carrots, mushrooms, or broccoli.
4. Is it okay to use low-sodium soy sauce?
Yes, and it’s actually a great option if you’re watching your salt intake. Just be aware that the flavor will be a little milder. You can adjust with a pinch of salt or a splash more soy sauce to taste.
5. How should I store leftovers?
Let the fried rice cool completely, then store it in an airtight container in the fridge for up to 3 days. Reheat it in a skillet over medium heat for best results—you can add a splash of water or soy sauce if it seems a bit dry.
6. Can I freeze hibachi fried rice?
Yes, you can! Portion it out into freezer-safe containers or zip-top bags, remove as much air as possible, and freeze for up to 1 month. Reheat from frozen in a skillet or microwave until hot.
7. What proteins go well with hibachi fried rice?
Grilled chicken, steak, shrimp, or even tofu are all great choices. You can cook them separately and stir them into the rice at the end or serve them on top for a full hibachi-style meal.
Conclusion: A Restaurant Classic Made Easy at Home
There’s something so satisfying about making a dish at home that tastes just as good—if not better—than what you’d get at a restaurant. This Hibachi Fried Rice is one of those dishes. It’s buttery, garlicky, and perfectly fried, with just the right amount of savory soy sauce and a pop of freshness from the green onions.
It’s also endlessly customizable, which makes it perfect for weeknight dinners, last-minute meals, or even meal prepping for the week ahead. I love that it uses ingredients I almost always have on hand, and it never fails to be a hit—even with picky eaters.
If you try this recipe, I’d love to hear how it turns out! Did you add any fun extras or pair it with your favorite grilled meat? Leave a comment and let me know. Your version might just inspire someone else’s next dinner. And if this becomes a go-to in your kitchen like it has in mine, then I’d call that a fried rice win.
Print
Hibachi Fried Rice
- Author: Andrew Recipes
Description
Hibachi Fried Rice is a simple yet flavorful side dish often served in Japanese steakhouses. It features buttery fried rice with scrambled eggs, savory garlic, sweet onions, and a splash of soy sauce, all cooked to perfection on a hot skillet. It’s a perfect way to use leftover rice and pairs well with grilled meats or veggies.
Ingredients
2 tablespoons vegetable oil
2 large eggs, well beaten
2 tablespoons salted butter
½ cup small diced sweet onion
3 cloves garlic, minced
2 cups cooked and cooled leftover long-grain white rice
2 tablespoons soy sauce
2 green onions (green part only), thinly sliced
Instructions
1️⃣ Heat the vegetable oil in a wok or large skillet over medium-high heat.
2️⃣ Pour in the beaten eggs and stir continuously until they are mostly cooked but still slightly soft, about 30 seconds to 1 minute. Remove the eggs from the skillet and set aside.
3️⃣ Add the salted butter and diced sweet onion to the skillet. Cook, stirring occasionally, until the onions are translucent, about 3–5 minutes.
4️⃣ Add the minced garlic and cook until fragrant, about 30 seconds, stirring frequently to avoid burning.
5️⃣ Add the cooked and cooled rice to the skillet. Stir well to combine with the butter, onions, and garlic. Cook for 3–5 minutes, stirring occasionally, until the rice is warmed through and lightly fried.
6️⃣ Return the scrambled eggs to the skillet. Add the soy sauce and stir everything together, breaking the eggs into small pieces as you mix. Cook for an additional 2 minutes.
7️⃣ Stir in the sliced green onions, then remove from heat and serve hot.
Notes
Cold, day-old rice works best for fried rice as it prevents the dish from becoming mushy. You can enhance the flavor with a drizzle of sesame oil or a pinch of white pepper. This rice also makes an excellent base for stir-fry dishes or as a standalone meal by adding cooked chicken, shrimp, or vegetables.

