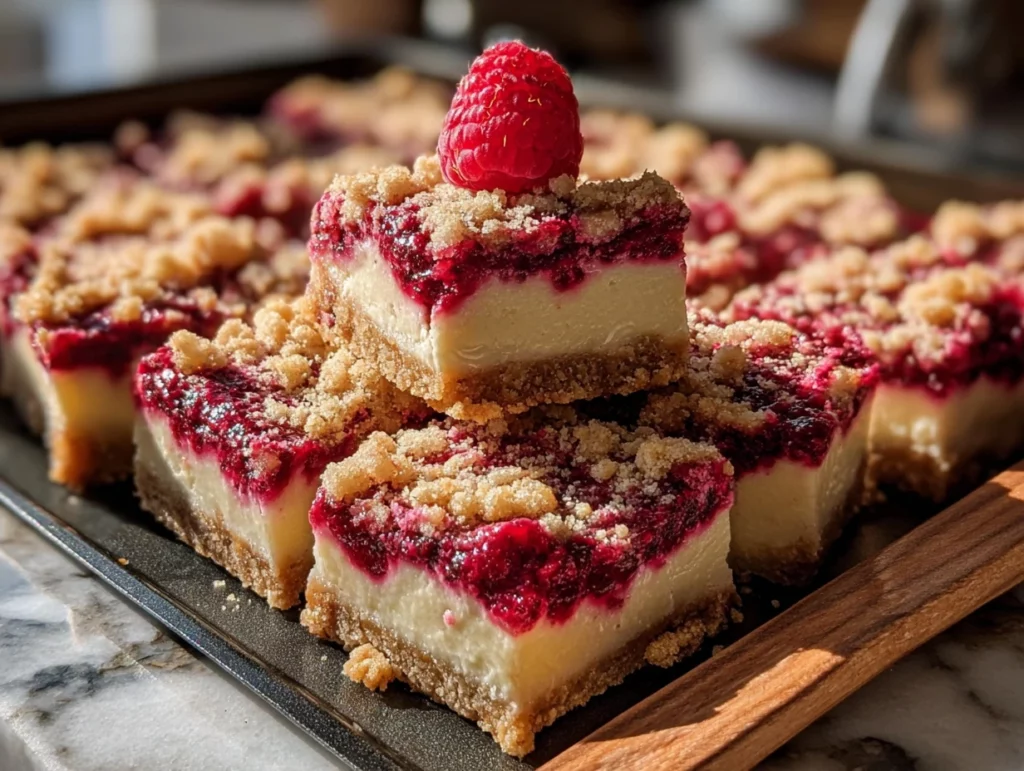
There’s something about the combo of tart lemon, sweet raspberries, and rich, creamy cheesecake that just screams summer to me. Whether I’m hosting brunch for friends or just craving a cool and fruity dessert, these Lemon Raspberry Cheesecake Crunch Bars always hit the spot. They’re vibrant, full of texture, and surprisingly easy to make—perfect for when you want something a little special but don’t want to spend all day in the kitchen.
I first came across a version of these bars at a summer potluck a few years ago. One bite in, and I was hooked—the bright lemon flavor, the burst of berries, that velvety cheesecake center, all nestled in a buttery, oat-studded crust. I asked for the recipe on the spot, and after a few tweaks (and lots of taste-testing), this has become my go-to version. The best part? You can make them ahead, keep them chilled, and they slice up beautifully. Let’s dive into how to make them!
Ingredients You’ll Need
These bars are made with three simple layers: a buttery crust that doubles as the crumble topping, a zesty lemon cheesecake filling, and a juicy raspberry layer that ties it all together.
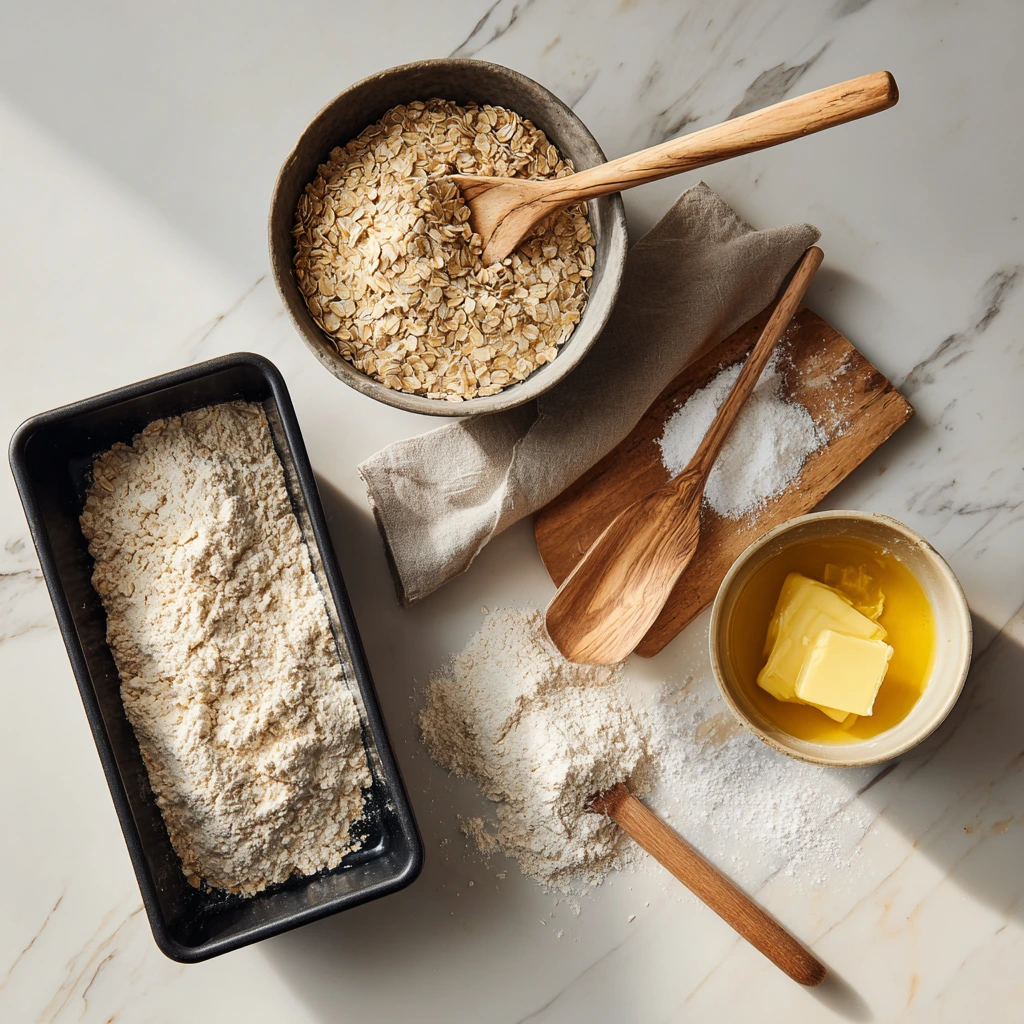
For the crust and crumble topping:
1 ½ cups all-purpose flour
1 cup rolled oats
½ cup brown sugar
½ teaspoon baking soda
¼ teaspoon salt
¾ cup unsalted butter, melted
For the cheesecake layer:
8 oz cream cheese, softened
⅓ cup granulated sugar
1 large egg
2 tablespoons lemon juice
1 teaspoon lemon zest
1 teaspoon vanilla extract
For the fruit layer:
1 cup fresh or frozen raspberries
1 tablespoon cornstarch
1 tablespoon sugar
STEP 1: Prep Your Pan and Preheat the Oven
Start by preheating your oven to 350°F (175°C). Line an 8×8-inch baking pan with parchment paper, leaving some overhang on the sides to help lift the bars out later. This step makes cleanup so much easier—and trust me, you’ll thank yourself when you’re ready to slice and serve.

STEP 2: Make the Crust and Topping
In a large mixing bowl, combine the flour, oats, brown sugar, baking soda, and salt. Stir everything together until evenly mixed. Then pour in the melted butter and mix until the mixture turns into coarse, crumbly bits. You want it to look like a streusel topping—moist but crumbly.
Take about two-thirds of this mixture and press it firmly into the bottom of your prepared pan. Use the back of a spoon or your fingers to really pack it down. This will be your crust base, and it needs to be solid enough to hold up the creamy layers that come next.
STEP 3: Whip Up the Cheesecake Layer
In another bowl, beat the cream cheese with a hand mixer (or a stand mixer if you prefer) until it’s smooth and creamy—no lumps here. Add in the granulated sugar, egg, lemon juice, lemon zest, and vanilla extract, and beat until everything is fully combined and silky. This layer is what gives these bars that rich, creamy bite with a hint of citrusy brightness.
Once your cheesecake mixture is ready, pour it over the crust and gently spread it into an even layer with a spatula.
STEP 4: Add the Raspberry Layer
Toss your raspberries in a small bowl with cornstarch and sugar. If you’re using frozen berries, there’s no need to thaw them first—just mix and go. You can lightly mash them if you want a smoother fruit layer, but I like to keep some whole for little pockets of juicy berry flavor.
Evenly sprinkle the berry mixture over the cheesecake layer. It doesn’t need to be perfect—just make sure the berries are fairly spread out so each bite gets some fruit.
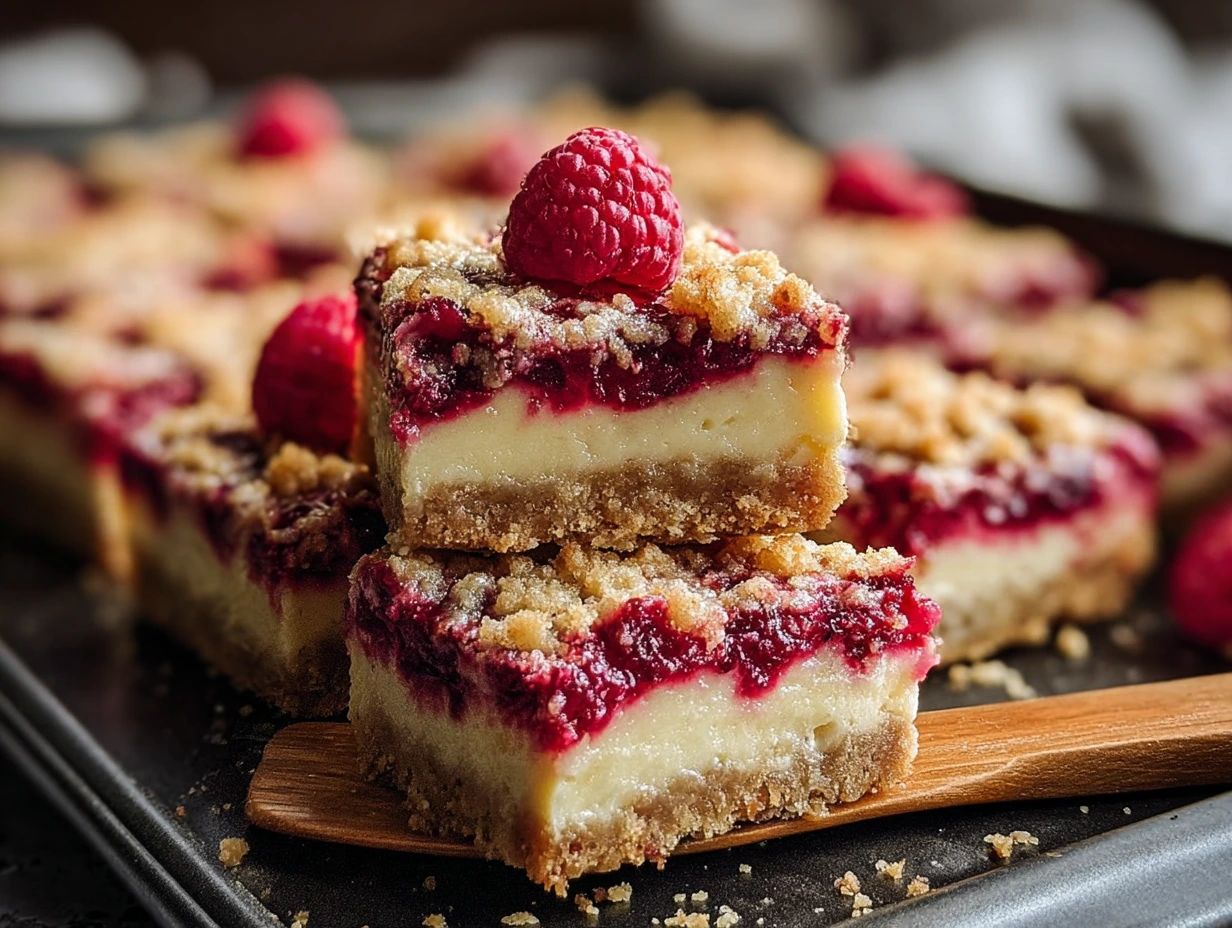
Irresistible Lemon Raspberry Cheesecake Crunch Bars: Assembly, Baking, and Pro Tips
We left off with our buttery crust layered up and topped with that smooth lemon cheesecake filling and juicy raspberries—now it’s time to bring it all together. This is where that final crumb topping adds a golden, crispy finish that really sets these bars apart.
Whether you’re planning to serve these at a baby shower, bring them to a backyard barbecue, or just enjoy a treat with your coffee, the next steps will ensure these bars turn out as dreamy and delicious as they look.
STEP 5: Add the Crumble Topping
Grab the remaining third of your crust mixture—the part we set aside earlier. Sprinkle it evenly over the raspberry layer. Try to cover as much of the surface as possible, but don’t stress if a few raspberries peek through. This crumble topping will crisp up beautifully in the oven, adding that buttery, golden crunch that balances the soft cheesecake and juicy fruit underneath.
Use your fingers to gently press the crumbs down just a bit—this helps everything stick together nicely while baking.
STEP 6: Bake to Golden Perfection
Place your assembled bars into the preheated 350°F oven and bake for 35 to 40 minutes. You’ll know they’re ready when the top is golden brown and the edges look set. The center might still have a little jiggle to it, which is totally fine—it will firm up as it cools.
Resist the temptation to overbake. If you wait until the entire top looks dry, you’ll miss out on that soft and creamy cheesecake texture that makes these bars so irresistible.
STEP 7: Cool and Chill Before Slicing
Once they’re out of the oven, let the bars cool completely in the pan. This part is key—if you try to cut them while they’re warm, the layers won’t hold together, and you’ll end up with a gooey mess (delicious, but not very pretty).
After they’ve cooled to room temp, transfer the pan to the fridge and chill for at least 2 hours—or overnight, if you’re planning ahead. Chilling helps the cheesecake layer set and makes slicing so much easier.
Tips for the Best Cheesecake Bars Every Time
These bars are pretty simple, but a few extra tricks can take them from good to next-level:
Use parchment paper with overhang – This makes it super easy to lift the bars out in one piece and get clean slices.
Don’t skip the lemon zest – It adds that bright citrus flavor that pairs perfectly with the raspberries.
Fresh vs. frozen berries – Either works great! If you’re using frozen, don’t thaw them first—just toss and sprinkle. They’ll bake up just fine.
For smoother texture – Lightly mash your raspberries before adding them for a more uniform fruit layer.
Chill well before slicing – These bars hold their shape best when fully set. Patience pays off here.
Make-Ahead and Storage Notes
One of my favorite things about this recipe is how well it stores. You can make these bars a day or two ahead of time and just keep them in the fridge until you’re ready to serve.
Storage: Keep in an airtight container in the refrigerator for up to 5 days. They stay fresh and delicious the whole time.
Freezing: You can also freeze them! Wrap individual bars tightly in plastic wrap and place them in a freezer-safe container. They’ll keep for up to 2 months. Just thaw in the fridge before serving.
Irresistible Lemon Raspberry Cheesecake Crunch Bars: FAQs and Final Thoughts
By now, your kitchen is probably smelling amazing—and if you’ve already sliced into a batch of these Lemon Raspberry Cheesecake Crunch Bars, you know just how special they are. In this last section, I want to wrap up with answers to a few common questions, especially if you’re planning to make these for the first time. I’ll also share a few final serving tips to make sure your bars are the star of the show!
Frequently Asked Questions
1. Can I use other berries instead of raspberries?
Absolutely! Blueberries, blackberries, or chopped strawberries all work great in this recipe. You can even mix different berries together for a blend of flavors. Just make sure to keep the total fruit amount around 1 cup.
2. What’s the best way to soften cream cheese quickly?
If you’re short on time, cut the cream cheese into small cubes and let it sit at room temperature for 15–20 minutes. You can also microwave it in 10-second bursts (still in the wrapper or on a plate) until it’s soft but not hot.
3. Can I double this recipe for a larger crowd?
Yes! You can double all the ingredients and bake the bars in a 9×13-inch pan. Just add a few extra minutes to the baking time—start checking around 40–45 minutes and watch for that golden top.
4. Why did my cheesecake layer crack?
A few small cracks are normal and won’t affect the taste at all. They usually happen from overbaking or sudden temperature changes. Be sure to let the bars cool gradually, and don’t skip the chilling step in the fridge.
5. Can I make these gluten-free?
Yes! Substitute the all-purpose flour with a 1:1 gluten-free flour blend and make sure your oats are labeled gluten-free. The bars will still have that great texture and flavor.
6. Do these bars have to be refrigerated?
Yes, because of the cheesecake layer, these bars should be kept chilled. Store them in the fridge until ready to serve, especially if you’re making them ahead or bringing them to a gathering.
7. How do I get clean slices?
Use a sharp knife, and wipe it clean between cuts. Chilling the bars thoroughly before slicing makes a big difference in keeping those layers neat and tidy.
Final Thoughts and Serving Suggestions
These Lemon Raspberry Cheesecake Crunch Bars are one of those desserts that look fancy but come together with everyday ingredients and minimal effort. I love serving them chilled on a warm day with a cup of iced tea or coffee. They’re also great for potlucks and holiday brunches—honestly, there’s never a bad time for them.
If you want to dress them up a bit more, try dusting a little powdered sugar on top right before serving, or add a dollop of whipped cream for a little extra indulgence. You can even cut them into smaller squares and serve them as part of a dessert platter—they hold their shape beautifully and bring a pop of color to any spread.
Print
Irresistible Lemon Raspberry Cheesecake Crunch Bars
- Author: Andrew Recipes
Description
Irresistible Lemon Raspberry Cheesecake Crunch Bars combine tangy lemon, sweet raspberries, and a velvety cheesecake layer, all set atop a buttery cookie crust with a crunchy topping. These bars are a delightful balance of creamy, fruity, and crisp textures, making them perfect for summer gatherings, brunches, or a decadent afternoon treat.
Ingredients
For the crust and crumble topping:
1 ½ cups all-purpose flour
1 cup rolled oats
½ cup brown sugar
½ teaspoon baking soda
¼ teaspoon salt
¾ cup unsalted butter, melted
For the cheesecake layer:
8 oz cream cheese, softened
⅓ cup granulated sugar
1 large egg
2 tablespoons lemon juice
1 teaspoon lemon zest
1 teaspoon vanilla extract
For the fruit layer:
1 cup fresh or frozen raspberries
1 tablespoon cornstarch
1 tablespoon sugar
Instructions
Preheat the oven to 350°F and line an 8×8-inch baking pan with parchment paper.
In a mixing bowl, combine flour, oats, brown sugar, baking soda, and salt. Stir in melted butter until the mixture forms coarse crumbs.
Press two-thirds of the crumb mixture into the bottom of the prepared pan to form a firm crust.
In another bowl, beat together the cream cheese, granulated sugar, egg, lemon juice, lemon zest, and vanilla until smooth.
Spread the cheesecake mixture evenly over the crust.
In a small bowl, toss the raspberries with cornstarch and sugar. Sprinkle the berries evenly over the cheesecake layer.
Top with the remaining crumb mixture, gently pressing it in.
Bake for 35-40 minutes or until the top is golden and the cheesecake layer is set.
Let cool completely, then refrigerate for at least 2 hours before slicing into bars.
Notes
For a smoother fruit layer, lightly mash the raspberries before adding. You can substitute other berries like blueberries or blackberries. Use gluten-free oats and flour if needed. These bars are best served chilled and can be stored in the refrigerator for up to 5 days.

