There’s something about sinking your teeth into a pillowy, chocolate-coated treat that takes you right back to childhood holiday gatherings—those little candies that magically disappeared off the platter faster than you could wink. Martha Washington Candy, with its tender coconut–pecan–cherry center enveloped in a crisp, glossy chocolate shell, has been one of my favorite Southern indulgences for as long as I can remember. Growing up, my grandma would haul out her vintage recipe card each December, and the kitchen would fill with the sweet scent of coconut and pecans, punctuated by the bright, fruity tang of maraschino cherries.
I still laugh when I recall the year I tried to “help” my grandma by taste-testing a few too many of those uncoated centers—my sneaky scheme backfired when I had to help roll them into neat little balls afterward! Between sticky fingers and failed attempts at perfect spheres, I learned two things: one, you can never have too many paper towels on hand; and two, once these little gems are dipped in chocolate, they truly become irresistible. Today, I’m excited to share that same recipe with you—complete with a few tricks I’ve picked up over the years to make the process smooth and stress-free.
Whether you’re making these for a festive gift, a bake sale, or simply to keep on your counter for whenever the chocolate craving hits, this candy is surprisingly easy to assemble. You don’t need any baking skills or special equipment—just a big bowl, a bit of patience during chilling, and plenty of parchment paper. The combination of sweetened shredded coconut, chopped pecans, and juicy maraschino cherries bound together with sweetened condensed milk creates a rich, creamy filling that pairs beautifully with any high-quality candy coating you prefer.
Before we dive into the fun part—rolling and dipping—let’s gather everything we need. Here’s a quick glance at the kitchen lineup:
1 cup (2 sticks) unsalted butter, melted
1 pound powdered sugar
1 tablespoon pure vanilla extract
14 ounces sweetened shredded coconut
14 ounces sweetened condensed milk
10 ounces maraschino cherries, drained & finely chopped
3 cups finely chopped pecans
16 ounces candy coating (Ghirardelli melting wafers or Almond Bark)
With our ingredients on deck, we’ll start by prepping those cherries and combining the filling. Remember: a little extra time chilling the filling makes the mixture easier to handle and helps the candy coating set up in a snap.

STEPS
Prep the Cherries.
Drain your maraschino cherries thoroughly, then chop them into small, even pieces. Lay them out on a few layers of paper towels and gently pat them dry to remove excess moisture—this keeps your filling from getting too wet and helps it set more firmly.Combine the Filling.
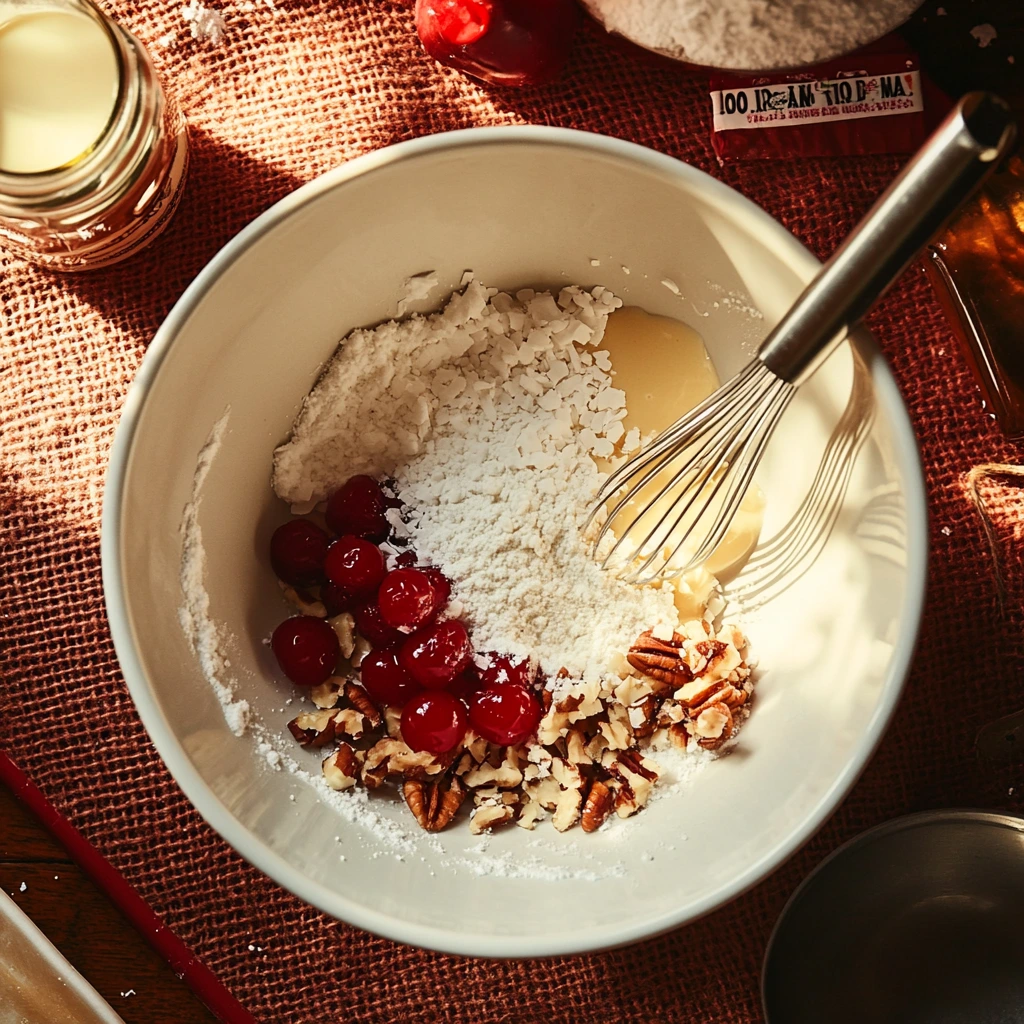
In a large mixing bowl, pour in the melted butter, powdered sugar, and vanilla extract. Stir until the sugar starts to absorb the butter and the mixture is smooth. Add the shredded coconut, sweetened condensed milk, chopped cherries, and pecans. Work quickly with a sturdy spoon or spatula, folding everything together until you have a thick, sticky mass. You’ll know it’s ready when it clings together without crumbling apart.Chill the Mixture.
Cover the bowl tightly with plastic wrap and pop it into the refrigerator for at least two hours. This step is crucial: chilled filling firms up significantly, making it far easier to scoop and shape, and it prevents the chocolate shell from sliding off when you dip.
Rolling, Dipping, and Insider Tips
By now, your filling has chilled into a firm, easy-to-handle mass—and you’re ready for the most satisfying part: transforming these coconut-pecan-cherry balls into glossy, chocolate-coated delights. In this section, we’ll tackle the rolling, dipping, and finishing touches that give Martha Washington Candies their signature look and texture. Plus, I’ll share a few insider tips to streamline the process and elevate your results.

STEPS
Portion and Roll the Filling
Line a baking sheet with parchment paper or a silicone mat.
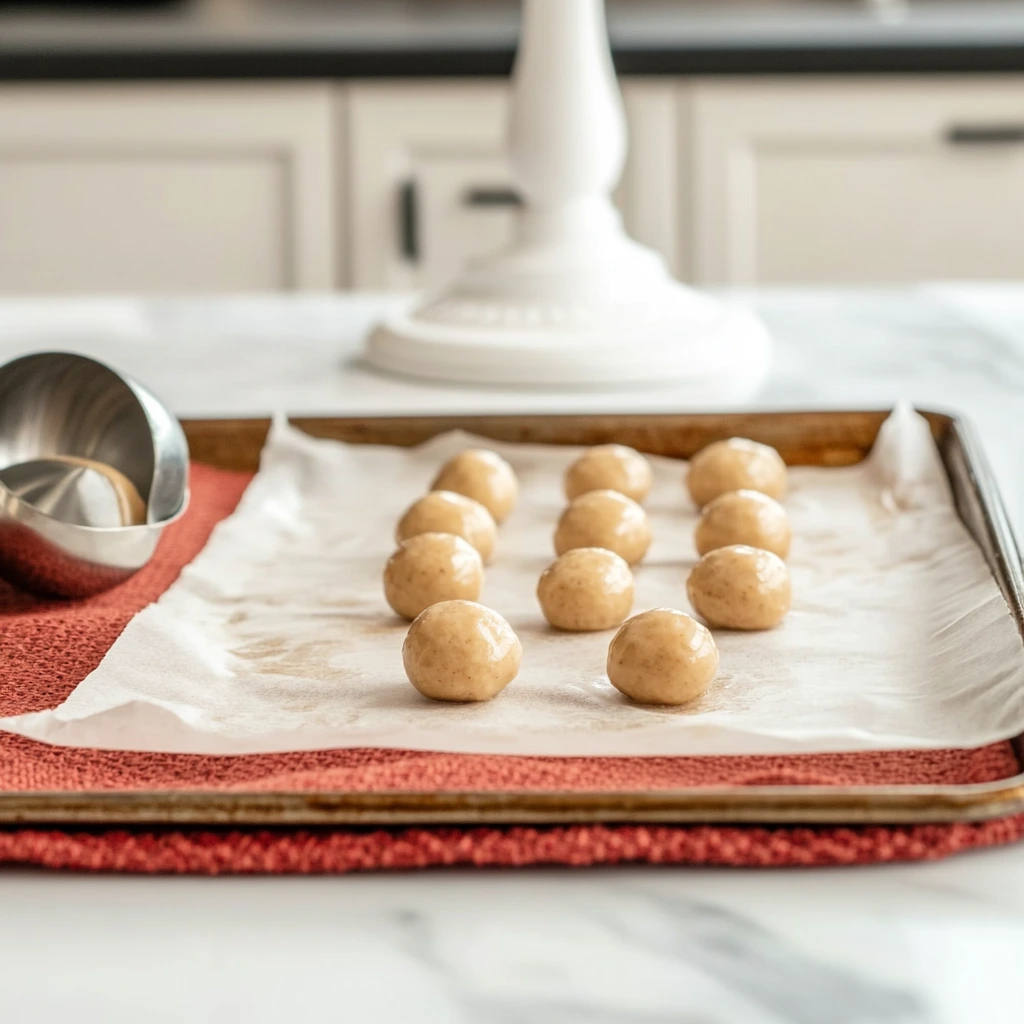
Use a small cookie scoop (about 1 teaspoon) or a measuring spoon to portion out walnut-sized scoops—roughly 1-inch balls.
Roll each mound between your palms, applying gentle pressure to form smooth, even spheres. If the mixture sticks, lightly dust your hands with powdered sugar.
Arrange the formed balls in neat rows on the prepared sheet, leaving a little space between each one.
Once complete, return the tray to the refrigerator for about 20 minutes. Chilled centers ensure the coating adheres properly and sets quickly.
Prepare Your Dipping Station
While the filling chills, set up a clean work area: a second parchment-lined tray for the coated candies, a small microwave-safe bowl for the candy coating, and two forks or a dipping tool.
If you like extra shine, stir in 1–2 teaspoons of coconut oil or vegetable shortening into your candy coating as it melts—this helps achieve that professional gleam.
Melt the Candy Coating
Place 16 ounces of your chosen candy coating (Ghirardelli melting wafers or Almond Bark) into the microwave-safe bowl.
Microwave at 50% power in 30-second intervals, stirring thoroughly between each burst, until the mixture is completely smooth and pourable. Be careful not to overheat; chocolate can seize if it gets too hot.
Dip Each Ball
Working one at a time, use your dipping tool or two forks to lower a chilled ball into the coating. Submerge it fully, then gently lift, tapping the tool’s handle on the bowl’s rim to shake off excess chocolate.
With a quick wrist twist, transfer the coated candy onto the second parchment-lined tray. Aim for an even coating and minimal “pooling” at the base.
Set and Repeat
Allow the dipped candies to rest at room temperature until the shells firm up—about 30 minutes. If your kitchen is warm, pop the tray into the fridge for 5–10 minutes to speed up setting without creating condensation.
Return to the remaining centers, reheating the coating briefly if it thickens. Continue dipping until all candies are coated.
Final Touches & Storage
If you’d like, use a toothpick to swirl on contrasting lines of white or dark chocolate for a decorative finish—just melt a small amount, transfer to a squeeze bag, and drizzle.
Once fully set, store your Martha Washington Candies in an airtight container at room temperature for up to two weeks. Layer with parchment or wax paper to keep them from sticking together.
Insider Tips & Variations
Uniform Size: Consistent scooping ensures that every candy takes the same time to chill and set—no half-done centers!
Flavor Twists: Swap maraschino cherries for finely chopped dried cranberries or candied orange peel for a bright zing. A teaspoon of almond or rum extract in the filling can add a nuanced aroma.
Miniature Morsels: For bite-sized charm, use a ¾-inch scoop and reduce chilling times by about 5 minutes.
Double Coating: For extra thickness, dip twice—let the first layer set, then dip again. This also helps seal any small cracks in the shell.
Chill Management: If your filling starts to soften while you work, simply return the tray to the fridge for a few minutes to re-firm.
FAQ Section and Conclusion
Frequently Asked Questions
1. Can I make the filling ahead of time and freeze it?
Absolutely! After mixing the filling, shape the balls and flash-freeze them on a parchment-lined tray for about an hour. Once firm, transfer to an airtight container or freezer bag. When you’re ready to dip, thaw in the refrigerator for 1–2 hours before coating.
2. My centers are too soft and fall apart when I try to roll them. What can I do?
This usually means the filling needs more chilling. Pop it back in the fridge for another 30–60 minutes. If it’s still too loose, stir in a tablespoon or two of extra powdered sugar or shredded coconut to absorb moisture and help it bind.
3. How do I avoid white streaks or bloom on the candy coating?
White streaks can form if the coating cools too quickly. Work in a cool, dry room, and avoid drastic temperature changes—don’t refrigerate dipped candies until the coating has fully set at room temperature. Adding a small amount of coconut oil when melting can also help prevent bloom.
4. What’s the best way to store Martha Washington Candies?
Store them in a single layer in an airtight container at room temperature, ideally between 65°F and 70°F. If you need to stack layers, place parchment or wax paper between them. They’ll keep beautifully for up to two weeks.
5. Can I use dark or white chocolate instead of candy coating wafers?
Yes! If you prefer real chocolate, choose high-quality chips or bars. Tempering is recommended for the best snap and shine: melt two-thirds of your chocolate to 115°F, stir in the remaining third to cool to 82°F, then gently reheat to 88–90°F before dipping.
6. My cherries sank to the bottom of the filling mixture—any tips?
To prevent sinking, toss chopped cherries in a teaspoon of powdered sugar before folding them into the filling. The light coating helps them suspend evenly throughout the mixture.
7. How can I add a festive touch to these candies?
Sprinkle finely chopped pistachios or crushed freeze-dried raspberries on top immediately after dipping for a pop of color and texture. You can also drizzle contrasting chocolate in zigzags or use edible gold dust for holiday glam.
Conclusion
There you have it—your complete guide to Martha Washington Candy, from the very first coconut-scented scoop to the last glossy, chocolate-coated bite. This timeless Southern treat isn’t just a candy; it’s a memory maker. Whether you’re gifting a beautifully wrapped box or setting out a plate for family and friends, these candies are bound to disappear in seconds.
Don’t be intimidated by the chilling and dipping steps—each one is part of the fun. With a bit of patience and the tips you’ve learned, you’ll have perfectly shaped, shiny treats that look like they came straight from a chocolatier. And if you encounter any hiccups—soft centers, bloom, or cherry-sinking—you now know exactly how to fix them.
So preheat your mixer, line your parchment, and gather your loved ones for a little kitchen party. Share your experiences, variations, and photos in the comments below—I love hearing how you make these candies your own. Here’s to sweet traditions, warm memories, and plenty of Martha Washington Candy to go around!
Print
Martha Washington Candy
- Author: Andrew Recipes
Description
For firmer bars, freeze for 30 minutes before cutting.
Use natural peanut butter for a more pronounced nutty flavor, but reduce any added salt if the butter is salted.
Caramel sauce can be home-made or store-bought; if using homemade, allow it to cool slightly before pouring to prevent it from melting the chocolate topping.
Store bars in an airtight container in the refrigerator for up to one week or freeze individual bars for longer storage.
Ingredients
1 ½ cups crispy rice cereal
1 cup smooth peanut butter
½ cup unsalted butter
1 cup powdered sugar
1 cup mini chocolate chips
1 cup salted roasted peanuts, chopped
1 cup caramel sauce
1 ½ cups semisweet chocolate chips
1 tablespoon coconut oil
Instructions
1 ½ cups crispy rice cereal
1 cup smooth peanut butter
½ cup unsalted butter
1 cup powdered sugar
1 cup mini chocolate chips
1 cup salted roasted peanuts, chopped
1 cup caramel sauce
1 ½ cups semisweet chocolate chips
1 tablespoon coconut oil
Notes
Martha Washington Candy
Description
A nostalgic Southern confection combining tender coconut and pecan–cherry centers enrobed in smooth chocolate. Sweetened condensed milk and powdered sugar bind shredded coconut, pecans, and chopped maraschino cherries into a rich, creamy filling. Once chilled and formed into bite-sized balls, each piece is dipped in candy coating for a crisp, glossy shell. Perfect for gifting or serving alongside coffee, these candies capture the classic flavors of a holiday treat without any baking.
Ingredients
1 cup butter, melted
1 pound powdered sugar
1 tablespoon vanilla extract
14 ounces sweetened shredded coconut
14 ounces sweetened condensed milk
10 ounces maraschino cherries, drained and chopped
3 cups finely chopped pecans
16 ounces candy coating (such as Ghirardelli melting wafers or Almond bark)
Instructions
Chop the drained maraschino cherries into small pieces, then blot them on paper towels to remove excess moisture.
In a large bowl, stir together melted butter, powdered sugar, vanilla extract, shredded coconut, sweetened condensed milk, chopped cherries, and pecans until fully combined into a thick, sticky mixture.
Cover the bowl and refrigerate the filling for at least two hours so it firms up—colder filling will help the chocolate coating set more quickly.
Use a small cookie scoop or a teaspoon to portion out walnut-sized balls (about 1 inch in diameter). Roll each portion between your palms to form smooth, round balls. Place the balls on a parchment-lined baking sheet and chill in the refrigerator for 20 minutes.
Meanwhile, prepare a clean baking sheet lined with fresh parchment paper. Melt the candy coating in a microwave-safe bowl according to package directions, stirring every 30 seconds until completely smooth.
One at a time, dip each chilled filling ball into the melted coating, using dipping tools or two forks to submerge and lift. Tap off any excess coating before setting the candy on the parchment. Allow the coated candies to set at room temperature until the shell is firm, about 30 minutes.
Repeat the dipping process until all the filling balls are coated. Store the finished candies in an airtight container at room temperature for up to two weeks.
Notes
For extra shine on the chocolate shell, stir in a small amount of coconut oil or vegetable shortening when melting the coating.
If your kitchen is warm, briefly chill the dipped candies in the fridge for 5 minutes to help the shell set without pooling at the base.
Variations can include swapping maraschino cherries for finely chopped dried cranberries or adding a teaspoon of almond extract for a nutty aroma.
To make smaller bite-sized candies, roll the filling into ¾-inch balls and reduce chilling times accordingly.


