
If you’ve ever found yourself in the mood for a comforting dessert but don’t want to spend hours in the kitchen, Poor Man’s Pie—also known as Hillbilly Pie—is the answer. This pie has a simple charm that harkens back to old-fashioned cooking, making it the kind of recipe you’ll want to keep on hand for those times when you crave something sweet but don’t have much in the pantry. With just a handful of ingredients, you can create a creamy, buttery dessert that feels like a hug in a slice.
I remember the first time I tried making Poor Man’s Pie. It was one of those nights when I didn’t have much to work with—just a few basics in my pantry, a lonely pie crust hanging out in the fridge, and an overwhelming urge for something sweet. I stumbled across this recipe, and boy, am I glad I did! It’s not just delicious, it’s also a wonderful reminder that the simplest things often turn out to be the most satisfying. Plus, it’s the kind of pie that doesn’t require a whole lot of skill or a ton of fancy ingredients. Just a few staples, a bit of time, and you’re on your way to pie heaven!
So let’s dive into making this timeless treat. It’s easy, budget-friendly, and perfect for a weeknight dessert or even a special occasion when you want something homemade but not too complicated.
Step 1: Preheat the Oven and Prepare the Pie Crust
The first step is to get your oven preheated to 375°F (190°C). This temperature is perfect for ensuring the pie bakes up nice and golden without drying out. While the oven is heating up, grab your 9-inch pie crust. You can either use a store-bought pie crust or, if you’re feeling fancy, make your own from scratch. No matter which route you choose, just make sure the crust is unbaked and ready to go.
Once your pie crust is in the pie pan, take a moment to crimp the edges however you like. Some people go for a fancy fluted design, while others keep it simple. Either way, just make sure the crust fits snugly in the pan and is ready to be filled with that dreamy, creamy filling.
Step 2: Mix the Dry Ingredients
Next, grab a small bowl and whisk together the sugar, flour, and cinnamon. Cinnamon isn’t an absolute must, but I definitely recommend adding it for a little extra warmth and flavor. It pairs so nicely with the buttery filling, giving the pie that comforting taste of home. If you’re not a cinnamon fan or want to experiment with other spices, feel free to skip it or use something else like nutmeg or allspice. The beauty of this pie is in its versatility—there’s no one “right” way to make it.
The sugar and flour are the base of the filling, helping to create that custard-like texture that makes Poor Man’s Pie so special. The flour helps thicken the milk while the sugar gives it just the right amount of sweetness. It’s the kind of combination that feels like a hug for your taste buds.

Step 3: Assemble the Pie
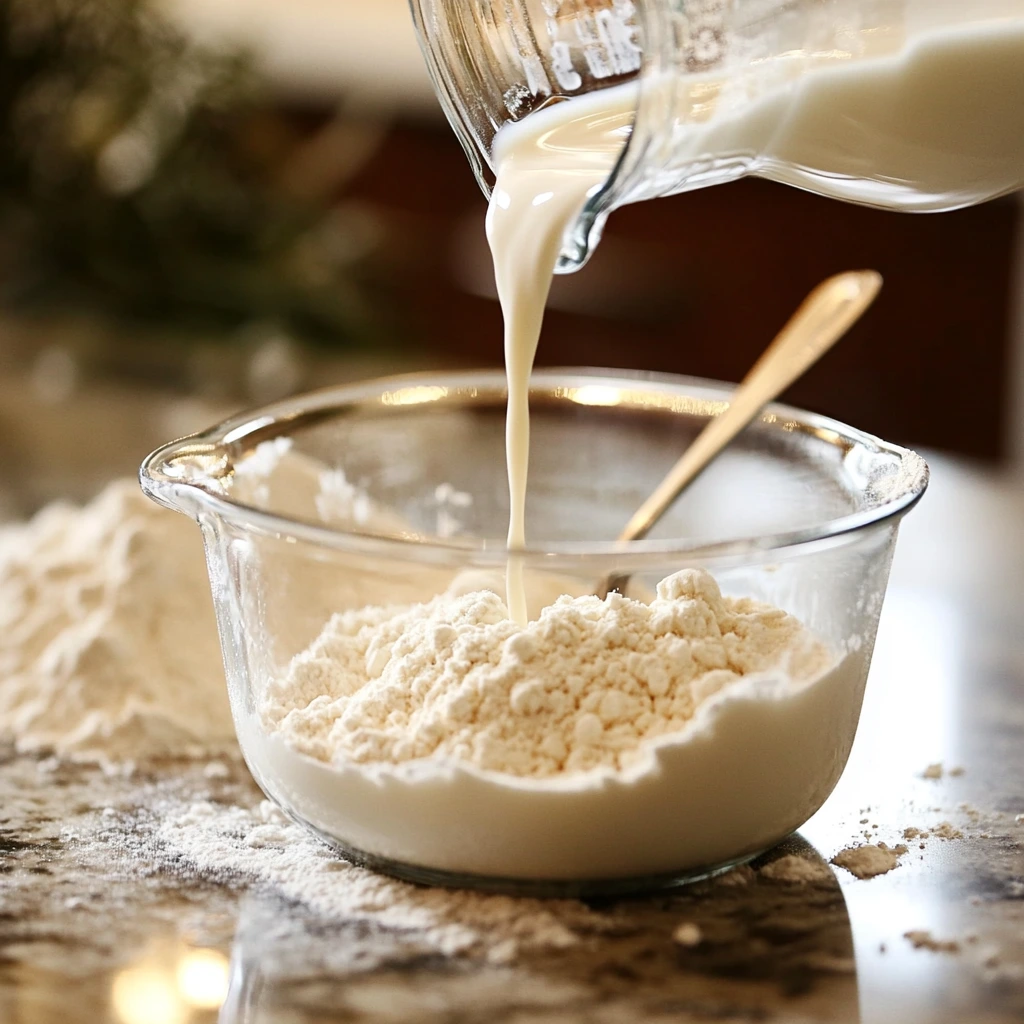
Now for the fun part—putting it all together. In a separate bowl or large measuring cup, pour in the two cups of whole milk. Add the dry ingredients you just mixed, and stir everything together until the mixture is smooth and fully combined. You want the milk to have a silky texture, so take a minute to make sure there are no lumps from the flour.
Once that’s all smooth, pour the milk mixture into your prepared pie crust. It will be liquid at this point, but don’t worry—it will thicken up beautifully as it bakes. To make the filling even more decadent, dot the top of the pie with cubed butter. This adds a richness that will melt into the filling as it bakes. Lastly, drizzle in a teaspoon of vanilla extract for that extra layer of flavor. The vanilla ties everything together, giving the pie a hint of warmth that’s perfect for cozying up with on a cool evening.
That’s all there is to the prep work for this pie—super simple and easy to pull together, even for beginner bakers!
Baking the Pie and Helpful Tips for Perfecting Your Poor Man’s Pie
Now that your pie is assembled and ready to go, it’s time to get it baking. This is where the magic happens—watching the ingredients transform into a golden, creamy, dreamy dessert that will have everyone asking for seconds. But before we throw it into the oven, let’s walk through the next few steps and tips to make sure your Poor Man’s Pie turns out just right.
Step 4: Bake the Pie
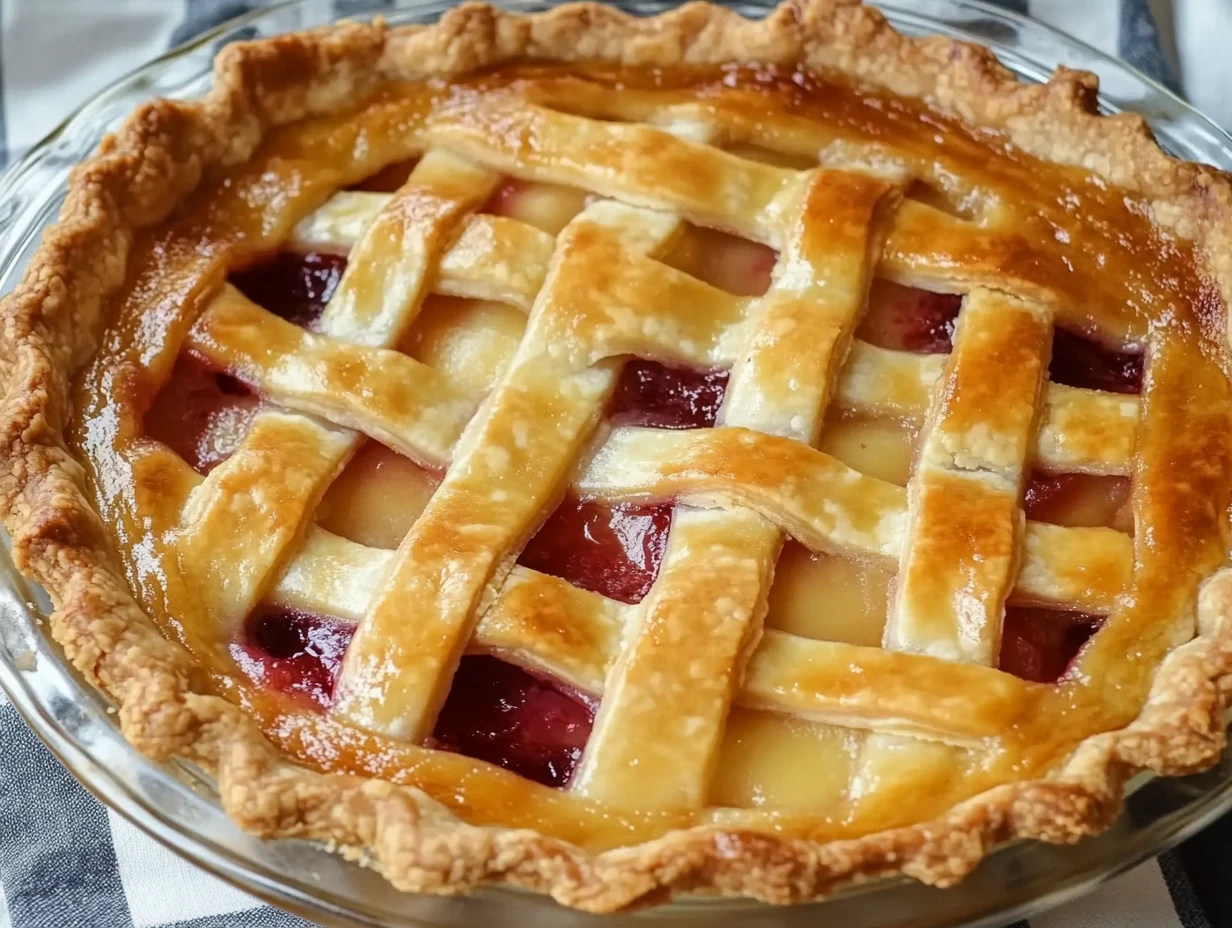
Place your pie into the preheated oven, and set a timer for 45 to 50 minutes. This is the sweet spot for baking this pie. As it bakes, the milk mixture will firm up into a custard-like filling, and the edges of the pie crust will become perfectly golden brown.
One important thing to note: the top of the pie should be lightly golden, but don’t be alarmed if it looks a bit bubbly around the edges as it bakes—that’s just the filling thickening and setting. Keep an eye on the crust, though. If it starts to get too dark too quickly, you can cover the edges with a piece of foil to prevent over-browning. You want the crust to be golden but not burnt, so just check on it every 15 minutes or so during baking.
It’s also worth mentioning that ovens can vary a bit, so your pie may need more or less time. After about 45 minutes, start checking for doneness by giving the pie pan a little jiggle. If the filling is mostly set and only a tiny bit wobbles in the center, it’s done! The top should be a soft golden brown, and the filling should be firm enough to hold its shape when you slice into it.
Step 5: Cool the Pie
Once your pie is out of the oven, it’s important to let it cool completely before slicing into it. I know, I know—waiting can be the hardest part, especially when the house smells like cinnamon-sweet goodness, but trust me on this one. The pie needs time to set and firm up. If you slice it too early, you may end up with a runny filling, and nobody wants that.
You can let it cool at room temperature, or if you prefer a firmer texture, pop it in the fridge for a couple of hours. I personally love it chilled—it gives the pie that perfect sliceable consistency. But if you can’t wait and want to dive in warm, that’s okay too! There’s no wrong way to enjoy this dessert.
Step 6: Optional Add-Ins and Variations
One of the best things about Poor Man’s Pie is its flexibility. You can really get creative with it if you want to switch things up or add your own personal touch. Here are a few ideas to consider:
- Eggs for Richness: If you prefer a richer, more custard-like filling, you can whisk a couple of beaten eggs into the milk mixture before you pour it into the crust. The eggs will give the filling a slightly thicker, creamier texture.
- Spices: Cinnamon is the classic spice here, but you can experiment with other options too! Nutmeg, allspice, or even a little dash of ginger would add wonderful flavor to the filling. Don’t be afraid to play around with these spices based on what you have on hand or what flavors you love most.
- Add a Topping: While Poor Man’s Pie is fantastic on its own, it’s also great served with a little extra indulgence. Consider topping it with a dollop of whipped cream or a scoop of vanilla ice cream. If you want to get fancy, a sprinkle of cinnamon or nutmeg on top of the whipped cream adds a nice touch.
- Fruit Add-ins: For a fruity twist, you could fold some sliced bananas or berries into the filling before baking. The sweetness of the fruit would blend perfectly with the creamy texture of the filling and add a pop of color to the pie.
The beauty of this pie is its simplicity, but that doesn’t mean you can’t make it your own. Play around with the ingredients and find the combination that works best for you and your family!
Frequently Asked Questions and Conclusion
After walking through the steps to make Poor Man’s Pie, I’m sure you’re ready to dive in and try it yourself! But before you do, here are a few frequently asked questions to help you troubleshoot any issues and ensure your pie turns out perfectly. Plus, I’ll leave you with a few final thoughts on why this pie is such a gem.
FAQ Section
1. Can I use a pre-baked pie crust for Poor Man’s Pie?
Technically, you can use a pre-baked pie crust, but I would recommend using an unbaked one for the best results. The unbaked crust will absorb some of the filling as it bakes, creating a softer, more cohesive texture. If you do use a pre-baked crust, just be aware that the bottom of the pie may turn out a bit more crisp or even dry.
2. Can I make this pie ahead of time?
Yes! Poor Man’s Pie actually holds up quite well when made ahead of time. You can bake it a day or two before serving, and then just let it cool completely and store it in the refrigerator. This is a great option if you’re prepping for a dinner party or holiday gathering. Just be sure to let it cool before storing it to avoid sogginess.
3. How do I know when the pie is done?
The easiest way to tell if your Poor Man’s Pie is done is to check for a mostly set filling. You can give the pie a little jiggle—if the center is still very wobbly, it likely needs more time. The top should also be lightly golden brown, and the edges of the crust should be a rich, golden color. If you’re unsure, it’s always better to give it a few extra minutes in the oven to make sure it’s fully set.
4. Can I freeze Poor Man’s Pie?
Yes, Poor Man’s Pie can be frozen for later! After baking and cooling the pie completely, wrap it tightly in plastic wrap and aluminum foil, then place it in the freezer. To serve, let it thaw in the fridge overnight and then warm it up in the oven at 350°F for about 10 minutes to refresh the crust. Freezing works well for preserving the pie, though the filling may lose a bit of its smooth texture once frozen.
5. Can I add other ingredients to the filling?
Absolutely! Poor Man’s Pie is very adaptable. You can try adding a bit of lemon zest or orange zest to the milk mixture for a citrusy kick. Some people also like to mix in a splash of bourbon or rum for a grown-up twist. Don’t hesitate to experiment and find the flavor profile that you enjoy most.
6. Can I make this pie dairy-free or vegan?
While this recipe relies on whole milk and butter for its creamy texture, you can easily swap those for dairy-free alternatives. Use a non-dairy milk like almond milk, oat milk, or coconut milk and replace the butter with a plant-based option. Keep in mind that the texture might change slightly, but it should still be a delicious treat!
7. How can I get a crispier crust?
If you love a crispy, flaky crust, here’s a trick: Blind bake the crust before adding the filling. To do this, line the unbaked crust with parchment paper and fill it with pie weights or dried beans. Bake the crust for about 10-12 minutes, then remove the paper and weights and continue assembling the pie. This ensures the crust stays crisp and doesn’t get soggy from the filling.
Conclusion
Poor Man’s Pie is one of those desserts that proves you don’t need fancy ingredients or complicated techniques to create something truly special. With just a handful of pantry staples, you can whip up a creamy, comforting pie that will make your house smell amazing and leave everyone at the table satisfied. Whether you’re on a budget, looking for an easy weeknight dessert, or simply craving something homemade, this pie is a winner every time.
What I love most about Poor Man’s Pie is its simplicity. It’s the kind of recipe that you can make even when you’re low on time or ingredients but still want to serve something delicious and homemade. Plus, it has that old-fashioned charm that makes you feel like you’re sitting at a kitchen table, enjoying a slice with a cup of tea, just like they did back in the day.
So, what are you waiting for? Grab your ingredients, preheat that oven, and get ready to enjoy the most comforting slice of nostalgia you’ve ever had. Don’t forget to share your thoughts and any variations you try—I’d love to hear how it turns out for you! Happy baking!
Print
Poor Man’s Pie (Hillbilly Pie)
- Author: Andrew Recipes
Description
Poor Man’s Pie, also known as Hillbilly Pie, is a simple yet delicious dessert that combines a few basic pantry ingredients to create a creamy, comforting treat. With a buttery pie crust, sweet milk-based filling, and a hint of cinnamon, this pie has an old-fashioned charm that’s both satisfying and nostalgic. It’s an easy, budget-friendly dessert that’s perfect for any occasion, and it can be made with ingredients you probably already have in your kitchen!
Ingredients
- 1 unbaked 9-inch pie crust (store-bought or homemade)
- 1 cup sugar
- 2 tablespoons all-purpose flour
- 1/4 teaspoon ground cinnamon (optional, for added flavor)
- 2 cups whole milk
- 2 tablespoons unsalted butter, cubed
- 1 teaspoon vanilla extract
Instructions
Preheat the Oven
Preheat your oven to 375°F (190°C). Place the unbaked pie crust into a 9-inch pie pan and crimp the edges as desired.
Mix the Dry Ingredients
In a small bowl, whisk together the sugar, flour, and cinnamon (if using).
Assemble the Pie
In a separate bowl or large measuring cup, combine the whole milk and the dry ingredients. Stir until the mixture is smooth. Pour the milk mixture into the unbaked pie crust. Dot the top of the filling with the cubed butter, and then add the vanilla extract.
Bake the Pie
Place the pie in the preheated oven and bake for 45-50 minutes, or until the center is set and the top is lightly golden brown. You may need to cover the edges of the crust with foil if it starts to brown too quickly.
Cool and Serve
Allow the pie to cool completely before slicing. It can be served at room temperature or chilled for a firmer texture.
Notes
This pie is incredibly versatile and can be adapted to your taste. For extra flavor, you can sprinkle a little nutmeg or allspice in place of the cinnamon. If you’d like a richer filling, you can add a couple of beaten eggs to the milk mixture. Serve this pie with whipped cream or vanilla ice cream for an extra indulgent treat!

