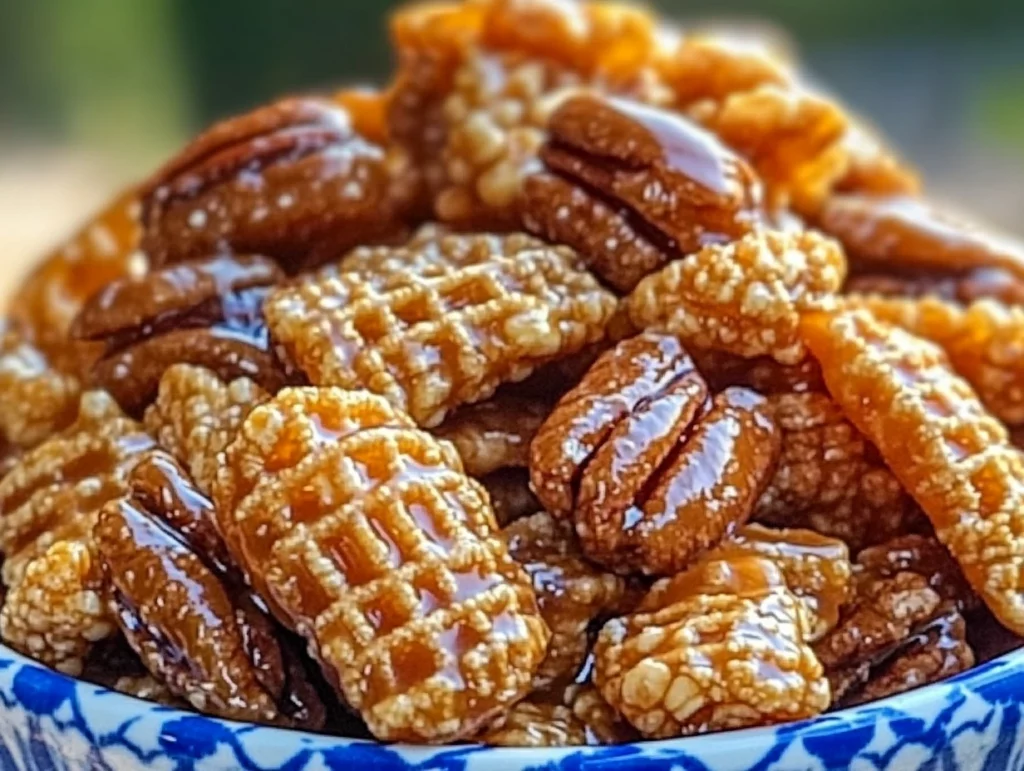
There’s something magical about the combination of sweet caramelized coating, crunchy cereal, and buttery pecans. If you’re looking for a snack that’s perfect for movie nights, holiday gifts, or just an afternoon treat, this Praline Crunch is exactly what you need. It’s easy to make, incredibly addictive, and stays fresh for days—though, let’s be honest, it never lasts that long!
This recipe is one of those dangerously good snacks that you keep coming back to for “just one more handful.” With a rich praline coating that’s light and crispy, it has the perfect balance of sweetness and crunch. Whether you’re a fan of classic Crispix cereal or prefer to mix in different types of nuts, this recipe is flexible and foolproof.
Now, let’s get into the step-by-step process of making this delicious treat.
Gather Your Ingredients
Before you start, make sure you have everything ready to go. Here’s what you’ll need:
- Crispix cereal – The base of this crunchy snack, but you can swap in Chex or another similar cereal if you prefer.
- Pecan halves – These add a nutty, buttery richness. Feel free to mix in other nuts like almonds or cashews.
- Brown sugar – Adds deep caramel-like sweetness.
- Light corn syrup – Helps create that glossy, crispy coating.
- Unsalted butter – Because everything is better with butter!
- Baking soda – This helps aerate the caramel coating, giving it a light, crispy texture.
- Vanilla extract – Enhances the sweetness and flavor.
Prepping for Success
Start by preheating your oven to 250°F (120°C). This low temperature ensures that the coating sets properly without burning. Line a large baking sheet with parchment paper or a silicone baking mat to make cleanup a breeze.
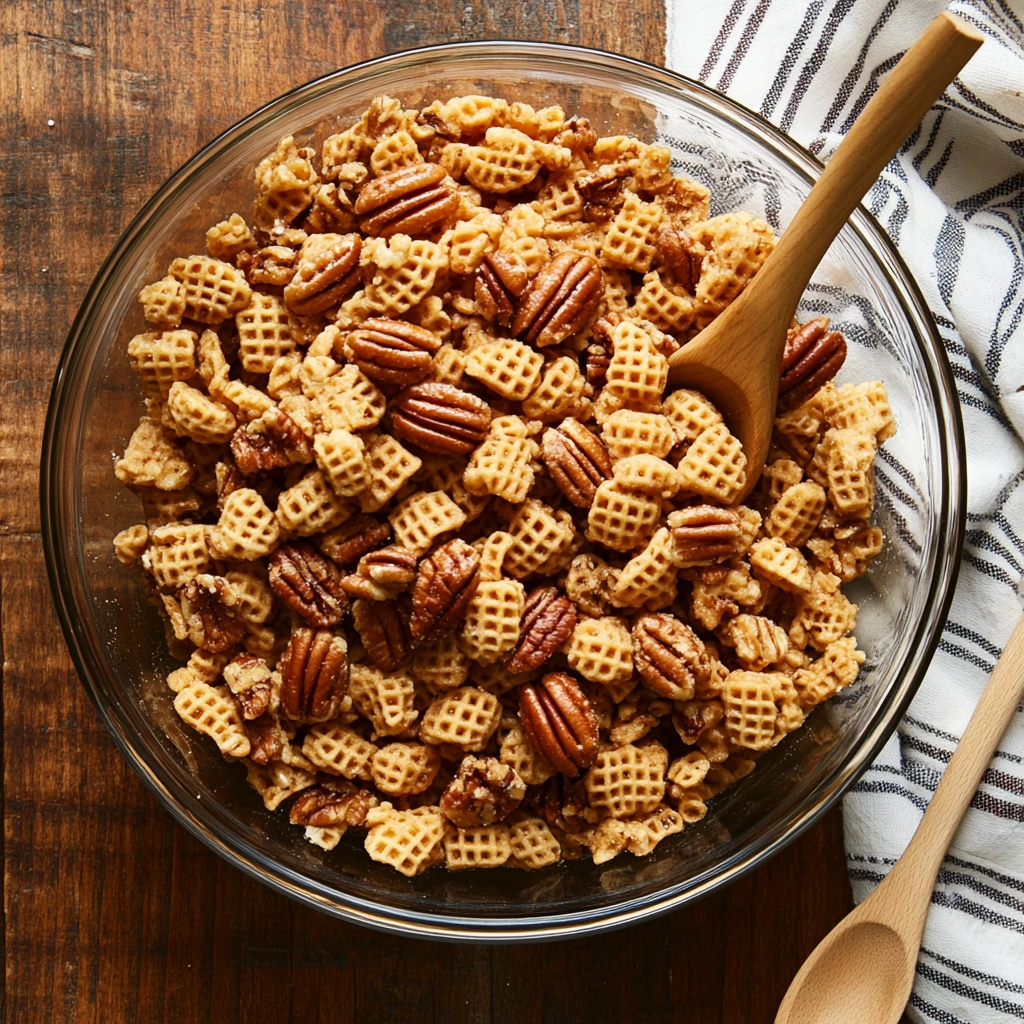
In a large mixing bowl, combine 8 cups of Crispix cereal and 2 cups of pecan halves. Give it a gentle toss to distribute the nuts evenly. Set this aside while you make the praline coating.

Making the Praline Coating
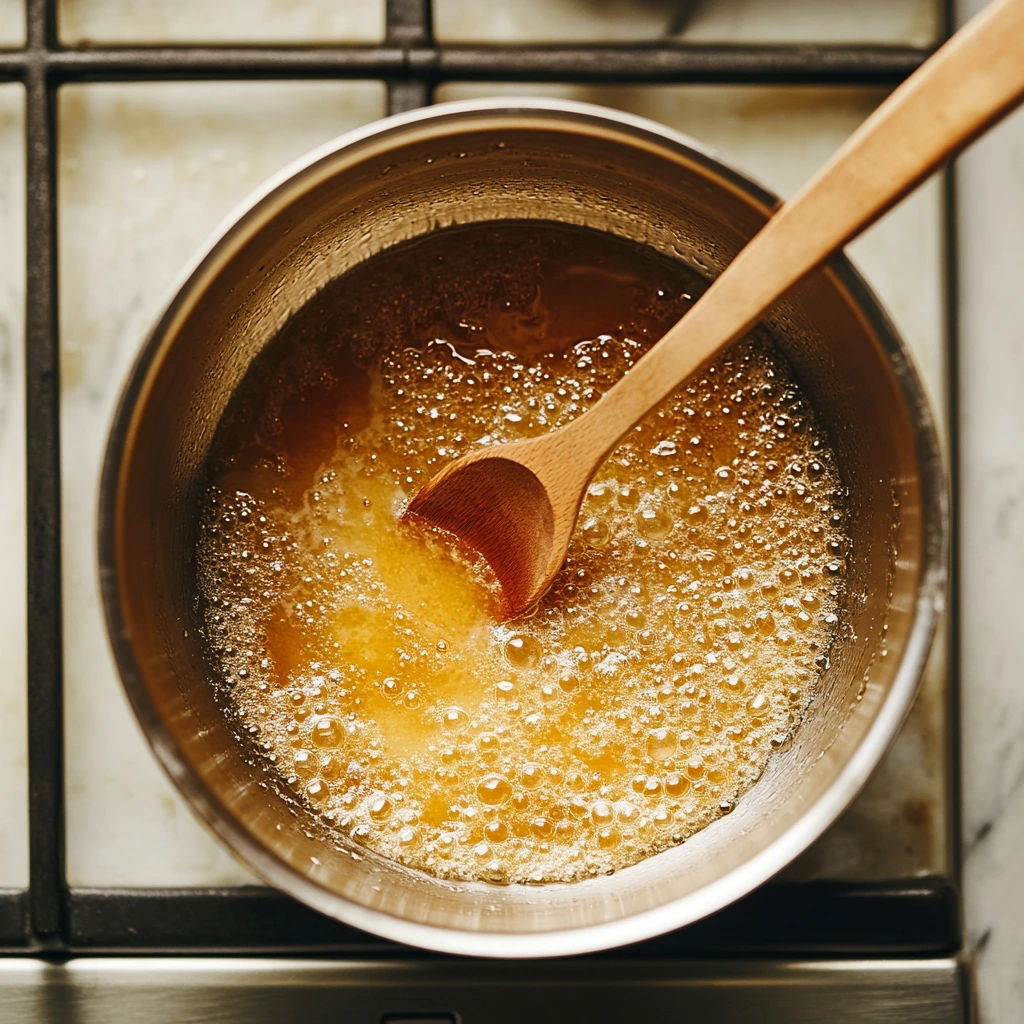
Now, it’s time for the magic to happen! In a medium saucepan, combine:
- 1 cup of packed light brown sugar
- 1/2 cup of light corn syrup
- 1/2 cup of unsalted butter
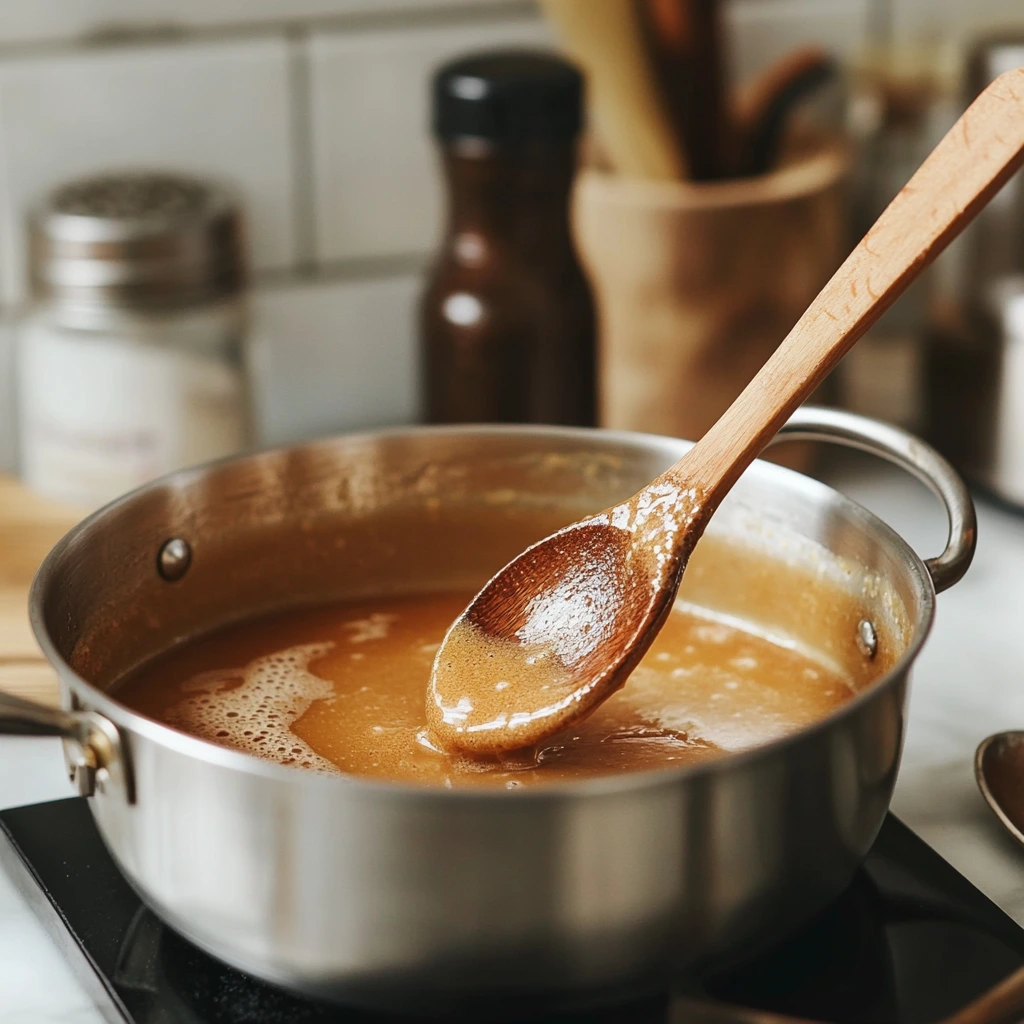
Place the saucepan over medium heat, stirring continuously as the butter melts and the mixture starts to come together. Once it reaches a boil, let it bubble for exactly 2 minutes, still stirring.
After the 2-minute mark, remove the saucepan from heat and stir in 1/4 teaspoon of baking soda and 1 teaspoon of vanilla extract. This is where the science kicks in—the baking soda reacts with the sugar mixture, causing it to bubble up slightly. This helps create that light, crispy texture in the final product.
Perfecting Your Praline Crunch: Coating and Baking
Now that we’ve made the rich, caramelized praline coating, it’s time to bring everything together. This step is where the magic happens—coating each piece of cereal and pecans with that buttery, sugary glaze and baking it to crispy perfection.
If you’ve never made a snack like this before, don’t worry. The process is simple, and the results are more than worth it. Just be sure to stir everything well so that each bite is evenly coated.
Coating the Cereal and Nuts
With the praline mixture ready, it’s time to pour it over the Crispix and pecan mix. Slowly drizzle the hot caramel mixture over the cereal and nuts while gently stirring with a spatula. This ensures that every piece gets an even coating.
Tips for an Even Coating:
- Work quickly—the praline mixture thickens as it cools.
- Use a silicone spatula or wooden spoon to fold everything together gently.
- If you see clumps forming, keep stirring to spread the coating evenly.
Once everything is fully coated, transfer the mixture onto the prepared baking sheet, spreading it out as evenly as possible. Don’t worry if it looks slightly sticky or uneven at this stage—baking will help set the caramel and create that light, crunchy texture.
Baking to Golden Perfection
Set your oven to 250°F (120°C) and place the baking sheet on the center rack. This low and slow baking method ensures the praline coating crisps up without burning.
Bake for 1 hour, stirring every 15 minutes to prevent sticking and ensure even caramelization. The goal is to get a golden, crisp texture on every piece.
Why Stir Every 15 Minutes?
- It prevents the mixture from clumping together.
- It allows all sides of the cereal and nuts to crisp up evenly.
- It helps distribute the praline coating for a balanced flavor.
By the time the hour is up, your kitchen will be filled with the irresistible aroma of caramelized pecans and buttery praline. Remove the baking sheet from the oven and let the Praline Crunch cool completely.
Breaking It Up and Storing for Freshness
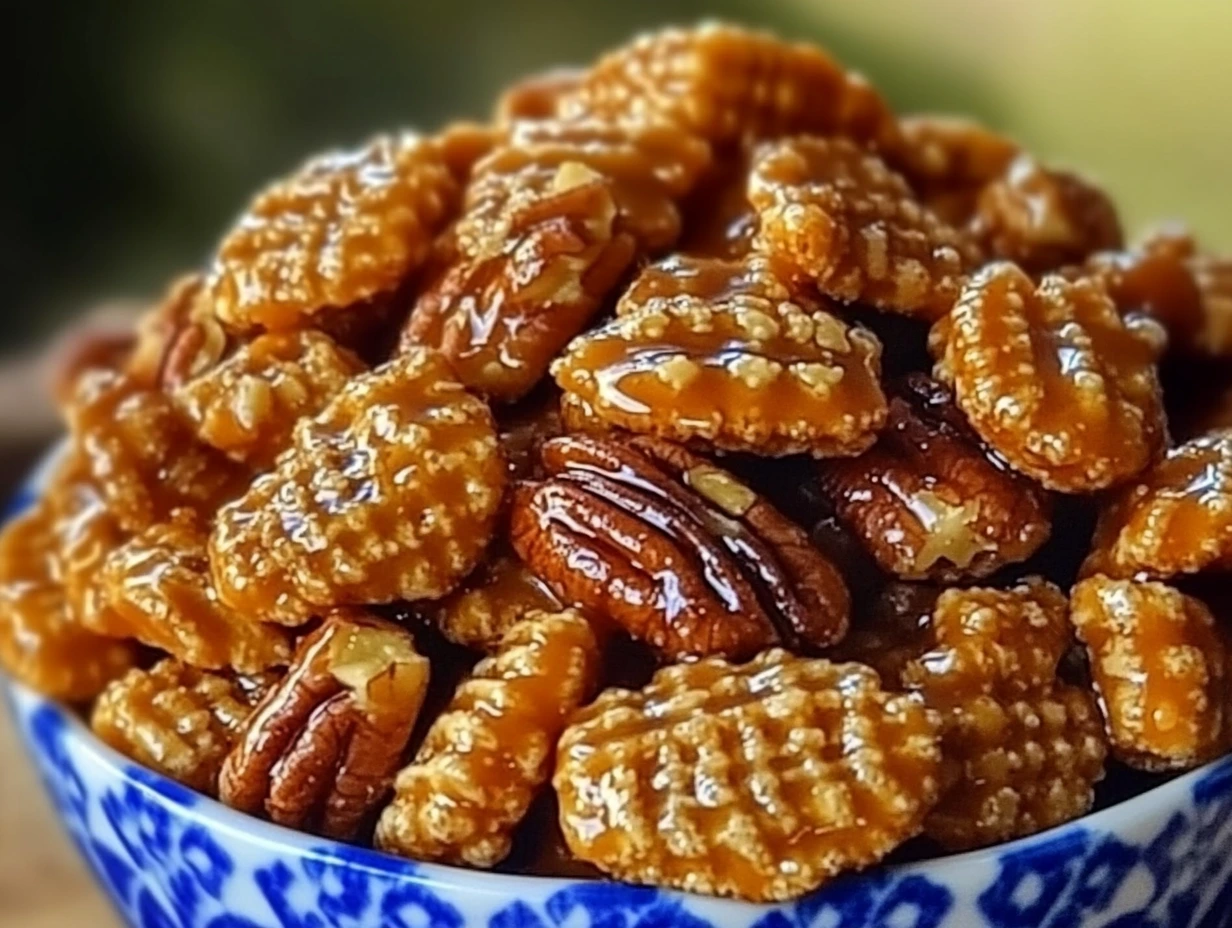
Once cooled, break the Praline Crunch into bite-sized pieces. It should snap apart easily, leaving you with perfectly crunchy, caramel-coated cereal and nuts.
Storage Tips:
- Store in an airtight container at room temperature for up to a week.
- For longer storage, keep it in a sealed bag or container in the freezer—it stays fresh and crisp for up to a month.
- Avoid humidity and direct sunlight, as moisture can make it sticky.
This snack is perfect for gifting, especially during the holidays. Just pack it into decorative tins or jars for a delicious homemade treat that everyone will love.
Fun Variations and Add-Ins
Want to switch things up? Here are some ways to customize your Praline Crunch:
- Try different cereals – While Crispix is classic, Chex (corn, rice, or wheat) works just as well.
- Experiment with nuts – Swap pecans for almonds, cashews, or walnuts for a new flavor twist.
- Add a chocolate drizzle – Melt some chocolate and drizzle it over the cooled Praline Crunch for extra indulgence.
- Mix in dried fruit – Dried cranberries or chopped dried apples add a chewy contrast to the crunch.
- Make it spicy – Add a pinch of cayenne pepper or cinnamon for a subtle heat that balances the sweetness.
Praline Crunch FAQ and Final Thoughts
By now, you have a delicious batch of homemade Praline Crunch ready to enjoy! Whether you’re munching on it straight from the container, sharing it with friends, or gifting it for the holidays, this sweet and crispy snack is sure to be a hit.
Before we wrap up, let’s go over some frequently asked questions to ensure your Praline Crunch turns out perfectly every time.
Frequently Asked Questions
1. Can I use a different type of cereal instead of Crispix?
Yes! Chex cereal (corn, rice, or wheat) is a great alternative. You can also experiment with other crunchy cereals, but avoid ones that are already heavily sweetened.
2. Why do I need to add baking soda to the caramel mixture?
Baking soda creates tiny air bubbles in the praline coating, giving it a lighter, crispier texture. Without it, the coating could become too hard and sticky.
3. How do I keep Praline Crunch from sticking together?
Stirring the mixture every 15 minutes while baking prevents clumping. After it cools, break up any larger pieces with your hands before storing.
4. Can I make this recipe without nuts?
Absolutely! If you have a nut allergy or prefer a nut-free version, simply omit the pecans or substitute them with pretzels or sunflower seeds for a different crunch.
5. How long does Praline Crunch stay fresh?
Stored in an airtight container, it stays fresh and crisp for about a week at room temperature. If you want to keep it longer, freeze it for up to a month.
6. Can I add chocolate to this recipe?
Yes! Once the Praline Crunch has cooled, drizzle it with melted chocolate (milk, dark, or white) for an extra layer of flavor. Let the chocolate set before breaking into pieces.
7. Can I double the recipe?
Yes, but be sure to use two baking sheets to avoid overcrowding. This ensures that the praline coating crisps up evenly.
Final Thoughts on This Irresistible Snack
Praline Crunch is one of those recipes that’s easy to make, dangerously addictive, and perfect for any occasion. Whether you’re snacking on it during a movie night, packing it into lunchboxes, or gifting it in festive tins, it’s always a crowd-pleaser.
One of the best things about this recipe is how versatile it is. You can customize it with different nuts, cereals, or mix-ins, making it unique every time. Plus, with its long shelf life, it’s an ideal make-ahead treat for holidays and gatherings.
If you try this recipe, let me know how it turns out! Did you add any fun twists? Leave a comment and share your experience. Happy snacking!
Print
Praline Crunch
- Author: Andrew Recipes
Description
A sweet, crunchy, and buttery snack with the perfect balance of caramelized praline coating and nutty goodness. Great for parties, gifts, or an indulgent treat!
Ingredients
- 8 cups Crispix cereal (or your favorite crunchy cereal)
- 2 cups pecan halves (or a mix of your favorite nuts)
- 1 cup light brown sugar, packed
- 1/2 cup light corn syrup
- 1/2 cup unsalted butter
- 1/4 teaspoon baking soda
- 1 teaspoon vanilla extract
Instructions
Preheat your oven to 250°F (120°C) and line a large baking sheet with parchment paper or a silicone baking mat for easy cleanup.
In a large mixing bowl, combine the Crispix cereal and pecan halves, then set aside.
In a medium saucepan, combine the brown sugar, corn syrup, and butter. Cook over medium heat, stirring constantly, until the mixture comes to a boil. Let it boil for 2 minutes, then remove from heat. Stir in the baking soda and vanilla extract. The mixture will bubble up slightly—this is normal and helps create the light, crispy coating.
Pour the praline mixture over the cereal and nuts in the bowl. Gently stir with a spatula to coat everything evenly.
Spread the coated mixture evenly onto the prepared baking sheet. Bake for 1 hour, stirring every 15 minutes to ensure even coating and prevent sticking.
Remove from the oven and let the praline crunch cool completely on the baking sheet. Once cooled, break into bite-sized pieces and transfer to an airtight container for storage.
Notes
- Store in an airtight container to maintain freshness for up to a week.
- Try mixing in other nuts like almonds or cashews for variety.
- This makes a great homemade gift or party snack.

