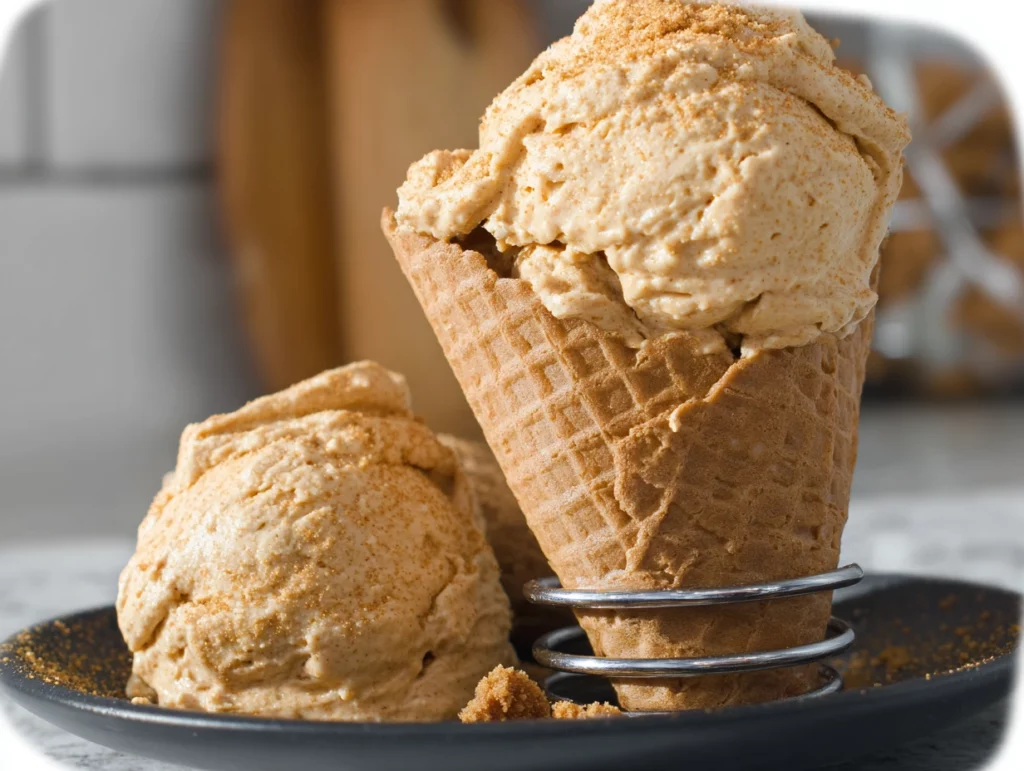
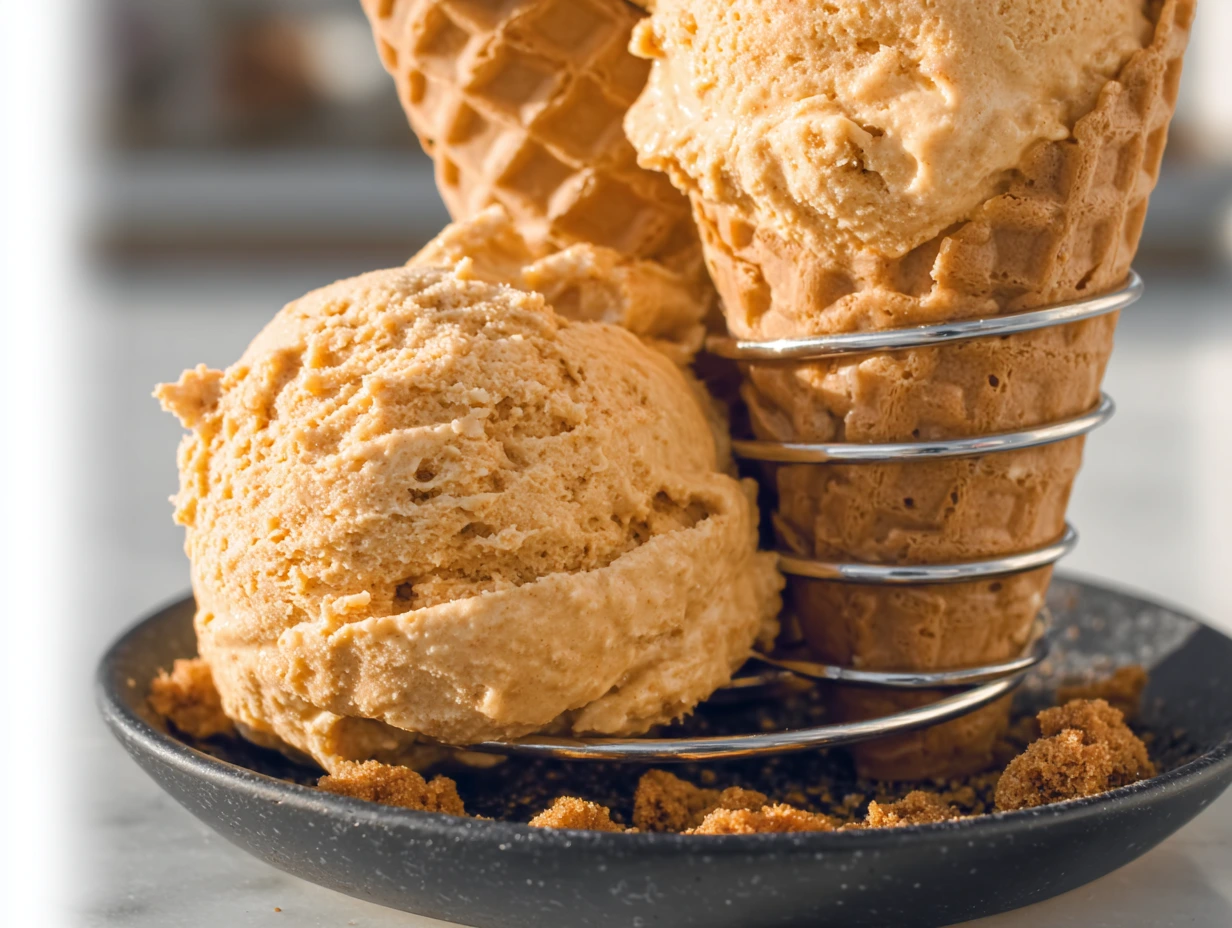
There’s something about fall flavors that feels like a warm hug—cinnamon, nutmeg, cloves, and that rich, earthy pumpkin. Now imagine those comforting flavors swirled into a creamy, dreamy scoop of ice cream. That’s exactly what this Pumpkin Ice Cream delivers—a little bite of autumn, no matter the season.
I’ll be honest with you—pumpkin isn’t just for lattes and pies anymore. This pumpkin ice cream has become one of my go-to fall desserts, especially when I want something unique for a holiday gathering or just a cozy weekend treat. The first time I made it, I paired it with a slice of warm apple pie, and let me tell you—it was gone in seconds.
So whether you’re gearing up for Thanksgiving, craving a sweet bite after Sunday dinner, or just looking for a way to use up that can of pumpkin in the back of your pantry, this recipe has you covered. Let’s dive right in and get started on making your new favorite fall treat.

Ingredients You’ll Need
Here’s everything you need to whip up this creamy pumpkin ice cream:
1 cup pumpkin puree
1 cup heavy cream
1 cup whole milk
3/4 cup brown sugar
4 large egg yolks
1 teaspoon vanilla extract
1 teaspoon cinnamon
1/2 teaspoon ground ginger
1/4 teaspoon nutmeg
1/8 teaspoon ground cloves
Pinch of salt
You probably already have most of these ingredients in your kitchen, especially if you’re a fall baking fan. I love how the spice blend gives this ice cream that pumpkin pie flavor, without being overpowering.
STEP 1: Heat the Cream and Sugar Mixture
In a medium saucepan, whisk together your whole milk, heavy cream, and half of the brown sugar. Turn the heat to medium and warm the mixture until it’s steaming. You don’t want it to boil—just hot enough to start cooking the base gently.
Tip: Keep an eye on the pot! Cream heats up fast, and you don’t want to scorch it. A little patience here sets the tone for the rest of your creamy, custardy base.
STEP 2: Whisk the Egg Yolks and Remaining Sugar
In a separate medium bowl, whisk your egg yolks and the remaining brown sugar. You’ll want to whisk it until it turns thick and pale—that’s how you know the sugar is fully incorporated and the yolks are ready to temper.
Tempering sounds a bit fancy, but it just means slowly warming up the eggs so they don’t scramble when they hit the heat.
STEP 3: Temper the Egg Mixture
Now, this step is all about control. Slowly pour about half of the hot cream mixture into the egg yolks, whisking constantly. That constant whisking is crucial—it keeps everything smooth and lump-free.
Once your egg mixture is tempered, pour it all back into the saucepan with the rest of the warm cream. Keep your heat on low, and stir constantly. You’ll want to do this until the custard thickens enough to coat the back of a spoon. This usually takes 5 to 7 minutes.
Test Tip: Dip a spoon into the custard and run your finger through the back—if the line holds, it’s ready!
STEP 4: Add the Pumpkin and Spices
Time for the magic! Once you’ve removed the saucepan from the heat, whisk in your pumpkin puree, vanilla extract, cinnamon, ginger, nutmeg, cloves, and that little pinch of salt.
This is where the ice cream really comes alive. The mixture should be smooth, creamy, and smell like your favorite fall candle (in the best way possible).
How to Finish and Customize Your Pumpkin Ice Cream
Now that you’ve whisked, tempered, and spiced your way to a beautiful pumpkin custard base, it’s time to chill and churn. This next phase is where the transformation really happens—turning your warm, fragrant custard into a creamy, scoopable fall dessert. It’s easier than you think, and with a few little tips and tricks, you can make it taste like it came straight from a gourmet ice cream shop.
Before we jump into the next steps, let me just say: this is the point where your kitchen will smell amazing. That warm pumpkin spice blend lingers in the air, and it’s hard not to sneak a spoonful. But hold off—this custard still needs time to chill before it becomes ice cream.
STEP 5: Strain and Chill the Custard
Once the pumpkin, spices, and vanilla have been whisked into your custard, go ahead and pour the whole mixture through a fine mesh sieve into a clean bowl. This step catches any little bits of cooked egg that might have formed during the cooking process, giving you a silky smooth ice cream base.
After straining, cover the bowl with plastic wrap—make sure the wrap is touching the surface of the custard. This prevents a skin from forming on top. Pop it in the fridge for at least 4 hours, though overnight is even better if you can wait. The flavors deepen, and the custard thickens just enough to churn beautifully.
STEP 6: Churn the Ice Cream
Once your custard is fully chilled, it’s time to churn! Pour the cold mixture into your ice cream maker and churn it according to the manufacturer’s instructions. Most machines take anywhere from 20 to 30 minutes.
You’re looking for a soft-serve consistency—it should be thick, creamy, and hold its shape when scooped. If you’re not sure it’s ready, dip a spoon in and give it a little taste test (purely for quality control, of course).
STEP 7: Add Optional Mix-Ins (Optional but Fun!)
Right after churning—when your ice cream is still soft—is the perfect time to stir in any extras you’d like. Here are some of my personal favorites that add just the right amount of texture and flavor:
Crushed gingersnap cookies – These add a spicy crunch that plays perfectly with the pumpkin.
Candied pecans – Sweet, buttery, and slightly salty, they make every bite interesting.
Swirls of caramel sauce – For those who like a little extra indulgence.
Just gently fold them in with a spatula before transferring the ice cream to your freezer-safe container.
STEP 8: Freeze Until Firm
Transfer the churned ice cream into a loaf pan or airtight container, smooth the top, and press a piece of parchment paper or plastic wrap against the surface to prevent ice crystals. Freeze for at least 4 hours, or until it’s firm enough to scoop.
And here’s the best part—this ice cream only gets better with time. The spices mellow slightly, the pumpkin flavor deepens, and the texture becomes even creamier after a night in the freezer. It’s a great make-ahead dessert, especially during the holiday season when oven space is at a premium.
Serving Ideas and Variations
If you’re looking to level up your pumpkin ice cream experience, try one of these delicious serving ideas:
Serve it with a warm slice of pecan pie or apple crisp for a hot-and-cold dessert that’s truly next-level.
Top with a dollop of whipped cream and a sprinkle of cinnamon for a pumpkin-pie-inspired sundae.
Scoop it into a graham cracker crust and freeze for a no-bake pumpkin ice cream pie.
You could even sandwich a scoop between two chewy molasses cookies for a fall-themed ice cream sandwich.
Pumpkin Ice Cream FAQ + Final Thoughts
By now, you’ve prepped, chilled, churned, and frozen your way to one of the creamiest, coziest homemade ice creams you’ll ever taste. But before you grab your scoop and dig in, let’s answer some of the most common questions that come up when making this fall-inspired treat.
Whether you’re making pumpkin ice cream for the first time or adding it to your seasonal dessert rotation, this FAQ section will help you feel confident every step of the way.
Frequently Asked Questions
1. Can I make pumpkin ice cream without an ice cream maker?
Yes, you can! After chilling the custard, pour it into a shallow freezer-safe dish. Place it in the freezer and stir it every 30 minutes for about 3 to 4 hours until it reaches a creamy consistency. It won’t be quite as fluffy as churned ice cream, but the flavor will still be amazing.
2. Is canned pumpkin okay to use?
Absolutely. Just make sure to use 100% pure pumpkin puree, not pumpkin pie filling. The pie filling has added sugar and spices, which will throw off the flavor and balance of this recipe.
3. How long does homemade pumpkin ice cream last in the freezer?
Stored properly in an airtight container, it will last about 2 to 3 weeks in the freezer. For best texture and flavor, enjoy it within the first week.
4. Can I use non-dairy milk or cream alternatives?
You can experiment with full-fat coconut milk or other non-dairy options, but keep in mind that the texture may change. The high fat content in cream and whole milk is what gives this ice cream its rich and smooth consistency.
5. Why do I need to strain the custard?
Straining helps remove any bits of cooked egg that might make the final ice cream gritty. It ensures a smooth, creamy base that freezes beautifully.
6. Can I adjust the spice level?
Definitely. If you love cinnamon, feel free to add a bit more. Prefer a little less clove or nutmeg? Dial it down to suit your taste. You can even add a pinch of allspice for an extra fall flavor twist.
7. Is this recipe gluten-free?
Yes, the base recipe is naturally gluten-free. Just be careful with any add-ins (like cookies or mix-ins) if you’re serving someone with a gluten intolerance.
Final Thoughts: Why This Pumpkin Ice Cream Belongs in Your Fall Recipe Rotation
Pumpkin ice cream is one of those recipes that surprises people—in the best way. It captures all the cozy, nostalgic flavors of pumpkin pie but transforms them into a cool and creamy dessert that works even when the oven is off. It’s the perfect balance of sweet, spiced, and seasonal.
What I love most is how versatile it is. You can serve it with your Thanksgiving pie, tuck it into a waffle cone, or sneak a scoop straight from the freezer on a quiet evening. Plus, it’s a fun twist on traditional fall desserts that always gets a “Wow, you made this?” reaction.
Print
Pumpkin Ice Cream
- Author: Andrew Recipes
Description
Pumpkin ice cream is a creamy, spiced dessert that captures the cozy flavors of fall in every scoop. Smooth and rich, it blends pumpkin puree with warm spices like cinnamon, nutmeg, and cloves, creating a perfectly balanced treat that tastes like pumpkin pie in frozen form. This ice cream is a delightful seasonal dessert that works just as well served on its own as it does paired with pies, cakes, or cookies.
Ingredients
1 cup pumpkin puree
1 cup heavy cream
1 cup whole milk
3/4 cup brown sugar
4 large egg yolks
1 teaspoon vanilla extract
1 teaspoon cinnamon
1/2 teaspoon ground ginger
1/4 teaspoon nutmeg
1/8 teaspoon ground cloves
Pinch of salt
Instructions
In a medium saucepan, whisk together the milk, cream, and half of the brown sugar. Heat over medium until the mixture is steaming but not boiling.
In a separate bowl, whisk the egg yolks with the remaining brown sugar until thick and pale.
Slowly pour about half of the hot cream mixture into the yolks while whisking constantly to temper them.
Return the egg mixture to the saucepan and cook over low heat, stirring constantly, until it thickens enough to coat the back of a spoon.
Remove from heat and whisk in the pumpkin puree, vanilla, and spices until smooth.
Strain the custard through a fine sieve into a clean bowl to remove any bits of cooked egg.
Cover and refrigerate for at least 4 hours, or until fully chilled.
Churn the mixture in an ice cream maker according to the manufacturer’s instructions, then freeze until firm.
Notes
For extra texture, fold in crushed gingersnaps, candied pecans, or swirls of caramel after churning. If you don’t have an ice cream maker, you can pour the mixture into a shallow pan, freeze, and stir every 30 minutes until creamy. The flavor develops even more after sitting overnight in the freezer, making it a great make-ahead dessert for holidays.

