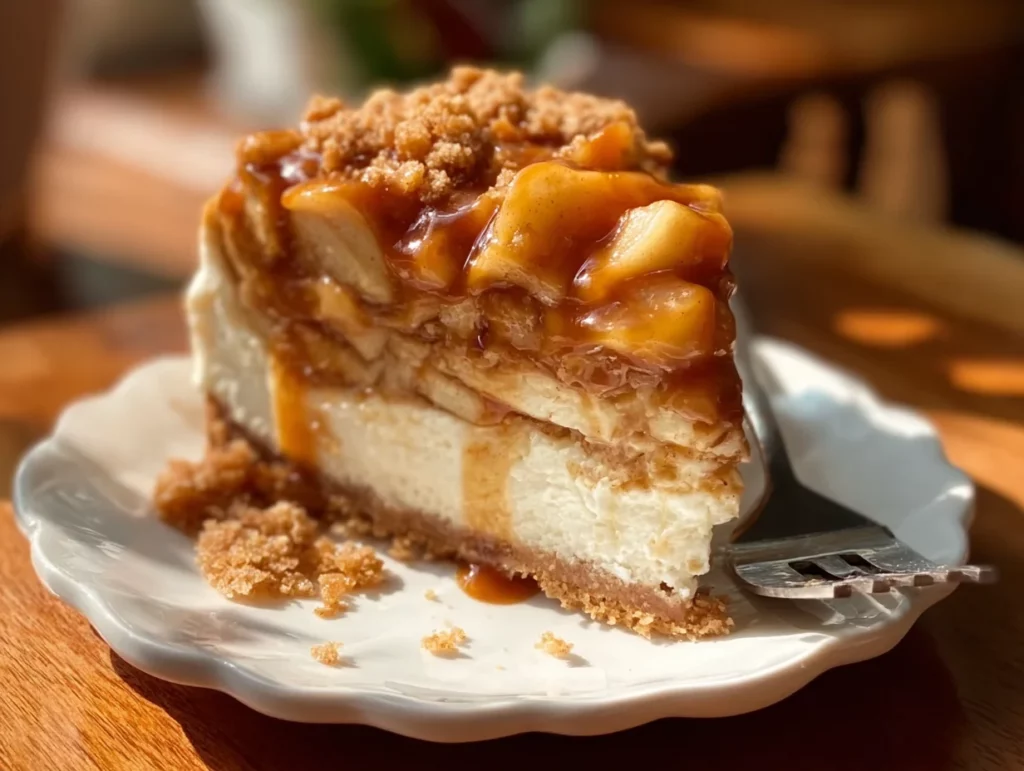
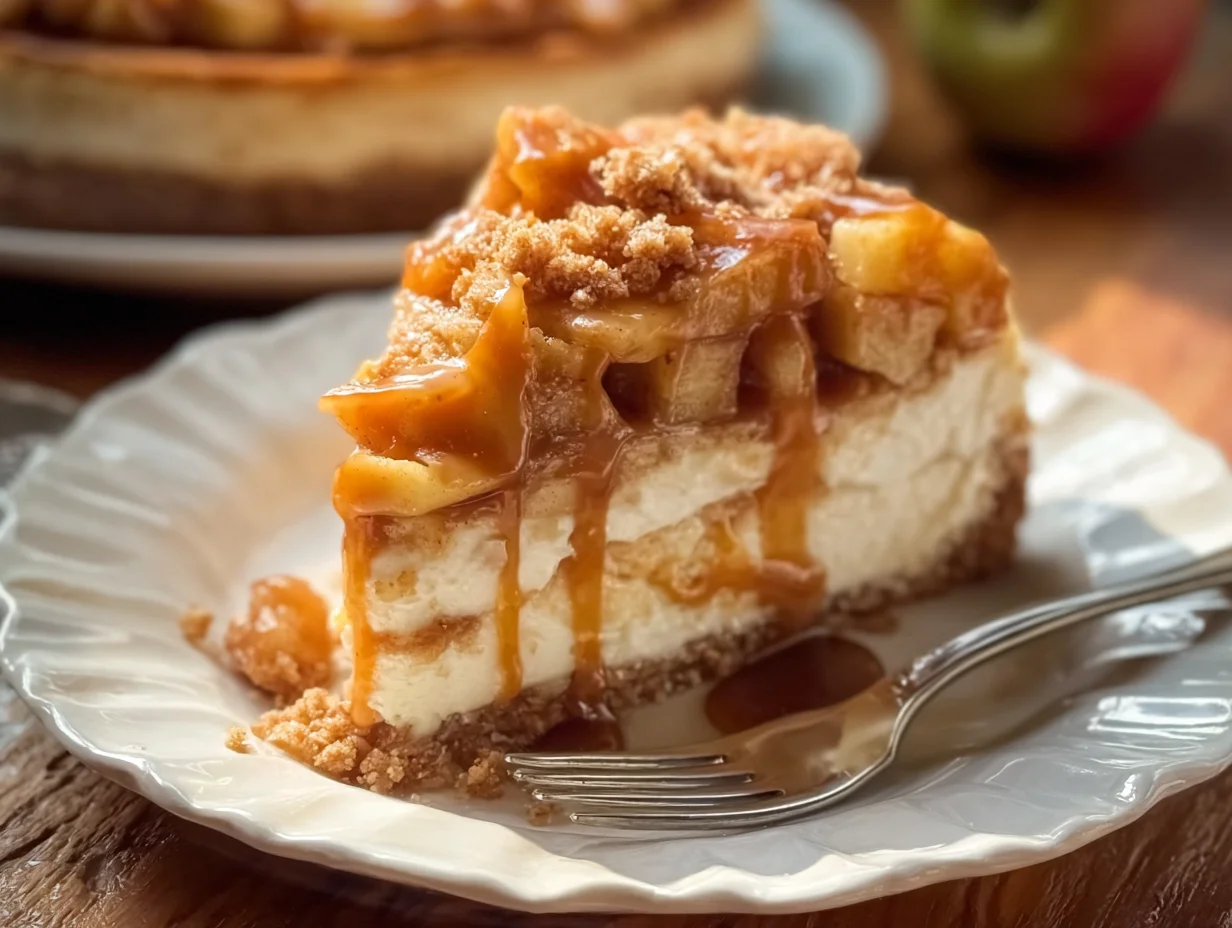
If there’s one dessert that screams cozy fall comfort and pure indulgence, it’s this Salted Caramel Apple Pie Cheesecake. I mean, come on — we’re talking about the dreamy combo of cheesecake, apple pie, and salted caramel, all wrapped up into one luscious dessert. It’s like all your holiday favorites got together and decided to outdo themselves.
Now, I know cheesecake can sound a little intimidating, especially when we’re throwing in extra layers like apple pie filling and homemade caramel. But trust me — this one’s totally doable. I’ve broken it down step-by-step, and with just a little patience (and some fridge time), you’ll be digging into one seriously showstopping dessert.
This is the kind of treat that makes people pause mid-bite, look up, and say, “Wait… did you make this?” Yes. Yes, you did.
Let’s get baking!
Why You’ll Love This Salted Caramel Apple Pie Cheesecake
Three Desserts in One: Cheesecake + apple pie + caramel. Enough said.
Perfect for Fall or Holidays: Think Thanksgiving, Friendsgiving, or that random chilly weekend when you want to impress.
Make-Ahead Friendly: You can prep the caramel and even the whole cheesecake ahead of time.
A Total Crowd-Pleaser: This dessert always gets rave reviews. No leftovers guaranteed.
Ingredients You’ll Need
Let’s break down what goes into this masterpiece. Don’t worry — it’s all super easy to find at the grocery store.
For the Graham Cracker Crust:
1 1/2 cups graham cracker crumbs
1/4 cup granulated sugar
1/2 cup melted butter
For the Cheesecake Filling:
24 oz cream cheese, softened
3/4 cup granulated sugar
1/2 cup sour cream
1 teaspoon vanilla extract
3 large eggs
For the Apple Pie Topping:
3 cups peeled and diced apples (Granny Smith is a great choice)
1/4 cup brown sugar
1 teaspoon cinnamon
1/4 teaspoon nutmeg
1 tablespoon cornstarch
2 tablespoons water
For the Salted Caramel Sauce:
1 cup granulated sugar
6 tablespoons butter
1/2 cup heavy cream
1/2 teaspoon sea salt
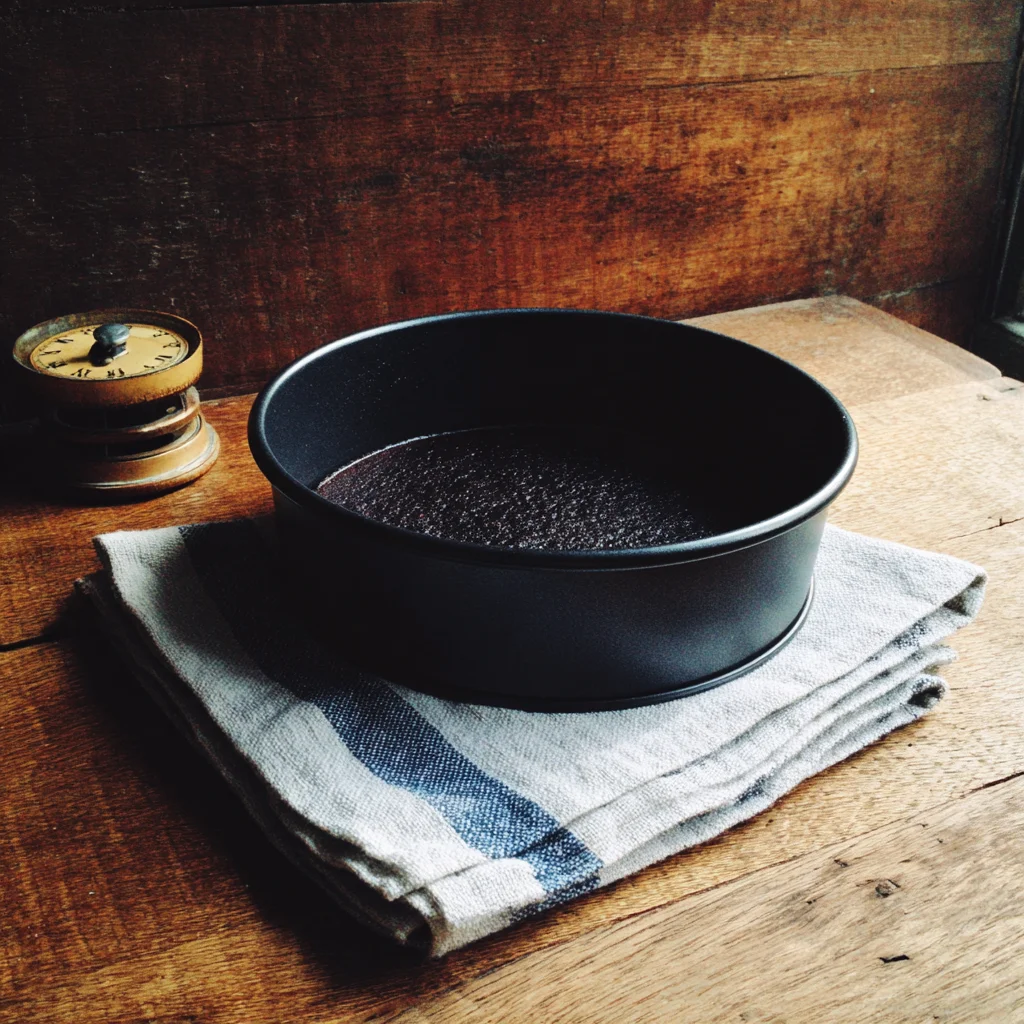
STEP 1: Make the Crust
Start by preheating your oven to 325°F. Then grab your springform pan and line the bottom with parchment paper if you want easy removal later (totally optional but helpful!).
In a medium bowl, mix together the graham cracker crumbs, sugar, and melted butter until the mixture resembles wet sand. Press it firmly into the bottom of the springform pan — I like to use the bottom of a measuring cup to make sure it’s nice and compact.
Pop the crust into the oven and bake for 8 minutes. Take it out and let it cool slightly while you get to work on the filling.

STEP 2: Whip Up That Creamy Cheesecake Filling
Now it’s time for the good stuff. In a large mixing bowl, beat the softened cream cheese until it’s smooth and creamy. You want to make sure there are no lumps at this stage — a good hand or stand mixer works best here.
Next, add in the sugar and mix again until well combined. Then stir in the sour cream and vanilla extract.
Crack your eggs in one at a time, mixing just until incorporated after each one. This is important: don’t overmix. Overmixing can lead to cracks in your cheesecake later on, and we want this baby smooth and pretty.
Pour the cheesecake batter over your cooled crust and smooth the top out with a spatula.
STEP 3: Bake the Cheesecake
Bake the cheesecake in your preheated oven for about 50 to 60 minutes. You’re looking for the edges to be set and the center to have a slight jiggle when you gently shake the pan. It might look underdone, but it will continue to set as it cools.
Once the time is up, turn off the oven and crack the door open slightly. Let the cheesecake cool inside the oven for 1 hour. This slow cooling process helps prevent cracks.
After that, take it out and refrigerate for at least 4 hours, or overnight if you can. (Overnight is best — the texture is even better the next day.)
Salted Caramel Apple Pie Cheesecake: Layering the Flavor
Now that we’ve got the creamy cheesecake chilling and doing its thing in the fridge, it’s time to take this dessert to the next level. And that’s where the apple pie topping and salted caramel sauce come in. These two layers are what really push this cheesecake over the top — adding warm, cozy flavor and that signature sweet-and-salty finish.
You know that feeling when fall is just starting to hit, the leaves are changing, and everything smells like cinnamon and butter? That’s the vibe we’re going for here. This part of the recipe is surprisingly simple, but it makes the cheesecake feel like something straight out of a fancy bakery case.
Let’s dive into the rest of the magic!
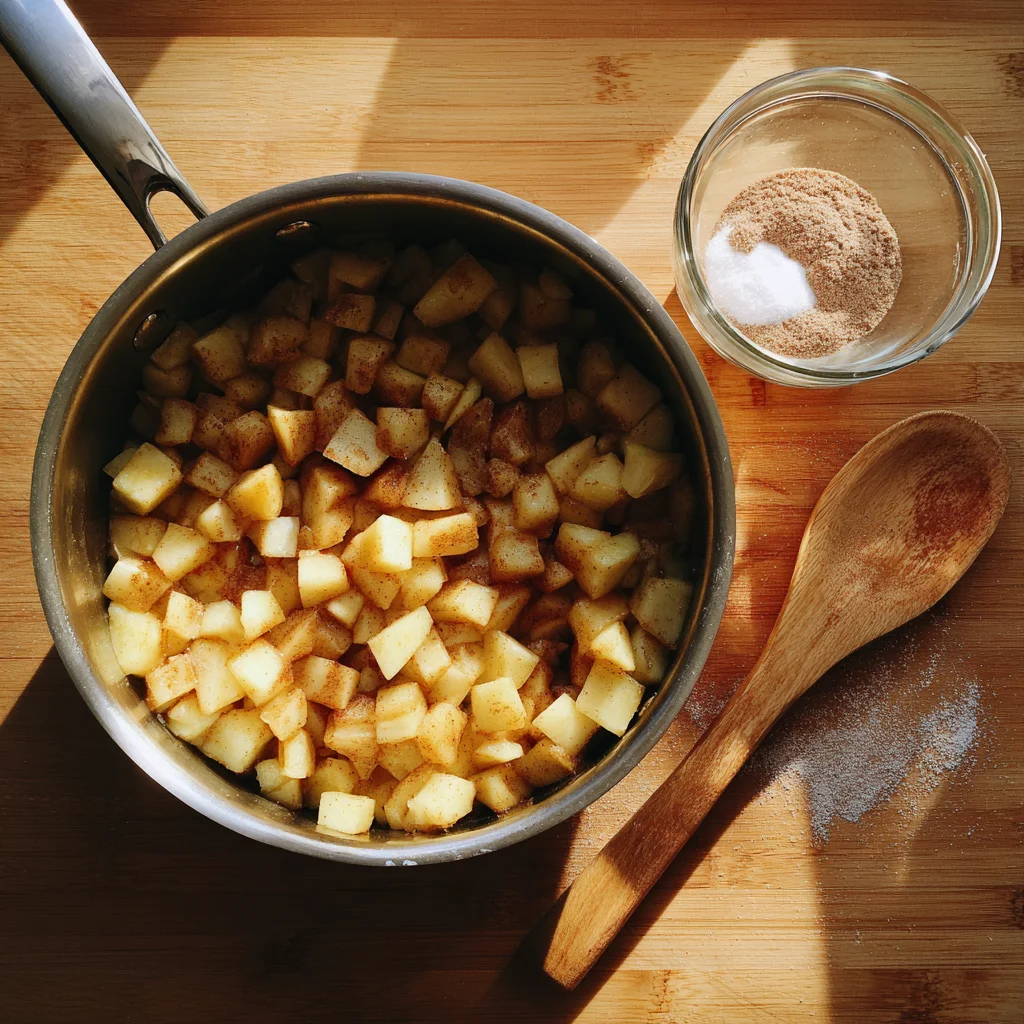
STEP 4: Make the Apple Pie Topping
This topping is like homemade apple pie filling — warm, sweet, and perfectly spiced. The best part? It only takes about 10 minutes.
Here’s how to make it:
In a medium saucepan over medium heat, combine:
3 cups peeled and diced apples
1/4 cup brown sugar
1 teaspoon cinnamon
1/4 teaspoon nutmeg
Stir everything together and cook for about 5 minutes, or until the apples start to soften and release their juices.
While that’s simmering, mix 1 tablespoon cornstarch with 2 tablespoons water in a small bowl to make a slurry. Once the apples are softened, stir the slurry into the saucepan.
Keep cooking for another 1–2 minutes, just until the mixture thickens up and becomes glossy. It should look and smell like warm apple pie filling — thick, spiced, and spoonable.
Set the topping aside to cool completely. You don’t want to add it to your chilled cheesecake while it’s still warm or it could soften the top and mess with the texture.
Tip: You can make this apple topping ahead of time and store it in the fridge until you’re ready to assemble.
STEP 5: Whip Up the Salted Caramel Sauce
Now for the grand finale — that rich, golden salted caramel drizzle. If you’ve never made caramel before, don’t worry! This version is super beginner-friendly and doesn’t require a candy thermometer.
Here’s what you’ll need:
1 cup granulated sugar
6 tablespoons butter (cut into pieces)
1/2 cup heavy cream
1/2 teaspoon sea salt
How to make it:
Place the sugar in a medium saucepan over medium heat. Stir constantly with a heatproof spatula or wooden spoon as the sugar begins to melt. First, it will clump, then gradually turn into a golden amber liquid.
Once fully melted and deep amber in color, carefully whisk in the butter. It’ll bubble up quite a bit — that’s normal. Once the butter is fully incorporated, slowly pour in the heavy cream. Again, it will bubble up, so pour steadily and stir constantly.
Stir in the sea salt and let the mixture bubble for another minute, then remove from heat and let it cool slightly. It will thicken as it sits.
Tip: Make the caramel while the cheesecake chills, and let it cool at room temp or store it in a jar in the fridge. You can rewarm it slightly before drizzling it on top.
STEP 6: Assemble the Cheesecake
Now for the best part — bringing it all together!
Once your cheesecake is fully chilled and the apple topping has cooled:
Remove the cheesecake from the springform pan and transfer to a serving plate or cake stand.
Spoon the apple pie topping generously over the top of the cheesecake.
Drizzle the salted caramel sauce over the apples, letting it drip down the sides a little for that bakery-style look.
You can chill the whole assembled cheesecake again until ready to serve, or serve it right away if everything is cooled properly.
Serving Tip: For clean slices, use a sharp knife dipped in hot water and wiped dry between each cut.
Variations and Pro Tips
Use different apples: Granny Smith is the go-to for tartness, but Honeycrisp or Fuji can add a sweeter twist.
Spice it up: Add a pinch of clove or allspice to the apple topping for extra warmth.
Crust swap: Try using gingersnap crumbs or crushed vanilla wafers instead of graham crackers for a fun twist.
Short on time? Use store-bought salted caramel and canned apple pie filling in a pinch — it won’t be exactly the same, but it’ll still taste amazing.
Salted Caramel Apple Pie Cheesecake: FAQ & Final Thoughts
So now that you’ve got your cheesecake baked, cooled, topped, and drizzled, let’s talk about what happens next. Whether you’re planning to serve it for a special holiday dinner or just want a luxurious fall dessert on hand, a few final tips and answers to common questions can help make this recipe foolproof.
Before we wrap up, let’s go through a quick FAQ to troubleshoot and give you all the confidence you need to slice into that creamy, caramel-drizzled beauty.
Frequently Asked Questions
1. How do I prevent cracks in my cheesecake?
Cracks usually happen when cheesecake batter is overmixed or when the cooling process is rushed. To avoid this, mix just until the ingredients are combined (especially the eggs), and always let the cheesecake cool slowly in the oven with the door cracked open for an hour before refrigerating.
2. Can I make this cheesecake ahead of time?
Absolutely. This cheesecake is perfect for making a day ahead. In fact, it tastes even better after chilling overnight. You can also prep the apple topping and caramel sauce separately and assemble everything just before serving.
3. What type of apples should I use?
Granny Smith apples are my go-to because their tartness balances the sweet cheesecake and caramel. But feel free to use what you have—Honeycrisp, Braeburn, or Fuji work great, too.
4. Can I freeze this cheesecake?
Yes! Once the cheesecake is fully cooled and set, you can freeze it (without the toppings) for up to 2 months. Wrap it tightly in plastic wrap and foil. When ready to serve, thaw overnight in the fridge and then add the apple topping and caramel fresh.
5. Is there a shortcut for the caramel sauce?
Totally. If you’re short on time, store-bought salted caramel sauce works in a pinch. Just warm it up slightly before drizzling so it spreads easily.
6. Do I need a water bath for this cheesecake?
Nope, not for this recipe. The lower baking temperature and gradual cooling method help reduce the risk of cracking, so a water bath isn’t necessary here. Just follow the baking and cooling steps carefully for best results.
7. How long will the cheesecake keep in the fridge?
It’ll stay fresh for up to 4–5 days in the fridge. Just make sure it’s stored in an airtight container or wrapped well to prevent it from drying out.
Final Thoughts: Time to Impress with Your Cheesecake Skills
There’s something incredibly satisfying about slicing into a dessert that not only looks like it came from a high-end bakery, but actually tastes even better — and you made it from scratch.
This Salted Caramel Apple Pie Cheesecake is truly a celebration of fall flavors, with every bite bringing together creamy, spiced, sweet, and salty elements. Whether you’re making it for Thanksgiving, a dinner party, or just to treat yourself on a cozy weekend, it’s guaranteed to be the highlight of the table.
And remember — baking a cheesecake isn’t about perfection. Even if it gets a little rustic or the caramel drips down the side (honestly, that’s part of the charm), it’s still going to taste amazing. So don’t stress too much. Enjoy the process, trust your instincts, and get ready for all the “Can I have the recipe?” questions.
If you try this recipe, I’d love to hear how it turned out! Leave a comment, share your tweaks or topping ideas, or just tell me how much everyone loved it. And if you’re feeling inspired, go ahead and bookmark this one — it’s a keeper.
Print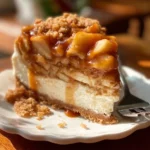
Salted Caramel Apple Pie Cheesecake
- Author: Andrew Recipes
Description
Salted Caramel Apple Pie Cheesecake brings together three classic desserts in one showstopping creation. A buttery graham cracker crust supports a rich and creamy cheesecake filling layered with spiced apple pie topping, all finished with a generous drizzle of salted caramel sauce. This dessert is indulgent, comforting, and perfect for fall gatherings or holiday tables.
Ingredients
For the crust
1 1/2 cups graham cracker crumbs
1/4 cup granulated sugar
1/2 cup melted butter
For the cheesecake filling
24 oz cream cheese, softened
3/4 cup granulated sugar
1/2 cup sour cream
1 teaspoon vanilla extract
3 large eggs
For the apple pie topping
3 cups peeled and diced apples
1/4 cup brown sugar
1 teaspoon cinnamon
1/4 teaspoon nutmeg
1 tablespoon cornstarch
2 tablespoons water
For the salted caramel
1 cup granulated sugar
6 tablespoons butter
1/2 cup heavy cream
1/2 teaspoon sea salt
Instructions
Preheat the oven to 325°F. Combine graham cracker crumbs, sugar, and melted butter in a bowl until evenly moistened. Press the mixture into the bottom of a springform pan. Bake for 8 minutes and let cool slightly.
In a large bowl, beat cream cheese until smooth and creamy. Add sugar and mix until combined. Mix in sour cream and vanilla extract. Add eggs one at a time, mixing just until incorporated after each addition. Pour the filling over the cooled crust.
Bake the cheesecake for 50 to 60 minutes, or until the center is set with a slight jiggle. Turn off the oven and crack the door open, letting the cheesecake cool gradually for 1 hour. Refrigerate for at least 4 hours or overnight.
To make the apple pie topping, cook diced apples, brown sugar, cinnamon, and nutmeg in a saucepan over medium heat for about 5 minutes. Dissolve cornstarch in water and stir into the apple mixture. Cook until thickened, then let cool completely.
For the salted caramel, heat sugar in a saucepan over medium heat until melted and amber-colored. Carefully whisk in butter, followed by heavy cream. Stir in sea salt and cook for another minute. Let cool slightly before using.
Once the cheesecake is fully chilled, spoon the apple pie topping over the top and drizzle generously with salted caramel. Chill until ready to serve.
Notes
Use tart apples like Granny Smith for a balance of flavor. Be careful not to overmix the cheesecake batter to avoid cracks. If you prefer a no-bake version, use a no-bake cheesecake filling and cook the apple topping separately. The caramel sauce can be made ahead and stored in the fridge, then warmed slightly before serving.

