If you’ve ever wished you could bottle up that nostalgic campfire s’mores flavor and bring it into your kitchen year-round—this S’mores Pie is your dream dessert. It’s everything you love about the classic treat, layered into a buttery cookie-like crust and baked to golden perfection. No smoky firepit required.
I first made this recipe on a chilly weekend when the weather ruined our backyard bonfire plans. My kids were bummed about missing out on s’mores, so I got creative—and this pie was born. Let me tell you, it disappeared in one sitting. That’s when I knew this one was a keeper!
This pie is like a cozy hug from your favorite childhood memory. It’s gooey, melty, sweet, and just a little bit chewy with a crust that tastes like a soft graham cracker cookie. And the best part? It’s easy. You don’t need a mixer with 12 attachments or fancy ingredients. Just some pantry staples and a love for chocolate and marshmallows.
Let’s get started!
Ingredients You’ll Need
Here’s a quick look at what you’ll need to make this S’mores Pie:
½ cup unsalted butter, softened to room temperature
¾ cup granulated sugar
1 large egg, room temperature
1½ teaspoons vanilla extract
1½ cups all-purpose flour
¾ cup finely ground graham cracker crumbs
1 teaspoon baking powder
½ teaspoon salt
7 ounces marshmallow creme
6 Hershey’s milk chocolate bars (1.55 oz each), roughly chopped (reserve ⅓ cup for topping)
1 cup mini marshmallows, divided (⅔ cup for filling, ⅓ cup for topping)
You’ll also need a 9-inch pie dish and some non-stick spray to prep it. Now let’s walk through the first steps to building this delicious dessert.
Step 1: Prep the Pie Dish and Preheat
Start by preheating your oven to 350°F. Lightly spray a 9-inch pie dish with non-stick baker’s spray. This helps ensure your crust doesn’t stick and lifts out smoothly when serving.
Step 2: Cream the Butter and Sugar
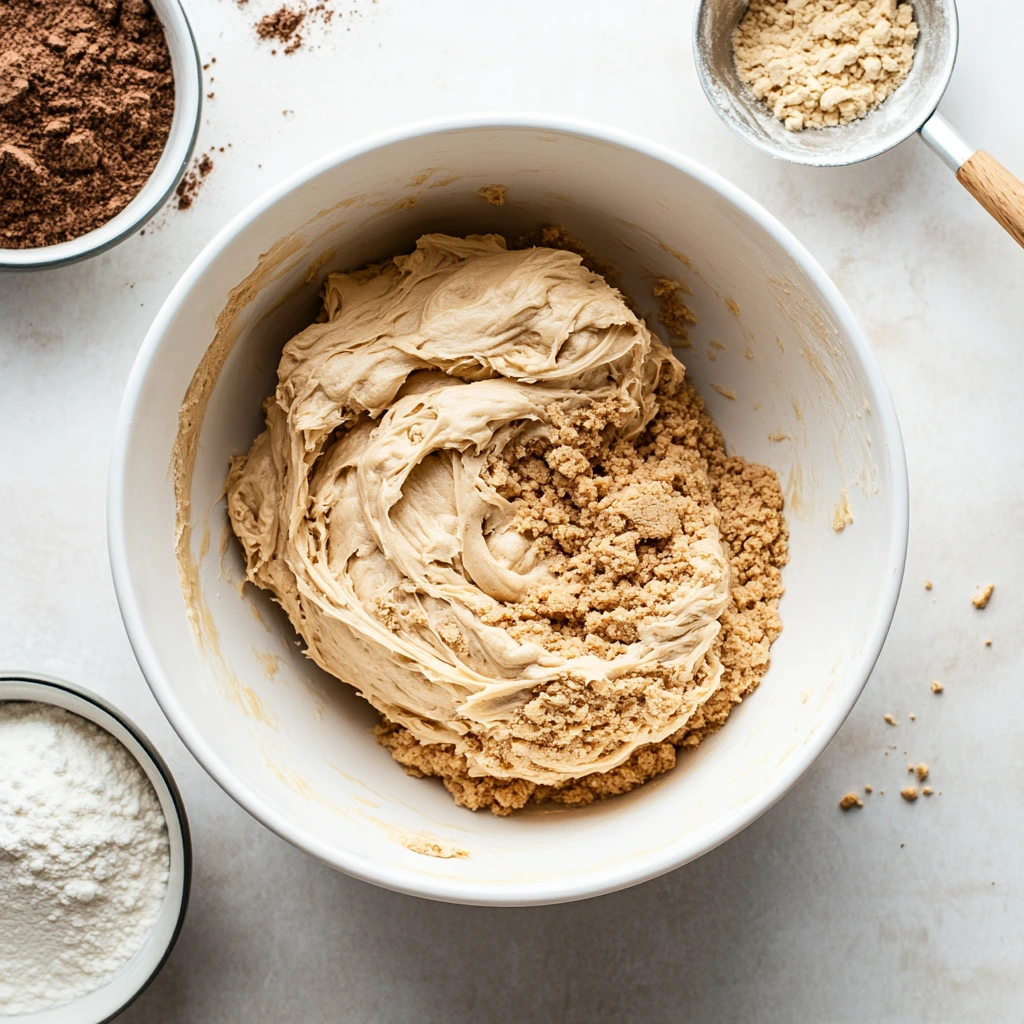
In a large mixing bowl, beat together the softened butter and granulated sugar using a hand mixer (or a stand mixer, if you prefer). Mix on medium-high speed for about 1 to 2 minutes, or until the mixture turns light and fluffy.
This step creates a soft, cookie-like texture in the crust—so don’t skip it or cut it short. That air you whip in here makes all the difference later on.

Step 3: Add the Egg and Vanilla
Next, add the egg and vanilla extract to the butter-sugar mixture. Beat again until everything is smooth and well incorporated. Your mixture should look creamy and slightly thickened.
Step 4: Mix the Dry Ingredients
Now, add in the dry ingredients: flour, graham cracker crumbs, baking powder, and salt. Mix just until a soft dough forms. Be careful not to overmix here—we want the dough to stay tender, not tough.
At this point, you’ll notice the dough smells just like graham crackers, but with the texture of a sugar cookie. It’s magic.
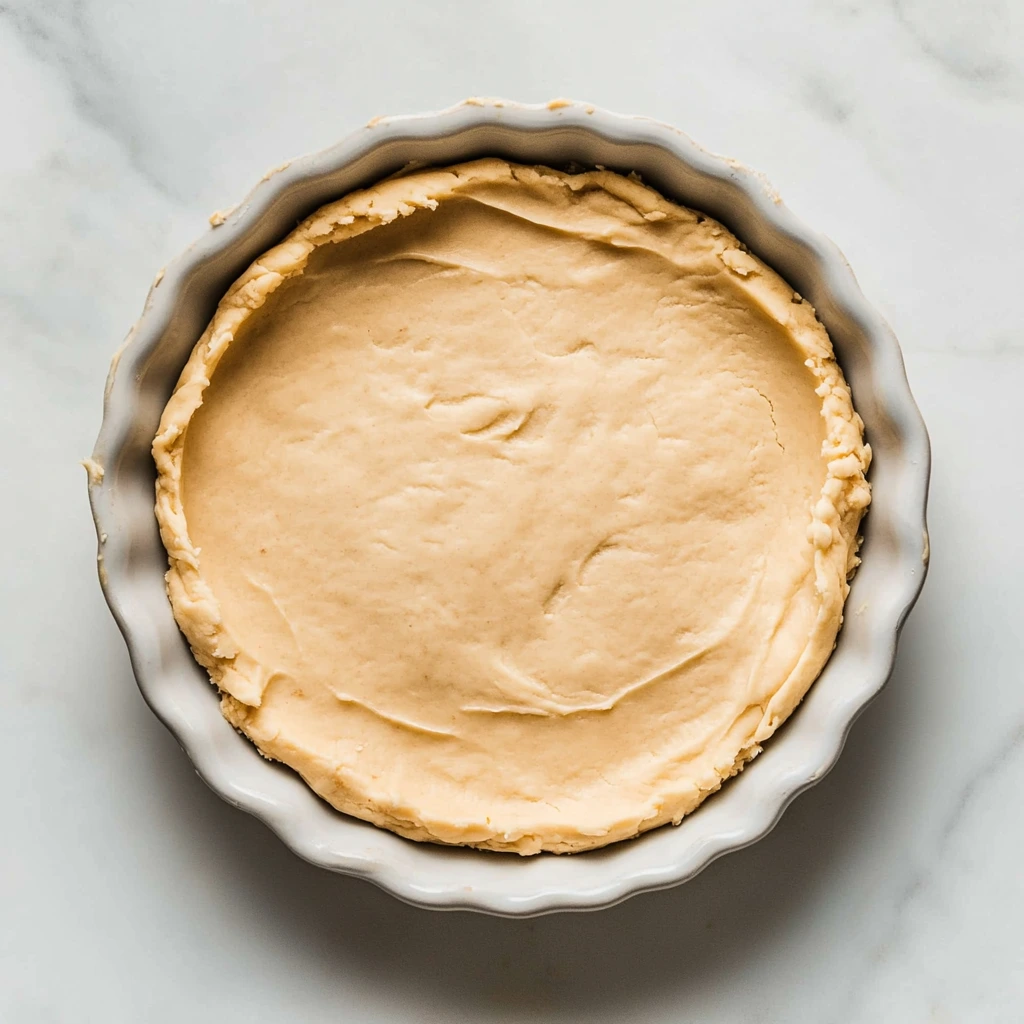
Step 5: Press the Bottom Crust
Divide the dough in half. Press one half of the dough into the bottom and up the sides of your prepared pie dish. Use your fingers or the back of a spoon to get it nice and even.
It should cover the bottom fully, and climb about halfway up the sides to help hold all that gooey goodness in place.
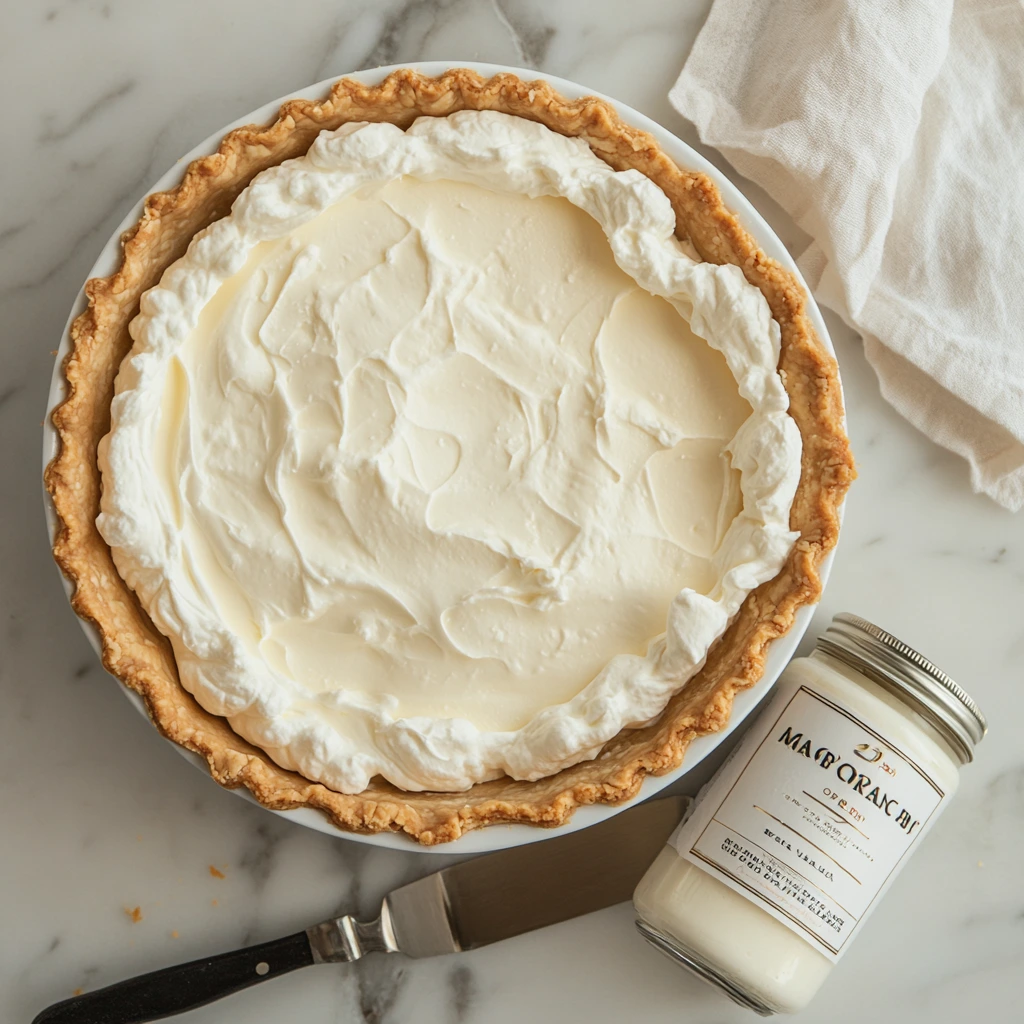
Step 6: Add the Marshmallow Layer
Spoon the marshmallow creme over the bottom crust. It’s sticky stuff, so take your time spreading it evenly with an offset spatula or back of a spoon. You don’t have to be perfect—just try to get it into an even layer that covers the crust.
How to Finish and Bake the Perfect S’mores Pie
Alright, now that we’ve got our buttery graham cracker cookie crust and that dreamy marshmallow creme layer ready to go, it’s time to bring in the stars of the show—chocolate and mini marshmallows—and finish building this beautiful pie.
This is the part where things start to look and smell like a real s’mores treat, only baked into a cozy, sliceable dessert that’s perfect for family nights, potlucks, or just treating yourself to something warm and sweet.
Let’s jump back into it.
Step 7: Layer the Chocolate and Mini Marshmallows
Grab the roughly chopped Hershey’s bars and sprinkle all but ⅓ cup of the pieces evenly over the marshmallow creme layer. Then take ⅔ cup of your mini marshmallows and scatter those across the top of the chocolate.
At this point, it already looks like a giant s’more in the making. The key is not to overload any one area—just make sure every bite gets a little bit of chocolate and marshmallow love.
Step 8: Add the Top Crust
Take the remaining half of your dough and press it into a flat, 9-inch round on a sheet of parchment paper. Don’t worry if it’s not a perfect circle—just get it roughly the same size as your pie dish.
Now comes the slightly tricky part: carefully flip or lift the dough disc and lay it over the top of your pie. You can patch any cracks with extra dough—this is a rustic dessert, so don’t stress about it being picture-perfect.
Once the top crust is on, gently press around the edges to seal everything in. This helps trap the gooey marshmallow and chocolate inside so it melts into all the right places while baking.
Step 9: Bake the Pie – First Round
Place your pie into the preheated 350°F oven and bake for 10 minutes.
This first bake helps set the crust and starts melting that chocolate layer. Don’t skip the timing here—if you go longer now, the marshmallow topping you’ll add later can burn before the crust finishes.
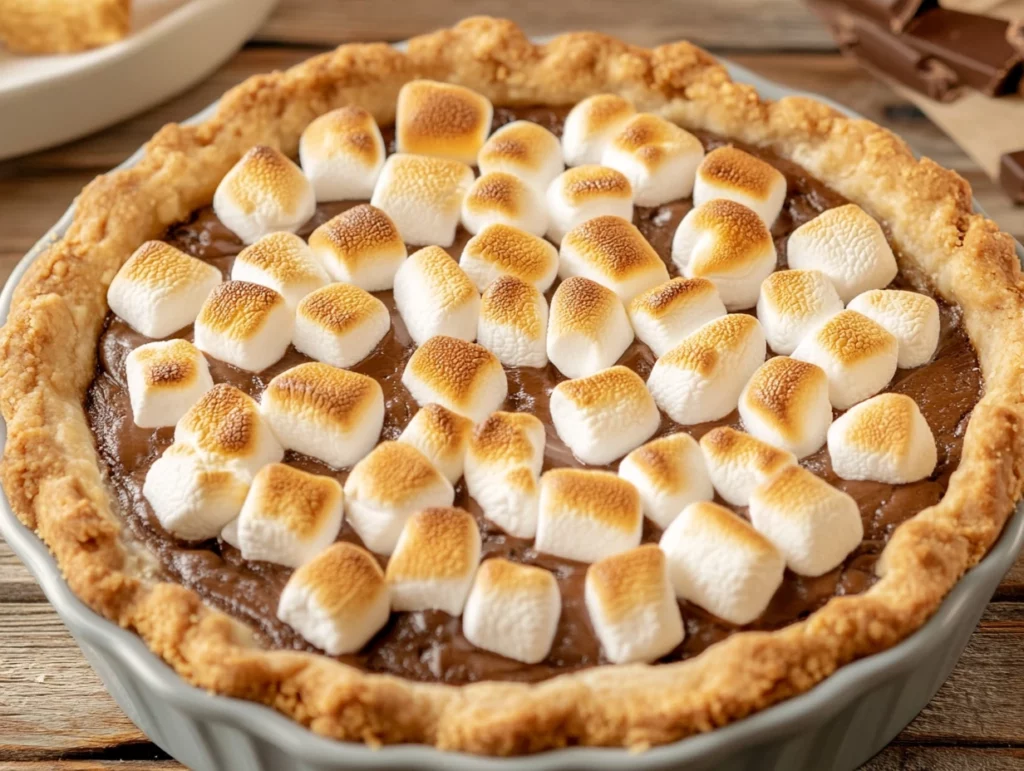
Step 10: Add Final Toppings
After the first 10 minutes of baking, remove the pie from the oven and carefully sprinkle the remaining ⅓ cup of chopped chocolate and ⅓ cup of mini marshmallows over the top.
The marshmallows will toast beautifully in the oven during the second round of baking, and the chocolate will get perfectly melty right on top.
Step 11: Bake Again – Final Round
Return the pie to the oven for another 8 to 10 minutes, or until:
The top crust is lightly golden
The marshmallows are just toasted (think golden brown, not burnt)
The chocolate is melted and shiny
Keep an eye on it near the end—every oven is a little different, and marshmallows can go from golden to dark pretty quickly.
Step 12: Cool Before Slicing
Once your S’mores Pie is out of the oven, let it cool for at least 15 minutes before slicing. This gives the gooey layers time to set up a bit, so your slices hold together better.
If you’re anything like me, it’s hard to wait—but it’s worth it!
Tips for Success and Simple Variations
Don’t skip the parchment trick when shaping the top crust—it makes transferring the dough so much easier.
Use a glass pie dish if you want to sneak a peek at the browning crust underneath.
Swap the chocolate if you’d like—semi-sweet chips, chopped dark chocolate, or even peanut butter cups work great in place of the classic Hershey’s.
Feeling extra indulgent? Serve warm slices with a scoop of vanilla ice cream or a drizzle of hot fudge.
This pie is just as delightful the next day—if it lasts that long. And if you do have leftovers, you’ll want to check out how to store and reheat them in the next section.

S’mores Pie FAQ and Final Thoughts
Before we wrap things up, let’s take a moment to answer some of the most common questions you might have about making this gooey, chocolate-filled pie. Whether it’s your first time baking or you’ve got marshmallows in your pantry 24/7, these tips will help you nail it every single time.
Frequently Asked Questions
1. Can I use marshmallows instead of marshmallow creme?
You can, but the texture will be different. Marshmallow creme creates an even, gooey layer that spreads smoothly across the crust. If using regular marshmallows, try cutting them into smaller pieces and melting them slightly before spreading to mimic the same effect.
2. How do I store leftover S’mores Pie?
Once cooled, cover the pie loosely with foil or plastic wrap and keep it at room temperature for up to 3 days. You can also store it in the refrigerator, but bring it to room temp or warm it up slightly before serving for the best texture.
3. Can I make this pie ahead of time?
Yes! You can assemble the entire pie (minus the final marshmallow and chocolate topping) a day in advance. Keep it covered in the fridge and bake as directed when ready. Add the toppings midway through baking just like in the recipe.
4. What’s the best way to reheat a slice?
Pop an individual slice in the microwave for 10 to 15 seconds to warm it up and get that melty texture again. If you want to reheat a larger portion, use a 300°F oven for about 10 minutes.
5. Can I freeze S’mores Pie?
This pie isn’t ideal for freezing because of the marshmallow content, which can become sticky or grainy once thawed. If you do try freezing it, wrap it tightly in foil and store for up to 1 month. Reheat from frozen in the oven for best results.
6. What if I don’t have Hershey’s bars?
No problem! You can use about 1¼ cups of chocolate chips instead. Milk chocolate chips are the closest match to the Hershey’s flavor, but feel free to mix in dark or semi-sweet chips if that’s your thing.
7. Can I double the recipe for a crowd?
Absolutely. Just bake it in a 9×13-inch pan instead of a pie dish. You may need to adjust the baking time slightly—start checking around the 18-minute mark during the second bake.
Final Thoughts: Bring the Campfire Indoors
This S’mores Pie is one of those desserts that feels like an experience. It’s nostalgic, indulgent, and full of that unmistakable chocolate-marshmallow-graham combo we all know and love. Best of all, it’s easy to make and even easier to share.
I love that this pie can turn any ordinary day into something special. Whether you’re baking it for your family, bringing it to a gathering, or just satisfying your own sweet tooth—it’s the kind of recipe that sparks a little joy in every bite.
If you give it a try, I’d love to hear how it turned out! Did you add a twist of your own? Maybe a peanut butter layer or a dark chocolate swap? Drop a comment and let me know. And don’t forget to share it with your fellow dessert lovers—trust me, they’ll thank you.
Now go grab that pie dish and bring the campfire magic to your kitchen. You’ve got this.
Print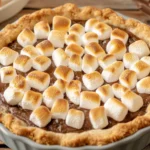
S’mores Pie
- Author: Andrew Recipes
Description
This gooey, golden S’mores Pie brings the magic of a campfire treat right into your kitchen. With a graham cracker-infused cookie crust, layers of marshmallow creme, melty Hershey’s chocolate, and mini marshmallows, it’s a fun and nostalgic dessert perfect for any occasion. Each bite delivers the classic s’mores flavor with a soft, chewy twist.
Ingredients
½ cup unsalted butter, softened to room temperature
¾ cup granulated sugar
1 large egg, room temperature
1½ teaspoons vanilla extract
1½ cups all-purpose flour
¾ cup finely ground graham cracker crumbs
1 teaspoon baking powder
½ teaspoon salt
7 ounces marshmallow creme
6 (1.55 oz) Hershey’s milk chocolate bars, roughly chopped (reserve ⅓ cup for topping)
1 cup mini marshmallows, divided (⅔ cup for filling, ⅓ cup for topping)
Instructions
Preheat the oven to 350°F. Lightly spray a 9-inch pie dish with non-stick baker’s spray and set aside.
In a large mixing bowl, beat the softened butter and granulated sugar using a hand mixer on medium-high speed for 1 to 2 minutes, until light and fluffy.
Add the egg and vanilla extract, then beat again until the mixture is smooth and well combined.
To the wet ingredients, add the flour, graham cracker crumbs, baking powder, and salt. Mix just until a soft dough forms. Divide the dough in half.
Press one half of the dough into the bottom and up the sides of the prepared pie dish, spreading it evenly.
Spread the marshmallow creme over the crust in a single, even layer.
Set aside ⅓ cup of the chopped chocolate. Sprinkle the remaining chocolate evenly over the marshmallow creme, followed by ⅔ cup of mini marshmallows.
Take the remaining dough and press it into a 9-inch round disc on a piece of parchment paper. Gently place the dough disc over the top of the pie and press around the edges to seal.
Bake the pie for 10 minutes. Remove from the oven and carefully top with the remaining ⅓ cup of mini marshmallows and reserved chocolate pieces.
Return the pie to the oven and bake for another 8 to 10 minutes, or until the top crust is lightly golden, the marshmallows are toasted, and the chocolate is melted.
Notes
Allow the pie to cool for about 15 minutes before slicing to help the layers set. For extra decadence, serve warm slices with a scoop of vanilla ice cream. Store leftovers at room temperature in a covered container for up to three days. Reheat individual slices for that perfect melty texture.

