There’s something about a creamy, fruity, no-bake dessert that just screams comfort food. And this Strawberry Banana Pudding? It’s the ultimate crowd-pleaser. Layers of velvety vanilla pudding, fresh strawberries, ripe bananas, and crunchy vanilla wafers all come together to create a dessert that’s as easy to make as it is delicious.
Whether you’re preparing for a potluck, a family gathering, or just want a sweet treat to keep in the fridge, this pudding is a perfect make-ahead option. The best part? No baking required! Just a few simple steps, some time to chill, and you’ve got a dessert that’s creamy, fruity, and full of texture.
Let’s get started!
How to Make Strawberry Banana Pudding
This recipe comes together in three simple steps: making the pudding mixture, assembling the layers, and chilling everything to perfection.
Step 1: Prepare the Pudding Mixture
First, grab a large mixing bowl and your ingredients for the pudding layer. You’ll need:
- 1 (5.1 oz) box of instant vanilla pudding mix
- 2 cups cold milk
- 1 (8 oz) tub of whipped topping (like Cool Whip)
- 1 (14 oz) can of sweetened condensed milk
- 1 teaspoon vanilla extract
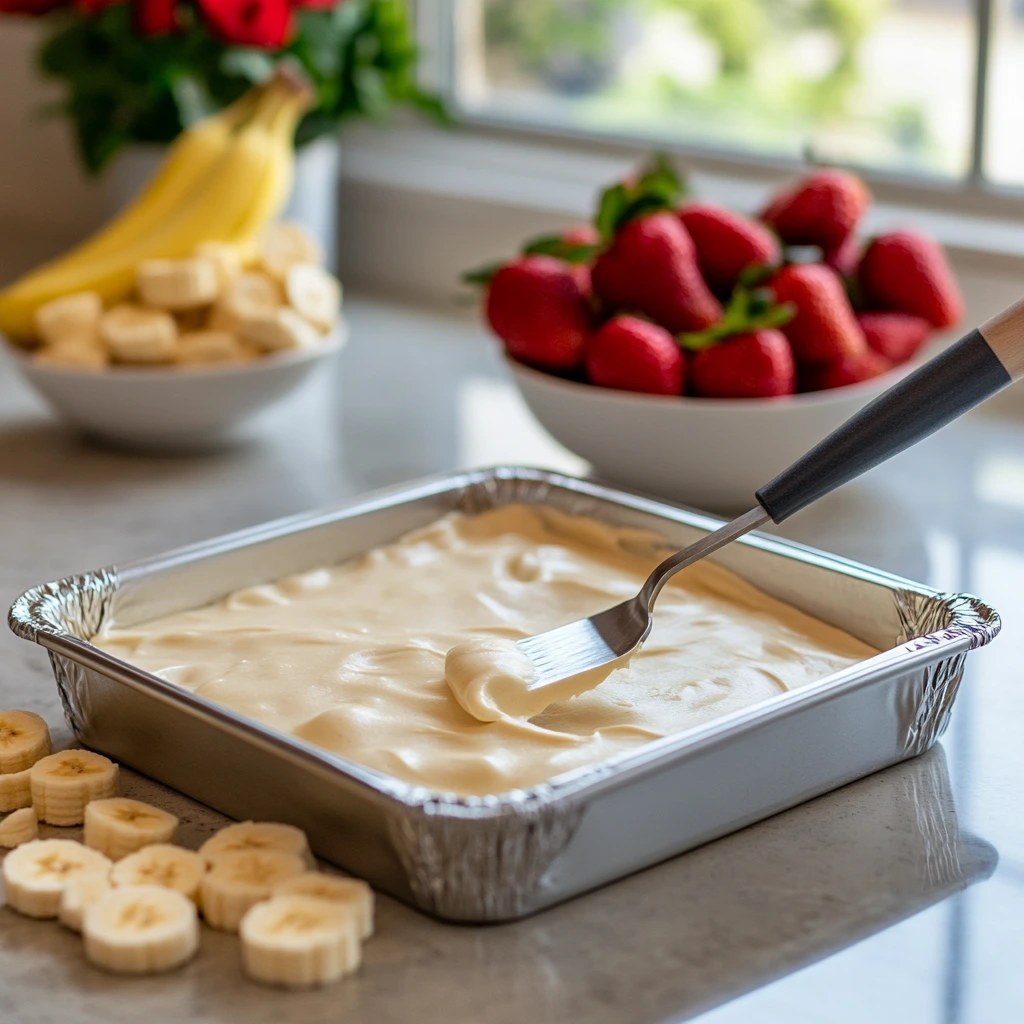
Start by whisking together the vanilla pudding mix and cold milk until the mixture thickens—this usually takes about two minutes. Instant pudding works quickly, so you’ll see it transform into a thick, creamy base almost immediately.
Next, fold in the whipped topping, sweetened condensed milk, and vanilla extract. Be gentle while mixing so you don’t deflate the light and airy texture of the whipped topping. This combination creates a pudding that’s extra creamy and slightly sweet with a hint of vanilla.
Set this mixture aside while you prepare the fruit and cookies.

Step 2: Prepare the Fruit and Cookies
For the perfect balance of flavors and textures, you’ll need:
- 2–3 ripe bananas, sliced
- 2 cups fresh strawberries, hulled and sliced
- 1 (11 oz) box of vanilla wafer cookies (or graham crackers)
Bananas tend to brown quickly once sliced, so if you’re making this ahead of time, you can toss them lightly in lemon or orange juice to keep them fresh. Strawberries add a fresh, slightly tangy contrast to the creamy pudding, making every bite even more delicious.
Now that everything is prepped, it’s time to start layering!
Step 3: Assemble the Layers
Now that the pudding mixture is ready and the fruit is prepped, it’s time to bring everything together. This is where the magic happens—layering all the ingredients to create a dessert that’s as beautiful as it is delicious.
Start by choosing your serving dish. A trifle dish, glass bowl, or even individual dessert cups work great for this recipe. If you’re serving a crowd, a large glass bowl makes for an impressive presentation, allowing you to see the distinct layers.
Here’s how to layer it:
- Start with a thin layer of pudding – Spread a small amount of the pudding mixture at the bottom of your dish. This helps anchor the layers and ensures the wafers don’t slide around.
- Add a layer of vanilla wafers – Arrange the cookies in a single layer over the pudding. You can overlap them slightly to create an even base.
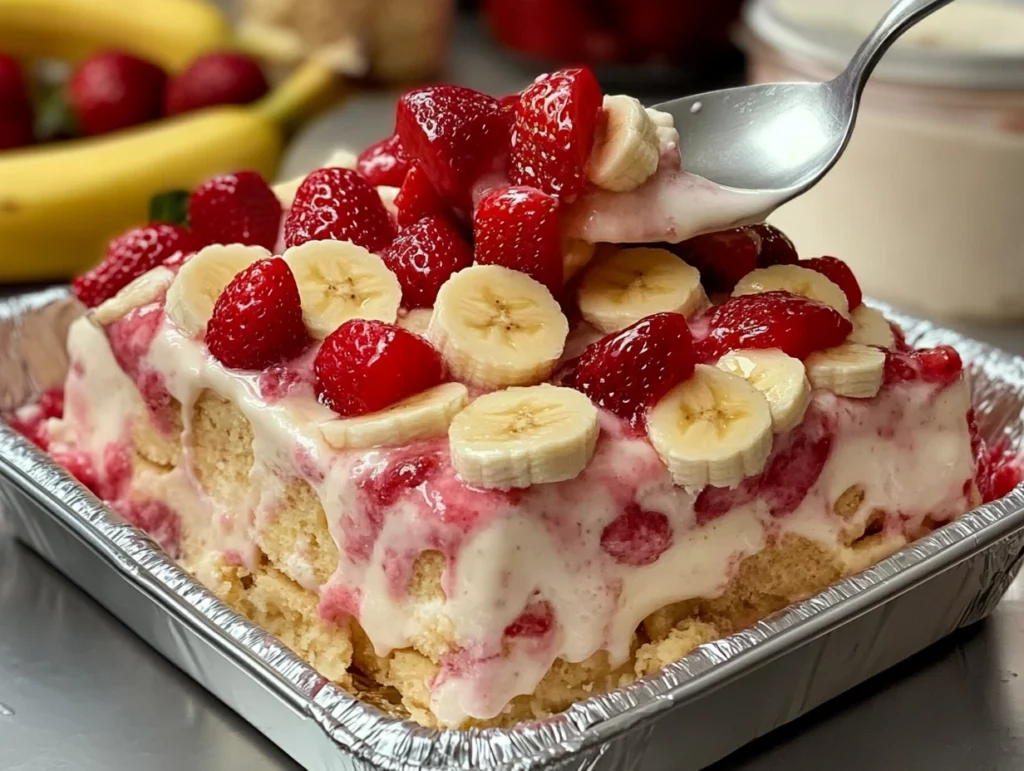
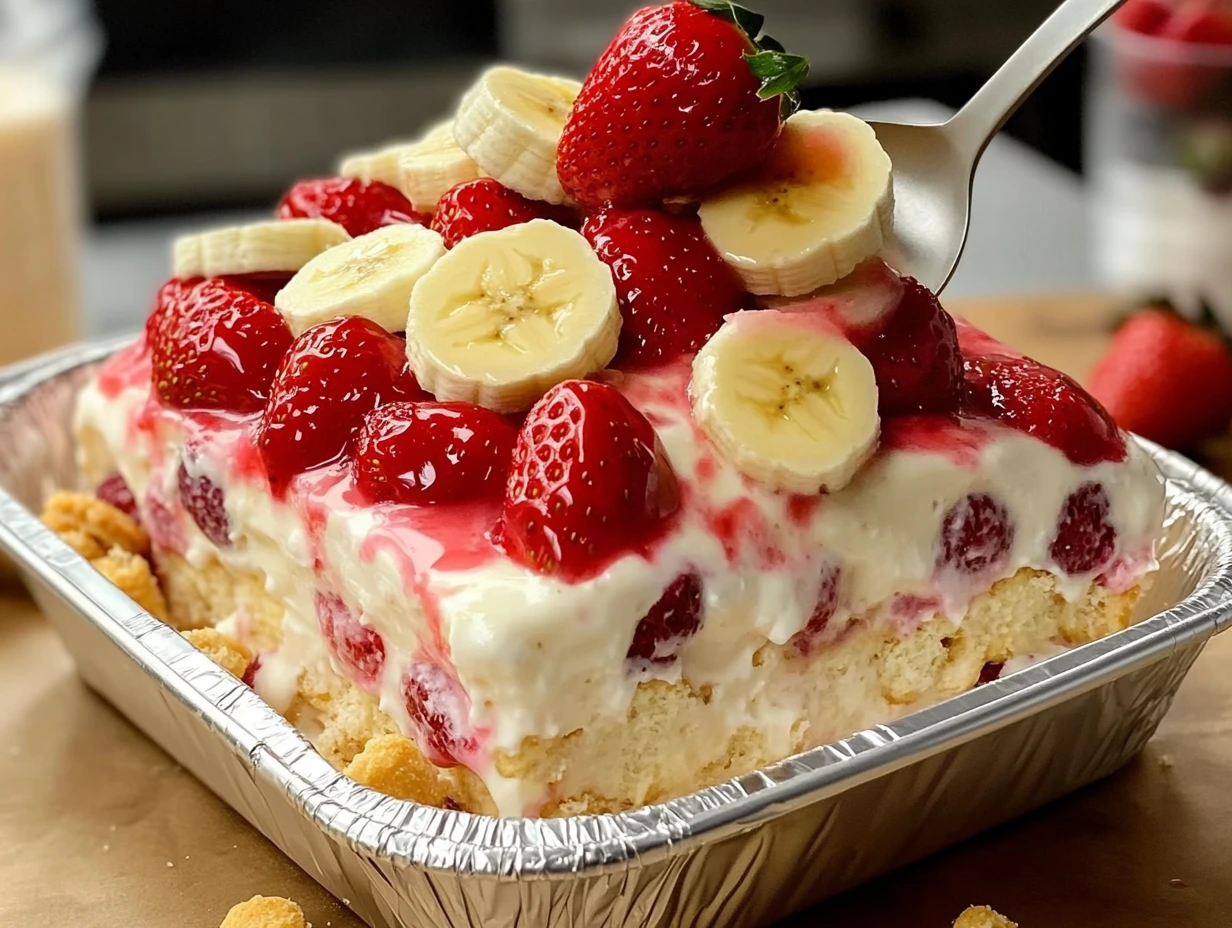
- Layer the fruit – Add a layer of sliced bananas and fresh strawberries over the wafers. Be generous here—this is what gives the dessert its refreshing, fruity flavor.
- Repeat the layers – Spread another layer of the pudding mixture over the fruit, smoothing it out with a spatula. Then, continue layering with wafers, bananas, strawberries, and more pudding until your dish is full.
- Finish with a layer of pudding – The final layer should be a thick, creamy spread of pudding to cover the fruit and cookies completely.
Once everything is layered, you can add a decorative touch to the top. Whole strawberries and crushed vanilla wafers make a beautiful garnish, adding a bit of crunch and a pop of color.
Step 4: Chill and Let the Flavors Meld
This pudding may be delicious right away, but the real magic happens after it chills. Cover the dish tightly with plastic wrap and refrigerate for at least 2–4 hours, or even overnight. This allows the vanilla wafers to soften, soaking up the pudding and fruit flavors for the perfect melt-in-your-mouth texture.
If you’re in a rush, you can serve it after two hours, but for the best results, letting it chill overnight is ideal. It gives the pudding time to set fully, creating a creamy, dreamy dessert with layers that blend perfectly together.

Pro Tips for the Best Strawberry Banana Pudding
- Prevent browning – Bananas can turn brown quickly, so lightly toss them in lemon or orange juice before layering to keep them fresh.
- Swap out the wafers – If you prefer a different texture, graham crackers work as a great alternative to vanilla wafers. They’ll soften into the pudding just like the wafers do.
- Make it extra special – Try adding a drizzle of caramel or a sprinkle of crushed nuts on top for extra flavor.
- Use homemade whipped cream – If you want to skip store-bought whipped topping, homemade whipped cream makes a great substitute for a fresher taste.
Now that your dessert is chilling and the flavors are coming together, all that’s left to do is wait—and trust me, it’s worth it.
Frequently Asked Questions
Strawberry Banana Pudding is a simple, crowd-pleasing dessert, but you may have a few questions before making it. Here are some common ones to help you out!
1. Can I make this dessert ahead of time?
Yes! In fact, it’s best when made at least 4 hours in advance to allow the wafers to soften and the flavors to meld. For the best results, make it the night before serving.
2. How do I keep the bananas from turning brown?
Tossing banana slices in lemon or orange juice helps prevent browning. Be sure to use just a light coating so the citrus flavor doesn’t overpower the dessert.
3. Can I use homemade whipped cream instead of Cool Whip?
Absolutely! If you prefer a fresher taste, homemade whipped cream is a great substitute. Simply whip 1 cup of heavy cream with 2 tablespoons of powdered sugar until stiff peaks form.
4. Can I use frozen strawberries instead of fresh?
Fresh strawberries work best, but if you only have frozen, make sure to thaw and drain them well before layering to avoid excess moisture.
5. How long does this dessert last in the fridge?
Strawberry Banana Pudding is best enjoyed within 2 days. After that, the bananas may become too soft, and the wafers can get overly mushy.
6. Can I make this in individual servings?
Yes! Layering the pudding, fruit, and wafers in small mason jars or dessert cups makes for an easy, grab-and-go treat.
7. What other fruits can I add?
This recipe is super versatile! Try adding blueberries, raspberries, or even pineapple for a fun twist.
Final Thoughts on Strawberry Banana Pudding
Strawberry Banana Pudding is one of those desserts that never fails to impress. It’s easy, delicious, and requires zero baking, making it perfect for any occasion. Whether you’re bringing it to a potluck, serving it at a family dinner, or just craving a creamy, fruity treat, this pudding will hit the spot every time.
The best part? It’s completely customizable! You can swap out the wafers for graham crackers, add extra fruit, or even drizzle a little caramel on top. However you choose to make it, this no-bake dessert is guaranteed to be a hit.
Give it a try and let us know how it turns out! Have any fun variations? Share them in the comments—we’d love to hear!
Print
Strawberry Banana Pudding
- Author: Andrew Recipes
Description
This creamy and fruity no-bake dessert combines layers of smooth vanilla pudding, fresh strawberries and bananas, and crunchy vanilla wafers. It’s the perfect make-ahead treat for potlucks, family gatherings, or any time you want a sweet and refreshing dessert.
Ingredients
For the Pudding Layers:
- 1 (5.1 oz) box of instant vanilla pudding mix
- 2 cups cold milk
- 1 (8 oz) tub of whipped topping (e.g., Cool Whip)
- 1 (14 oz) can sweetened condensed milk
- 1 teaspoon vanilla extract
For the Fruit and Assembly:
- 2–3 bananas, sliced
- 2 cups fresh strawberries, hulled and sliced
- 1 (11 oz) box vanilla wafer cookies (or graham crackers)
Instructions
Prepare the Pudding Mixture
In a large mixing bowl, whisk together the instant vanilla pudding mix and cold milk until thickened, about 2 minutes. Fold in the whipped topping, sweetened condensed milk, and vanilla extract until smooth. Set aside.
Assemble the Layers
In a large trifle dish, glass bowl, or individual serving cups, spread a thin layer of the pudding mixture on the bottom.
Add a layer of vanilla wafers, followed by a layer of sliced bananas and strawberries.
Top the fruit with another layer of the pudding mixture.
Repeat the layers (wafers, bananas, strawberries, pudding) until the dish is full, ending with a layer of pudding on top.
Garnish and Chill
For a decorative touch, top with whole strawberries and crushed vanilla wafers.
Cover the dish with plastic wrap and refrigerate for at least 2–4 hours (or overnight) to allow the flavors to meld and the wafers to soften.
Notes
- To prevent the bananas from browning, lightly toss them in a little lemon or orange juice before layering.
- Graham crackers can be used instead of vanilla wafers for a slightly different texture.
- Leftovers can be stored in the refrigerator for up to 2 days for the best texture.

