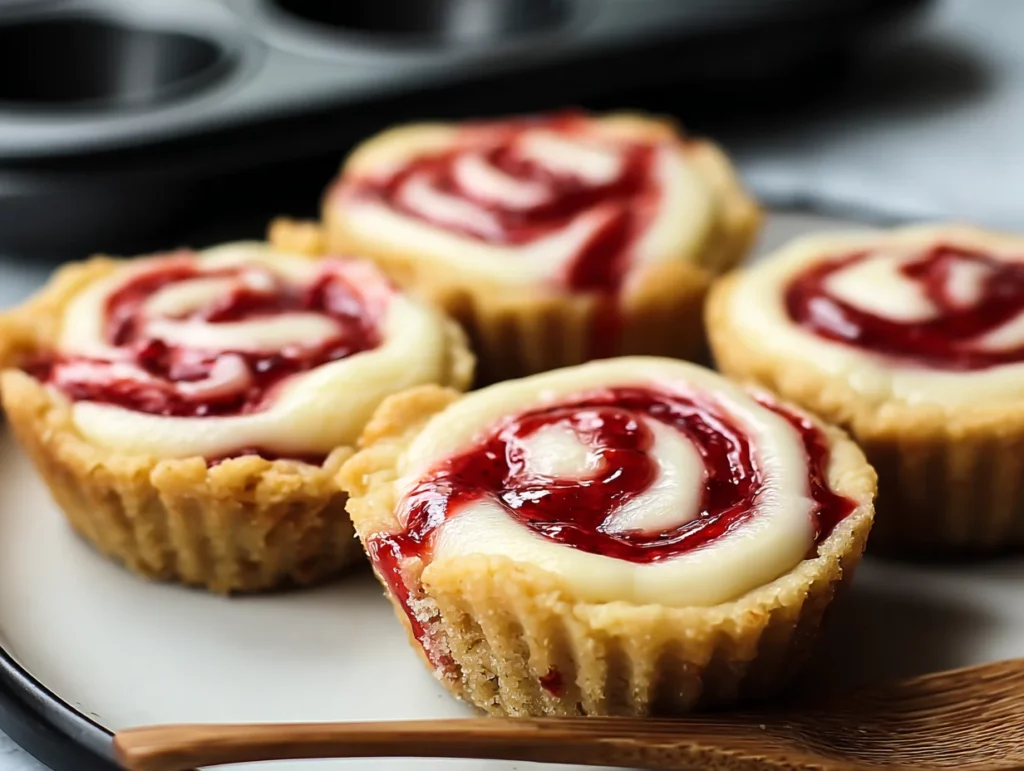
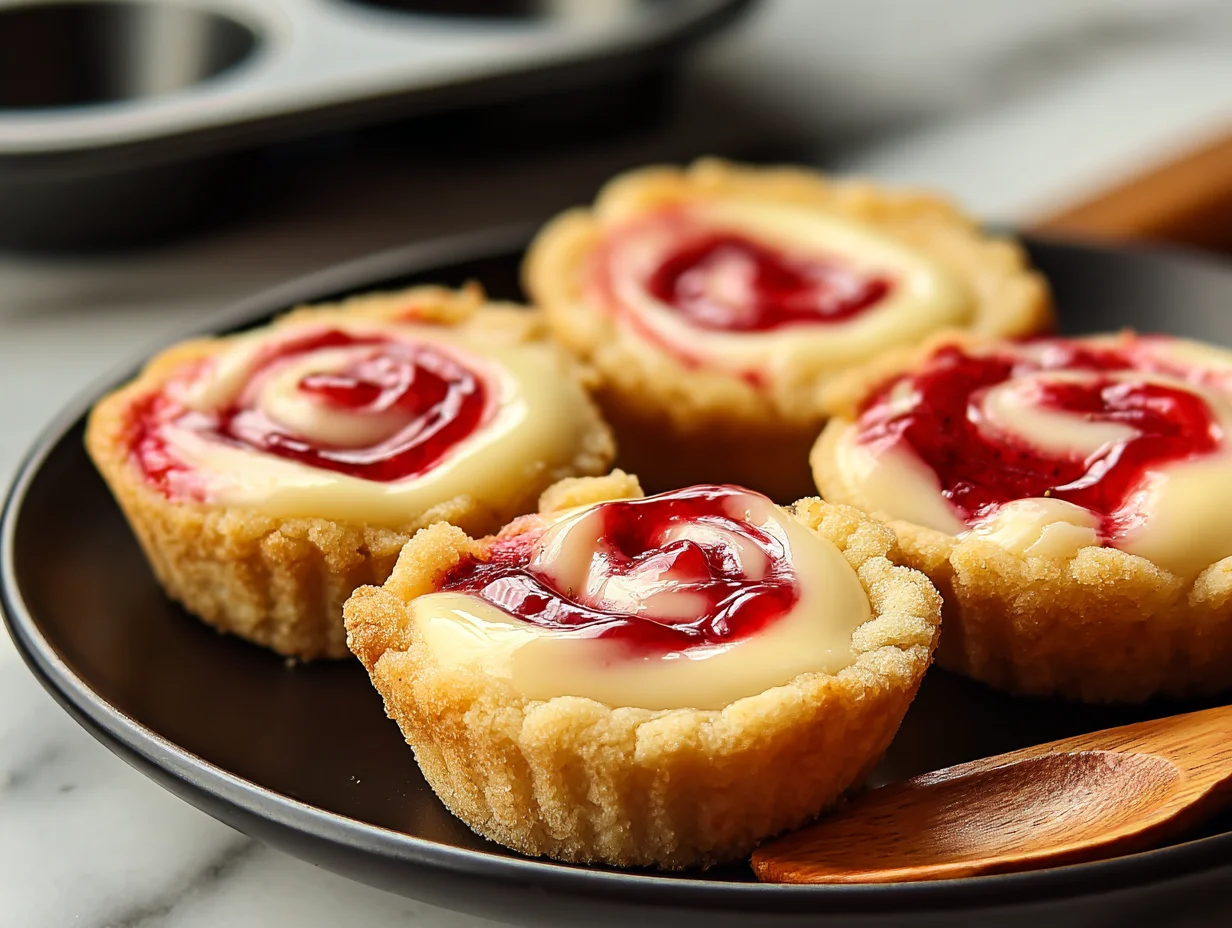
There’s just something about bite-sized desserts that makes them totally irresistible—and if they happen to include both sugar cookies and cheesecake, well, count me in! These Strawberry Swirl Cheesecake Cookie Cups are a sweet little mashup of two classic treats, and trust me, they’re every bit as good as they sound.
I actually made a batch of these for a family get-together last spring, and they disappeared within minutes. No plates, no forks, no fuss—just rich, creamy cheesecake tucked into golden sugar cookie cups, with a pretty swirl of strawberry jam right on top. They look fancy enough for holidays and parties but are easy enough to whip up on a random Thursday night (which, let’s be real, is when I’m most likely to crave cheesecake).
So if you’re in the mood for a fun twist on cheesecake—or if you just need a crowd-pleasing dessert that doesn’t take a ton of effort—these little cookie cups are a must-try. Let’s dive right in!

Ingredients You’ll Need
For the cookie base:
1 tube (16.5 oz) refrigerated sugar cookie dough
For the cheesecake filling:
8 oz cream cheese, softened
⅓ cup granulated sugar
1 large egg
1 teaspoon vanilla extract
For the strawberry swirl:
¼ cup strawberry jam or preserves
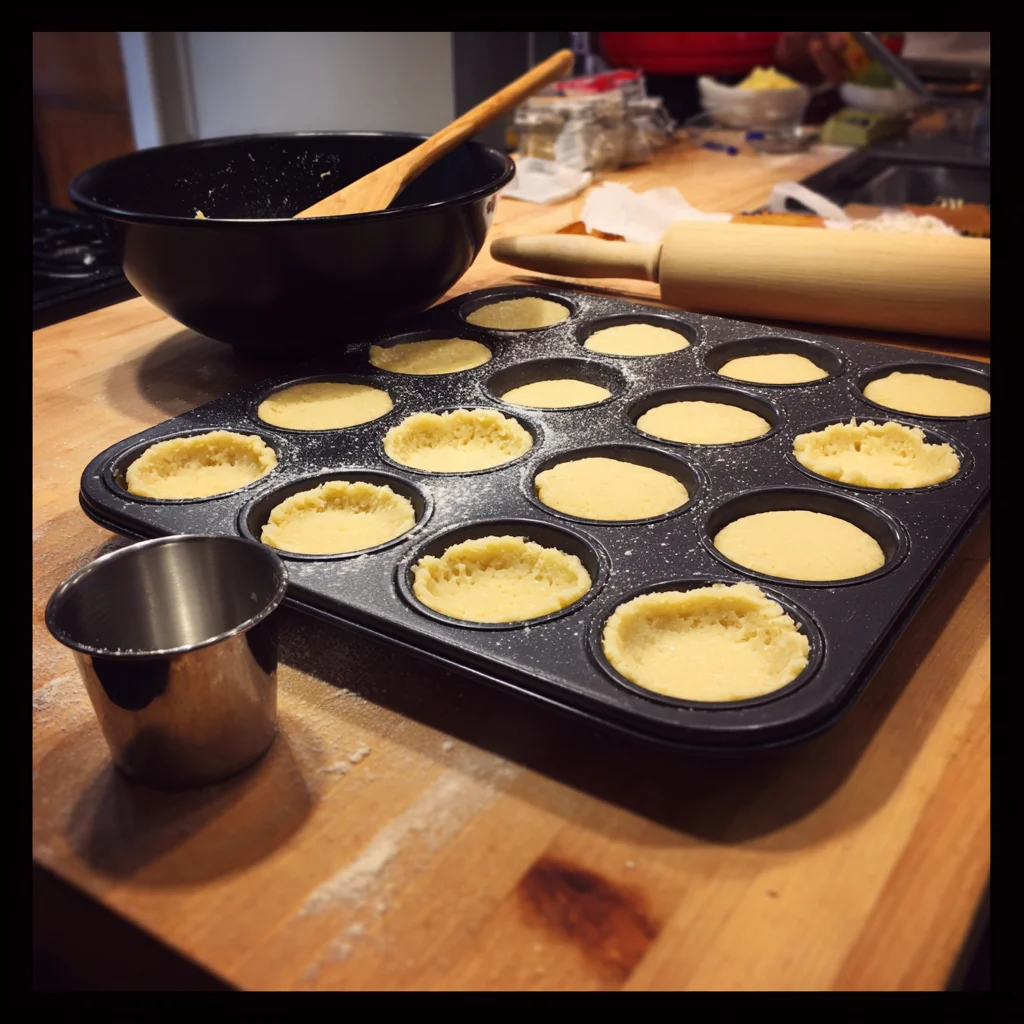
STEP 1: Prep Your Muffin Tin
Start by preheating your oven to 350°F (175°C). Lightly grease a 12-cup muffin tin or pop in some paper liners if you want an easier cleanup (and a more grab-and-go kind of feel). Either works great.
STEP 2: Form the Cookie Cup Base
Next, grab your tube of refrigerated sugar cookie dough and slice it into 12 equal pieces. Press each piece into the bottom of your prepared muffin cups, gently pressing the dough up the sides to form little wells. Don’t worry about making them perfect—once they bake, they’ll puff up and cradle that creamy filling beautifully.
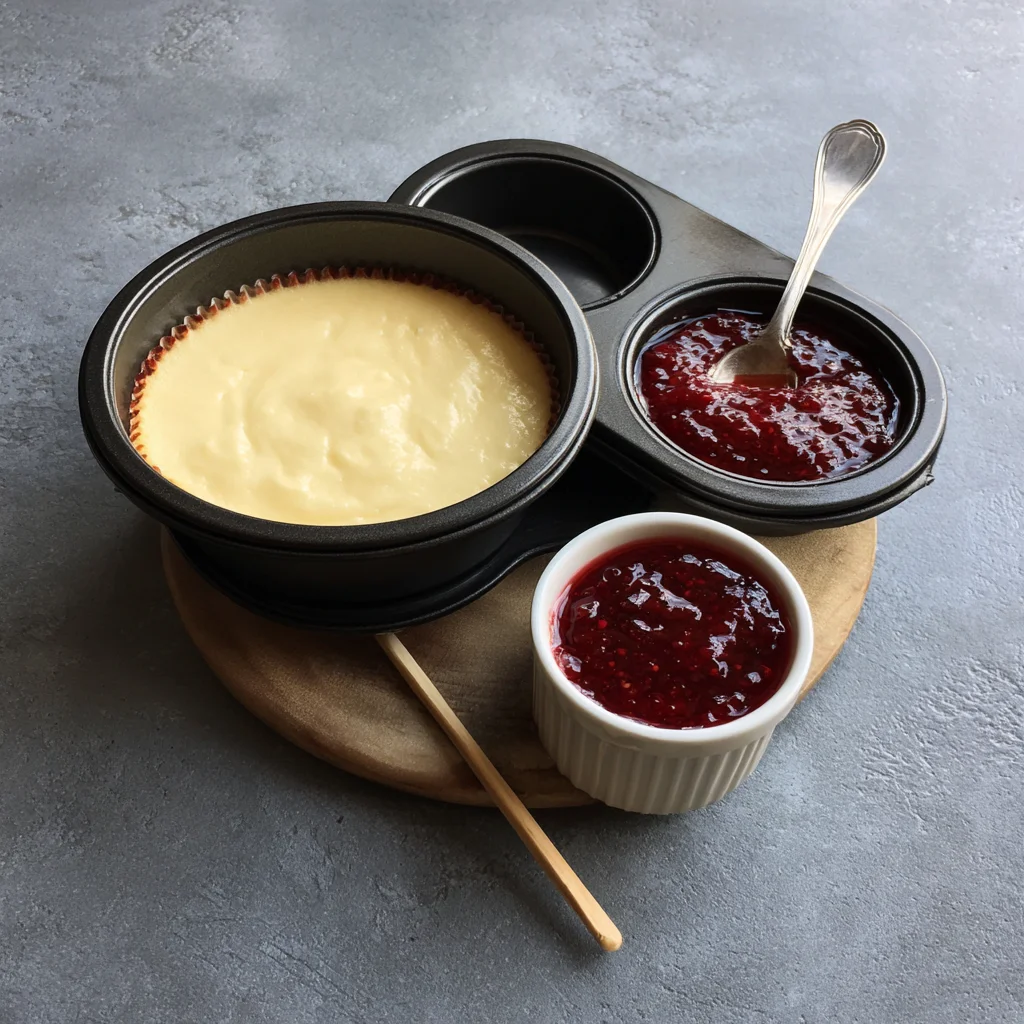
STEP 3: Make the Cheesecake Filling
In a medium bowl, beat together the softened cream cheese and granulated sugar until the mixture is nice and smooth—no lumps here! Then add in the egg and vanilla extract, mixing until it’s fully combined and silky.
This filling is the creamy heart of these cookie cups, so don’t rush this step. A smooth filling makes all the difference.
STEP 4: Fill the Cookie Cups
Using a spoon (or a small cookie scoop, which works wonders), divide the cheesecake filling evenly between the 12 cookie cups. You’ll want to fill them almost to the top—just leave a tiny bit of room so the filling doesn’t spill over while baking.
STEP 5: Add the Strawberry Swirl
Now comes the fun (and pretty!) part. Take your strawberry jam or preserves and add a few small drops to the top of each cheesecake-filled cookie cup. Then, using a toothpick or a skewer, gently swirl the jam into the cheesecake layer.
There’s no right or wrong way to do this—just swirl until you’ve got a nice marbled effect. It’ll look gorgeous once it bakes up, like a tiny dessert masterpiece in every cup.

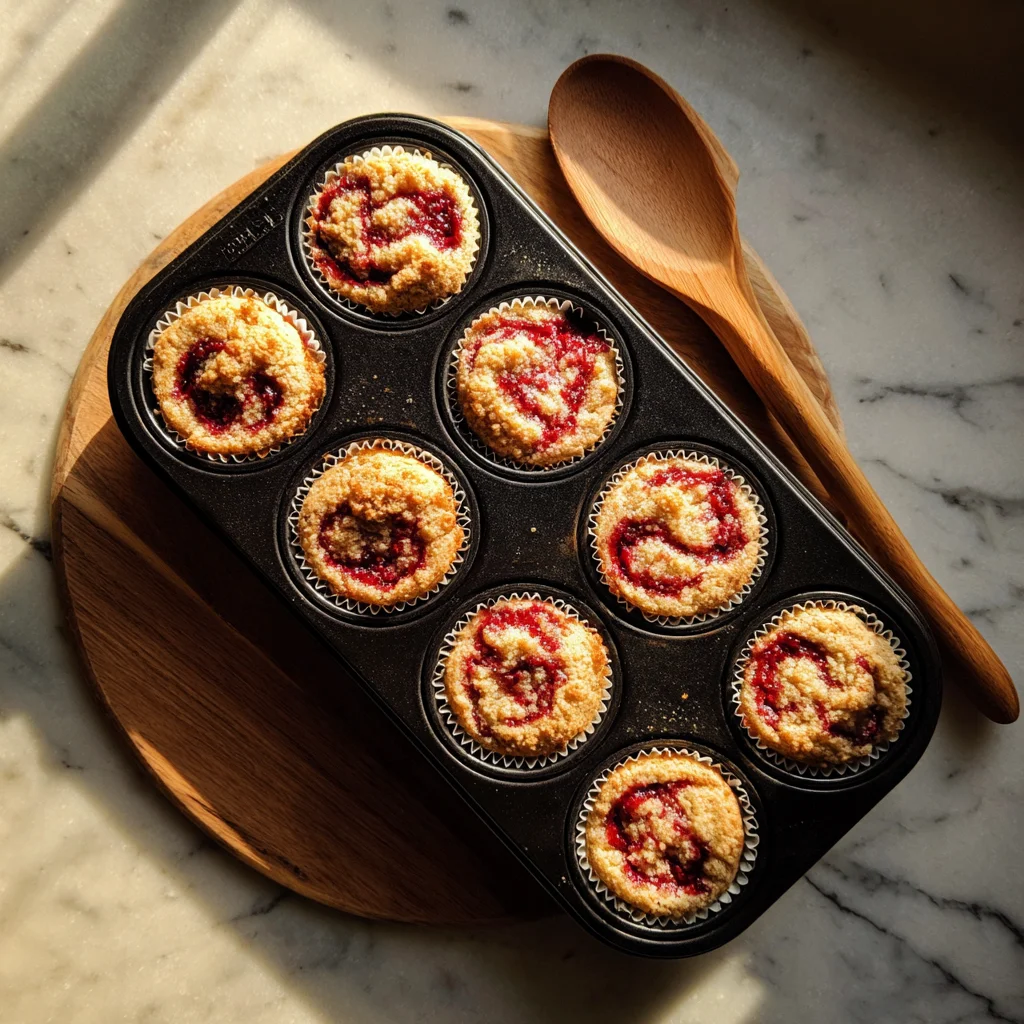
STEP 6: Bake to Perfection
Pop your muffin tin into the preheated oven (350°F/175°C) and bake the cookie cups for 18 to 22 minutes. You’re looking for a few key signs that they’re done:
The edges of the sugar cookie should be a light golden brown.
The cheesecake center should look set, with just a tiny bit of jiggle in the middle (think of it like a full-size cheesecake—slightly firm but still creamy).
Every oven runs a little differently, so I recommend checking around the 18-minute mark and going from there. You don’t want to overbake or dry out the cheesecake layer.
STEP 7: Cool Before Removing
Once baked, let the cookie cups cool in the pan for about 10 minutes. This is important—not just for avoiding burnt fingertips, but also because the cups are delicate right out of the oven. Cooling helps them firm up a bit so you can remove them without cracking the cheesecake.
After that short rest, carefully transfer them to a wire cooling rack to cool completely.
Tip: If you didn’t use liners, gently run a butter knife around the edges of each cup before lifting them out. This helps release them cleanly without damaging those beautiful swirled tops.
STEP 8: Chill in the Fridge
Here’s the secret to getting that true cheesecake texture: refrigeration.
Once your cookie cups are cooled to room temperature, place them in an airtight container and pop them into the fridge for at least 1 hour. If you have the time, chilling them overnight gives the best results. The cheesecake layer firms up beautifully, and the flavors meld together in the most delicious way.
Helpful Tips & Easy Variations
Whether you’re making these for a party, bake sale, or just a cozy night at home, there are a few little tweaks and tips that can help you take this recipe to the next level.
Try a Different Jam
While strawberry is a classic (and looks gorgeous), you can absolutely switch it up based on what you have in the fridge—or what fruit you’re craving. Try:
Raspberry jam for a slightly tart edge
Blueberry preserves for a rich, deep berry flavor
Apricot jam for a sunny, tangy twist
Each one gives these cookie cups a whole new vibe!
Add a Graham Cracker Sprinkle
For a little textural contrast, try sprinkling a tiny bit of crushed graham cracker crumbs on top after baking but before chilling. It adds a fun nod to traditional cheesecake crusts.
Make It a Mini Sampler
Can’t decide on one flavor? Use different jams in each cup and make a mini cheesecake sampler tray. It’s a hit at parties, and guests love choosing their favorite.
Make-Ahead Friendly
These cookie cups hold up really well in the fridge. You can make them 1-2 days ahead, which is a lifesaver if you’re prepping for an event. Just store them in a tightly sealed container and keep them chilled until serving.
Strawberry Swirl Cheesecake Cookie Cups (Easy & Delicious Mini Dessert!)
We’ve mixed, baked, swirled, and chilled—and by now, you’ve either got a batch of gorgeous Strawberry Swirl Cheesecake Cookie Cups chilling in the fridge or you’re counting down the minutes until your next baking session. Either way, you’re in for a real treat.
Before we wrap things up, let’s go over some common questions people tend to ask about this recipe. Whether it’s about storage, substitutions, or getting that perfect swirl, I’ve got you covered.
FAQ: Strawberry Swirl Cheesecake Cookie Cups
1. Can I use homemade sugar cookie dough instead of refrigerated dough?
Yes! If you have a favorite homemade sugar cookie recipe, feel free to use it. Just make sure to chill the dough first so it’s easy to press into the muffin cups without sticking.
2. Do I have to chill the cookie cups before serving?
Technically, you can serve them at room temperature after cooling, but chilling is what really sets the cheesecake layer. For the best texture and flavor, give them at least an hour in the fridge.
3. What’s the best way to swirl the jam without overmixing?
Use a toothpick or skewer and gently drag it through the drops of jam in a figure-eight or swirl pattern. Avoid stirring too much or the colors will blend together instead of creating a marbled look.
4. Can I make these ahead of time?
Absolutely. These cookie cups are great for prepping in advance. You can make them up to 2 days ahead and store them in an airtight container in the fridge until ready to serve.
5. Can I freeze these cookie cups?
Yes, you can freeze them! Let them cool completely, chill in the fridge, then place in a freezer-safe container with parchment between layers. They’ll keep for about a month. Thaw overnight in the fridge before serving.
6. Can I make these gluten-free?
You sure can—just swap in a gluten-free sugar cookie dough (store-bought or homemade) and double-check your jam and cream cheese labels to ensure they’re certified gluten-free.
7. Why did my cheesecake filling crack?
Cheesecake can sometimes crack if it’s overbaked or cools too quickly. Since these are small cups, it’s less likely, but to be safe, don’t overbake, and let them cool gradually before chilling.
Final Thoughts: A Mini Dessert That Makes a Big Impression
These Strawberry Swirl Cheesecake Cookie Cups are proof that you don’t need fancy ingredients or complicated techniques to make something truly special. They come together with just a few pantry staples and a little bit of love, and the end result is a dessert that’s equal parts charming, delicious, and totally satisfying.
Perfect for holidays, birthdays, bake sales, or even just a mid-week sweet tooth moment, this recipe is one that’s bound to end up on your regular baking rotation. I especially love that they’re so customizable—switch up the jam, add a topping, or try different cookie dough bases if you’re feeling adventurous.
Print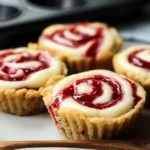
Strawberry Swirl Cheesecake Cookie Cups
- Author: Andrew Recipes
Description
Strawberry Swirl Cheesecake Cookie Cups combine the rich, creamy flavor of cheesecake with the buttery sweetness of sugar cookies, all in one handheld treat. A dollop of strawberry jam swirled into the cheesecake center adds a fruity brightness, making these mini desserts perfect for parties, holidays, or anytime indulgence.
Ingredients
For the cookie base
1 tube (16.5 oz) refrigerated sugar cookie dough
For the cheesecake filling
8 oz cream cheese, softened
⅓ cup granulated sugar
1 large egg
1 teaspoon vanilla extract
For the strawberry swirl
¼ cup strawberry jam or preserves
Instructions
1 Preheat your oven to 350°F (175°C). Lightly grease a 12-cup muffin tin or line with paper liners.
2 Slice the sugar cookie dough into 12 equal portions and press each piece into the bottom and up the sides of each muffin cup to form a small well.
3 In a medium bowl, beat the softened cream cheese and sugar until smooth. Add the egg and vanilla extract and mix until fully combined and creamy.
4 Spoon the cheesecake mixture evenly into the cookie cups, filling them almost to the top.
5 Place small drops of strawberry jam on top of the cheesecake filling in each cup. Use a toothpick or skewer to gently swirl the jam into the cheesecake.
6 Bake for 18-22 minutes, or until the cheesecake is set and the cookie edges are golden brown.
7 Allow the cups to cool in the pan for 10 minutes, then transfer to a wire rack to cool completely. Chill in the refrigerator for at least one hour before serving.
Notes
You can substitute raspberry or blueberry jam for a different twist. For a firmer texture, refrigerate overnight. To remove the cookie cups easily, run a butter knife around the edges after cooling slightly. These keep well in the fridge for up to 5 days in an airtight container.

