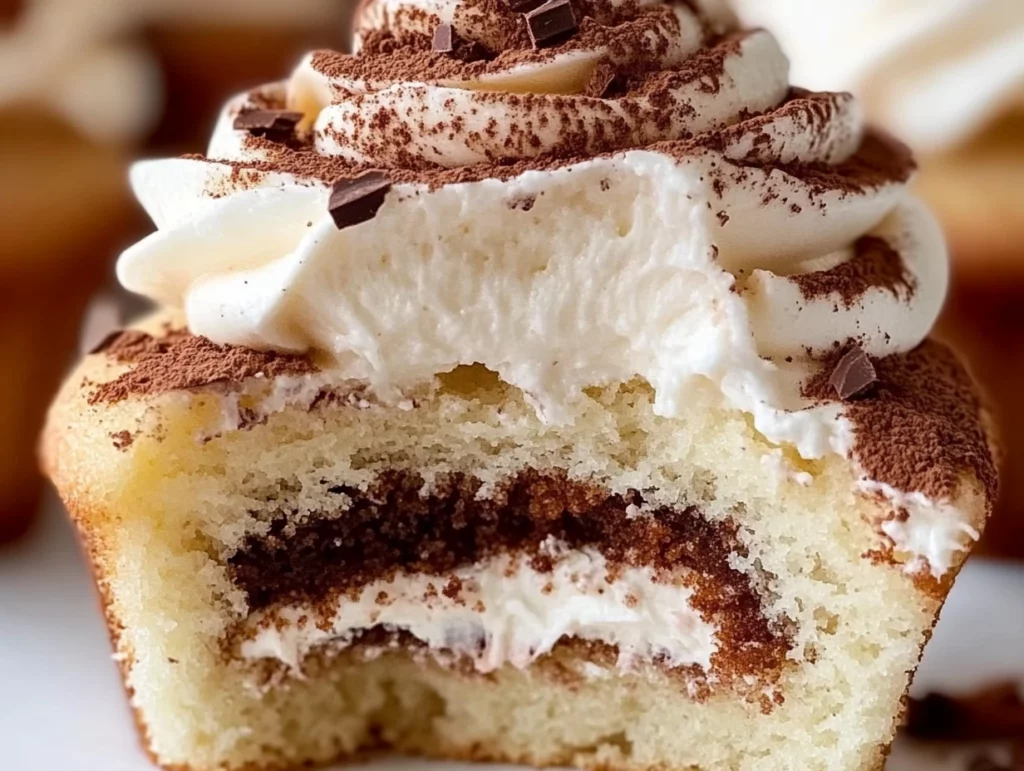
If you’re a fan of tiramisu, then you’re going to love these Tiramisu Cupcakes! These cupcakes are the perfect combination of two of my favorite things—coffee and cake—topped with a luxurious mascarpone frosting. They capture all the rich, coffee-infused flavors of a classic tiramisu dessert, but in a fun, portable cupcake form that’s sure to impress anyone who takes a bite.
I first tried this recipe when I was craving something sweet but didn’t want to go through the hassle of making an entire tiramisu. A cupcake seemed like the perfect solution, and I was not disappointed! The coffee soak makes each cupcake wonderfully moist, and the mascarpone frosting brings that familiar creamy sweetness we all love. What’s more, they’re totally customizable if you want to make them a little boozy (or not!) by adding coffee liqueur.
These Tiramisu Cupcakes make a show-stopping treat at any gathering, whether it’s a dinner party, birthday, or just a coffee lover’s indulgence. The balance between the rich espresso flavor, the creamy frosting, and the light texture of the cupcake is pure perfection. Let’s dive in and make these delicious little desserts!
Ingredients You’ll Need
Before we start, let’s gather all the ingredients you’ll need to make these cupcakes. Don’t worry, they’re easy to find at most grocery stores, and once you have everything, you’ll be ready to bake!
For the Cupcakes:
1 ½ cups all-purpose flour
1 ½ teaspoons baking powder
¼ teaspoon salt
½ cup unsalted butter (softened to room temperature)
1 cup granulated sugar
2 large eggs (room temperature)
1 teaspoon vanilla extract
½ cup whole milk (room temperature)
½ cup strong brewed espresso or coffee (cooled)
For the Coffee Soak:
¼ cup strong brewed espresso or coffee (cooled)
2 tablespoons coffee liqueur (optional; substitute with additional coffee if avoiding alcohol)
For the Mascarpone Frosting:
8 oz mascarpone cheese (softened to room temperature)
½ cup unsalted butter (softened to room temperature)
2 ½ cups powdered sugar (sifted)
1 teaspoon vanilla extract
Pinch of salt
For Garnish:
Cocoa powder (for dusting)
Chocolate shavings or curls (optional)
Step 1: Preheat Your Oven
To get started, preheat your oven to 350°F (175°C). This is a crucial step to ensure that the cupcakes bake evenly. While the oven is heating up, line a muffin tin with cupcake liners or grease the tin lightly if you’re not using liners. This will prevent the cupcakes from sticking and make cleanup a breeze!

Step 2: Make the Cupcake Batter
In a medium-sized bowl, whisk together the dry ingredients—flour, baking powder, and salt. Set this bowl aside while we work on the wet ingredients.
In a larger mixing bowl, beat the softened butter and granulated sugar together with either a hand mixer or stand mixer. Do this for about 2-3 minutes, until the mixture is light and fluffy. This step is key for creating a soft and airy cupcake!
Next, add the eggs one at a time, making sure to beat well after each addition. This ensures the eggs are fully incorporated into the butter and sugar mixture. After the eggs are mixed in, add the vanilla extract and give it a quick stir.
Now, we’ll alternate between adding the dry ingredients and the milk to the wet ingredients. Start by adding a little of the dry mixture, then add some milk, and repeat the process until everything is combined. Make sure to begin and end with the dry ingredients to avoid overmixing. Once the batter looks smooth, stir in the cooled espresso or coffee. This is where the magic happens! The coffee brings all those delicious flavors that make tiramisu so irresistible.
Step 3: Bake the Cupcakes
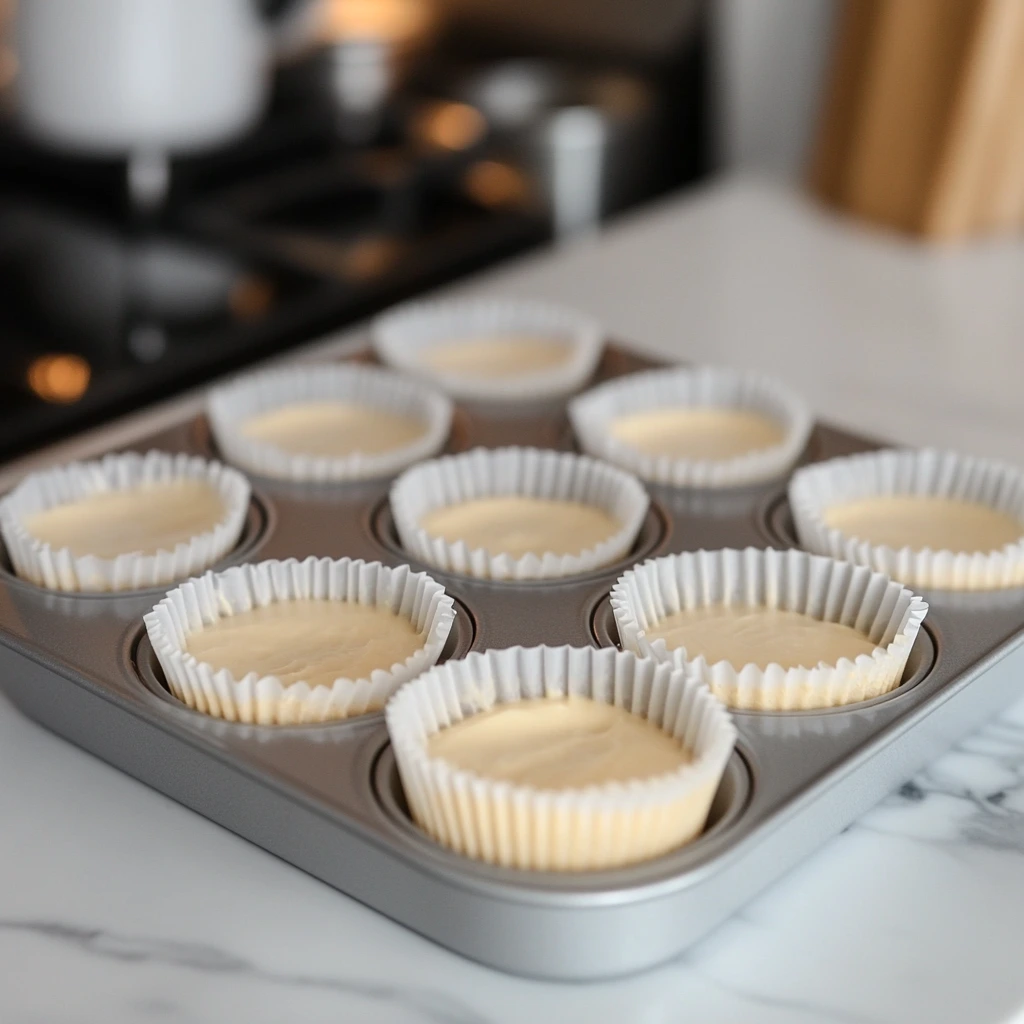
Once your batter is ready, divide it evenly among the cupcake liners in your prepared muffin tin. Be sure to fill each liner about ⅔ full—this allows room for the cupcakes to rise without overflowing.
Place the tin in the oven and bake for 18-20 minutes, or until a toothpick inserted into the center of a cupcake comes out clean. Every oven is different, so you might want to check around the 18-minute mark just to be safe. After baking, let the cupcakes cool in the tin for 5 minutes before transferring them to a wire rack to cool completely. Cooling them fully is important, especially before you add the coffee soak!
Step 4: Prepare the Coffee Soak
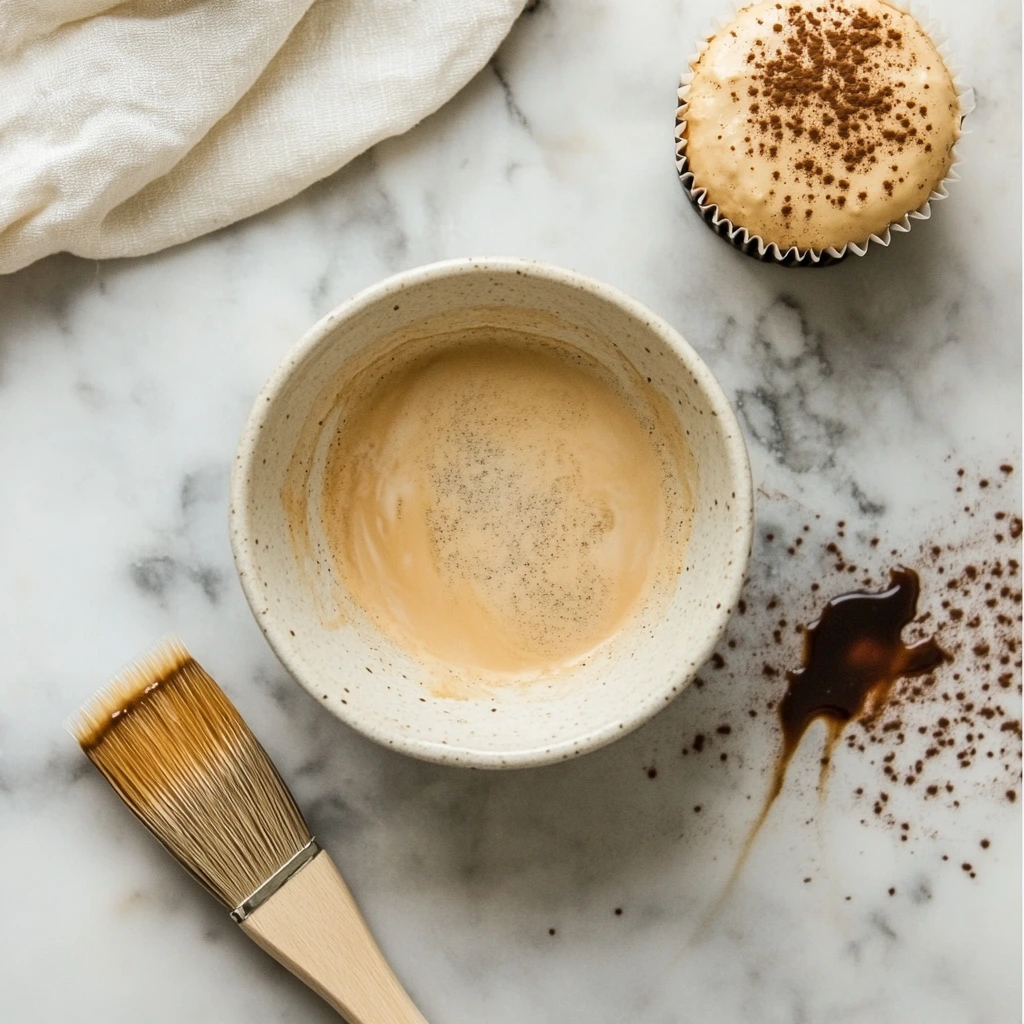
While your cupcakes are cooling, it’s time to prepare the coffee soak. This step is what gives the cupcakes that moist, coffee-infused flavor that makes them taste just like tiramisu.
In a small bowl, combine the cooled espresso or coffee with the coffee liqueur (if using). If you’re not using the liqueur, just double up on the coffee for that full espresso flavor. Once the mixture is ready, use a pastry brush to gently apply it to the tops of the cooled cupcakes. Don’t soak them too much—just a light brushing will do the trick! You want them moist, but not soggy.
Mascarpone Frosting and Assembling Your Tiramisu Cupcakes
Now that your cupcakes are baked, cooled, and soaked with coffee, it’s time for the real magic to happen: the mascarpone frosting. This frosting is creamy, slightly tangy, and the perfect complement to the rich coffee flavor of the cupcakes. With a few simple steps, you’ll have the perfect topping for your tiramisu-inspired treats. Let’s jump into it!
Step 5: Make the Mascarpone Frosting
The mascarpone frosting is what brings all the flavors of tiramisu together, and it’s easier to make than you might think! You’ll need some softened mascarpone cheese and butter to start. Make sure both ingredients are at room temperature—this will ensure a smooth, creamy frosting without any lumps.
In a large mixing bowl, beat the softened mascarpone cheese and butter together using either a hand mixer or a stand mixer. Mix for about 2-3 minutes, until the mixture becomes smooth and creamy. It’s important to take your time here and ensure the butter and mascarpone blend together nicely. This will create a fluffy base for the frosting.
Once the mascarpone and butter are fully mixed, gradually add the sifted powdered sugar, one cup at a time. Start mixing on low speed so that powdered sugar doesn’t go flying everywhere (trust me, you don’t want that mess!). Once all the powdered sugar is added, increase the mixer speed and beat for 2-3 minutes until the frosting becomes light, fluffy, and smooth.
Finally, add the vanilla extract and a pinch of salt. The vanilla adds a subtle sweetness, while the salt balances out the richness of the frosting. Give the mixture a quick final mix, and your frosting will be ready to go!
Step 6: Assemble and Garnish
Now that both your cupcakes and frosting are ready, it’s time to assemble these little beauties. This is where you get to unleash your inner pastry artist!
First, transfer the mascarpone frosting into a piping bag fitted with your favorite piping tip. I love using a large star tip for a nice, decorative swirl, but you can use any tip you prefer. If you don’t have a piping bag, no worries—simply spread the frosting on top of the cupcakes using a butter knife for a rustic look.
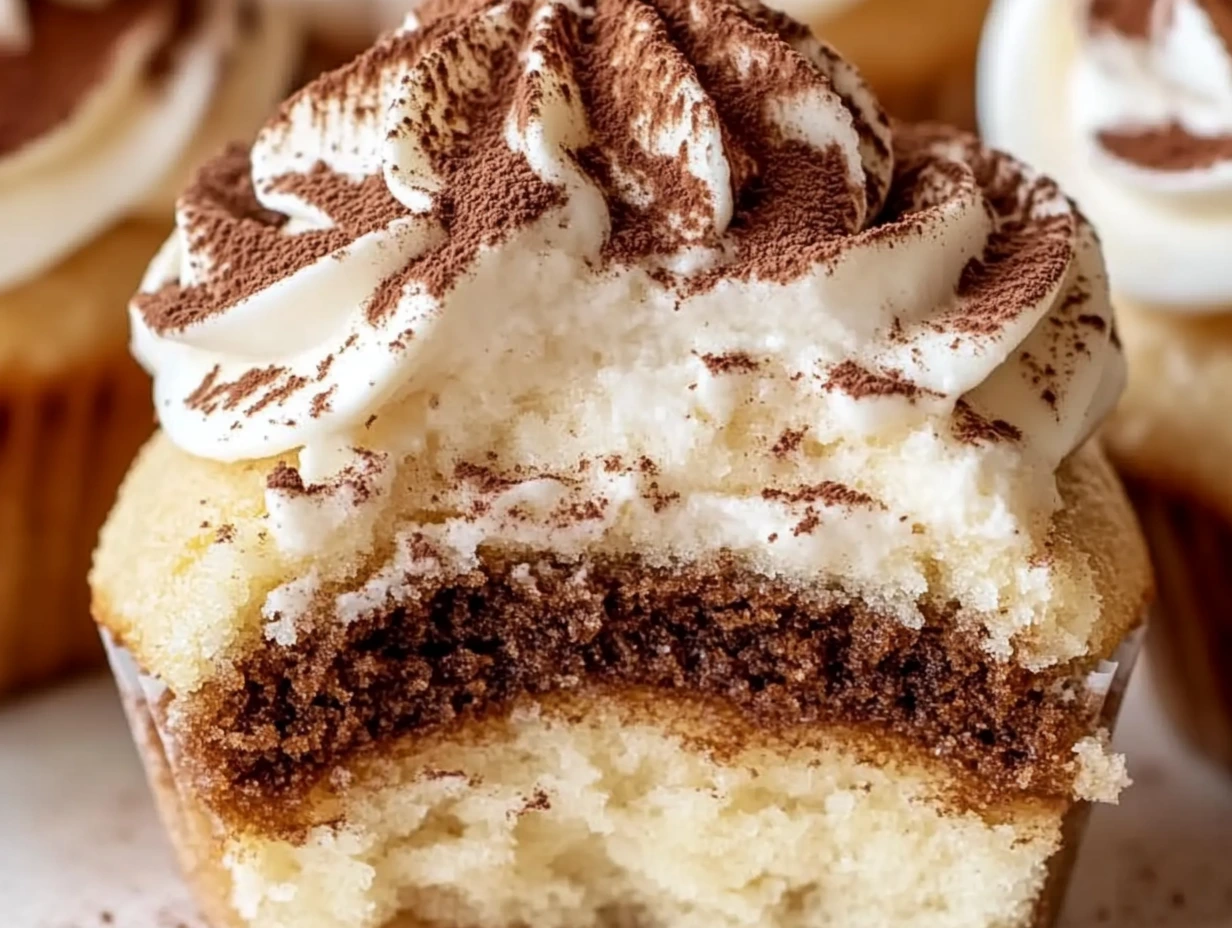
Once the cupcakes are frosted, it’s time to finish them off with a touch of cocoa powder. Lightly dust the tops of each cupcake with cocoa powder using a fine-mesh sieve or sifter. This not only adds that signature tiramisu touch, but it also gives the cupcakes a professional, polished look.
If you’re feeling extra fancy, you can also garnish with chocolate shavings or curls. These little chocolate accents will take your cupcakes to the next level, making them look as impressive as they taste. But if you prefer to keep it simple, the cocoa powder alone is more than enough to make these cupcakes look absolutely stunning.
Step 7: Serve and Enjoy
Now comes the best part—eating them! You can serve these Tiramisu Cupcakes either chilled or at room temperature. Personally, I love them chilled because it helps the mascarpone frosting set a bit, making each bite even creamier. However, they’re delicious at any temperature, so feel free to serve them however you prefer.
These cupcakes are the perfect treat for any occasion. Whether you’re hosting a dinner party, celebrating a special event, or simply indulging in a coffee-flavored dessert, these tiramisu cupcakes will definitely impress your guests (and satisfy your cravings!).
Store any leftovers in an airtight container in the refrigerator, and they should stay fresh for up to 3 days. But let’s be honest—these cupcakes are so delicious, you probably won’t have any leftovers!
FAQ Section:
1. Can I make these cupcakes ahead of time?
Yes! These cupcakes can be made a day or two in advance. Just be sure to store them in an airtight container in the refrigerator to keep them fresh. The coffee soak and frosting will actually help them stay moist and flavorful, making them even better the next day!
2. Is the coffee liqueur necessary in the coffee soak?
Not at all! The coffee liqueur adds a subtle extra flavor to the cupcakes, but it’s completely optional. If you prefer a non-alcoholic version, simply skip the liqueur and use more coffee instead. The cupcakes will still be delicious without it.
3. Can I substitute the mascarpone cheese with something else?
If you can’t find mascarpone cheese or would prefer a substitute, you can try using cream cheese or ricotta cheese. Keep in mind that the flavor and texture will be slightly different, but it will still result in a creamy frosting.
4. How can I make sure my cupcakes don’t turn out too dry?
To ensure your cupcakes stay moist, be careful not to overmix the batter. Overmixing can lead to dense, dry cupcakes. Additionally, don’t skip the coffee soak—this adds moisture and helps the cupcakes absorb all the rich coffee flavor.
5. Can I freeze these cupcakes for later?
Yes, you can freeze the cupcakes before frosting them. Just bake and cool the cupcakes completely, then store them in an airtight container or freezer bag. When you’re ready to serve, let them thaw and then frost them with the mascarpone frosting. Freezing after frosting may cause the texture of the mascarpone frosting to change, so it’s best to freeze the cupcakes un-frosted.
6. Can I use decaf coffee instead of regular coffee?
Absolutely! If you’re avoiding caffeine, you can easily substitute decaffeinated coffee in both the batter and the coffee soak. The flavor will still be rich and delicious without the caffeine kick.
7. How can I make these cupcakes even more like traditional tiramisu?
If you want to take these cupcakes to the next level, you can add a layer of cocoa powder between the cupcake and frosting, just like the layers in traditional tiramisu. This adds an extra layer of flavor and makes them even more similar to the classic dessert.
Conclusion
There you have it—Tiramisu Cupcakes that are rich, creamy, and bursting with coffee goodness. These cupcakes are a perfect twist on the classic Italian dessert, offering all the indulgent flavors in a portable and fun form. Whether you’re making them for a special event or just to satisfy your coffee cravings, these cupcakes are sure to be a hit!
Frequently Asked Questions and Conclusion
Now that you’ve got all the steps covered, it’s time to dive into a few common questions that might pop up as you make these delicious Tiramisu Cupcakes. Whether it’s about substitutions, storage, or making them in advance, I’ve got all the answers to ensure your baking experience is as smooth as possible.
FAQ Section:
1. Can I make these cupcakes ahead of time?
Absolutely! You can prepare the cupcakes the day before and store them in an airtight container at room temperature or in the fridge. They will actually taste even better the next day as the flavors continue to develop. Just wait to frost them until you’re ready to serve, as the frosting is best when fresh. The coffee soak will keep them nice and moist for a couple of days, too!
2. What can I substitute for mascarpone cheese in the frosting?
If you can’t find mascarpone or would prefer an alternative, you can use cream cheese as a substitute. Keep in mind that the flavor will change slightly, but the frosting will still be creamy and delicious. Ricotta is another option, but make sure it’s well-drained to avoid a watery consistency.
3. Can I make these cupcakes non-alcoholic?
Yes! If you want to avoid the coffee liqueur, simply leave it out and use additional coffee in the soak instead. The cupcakes will still have that delicious tiramisu flavor, just without the alcohol kick. The coffee liqueur adds a nice depth of flavor, but it’s totally optional.
4. How do I store these cupcakes?
Once your cupcakes are frosted, store them in an airtight container in the refrigerator. They’ll keep for up to 3 days. If you want to make them ahead of time, you can freeze the unfrosted cupcakes and frost them later. Just make sure to let them cool completely before freezing.
5. Can I freeze these cupcakes?
Yes! You can freeze the cupcakes before adding the frosting. After they cool, wrap them tightly in plastic wrap and place them in a freezer-safe bag or container. When you’re ready to enjoy them, let them thaw at room temperature and then frost. Freezing after frosting isn’t recommended as the mascarpone frosting may lose its texture.
6. What can I do if the coffee soak makes my cupcakes too soggy?
The coffee soak is meant to add flavor and moisture, but you don’t want to overdo it. If you find that your cupcakes are soggy, simply reduce the amount of coffee you apply. A light brush with the coffee soak is all that’s needed to give the cupcakes the rich coffee flavor they need without making them too wet.
7. Can I make mini tiramisu cupcakes?
Yes, you can make mini versions of these cupcakes! Just reduce the baking time to about 12-15 minutes, or until a toothpick inserted comes out clean. Mini tiramisu cupcakes are a perfect bite-sized treat for parties or gatherings.
Conclusion
And there you have it—your very own batch of Tiramisu Cupcakes that are rich, flavorful, and absolutely irresistible. These cupcakes are a fun twist on a classic dessert, and I hope you enjoyed making them as much as I did! Whether you’re serving them at a special event or just indulging in a little coffee-inspired treat, they’re guaranteed to impress anyone who takes a bite.
I’d love to hear how your Tiramisu Cupcakes turned out! Did you add your own twist or make any changes? Feel free to leave a comment below to share your experience or ask any other questions. And remember, the best part of baking is sharing, so don’t forget to share these with friends and family—it’s a treat everyone will love.
Happy baking, and enjoy your delicious tiramisu-inspired cupcakes!
Print
Tiramisu Cupcakes
- Author: Andrew Recipes
Description
These Tiramisu Cupcakes offer all the indulgent flavors of a classic tiramisu dessert, but in a fun and portable cupcake form. With a rich coffee-infused batter, a boozy coffee soak, and a creamy mascarpone frosting, these cupcakes are sure to impress at any occasion. They combine the perfect balance of sweetness, coffee richness, and creamy frosting, making them a decadent treat for any tiramisu lover.
Ingredients
For the Cupcakes:
1 ½ cups all-purpose flour
1 ½ teaspoons baking powder
¼ teaspoon salt
½ cup unsalted butter (softened to room temperature)
1 cup granulated sugar
2 large eggs (room temperature)
1 teaspoon vanilla extract
½ cup whole milk (room temperature)
½ cup strong brewed espresso or coffee (cooled)
For the Coffee Soak:
¼ cup strong brewed espresso or coffee (cooled)
2 tablespoons coffee liqueur (optional; substitute with additional coffee if avoiding alcohol)
For the Mascarpone Frosting:
8 oz mascarpone cheese (softened to room temperature)
½ cup unsalted butter (softened to room temperature)
2 ½ cups powdered sugar (sifted)
1 teaspoon vanilla extract Pinch of salt
For Garnish:
Cocoa powder (for dusting)
Chocolate shavings or curls (optional)
Instructions
Step 1: Preheat Your Oven Preheat your oven to 350°F (175°C). Line a muffin tin with cupcake liners or grease it lightly.
Step 2: Make the Cupcake Batter In a medium bowl, whisk together the flour, baking powder, and salt. Set aside. In a large mixing bowl, use a hand mixer or stand mixer to cream the softened butter and granulated sugar together until light and fluffy, about 2–3 minutes. Add the eggs one at a time, beating well after each addition. Mix in the vanilla extract. Alternate adding the dry ingredients and the milk to the wet ingredients, beginning and ending with the dry ingredients. Mix just until combined. Stir in the cooled espresso or coffee until fully incorporated.
Step 3: Bake the Cupcakes Divide the batter evenly among the prepared cupcake liners, filling each about ⅔ full. Bake in the preheated oven for 18–20 minutes, or until a toothpick inserted into the center comes out clean. Let the cupcakes cool in the pan for 5 minutes before transferring them to a wire rack to cool completely.
Step 4: Prepare the Coffee Soak In a small bowl, mix the cooled espresso or coffee with the coffee liqueur (if using). Use a pastry brush to gently brush the coffee mixture over the tops of the cooled cupcakes, allowing them to absorb the liquid.
Step 5: Make the Mascarpone Frosting In a large mixing bowl, beat the softened mascarpone cheese and butter together until smooth and creamy, about 2–3 minutes. Gradually add the powdered sugar, one cup at a time, mixing on low speed until fully incorporated. Add the vanilla extract and a pinch of salt. Beat on high speed for 2–3 minutes, until the frosting is light and fluffy.
Step 6: Assemble and Garnish Transfer the frosting to a piping bag fitted with your favorite tip. Pipe generous swirls of frosting onto each cupcake. Dust the tops with cocoa powder using a fine-mesh sieve for an elegant finish. Garnish with chocolate shavings or curls if desired.
Step 7: Serve and Enjoy Serve the cupcakes chilled or at room temperature. Store leftovers in an airtight container in the refrigerator for up to 3 days.
Notes
These Tiramisu Cupcakes capture all the flavors of the classic Italian dessert in a cupcake form, perfect for any celebration or coffee lover’s treat. The espresso-flavored batter and coffee soak bring richness and depth to the cupcakes, while the mascarpone frosting adds a creamy, sweet finish. Be mindful of the soak—don’t overdo it to prevent soggy cupcakes! The optional coffee liqueur adds an extra layer of flavor, but it can be omitted if you prefer a non-alcoholic version. Garnishing with cocoa powder and chocolate shavings will give them a professional touch, making them a showstopper at any event.

