There are days when you just want to bring something fun, flavorful, and a little unexpected to the table. That’s exactly where this Taco Pasta Salad comes in. It’s one of those recipes that perfectly balances comfort and freshness, making it ideal for family dinners, potlucks, or meal prepping for a busy week.
I first made this salad for a summer barbecue, and let me tell you—it was an instant hit! The kids loved the taco flavors, while the adults kept coming back for second (and third!) helpings. Ever since then, it’s become one of our go-to recipes whenever we need something crowd-pleasing and easy to pull together.
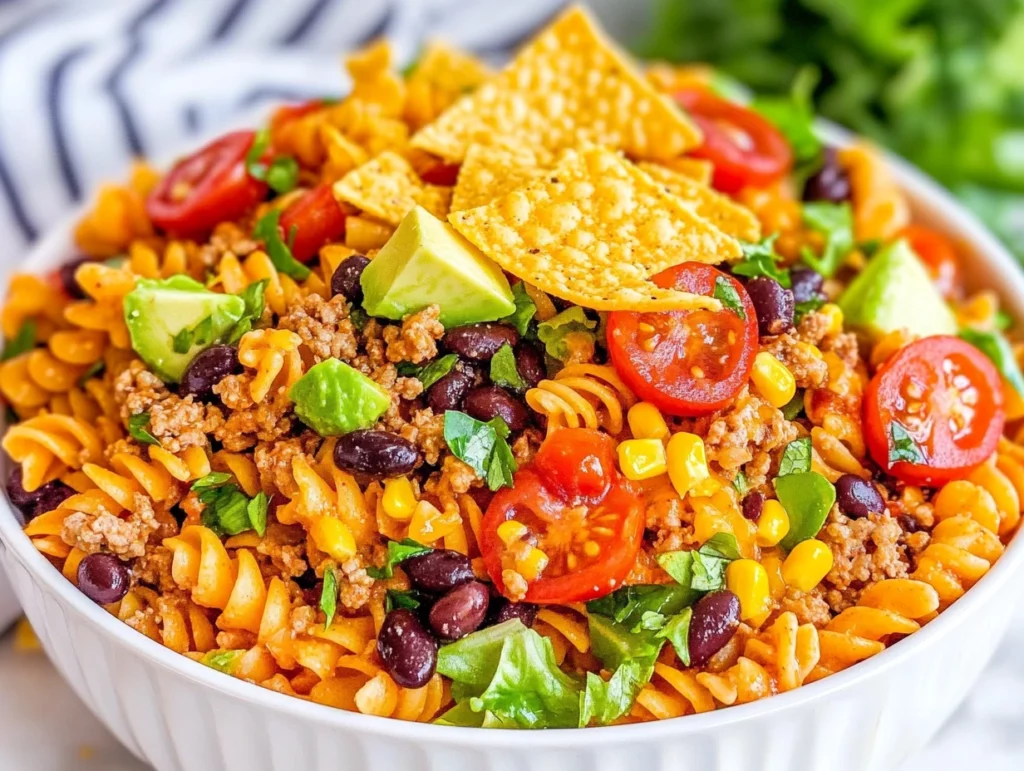
What I love most about this recipe is how it combines the hearty goodness of a taco with the cool, creamy texture of a pasta salad. You get seasoned ground beef, fresh veggies, creamy dressing, and perfectly cooked pasta all in one bite. It’s colorful, satisfying, and can be easily customized to fit your tastes or dietary needs.
Let’s dive right in and get started on this delicious dish!
INGREDIENTS YOU’LL NEED
For the Pasta:
12 oz rotini or fusilli pasta
Water for boiling
Salt for pasta water
For the Salad:
1 lb ground beef
1 packet taco seasoning
1 cup cherry tomatoes, halved
1 cup canned black beans, drained and rinsed
1 cup corn kernels (fresh, canned, or frozen and thawed)
1 red bell pepper, diced
1 cup shredded cheddar cheese
1 cup chopped romaine lettuce
1 avocado, diced
1/4 cup sliced black olives (optional)
2 green onions, sliced
For the Dressing:
1/2 cup sour cream
1/2 cup mayonnaise
2 tablespoons lime juice
1 teaspoon chili powder
1 teaspoon cumin
Salt and pepper to taste
STEP 1: COOK THE PASTA
Start by bringing a large pot of salted water to a boil. I always like to be generous with the salt—it really does make a difference in flavor! Once your water is boiling, add the pasta. You can use either rotini or fusilli; both shapes do a great job of holding onto the creamy dressing and little bits of taco goodness. Cook the pasta according to the package directions until it’s perfectly al dente.
When the pasta is done, drain it and rinse it under cold water. This helps stop the cooking process and cools it down quickly, which is exactly what we want for a chilled pasta salad. Set the cooled pasta aside while we move on to the next step.

STEP 2: PREPARE THE GROUND BEEF
In a large skillet over medium heat, cook the ground beef, breaking it up with a spoon as it cooks. You want to make sure it’s fully browned with no pink remaining. Once cooked, drain any excess grease to keep the salad from getting too oily.
Next, stir in the taco seasoning along with a small amount of water (follow the directions on your seasoning packet). Let the mixture simmer for a few minutes so the seasoning really gets absorbed into the meat. Once everything is well combined and flavorful, remove the skillet from the heat and let the beef cool slightly.
This step adds that bold, savory taco flavor that makes this pasta salad so irresistible.

STEP 3: MAKE THE CREAMY DRESSING
Now, let’s whip up the creamy, zesty dressing that ties everything together. In a medium mixing bowl, combine the sour cream, mayonnaise, lime juice, chili powder, cumin, salt, and pepper. Whisk everything together until smooth and creamy.
I always like to give it a little taste at this point and adjust the seasoning if needed. Sometimes I’ll add a bit more lime juice for extra zing or a touch more cumin for a deeper smoky flavor. This dressing is what gives the salad its signature creamy texture and perfectly complements the taco ingredients.
ASSEMBLING YOUR TACO PASTA SALAD: BRINGING IT ALL TOGETHER
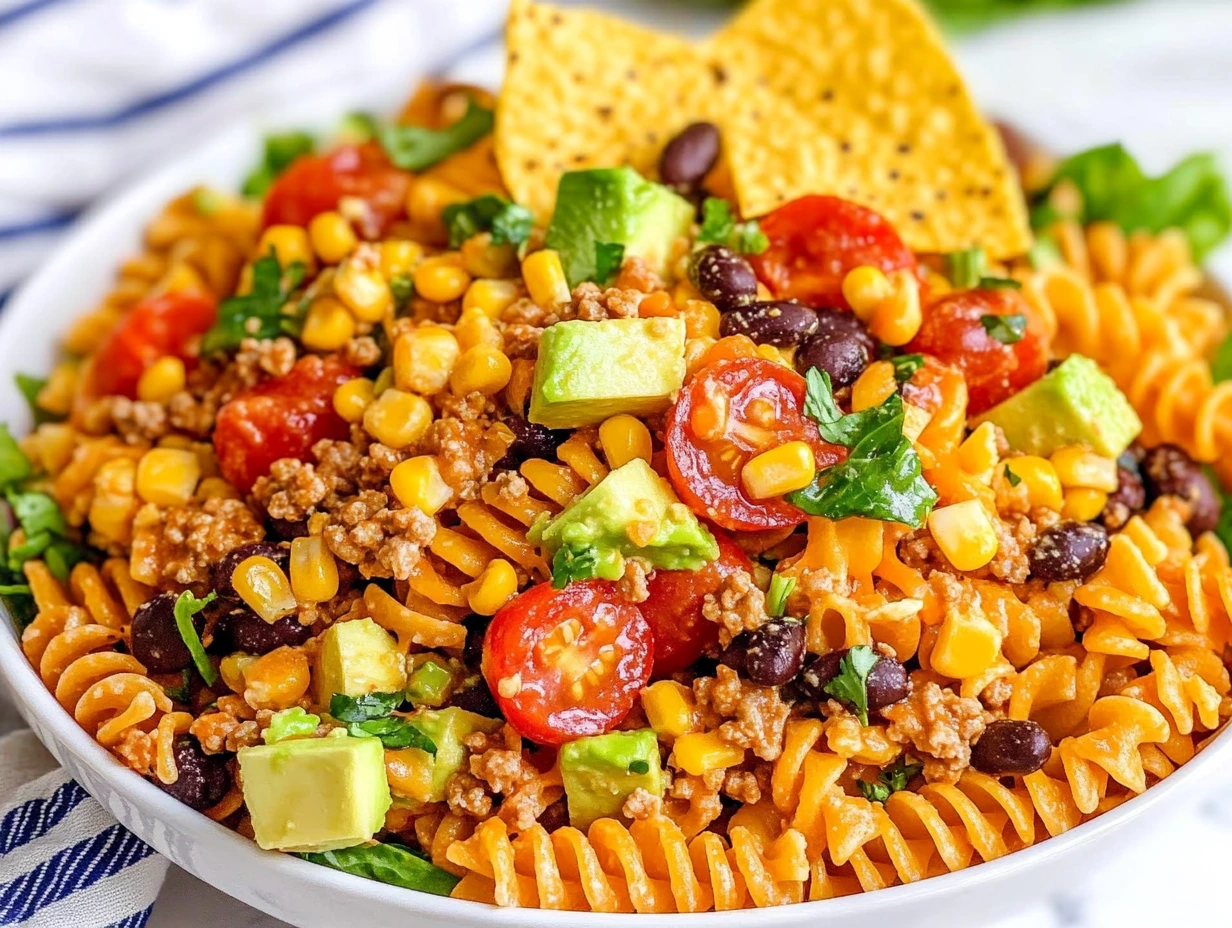
Alright, now that we have our perfectly cooked pasta, seasoned ground beef, and creamy dressing ready to go, it’s time for the best part—putting it all together. This step is where the real magic happens. You’ll see all those beautiful colors come together, and trust me, it’s a feast for the eyes and the taste buds!
STEP 4: COMBINE THE SALAD INGREDIENTS
Grab a large mixing bowl—you’ll want plenty of room to toss everything together without making a mess. Start by adding the cooled pasta and the slightly cooled, seasoned ground beef to the bowl. This forms the hearty base of the salad.
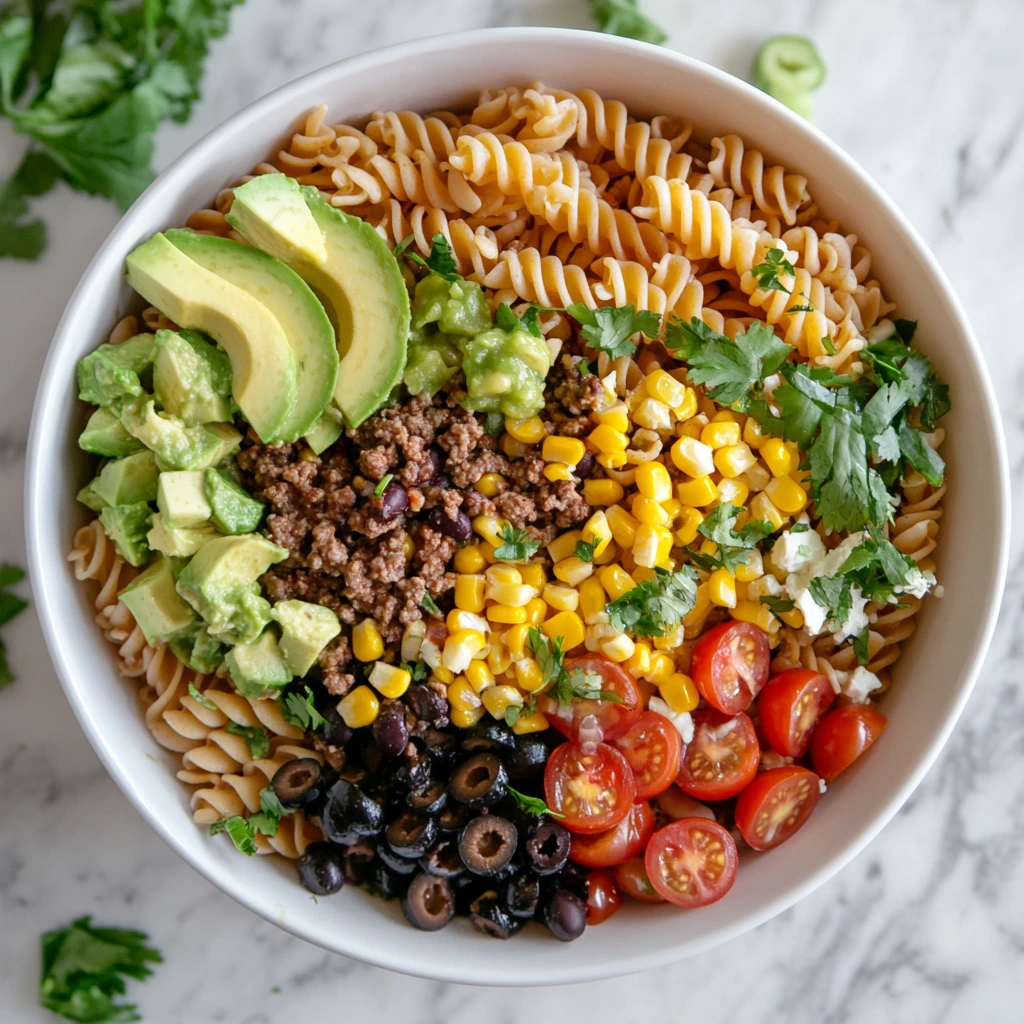
Next, start layering in the fresh ingredients:
Halved cherry tomatoes for a juicy burst of flavor.
Black beans for that creamy texture and a bit of protein.
Sweet corn kernels that give a nice pop of sweetness.
Diced red bell pepper for a little crunch and vibrant color.
Shredded cheddar cheese for that creamy, melty goodness.
Chopped romaine lettuce for a fresh, crisp bite.
Diced avocado for creaminess (make sure your avocado is ripe but still firm).
Sliced black olives for a bit of briny flavor (totally optional if you’re not an olive fan).
Sliced green onions for a subtle onion flavor and a pop of green.
You’ll see the bowl start to fill up with all these beautiful, colorful ingredients, and it’s hard not to get excited about the first bite!
STEP 5: ADD THE DRESSING AND TOSS
Now, pour that creamy dressing you made earlier right over the top of all those delicious ingredients. I always like to start with about three-quarters of the dressing and toss everything together gently, making sure every bite gets coated. Then I add more dressing if needed—it’s easier to add more than to take it out!
Use a large spoon or salad tongs to mix everything together, being careful not to mash the avocado or crush the lettuce too much. You want everything evenly coated but still looking fresh and vibrant.
STEP 6: CHILL BEFORE SERVING
Once everything is well combined, cover the bowl with plastic wrap or transfer the salad to an airtight container. Place it in the refrigerator and let it chill for at least 30 minutes. This step allows all the flavors to meld together, and the salad tastes even better once it’s had some time to rest.
Chilling also helps the dressing thicken slightly and coat the pasta and veggies more evenly, making every bite perfectly flavorful.
TIPS FOR THE BEST TACO PASTA SALAD
Don’t skip the rinse on the pasta. Rinsing the pasta under cold water not only stops the cooking but also removes excess starch, which helps prevent the salad from getting gummy.
Let the ground beef cool slightly. Adding hot beef directly to the salad can wilt the lettuce and melt the cheese too much. A brief cool-down ensures everything stays at the right temperature.
Customize your add-ins. Feel free to swap out or add any of your favorite taco toppings. Jalapeños, diced red onions, or even a sprinkle of hot sauce can kick it up a notch.
Wait to add certain ingredients if making ahead. If you’re preparing the salad several hours or a day ahead, hold off on adding the lettuce, avocado, and any crunchy toppings like tortilla chips until just before serving. This keeps everything fresh and crisp.
VARIATIONS TO TRY
What I absolutely love about this Taco Pasta Salad is how versatile it is. You can easily adjust it based on what you have on hand or what you’re in the mood for:
Make it vegetarian: Skip the ground beef and add extra black beans or a plant-based meat substitute.
Use different protein: Ground turkey or shredded rotisserie chicken work wonderfully.
Add a spicy kick: Toss in some diced jalapeños or a splash of your favorite hot sauce.
Try different cheese: Swap cheddar for pepper jack, Monterey Jack, or a Mexican blend for a little variety.
The possibilities are endless, and you can truly make this salad your own.
TACO PASTA SALAD FAQ: YOUR QUESTIONS ANSWERED
Every time I make this Taco Pasta Salad, I get a lot of great questions from friends and readers. So, I thought I’d answer some of the most common ones here to help you feel totally confident when you make it yourself!
Can I make Taco Pasta Salad ahead of time?
Yes! This salad is perfect for making ahead. You can prepare everything a day in advance, but I recommend adding the lettuce, avocado, and any crunchy toppings (like tortilla chips) right before serving to keep them fresh and crisp.
How long does Taco Pasta Salad last in the fridge?
Stored in an airtight container, it will stay fresh for about 3 days in the refrigerator. After that, the lettuce may start to wilt and the avocado can brown, so it’s best enjoyed within that time frame.
Can I use a different type of pasta?
Absolutely. While rotini and fusilli are great because they hold the dressing and mix-ins well, you can also use penne, bowtie (farfalle), or even elbow macaroni if that’s what you have on hand.
Is there a way to make this recipe lighter?
Yes! You can use light sour cream and mayonnaise in the dressing, or substitute plain Greek yogurt for some or all of the sour cream. You can also use ground turkey or chicken instead of beef for a leaner option.
What can I substitute for taco seasoning?
If you don’t have a packet of taco seasoning, you can easily make your own. Combine chili powder, cumin, paprika, garlic powder, onion powder, salt, and pepper. This way, you can control the spice level and sodium, too.
Can I freeze Taco Pasta Salad?
I wouldn’t recommend freezing this salad. The fresh veggies and creamy dressing don’t hold up well after freezing and thawing. It’s best enjoyed fresh or stored in the fridge for a few days.
How do I keep the avocado from browning?
Tossing the diced avocado in a little extra lime juice before adding it to the salad can help slow down browning. If you’re making the salad ahead of time, you might want to add the avocado just before serving.
WRAPPING IT UP: YOUR NEW FAVORITE POTLUCK DISH
There you have it—Taco Pasta Salad in all its creamy, flavorful glory. Whether you’re making it for a family dinner, a summer barbecue, or meal prepping for the week, this recipe is sure to be a hit. I love how it brings together so many of my favorite taco ingredients into a cool, refreshing pasta salad that’s just as good on day two as it is fresh.
Don’t be afraid to get creative with your add-ins and adjust the flavors to suit your taste. The versatility of this recipe is one of the reasons it’s become a staple in our house. And honestly, every time I serve it, there are never any leftovers—which is always a good sign!
If you give this recipe a try, I’d love to hear how it turns out. Feel free to leave a comment with your favorite variations or any tips you discover along the way. Happy cooking!
Print
Taco Pasta Salad
- Author: Andrew Recipes
Description
This Taco Pasta Salad is a flavorful, hearty dish that combines all the classic taco flavors with tender pasta for a perfect side dish or light meal. It’s easy to prepare, colorful, and can be made ahead for gatherings or meal prep. The creamy, zesty dressing ties everything together, making each bite irresistible.
Ingredients
For the pasta:
12 oz rotini or fusilli pasta
Water for boiling
Salt for pasta water
For the salad:
1 lb ground beef
1 packet taco seasoning
1 cup cherry tomatoes, halved
1 cup canned black beans, drained and rinsed
1 cup corn kernels (fresh, canned, or frozen and thawed)
1 red bell pepper, diced
1 cup shredded cheddar cheese
1 cup chopped romaine lettuce
1 avocado, diced
1/4 cup sliced black olives (optional)
2 green onions, sliced
For the dressing:
1/2 cup sour cream
1/2 cup mayonnaise
2 tablespoons lime juice
1 teaspoon chili powder
1 teaspoon cumin
Salt and pepper to taste
Instructions
Cook the pasta. In a large pot, bring salted water to a boil. Add the pasta and cook according to package directions until al dente. Drain and rinse under cold water to cool completely. Set aside.
Prepare the ground beef. In a skillet over medium heat, cook the ground beef until fully browned, breaking it apart with a spoon as it cooks. Drain any excess grease. Stir in the taco seasoning with a small amount of water as directed on the seasoning packet. Cook for a few more minutes until the seasoning is well incorporated. Remove from heat and allow to cool slightly.
Make the dressing. In a mixing bowl, whisk together the sour cream, mayonnaise, lime juice, chili powder, cumin, salt, and pepper until smooth and creamy. Adjust seasoning to taste.
Assemble the salad. In a large mixing bowl, combine the cooled pasta, seasoned ground beef, cherry tomatoes, black beans, corn, bell pepper, shredded cheese, romaine lettuce, avocado, black olives, and green onions.
Add the dressing. Pour the prepared dressing over the salad ingredients. Gently toss everything together until well coated and evenly mixed.
Chill and serve. Refrigerate the salad for at least 30 minutes before serving to allow the flavors to meld. Serve chilled, and garnish with extra green onions or shredded cheese if desired.
Notes
For added crunch, you can top the salad with crushed tortilla chips just before serving. If you plan to make the salad ahead of time, add the lettuce, avocado, and tortilla chips right before serving to maintain their texture. You can easily substitute ground turkey or chicken for the ground beef, or make it vegetarian by omitting the meat entirely.

