If you’ve ever stood at the crossroads of craving something cheesy, hearty, and just a bit spicy, let me introduce you to your new favorite dinner: Taco Stuffed Shells. This recipe is a little bit Mexican, a little bit Italian, and a whole lot of delicious. We’re talking jumbo pasta shells stuffed with savory taco-seasoned beef, smothered in salsa, and topped with melty Colby jack cheese. It’s the kind of comfort food that makes you do a happy dance after the first bite.
I first made this on a busy weeknight when I couldn’t decide between tacos and baked pasta. You know those nights when the fridge looks a little random, and you just have to make something work? That’s exactly how these Taco Stuffed Shells were born. Now, they’ve become a go-to when I want something easy, crowd-pleasing, and freezer-friendly.
This recipe has all the goodness of taco night — bold flavor, satisfying texture, and plenty of cheese — but it’s tucked into a cozy baked pasta dish. It’s a little unexpected, but once you try it, I promise you’ll be hooked.
Alright, let’s get started!

Ingredients You’ll Need
24 jumbo pasta shells, cooked according to package directions
2 pounds lean ground beef
1 cup finely diced sweet yellow onion
1 tablespoon fresh minced garlic
2 ounces mild taco seasoning (about one packet)
¾ cup water
16 ounces mild salsa (your favorite kind works!)
2½ cups shredded Colby jack cheese
Taco sauce, optional for garnish
STEP 1: Cook the Shells
Before we dive into the meat filling, go ahead and cook your jumbo pasta shells according to the package directions. Be careful not to overcook them — you want them al dente so they hold up when filled and baked. Once they’re done, drain them and lay them out on a baking sheet or a plate to cool. If they stick together, a little drizzle of olive oil helps.
STEP 2: Prep the Oven and Dish
Preheat your oven to 375°F and lightly spray a 9×13 baking dish with nonstick cooking spray. Set that aside — you’ll be filling it up with all sorts of goodness in just a minute.
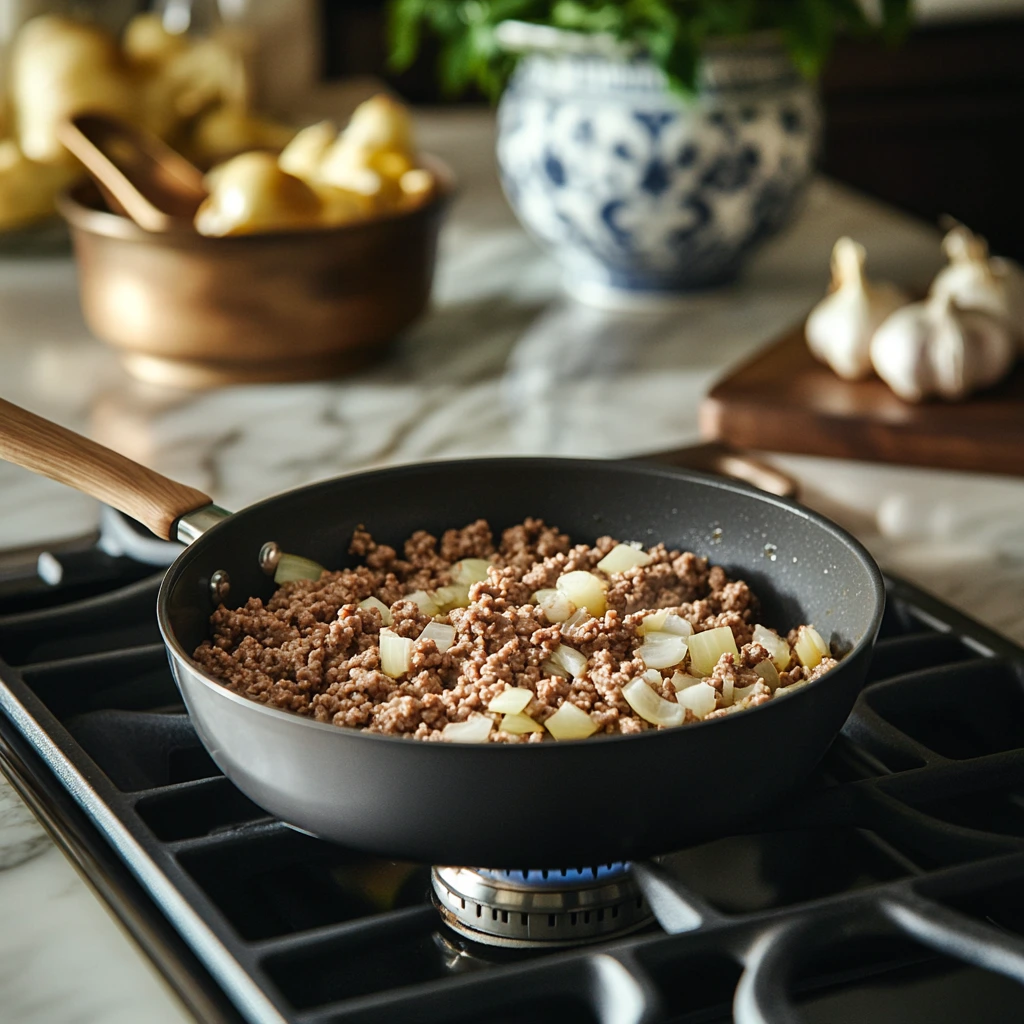
STEP 3: Cook the Taco Meat Filling
Now for the heart of the recipe — the taco filling! In a large saucepan or deep skillet, cook your ground beef, diced onion, and minced garlic over medium-high heat. Stir often and cook until the beef is browned and no longer pink, which takes about 5 to 7 minutes. Once it’s cooked, go ahead and drain any extra grease.
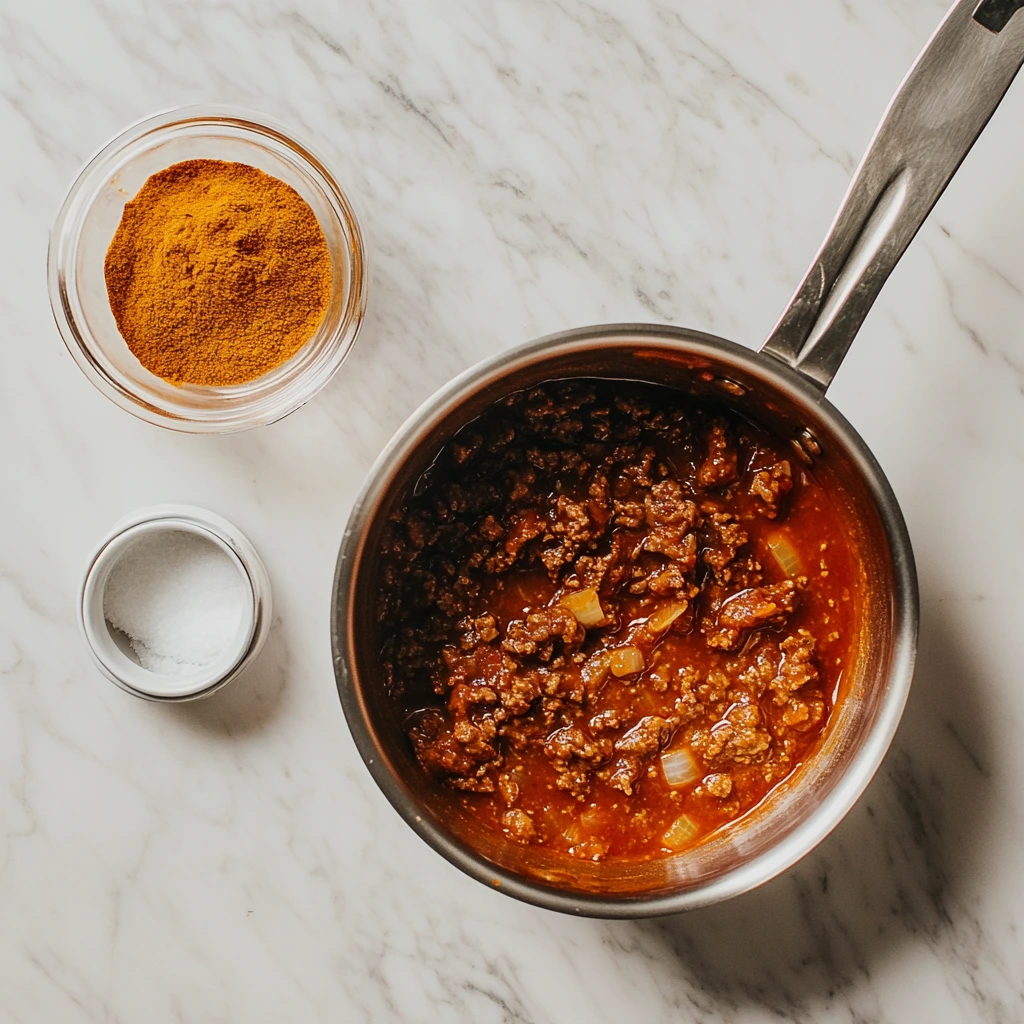
After draining, reduce the heat to medium-low. Add in your taco seasoning, ¾ cup water, and salsa. Stir everything together until it’s well combined and let it simmer for 3 to 5 minutes. This step really lets all the flavors blend into something magical. The salsa adds a nice tangy kick while the seasoning brings in all those familiar taco night flavors.
STEP 4: Fill the Shells
This part is surprisingly satisfying. Take each cooked pasta shell and stuff it with about 3 tablespoons of the taco meat mixture. It might not seem like much, but trust me — it’s the perfect amount for a hearty, not-too-stuffed shell.
Arrange the filled shells in your prepared baking dish, laying them out in neat rows — I like to do 5 across and 4 down. You might have a few extra shells left over, but that just means bonus snacks for later.
Cheesy Taco Stuffed Shells Recipe: Baked to Perfection and Packed with Flavor
Now that our shells are stuffed and the kitchen smells like taco night in the best way possible, it’s time to finish off this easy, flavor-packed dinner. If you stopped here and popped one of those filled shells straight into your mouth, I wouldn’t blame you — the filling is that good. But hang with me just a little longer, because once we bake these babies and top them with melted cheese, the final dish is next-level delicious.
Whether you’re making this for a weeknight dinner, prepping ahead for a busy day, or doubling the recipe for leftovers (which reheat beautifully, by the way), this part of the recipe is super simple but makes all the difference in flavor and texture.
STEP 5: Bake the Stuffed Shells (First Round)
With your filled shells snugly arranged in your greased 9×13 baking dish, go ahead and cover the dish tightly with aluminum foil. This helps trap the moisture and ensures that everything warms up evenly.
Place the covered dish in your preheated 375°F oven and bake for 20 minutes. This is the perfect amount of time for the shells to soften a little more and for the taco filling to get extra cozy inside the pasta.
STEP 6: Add the Cheese and Bake Again
Once the first bake is done, remove the foil and sprinkle 2½ cups of shredded Colby jack cheese evenly over the top of the shells. Make sure you get cheese in all the nooks and crannies — this is where the magic happens.
Return the dish to the oven, uncovered, and bake for another 10 minutes, just until the cheese is melted and bubbly. If you want a little golden-brown finish on the cheese, you can broil it for 1-2 minutes at the end — just keep a close eye on it so it doesn’t burn.
STEP 7: Rest, Garnish, and Serve
Once that melty cheese is looking irresistible, pull the dish out of the oven and let it rest for 5 minutes before serving. This little pause helps everything settle and makes serving easier (plus, no burnt tongues).
If you like a little extra kick or moisture, drizzle some taco sauce over the top, or serve it on the side. Sour cream, guacamole, or a handful of chopped green onions also make amazing toppings if you want to dress things up a bit.
![]()
Helpful Tips for Success
You already know this dish is easy, but here are a few tricks to make it even more foolproof:
Use a pastry bag or Ziploc: Filling the shells can get a little messy if you’re using a spoon. Try using a large zip-top bag with the corner cut off to pipe the meat mixture into each shell — it’s faster and way less messy.
Don’t overcook the pasta: Keep the shells just slightly underdone when you boil them. They’ll finish cooking in the oven and hold their shape better for stuffing.
Make it ahead: You can prep the entire dish (up to the first baking step) the night before, cover it tightly, and refrigerate. Just add 5-10 extra minutes to the baking time if it’s cold from the fridge.
Freezer-friendly: Assemble the shells in a disposable foil pan, cover tightly with foil, and freeze before baking. When you’re ready to eat, bake from frozen (covered) at 375°F for about 45-50 minutes, then add the cheese and bake another 10.
Mix up the flavors: Not a fan of beef? Swap in ground turkey, shredded chicken, or even black beans and corn for a vegetarian version. Want it spicier? Use hot salsa or a spicier taco seasoning blend.
Cheesy Taco Stuffed Shells Recipe: Your Questions Answered + Final Thoughts
By now, you’ve probably realized just how versatile and family-friendly these Taco Stuffed Shells are. Whether you’re feeding a crowd or prepping meals for the week, this dish brings big flavor without requiring a ton of effort. But before you jump into the kitchen and start stuffing shells like a pro, let’s take a minute to go over some of the most common questions readers have when making this recipe.
Frequently Asked Questions
1. Can I make this recipe ahead of time?
Absolutely. You can fully assemble the dish (including stuffing the shells and arranging them in the baking dish), then cover it and store it in the refrigerator for up to 24 hours before baking. When you’re ready to bake, just follow the same instructions — but add about 5–10 extra minutes to the first bake since it’s coming from the fridge.
2. Can I freeze Taco Stuffed Shells?
Yes! This is a great freezer-friendly recipe. Assemble the shells in a freezer-safe baking dish, cover tightly with foil, and freeze before baking. When you’re ready to cook, bake directly from frozen at 375°F for about 45–50 minutes, then add cheese and bake another 10 minutes.
3. What’s the best way to reheat leftovers?
You can reheat leftovers in the microwave or in the oven. For best results, cover the dish with foil and bake at 350°F for about 20 minutes, or microwave individual portions for 2–3 minutes until heated through.
4. Can I use a different type of meat or make it vegetarian?
Absolutely! Ground turkey, ground chicken, or even shredded rotisserie chicken all work well. For a vegetarian option, swap the meat for a mix of black beans, corn, and diced bell peppers — just season it the same way and you’re good to go.
5. What kind of salsa works best?
This is totally up to you. I like using a mild chunky salsa for a bit of texture, but you can go spicier if you like heat. Just make sure it’s a brand you enjoy on its own, since it’s a big part of the flavor base.
6. Do I have to use Colby Jack cheese?
Nope! Colby Jack melts beautifully and has a mild flavor that pairs well with the taco filling, but you can swap it for cheddar, Monterey Jack, or even a Mexican cheese blend. Use what you love.
7. How do I keep the shells from falling apart?
Make sure you cook the pasta just until al dente — overcooking will make them too soft and prone to tearing. Also, handle them gently when stuffing and try not to overfill.
Final Thoughts: Make It Your Own
There’s something so satisfying about recipes like this — simple, cheesy, filling, and totally customizable. It’s a fun twist on two comfort food favorites, and you really can’t mess it up. Whether you’re a taco night loyalist or a pasta lover at heart, this recipe bridges the best of both worlds and makes dinnertime exciting again.
One of my favorite things about this dish is how easily it adapts to whatever you’ve got on hand. Don’t have Colby Jack? Use sharp cheddar. Want to sneak in some veggies? Add diced zucchini or bell peppers to the meat mixture. Craving more spice? Throw in some jalapeños or hot sauce. The foundation is solid — the rest is up to you.
PrintTaco Stuffed Shells
- Author: Andrew Recipes
Description
Taco Stuffed Shells are a delicious fusion of Mexican and Italian cuisine, combining tender pasta shells with a flavorful taco meat filling, all topped with melted cheese. This dish is perfect for family dinners or entertaining, offering comfort food with a twist. It’s hearty, cheesy, and packs just the right amount of spice.
Ingredients
24 jumbo shells, cooked according to package directions
2 pounds lean ground beef
1 cup finely diced sweet yellow onion
1 tablespoon fresh minced garlic
2 ounces mild taco seasoning
¾ cup water
16 ounces mild salsa (your favorite brand)
2½ cups shredded Colby jack cheese
Taco sauce, optional garnish
Instructions
1️⃣ Cook your pasta shells according to package directions and set them aside.
2️⃣ Preheat the oven to 375°F. Lightly spray a 9×13 baking dish with nonstick spray and set it aside.
3️⃣ In a 3 to 4-quart saucepan, combine the ground beef, diced onion, and minced garlic. Cook uncovered over medium-high heat for 5 to 7 minutes, stirring often, until the beef is browned and no longer pink. Drain any excess grease.
4️⃣ Reduce the heat to medium-low. Add the taco seasoning, water, and salsa to the meat mixture. Stir well to combine and simmer for 3 to 5 minutes, stirring frequently.
5️⃣ Carefully fill each cooked shell with about 3 tablespoons of the meat mixture and arrange them in the prepared baking dish in rows of 5 across and 4 down. You may have a few extra shells left over.
6️⃣ Cover the baking dish with aluminum foil and bake for 20 minutes.
7️⃣ Remove from the oven, uncover, and sprinkle the shredded cheese evenly over the shells. Return the dish to the oven and bake for an additional 10 minutes until the cheese is melted.
8️⃣ Let the dish rest for 5 minutes before garnishing with taco sauce, if desired, and serve warm.
Notes
This dish can be prepped in advance and stored in the refrigerator overnight. To simplify filling the shells, use a pastry bag or a Ziploc bag with the tip cut off. Breaking up the ground beef into smaller pieces ensures an even filling in each shell. Leftovers store well and can be reheated easily, making this a great make-ahead meal.

