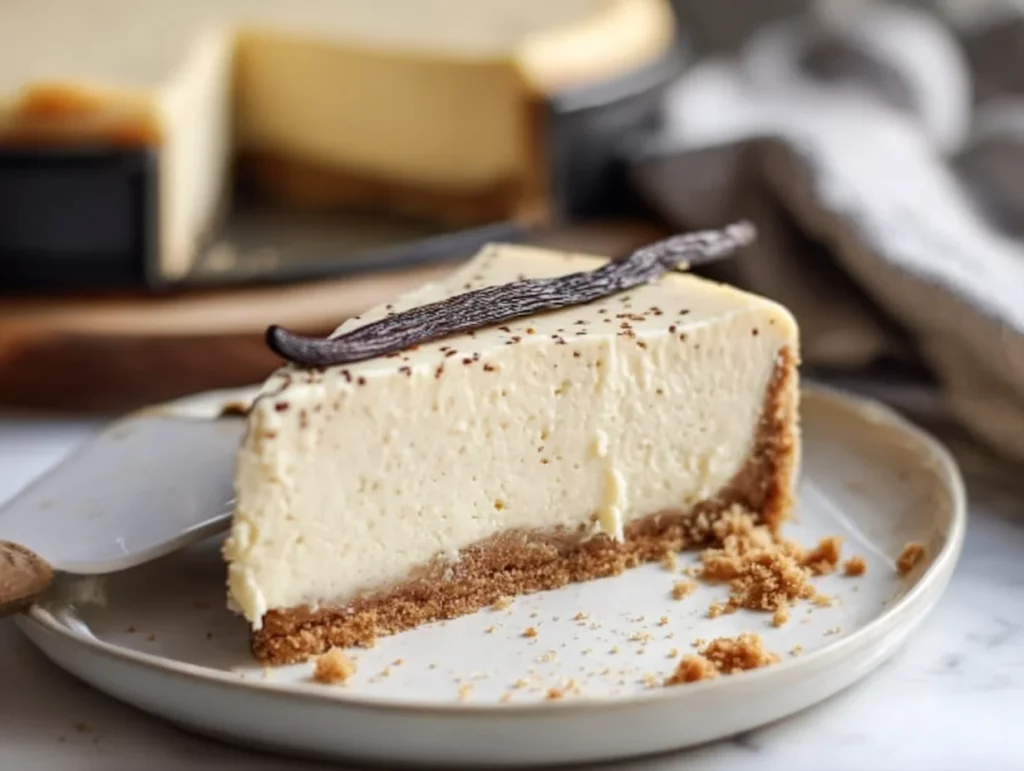
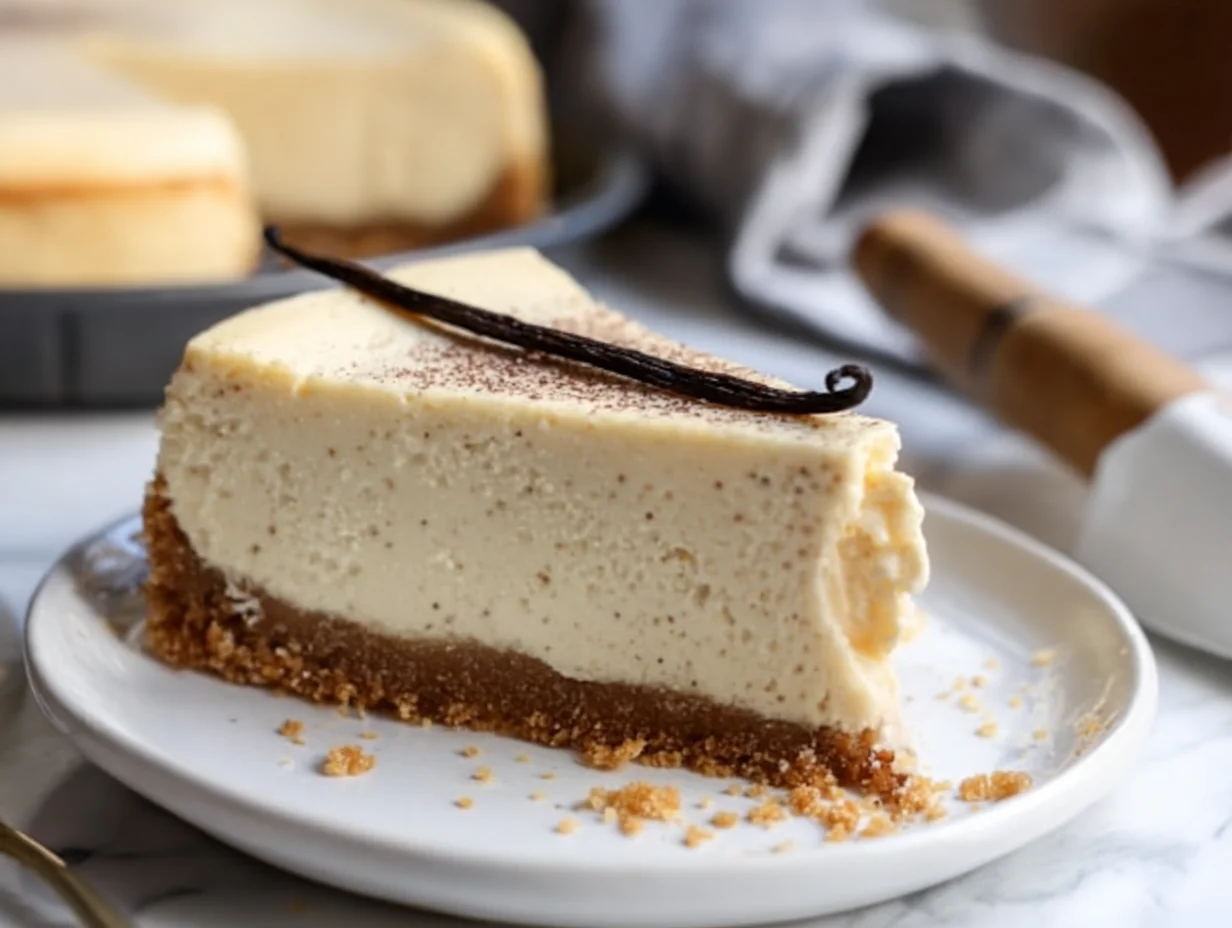
If there’s one dessert that never fails to impress, it’s cheesecake. And this Vanilla Bean Brown Butter Cheesecake? Well, it might just be the most decadent, dreamy version yet. The combination of silky cream cheese, fragrant vanilla bean, and the deep, nutty flavor of brown butter gives this classic treat an elevated feel—without making it complicated or fussy.
I first made this cheesecake for a holiday gathering, and it’s been a favorite ever since. People always ask what makes it taste so different, so special. The answer is simple: it’s the brown butter. That extra step adds this rich, toasted depth that plays beautifully with the vanilla bean. It’s subtle, but oh-so memorable.
Whether you’re baking for a birthday, a holiday, or just because you deserve a slice of something wonderful, this cheesecake delivers. So let’s walk through it together—step-by-step, from buttery crust to creamy topping.
Why You’ll Love This Recipe
Brown Butter Magic: Browning the butter brings out a rich, nutty flavor that transforms the crust and adds a cozy warmth to the entire cheesecake.
Real Vanilla Bean Flavor: Using vanilla bean paste or fresh seeds means you get that unmistakable vanilla taste and those pretty little specks throughout.
Smooth and Creamy Texture: Thanks to sour cream and heavy cream, the filling is light, luscious, and melts in your mouth.
Make-Ahead Friendly: This cheesecake sets beautifully overnight, making it perfect for prepping ahead of a big event.
Ingredients You’ll Need
For the Crust:
2 cups graham cracker crumbs
½ cup unsalted butter, browned
2 tablespoons granulated sugar
Pinch of salt
For the Filling:
24 oz cream cheese, softened
1 cup granulated sugar
1 tablespoon vanilla bean paste (or seeds from 1 vanilla bean)
3 large eggs
¾ cup sour cream
¼ cup heavy cream
¼ teaspoon salt
Optional Topping:
½ cup sour cream
2 tablespoons powdered sugar
½ teaspoon vanilla extract
Making the Crust & Preparing the Filling
Let’s start with the foundation of every good cheesecake—the crust. And trust me, once you try it with browned butter, you might never go back to plain melted butter again.

STEP 1: Brown the Butter
In a small saucepan over medium heat, melt the ½ cup of unsalted butter. Keep an eye on it, swirling the pan gently as the butter foams and then starts to deepen in color. You’re looking for a golden brown hue and a nutty aroma. Once it’s ready, remove it from the heat and let it cool slightly. (Pro tip: Make a little extra and save some for pancakes or cookies—it’s liquid gold.)
STEP 2: Make the Graham Cracker Crust
In a medium bowl, combine 2 cups of graham cracker crumbs, 2 tablespoons of sugar, a pinch of salt, and your slightly cooled brown butter. Stir until all the crumbs are coated and the mixture resembles wet sand.
Press this mixture firmly into the bottom of a 9-inch springform pan. You want a tight, even layer—use the bottom of a glass or measuring cup to help press it down.
Bake the crust at 325°F for 10 minutes, then remove it from the oven and let it cool completely. This little pre-bake gives the crust a head start and keeps it from getting soggy once the filling goes in.

STEP 3: Make the Creamy Vanilla Bean Filling
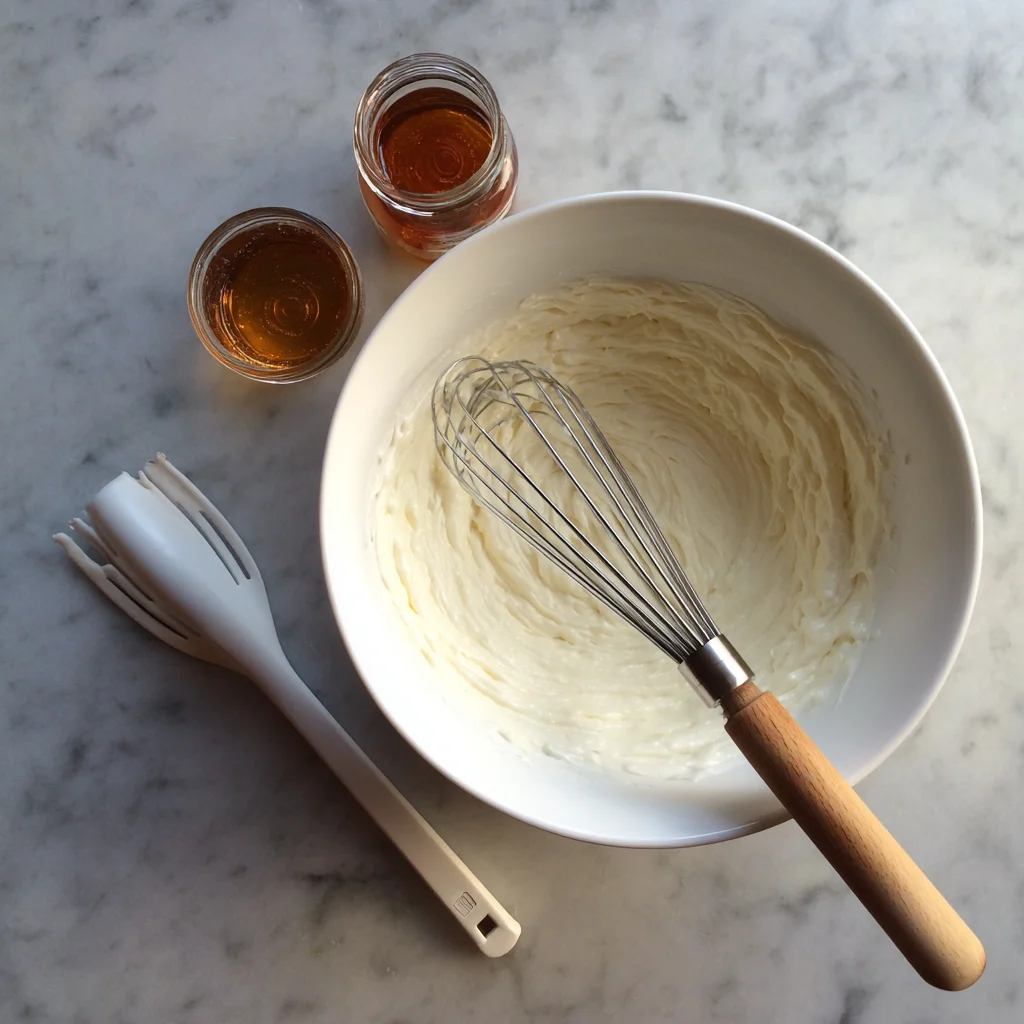
In a large bowl, beat your softened cream cheese and granulated sugar until the mixture is light, fluffy, and completely smooth. No lumps here—take your time with this step.
Next, add in the tablespoon of vanilla bean paste (or the seeds scraped from a whole vanilla bean). Beat until the vanilla is fully incorporated.
Now, one at a time, add your 3 eggs, mixing well after each addition. Scrape down the sides of the bowl in between to make sure everything gets evenly mixed.
Finally, blend in the sour cream, heavy cream, and salt. Mix until just combined—you don’t want to overbeat at this point, or the cheesecake might crack during baking.
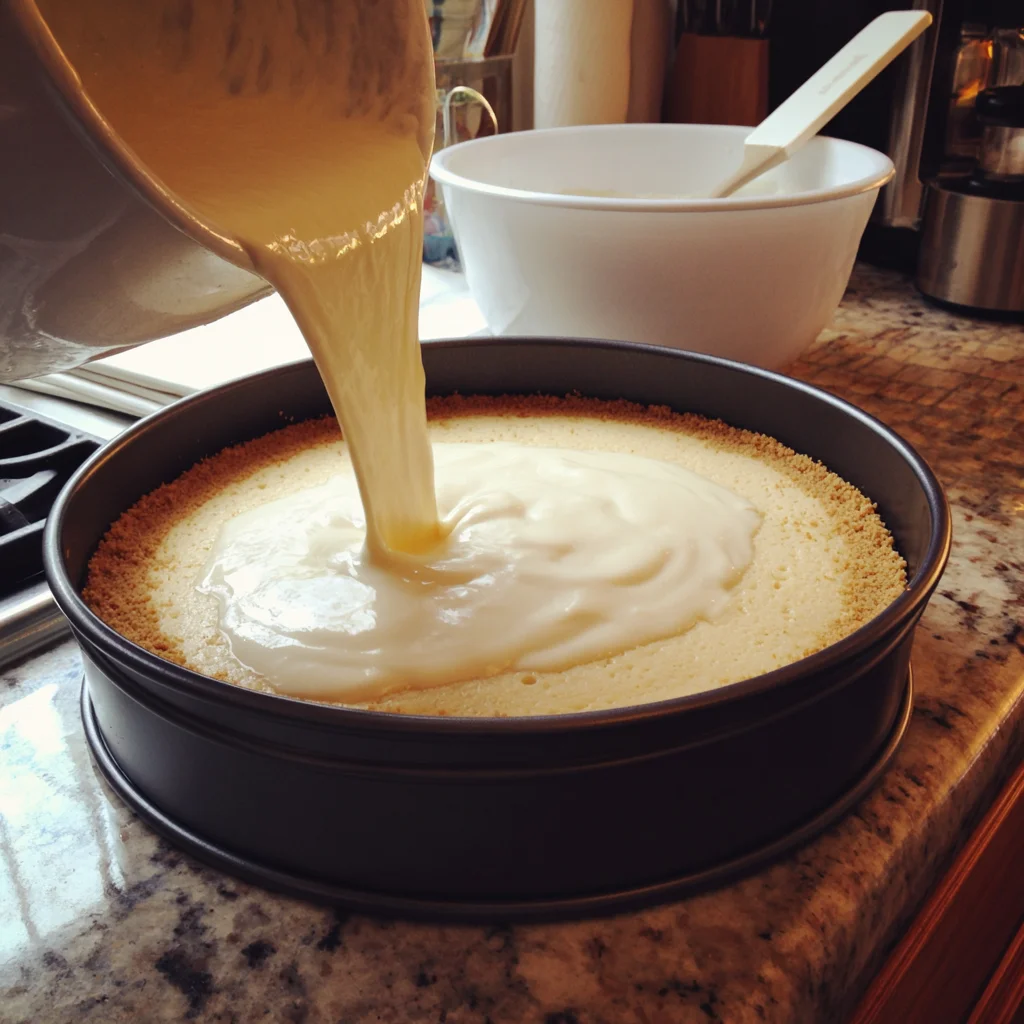
STEP 4: Assemble the Cheesecake
Once your crust has cooled and your filling is ready, go ahead and pour the filling into the prepared crust. Give the springform pan a few gentle taps on the counter—this helps release any air bubbles hiding in the batter. You want the surface nice and even.
STEP 5: Set Up the Water Bath
Now comes the water bath (also known as a bain-marie). It’s a little extra effort, but it makes a big difference.
Start by wrapping the outside of your springform pan tightly with two or three layers of aluminum foil. This keeps the water from leaking in during baking.
Place the foil-wrapped pan into a larger roasting pan or baking dish. Carefully pour hot water into the outer pan until it comes about halfway up the sides of the springform pan.
This gentle baking environment helps cook the cheesecake evenly and prevents the top from cracking.
STEP 6: Bake Low and Slow
Bake the cheesecake at 325°F for 55 to 65 minutes. You’ll know it’s ready when the edges are set and slightly puffed, but the center still has a bit of a jiggle when you gently shake the pan. It should look a little underbaked in the middle—that’s exactly what you want.
STEP 7: Cool Gradually
Turn off the oven, crack the door open a couple of inches, and let the cheesecake cool inside for 1 hour. This slow cooling process helps prevent sudden temperature changes that can cause cracking.
After an hour, remove the pan from the water bath and let it come to room temperature on the counter.
Then, transfer it to the fridge and chill for at least 4 hours—overnight is even better. Cheesecake needs that time to fully set and develop its flavor. And let’s be honest, it’s always better the next day.
STEP 8: Add the Optional Topping
This final step is completely optional, but if you love a silky finish on top of your cheesecake, this sour cream topping is simple and delicious.
In a small bowl, stir together ½ cup sour cream, 2 tablespoons powdered sugar, and ½ teaspoon vanilla extract until smooth.
Spread it gently over the chilled cheesecake right before serving. It adds a glossy, slightly tangy layer that complements the rich filling beautifully.
Tips for the Best Cheesecake Results
Use Room Temperature Ingredients: Cold cream cheese won’t blend smoothly and can lead to a lumpy batter. Let everything sit out for 30–60 minutes before starting.
Don’t Overmix: Once you start adding the eggs, mix gently. Too much air in the batter can lead to cracks or puffing.
Make It Ahead: Cheesecake actually improves in flavor after a day in the fridge. It’s the perfect make-ahead dessert for parties or special events.
Use Vanilla Bean Paste: If you’ve never used it before, vanilla bean paste gives you the beautiful specks of real vanilla and a much deeper flavor than extract alone.
Store Leftovers Properly: Cover leftover cheesecake with plastic wrap or store it in an airtight container in the fridge. It’ll keep well for up to 5 days.
FAQs and Final Thoughts on This Irresistible Dessert
If you’ve made it this far, you’re just about ready to serve up a truly stunning cheesecake. Whether it’s for a special occasion or simply because you felt like treating yourself (honestly, that’s reason enough), this Vanilla Bean Brown Butter Cheesecake is the kind of dessert that people remember.
But before we wrap things up, let’s tackle a few questions that tend to come up when baking cheesecakes at home. If you’ve ever wondered about cracks, freezing leftovers, or swapping ingredients, this section is for you.
Frequently Asked Questions
1. Do I really need to use a water bath?
Technically, no—you can bake a cheesecake without it. But if you want a silky-smooth texture and a top without cracks, the water bath is worth the extra step. It keeps the temperature gentle and even, which helps the cheesecake bake slowly and set properly.
2. What can I use instead of vanilla bean paste?
If you don’t have vanilla bean paste on hand, you can use the seeds from one whole vanilla bean or substitute with 1 tablespoon of pure vanilla extract. You’ll miss out on the signature specks and slightly more intense flavor, but it will still taste delicious.
3. How do I know when my cheesecake is done?
Look for set edges and a slightly jiggly center—think soft-set gelatin. Don’t wait for the whole cheesecake to be firm in the oven; it will continue to set as it cools. Overbaking can lead to a dry texture and cracks.
4. Can I make this cheesecake ahead of time?
Absolutely. This cheesecake is ideal for making a day ahead. In fact, the flavor and texture actually improve as it sits. Just keep it covered in the fridge until you’re ready to serve.
5. How do I prevent cracks in my cheesecake?
A few tips:
Use a water bath.
Don’t overmix the batter (especially after adding eggs).
Cool the cheesecake gradually—first in the oven with the door cracked, then at room temp.
Chill completely before slicing.
Even if a crack does happen, don’t stress. That optional sour cream topping covers it up beautifully.
6. Can I freeze cheesecake?
Yes! To freeze, chill the cheesecake fully, then wrap it tightly in plastic wrap and foil. You can freeze it whole or in slices. It’ll keep well in the freezer for up to 2 months. Thaw overnight in the fridge before serving.
7. Can I use a different crust?
You sure can. While the graham cracker crust is classic, you could try a cookie crust (like crushed vanilla wafers or shortbread), or even a nut-based crust if you want to play up the brown butter flavor.
Final Thoughts
There’s just something magical about the combination of brown butter and vanilla bean. It’s warm, rich, and incredibly satisfying—without being overly sweet or heavy. This cheesecake strikes the perfect balance between elegance and comfort food, which is probably why it disappears so quickly every time I serve it.
If you’re new to making cheesecake, don’t be intimidated. Follow the steps, give yourself time, and enjoy the process. The reward at the end is well worth it.
And if you try this Vanilla Bean Brown Butter Cheesecake, I’d love to hear how it turns out! Did you go with the sour cream topping? Add your own twist? Drop a comment, share your photos, or let me know how it went—your feedback always makes my day.
Print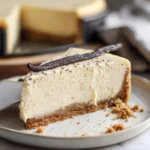
Vanilla Bean Brown Butter Cheesecake
- Author: Andrew Recipes
Description
This Vanilla Bean Brown Butter Cheesecake is a luxurious twist on a classic dessert. The nutty richness of brown butter enhances the creamy vanilla bean filling, all nestled in a golden graham cracker crust. It’s smooth, elegant, and deeply flavorful, making it a standout centerpiece for any special occasion or holiday table.
Ingredients
For the crust
2 cups graham cracker crumbs
½ cup unsalted butter, browned
2 tablespoons granulated sugar
Pinch of salt
For the filling
24 oz cream cheese, softened
1 cup granulated sugar
1 tablespoon vanilla bean paste or seeds from 1 vanilla bean
3 large eggs
¾ cup sour cream
¼ cup heavy cream
¼ teaspoon salt
For the topping (optional)
½ cup sour cream
2 tablespoons powdered sugar
½ teaspoon vanilla extract
Instructions
Preheat the oven to 325°F. Lightly grease a 9-inch springform pan and wrap the outside with foil to prevent leaks during the water bath.
In a small saucepan over medium heat, melt the butter and continue cooking until it turns golden brown and smells nutty. Remove from heat and let it cool slightly.
In a medium bowl, combine the graham cracker crumbs, sugar, salt, and browned butter. Mix until the crumbs are evenly coated. Press the mixture firmly into the bottom of the springform pan. Bake for 10 minutes, then remove from the oven and let cool.
In a large bowl, beat the softened cream cheese and sugar until smooth and fluffy. Add the vanilla bean paste and mix until fully incorporated.
Add the eggs one at a time, mixing well after each addition. Scrape down the sides of the bowl to ensure a smooth batter. Blend in the sour cream, heavy cream, and salt until just combined.
Pour the filling over the cooled crust. Tap the pan gently on the counter to release any air bubbles.
Place the cheesecake in a larger baking dish and fill the outer dish with hot water to create a water bath. Bake for 55 to 65 minutes, or until the edges are set and the center has a slight jiggle.
Turn off the oven, crack the door slightly, and let the cheesecake cool inside for 1 hour. Remove from the oven and let it cool to room temperature before chilling in the refrigerator for at least 4 hours or overnight.
For the optional topping, mix the sour cream, powdered sugar, and vanilla extract. Spread over the chilled cheesecake before serving.
Notes
Vanilla bean paste adds a rich depth of flavor and those signature specks of real vanilla. For best results, use full-fat cream cheese and room-temperature ingredients to ensure a smooth batter. Brown butter can be made ahead and stored in the fridge until ready to use. This cheesecake can be made a day in advance and actually improves in flavor as it sits.

