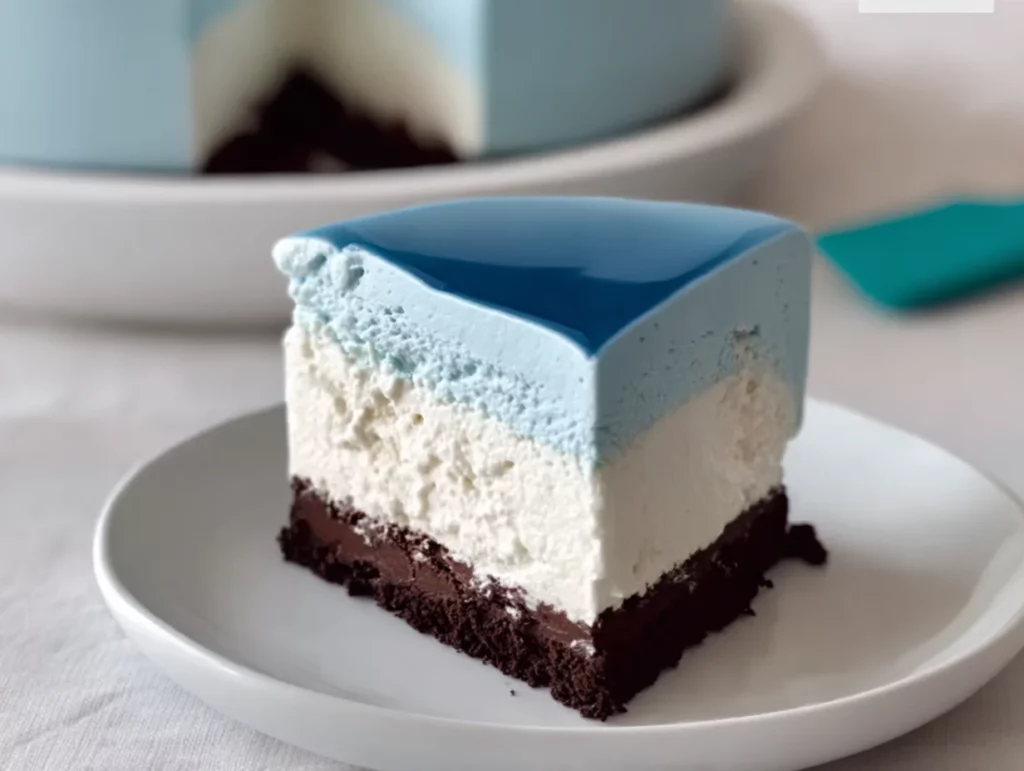
There’s something so magical about a dessert that feels indulgent, yet doesn’t weigh you down. That’s exactly what this Yogurt Mousse Cake delivers—light, airy, and just the right amount of tangy sweetness. This no-bake treat is perfect for warm weather days, dinner parties, or anytime you want to impress guests without turning on the oven.
I first fell in love with this cake one summer when I needed a make-ahead dessert for a backyard gathering. I didn’t want anything heavy or overly sweet, and this yogurt mousse cake came through like a dream. With its buttery biscuit base, smooth yogurt mousse center, and optional fruity topping, it struck the perfect balance—and disappeared within minutes!
Whether you’re already a fan of mousse-style desserts or trying one for the first time, this recipe is refreshingly simple to put together and endlessly customizable. Let’s dive into how to make it step by step.
Let’s Build the Foundation – The Base & Mousse Prep
The base of this mousse cake is delightfully simple. You can use either digestive biscuits or a thin layer of sponge cake, depending on your preference or what you have on hand. I personally love the slight crunch and buttery richness that the biscuit base adds—it really contrasts beautifully with the silky mousse layer.
Ingredients You’ll Need
For the base:
200 grams digestive biscuits or sponge cake
80 grams melted butter
For the yogurt mousse:
400 grams plain or flavored yogurt (strawberry, peach, mango—go wild!)
300 ml heavy cream
100 grams powdered sugar
10 grams powdered gelatin
4 tablespoons cold water
1 teaspoon vanilla extract
STEP 1: Make the Base
Start by crushing your digestive biscuits into fine crumbs. You can use a food processor for speed, but a rolling pin and a zip-top bag work just fine too if you’re up for a bit of manual labor. Once the crumbs are ready, mix them with the melted butter until everything is evenly coated and clumps slightly when pressed.
Press this mixture firmly into the bottom of a springform pan lined with parchment paper. Try to make it as even as possible for a neat base. Once it’s packed down, pop it into the fridge to chill while we move on to the mousse.
Tip: If you prefer a cakier texture, you can use a thin layer of sponge cake instead. Just make sure it fits your pan snugly.

STEP 2: Bloom the Gelatin
Gelatin can feel intimidating, but it’s easier than it seems. In a small bowl, sprinkle your powdered gelatin over 4 tablespoons of cold water. Let it sit for about 5 minutes to “bloom”—this means the gelatin granules will absorb the water and swell up.
After it blooms, gently warm the gelatin mixture until fully dissolved. You can do this in the microwave in short bursts or over a double boiler. Once it’s smooth and clear, let it cool slightly. You don’t want to pour hot gelatin into your yogurt—lukewarm is perfect.
STEP 3: Mix the Yogurt Base
In a large mixing bowl, combine the yogurt, powdered sugar, and vanilla extract. Give it a good whisk until smooth and lump-free. Now, slowly pour in your slightly cooled gelatin mixture, whisking as you go. This ensures the gelatin gets fully incorporated without clumping.
You can use plain yogurt here for a tangy finish or go with a flavored one for something fruity. I’ve tried peach and mango, and they’re both dreamy.
STEP 4: Whip the Cream
In a separate bowl, whip the heavy cream until soft peaks form. You’re not aiming for stiff peaks—just enough for the cream to hold some shape. This adds the light, mousse-like texture that makes this dessert so delightful.
Gently fold the whipped cream into the yogurt mixture in batches. Be careful not to deflate the mousse—you want to preserve all that airy volume. Take your time here; slow and steady wins the race.
How to Finish and Customize Your Yogurt Mousse Cake
Now that we’ve laid the creamy foundation for our Yogurt Mousse Cake, it’s time to bring it all together and add those final touches that make this dessert shine. The beauty of this cake is that it doesn’t need fancy ingredients or elaborate techniques to impress—it’s all about texture and flavor.
Once your mousse is folded and ready, it’s just a matter of setting it, optionally topping it with a light fruit glaze, and letting time do the rest. This part of the process is incredibly satisfying because once the cake chills and firms up, it slices beautifully and has that clean, polished look that guests always think took way more effort than it actually did.
Let’s jump into the final steps.
STEP 5: Assemble and Chill the Cake
Now that your mousse is perfectly fluffy and combined, it’s time to pour it over the chilled biscuit or sponge base.
Grab your springform pan from the fridge. Carefully pour the mousse mixture into the pan and use a spatula to smooth the surface. Try to get the top as even as possible—it’ll make the finished cake look extra professional.
Now comes the most important part: chilling.
Place the cake in the refrigerator for at least 4 to 6 hours, but ideally overnight. This gives the gelatin enough time to fully set, resulting in a firm yet creamy texture that holds its shape when sliced.
Tip: Cover the top with plastic wrap or foil while it chills to prevent it from picking up any fridge odors.
STEP 6: Add the Fruit Topping (Optional But Recommended)
While the mousse is perfectly lovely on its own, adding a fruity topping takes this cake to the next level. It adds a bit of color, extra flavor, and that gorgeous glossy finish.
For the fruit topping, you’ll need:
200 ml fruit juice or fruit puree (mango, strawberry, or berry blends work well)
5 grams powdered gelatin
2 tablespoons sugar
Here’s how to make it:
In a small bowl, bloom the gelatin in a few tablespoons of cold water (about 3–4 tablespoons) for 5 minutes.
In a small saucepan, warm your fruit juice or puree with the sugar just until the sugar dissolves.
Add the bloomed gelatin to the warm fruit mixture and stir until it dissolves completely.
Let the mixture cool slightly—about 10–15 minutes. You don’t want it to be hot when it hits the mousse layer, or it could melt it.
Once cooled to lukewarm, pour it gently over the set mousse layer.
Return the cake to the refrigerator and chill again until the top layer is fully firm—this usually takes another 1–2 hours.
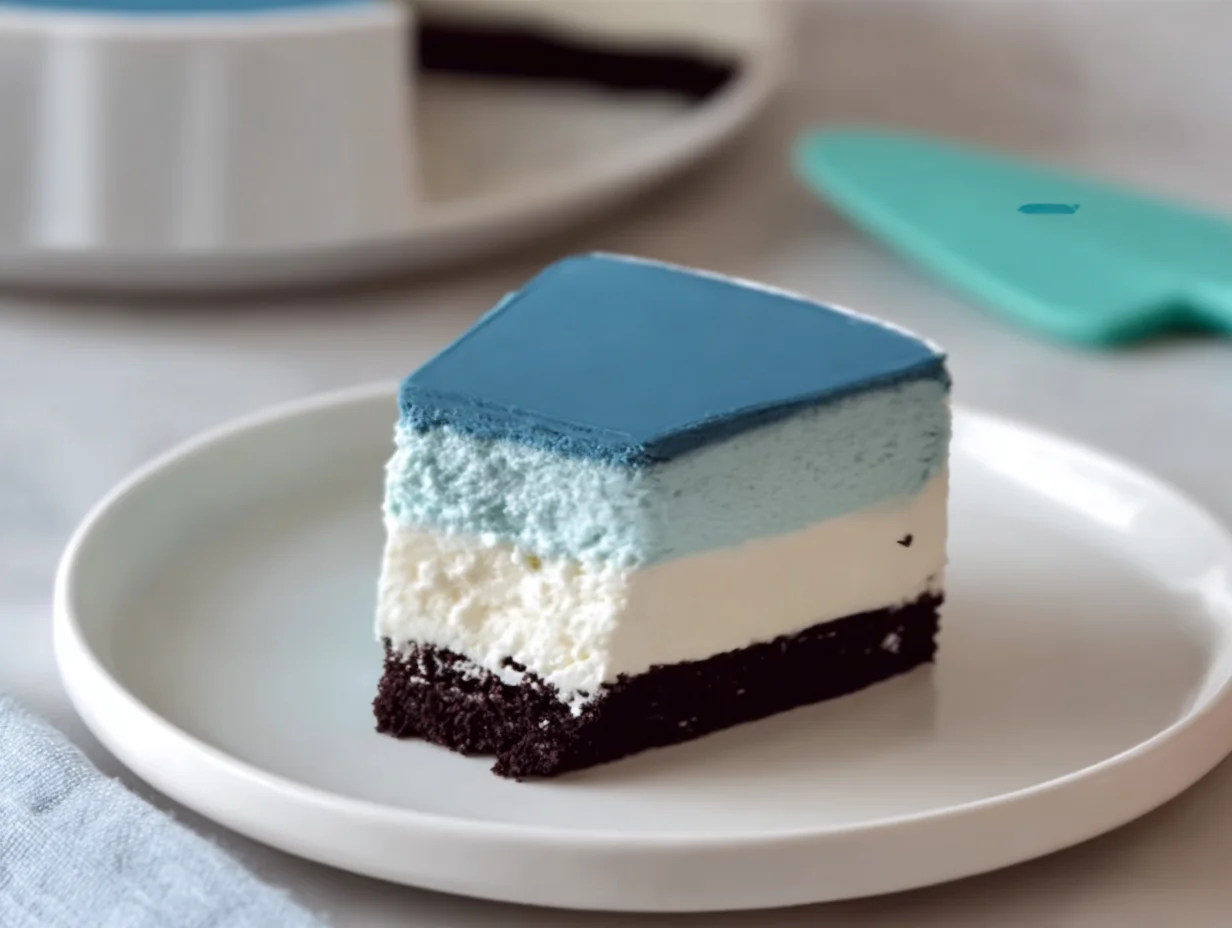
The result? A beautifully layered dessert with a vibrant, fruity sheen that makes it look straight out of a bakery window.
Tips, Variations, and Serving Ideas
If you’re anything like me, once you make this once, your mind starts racing with all the flavor possibilities. Here are a few of my favorite ways to switch things up or make the recipe work for different occasions:
Try different yogurts: Flavored yogurts like mango, peach, strawberry, or mixed berry all work wonderfully here. Greek yogurt can be used too—just be sure to thin it slightly with milk if it’s very thick.
Add fruit chunks: Fold in small pieces of fresh fruit (like mango, berries, or peaches) into the mousse before pouring it into the pan for extra bursts of flavor.
Use a nutty crust: Swap digestive biscuits for crushed almonds, hazelnuts, or granola mixed with a bit of honey and butter.
Make mini versions: This recipe works great in individual dessert cups or silicone molds for a party-friendly option.
Go low-fat: You can lighten things up by using low-fat yogurt and replacing half the cream with whipped topping or coconut cream.
How to Know It’s Set Perfectly
The hardest part of this recipe? Waiting for it to chill. But trust me, it’s worth the patience. You’ll know your mousse is ready when:
It jiggles slightly but holds together.
A knife inserted into the edge comes out clean.
The top is firm enough to support a fruit glaze without sinking in.
Once it’s fully set, carefully run a thin knife around the edge of the springform pan before releasing the sides. This helps prevent any cracking or sticking.
Yogurt Mousse Cake: FAQs and Final Thoughts
You’ve made it to the final part of our Yogurt Mousse Cake journey—and by now, your beautiful no-bake dessert is probably chilling in the fridge, getting ready to steal the show. Before we wrap things up, let’s take a moment to answer some of the most common questions people have about making this kind of mousse cake.
If you’re trying this recipe for the first time, or even if you’re a seasoned no-bake dessert lover, these tips will help you get the best results every time.
Frequently Asked Questions
1. Can I use Greek yogurt instead of regular yogurt?
Yes, but with a small adjustment. Greek yogurt is thicker and tangier than regular yogurt, so you may need to thin it slightly with a few tablespoons of milk to get that light, creamy texture. It does add a rich, slightly tart flavor, which many people love in mousse-style desserts.
2. What kind of fruit juice or puree works best for the topping?
You can use almost any fruit juice or puree, as long as it’s not too acidic (like lemon or pineapple, which can interfere with gelatin setting). Mango, strawberry, raspberry, and peach all work beautifully. Just make sure the juice or puree is smooth—strain it if needed for a glossy finish.
3. My mousse didn’t set properly—what went wrong?
If your mousse is too soft or didn’t firm up, it’s likely due to one of these common issues:
The gelatin wasn’t fully dissolved before adding it.
The mousse didn’t chill long enough.
The yogurt or cream ratio was off.
Double-check that your gelatin is fully activated and that the cake is chilled for at least 6 hours before serving.
4. Can I make this cake ahead of time?
Absolutely! In fact, this cake is best made a day in advance. It gives everything time to set perfectly, and the flavors develop even more overnight. Just keep it refrigerated and covered, and it will be good for up to 3 days.
5. How do I store leftovers?
Store any leftover cake in an airtight container in the fridge. It should stay fresh for 2–3 days. Because it’s made with dairy and gelatin, it’s not freezer-friendly—the texture changes when thawed.
6. Is there a vegetarian option for the gelatin?
Yes! You can use agar-agar powder as a vegetarian substitute for gelatin. It sets more firmly than gelatin and works well in no-bake desserts. Use about half the amount of agar-agar (so around 5 grams for this recipe), but always check your specific product instructions since brands vary.
7. Can I skip the fruit topping?
You definitely can! The mousse cake is delicious on its own and has a lovely creamy texture with just the biscuit base and mousse layer. That said, the fruit topping adds color, a fresh flavor contrast, and a slightly more festive presentation if you’re serving guests.
Final Thoughts: A Dessert Worth Making Again and Again
There’s something so satisfying about making a dessert that not only looks stunning but is also deceptively simple to pull together. This Yogurt Mousse Cake checks all the boxes: it’s creamy, light, tangy, and versatile enough to adapt to whatever fruit flavors you love most.
Whether you go with a simple plain yogurt version topped with fresh berries, or a tropical mango twist with a fruit glaze, you’re in for a treat that feels indulgent without being overly rich. Plus, since it’s a no-bake dessert, it’s perfect for warmer months or when you want to prep ahead for a party or gathering.
Print
Yogurt Mousse Cake
- Author: Andrew Recipes
Description
Light, airy, and refreshingly tangy, this Yogurt Mousse Cake is the perfect no-bake dessert for warmer days or any time you crave something delicate yet satisfying. With a simple biscuit or sponge base and a creamy yogurt mousse layer, it’s an elegant treat that feels indulgent without being too heavy. This cake is often topped with a thin fruit jelly or fresh fruits to complement the tartness of the yogurt.
Ingredients
For the base
200 grams digestive biscuits or sponge cake
80 grams melted butter
For the yogurt mousse
400 grams plain or flavored yogurt
300 ml heavy cream
100 grams powdered sugar
10 grams powdered gelatin
4 tablespoons cold water
1 teaspoon vanilla extract
For the topping (optional)
200 ml fruit juice or puree
5 grams powdered gelatin
2 tablespoons sugar
Instructions
1
Crush the digestive biscuits into fine crumbs and mix with melted butter until fully combined. Press the mixture into the bottom of a springform pan lined with parchment paper. Place in the refrigerator to set while you prepare the mousse.
2
In a small bowl, sprinkle gelatin over cold water and let it bloom for 5 minutes. Then gently heat the mixture until the gelatin dissolves completely. Let it cool slightly.
3
In a large bowl, mix yogurt with powdered sugar and vanilla extract until smooth. Slowly whisk in the cooled gelatin mixture until fully incorporated.
4
In a separate bowl, whip the heavy cream until soft peaks form. Gently fold the whipped cream into the yogurt mixture in batches, being careful not to deflate the mousse.
5
Pour the mousse over the prepared base and smooth the top. Refrigerate for at least 4-6 hours or until fully set.
6
If adding a fruit topping, dissolve gelatin and sugar in warm fruit juice or puree. Let it cool slightly, then pour over the set mousse layer. Chill again until the top is firm.
7
Once fully set, gently remove the cake from the mold and serve chilled. Garnish with fresh fruit or mint leaves if desired.
Notes
This recipe works beautifully with flavored yogurts such as strawberry, mango, or peach. Make sure the gelatin is fully dissolved to ensure a smooth texture. For a lighter version, use low-fat yogurt and reduce the sugar slightly. This cake can be made a day in advance, making it a great option for gatherings or special occasions.

