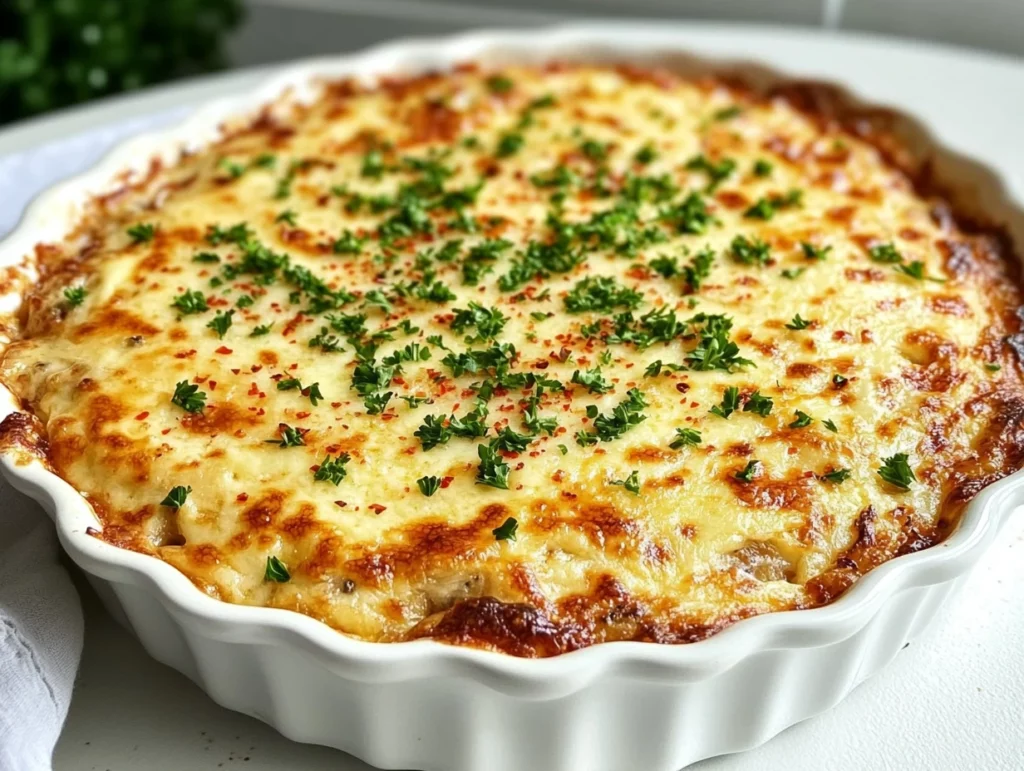
Garlic lovers, unite! If there’s one thing I adore about hosting, it’s serving up dishes that make everyone gather around, plates in hand, ready to dive in. And this Creamy Baked Garlic Bread Dip is just that kind of recipe—a rich, cheesy, garlicky masterpiece that pairs perfectly with crispy bread, bagel chips, or even fresh veggies. Trust me, this dip is a showstopper that’ll have everyone asking for the recipe before the night is over!
Before we dive into the recipe, let me set the stage. Imagine the warm, cozy aroma of roasted garlic wafting through your kitchen. It’s that kind of smell that makes you feel like you’re wrapped in a fluffy blanket of comfort food. This dip is all about layering bold flavors—roasted garlic, caramelized shallots, creamy cheeses, and a touch of spice. Plus, it’s ridiculously easy to make, which means less time fussing in the kitchen and more time enjoying it with your favorite people.
Now, let’s get started with the first few steps of this decadent dip.
Step 1: Roast the Garlic and Shallots
The magic starts with roasting. This step is non-negotiable because it brings out the sweet, mellow flavors of garlic and shallots, creating a savory foundation for the dip.
- Preheat your oven to 375°F. Grab two heads of garlic and two whole shallots. Trim the tops off the garlic heads and the bottoms off the shallots to expose the layers.
- Place them on a sheet of foil, drizzle with 2 tablespoons of olive oil, and sprinkle a pinch of salt over the top.
- Wrap the foil tightly and pop it into the oven for about an hour. This gives the garlic and shallots enough time to turn buttery soft and golden brown. Your kitchen will smell heavenly—consider this your appetizer for the senses!
Pro Tip: If you’ve never roasted garlic before, prepare to fall in love. It becomes soft enough to spread like butter, and the shallots take on a slightly sweet, caramelized flavor that perfectly complements the garlic.

Step 2: Prepare the Roasted Garlic Paste
Once the garlic and shallots have cooled just enough to handle, it’s time to turn them into a luscious paste.
- Carefully squeeze the roasted garlic cloves out of their skins—they’ll be buttery soft and golden. Do the same with the shallots. Add them to a mixing bowl.
- Use a fork to mash everything together until it forms a smooth, spreadable paste. This is your secret weapon for packing maximum flavor into the dip.
Quick Tip: If you’re feeling fancy, save some roasted garlic cloves to use as a garnish later. They’ll add an extra touch of gourmet flair when serving!

Step 3: Blend the Creamy Base
Now, it’s time to mix the creamy, cheesy base that makes this dip utterly irresistible.
- In the same bowl as your garlic-shallot paste, add:
- 1 block (8 oz) of softened cream cheese
- 1 cup sour cream
- Stir until everything is smooth and well-blended. The cream cheese adds richness, while the sour cream gives the dip a slight tang.
This is where things start coming together in a way that feels both luxurious and comforting. By this point, you’re already halfway to dipping bliss. Stay tuned—there’s more cheesy goodness and pro tips in Part 2 to make this the ultimate garlic bread dip!

Assembling the Cheesy Magic
Step 4: Add the Cheesy Goodness
What’s a great dip without cheese? This step is where we turn up the decadence with layers of mozzarella and Parmesan.
- To your garlic and cream cheese mixture, stir in:
- ½ cup shredded mozzarella cheese
- ½ cup grated Parmesan cheese
- ½ cup chopped fresh parsley (save a bit for garnish later)
- ½ teaspoon salt
- ¼ teaspoon pepper
- ½ teaspoon red pepper flakes (optional, but it adds a lovely hint of spice)
Mix everything until it’s evenly combined. At this stage, you’ll see the flecks of parsley and cheese weaving through the creamy base, and the aroma alone will have you tempted to grab a spoon for a sneak taste!

Step 5: Assemble the Dip
Now it’s time to assemble your dip into a baking dish that’ll deliver those deliciously crispy, golden edges.
- Transfer the creamy mixture into an 8 or 9-inch pie plate or a similar-sized baking dish.
- Use a spatula to spread the mixture evenly into the dish, making sure to get it into every corner.
- Top it off with the remaining 1 cup of shredded mozzarella cheese. This final cheesy layer is what creates that irresistible golden crust as it bakes.
Pro Tip: If you want to add a little crunch, sprinkle some seasoned breadcrumbs on top before baking. It adds a delightful texture that pairs perfectly with the gooey cheese underneath.
Step 6: Bake Until Bubbly
The final stretch! This is the moment where everything comes together—garlic, cheese, and cream uniting in a warm, bubbling dish of pure joy.
- Preheat your oven to 350°F (don’t forget to lower the temperature if you just roasted your garlic).
- Bake the dip for 20–25 minutes, or until the top is golden brown and the edges are bubbling.
- Keep an eye on it during the last few minutes. A little extra color on the cheese topping gives it that perfect toasty flavor.
As it bakes, your kitchen will be filled with the most heavenly aroma—a blend of roasted garlic, melted cheese, and warm, buttery notes. It’s the kind of smell that gets everyone wandering into the kitchen, asking, “Is it ready yet?”
Step 7: Garnish and Serve
Once your dip is out of the oven, let it cool slightly—just enough to avoid molten cheese burns (we’ve all been there!). Then, it’s time to add the final touches.
- Sprinkle the reserved chopped parsley over the top for a pop of freshness and color.
- For a little extra kick, dust the surface with a pinch of red pepper flakes. Not only does it look beautiful, but it also hints at the bold flavors waiting underneath.
Serve this hot, creamy dip with:
- Toasted baguette slices
- Bagel chips
- Pita chips
- Or even crunchy veggies like celery sticks and carrot spears for a lighter option.
Quick Tip: If you’re making this dip for a party, keep it warm by serving it in a small slow cooker or warming dish. That way, it stays gooey and delicious from start to finish.
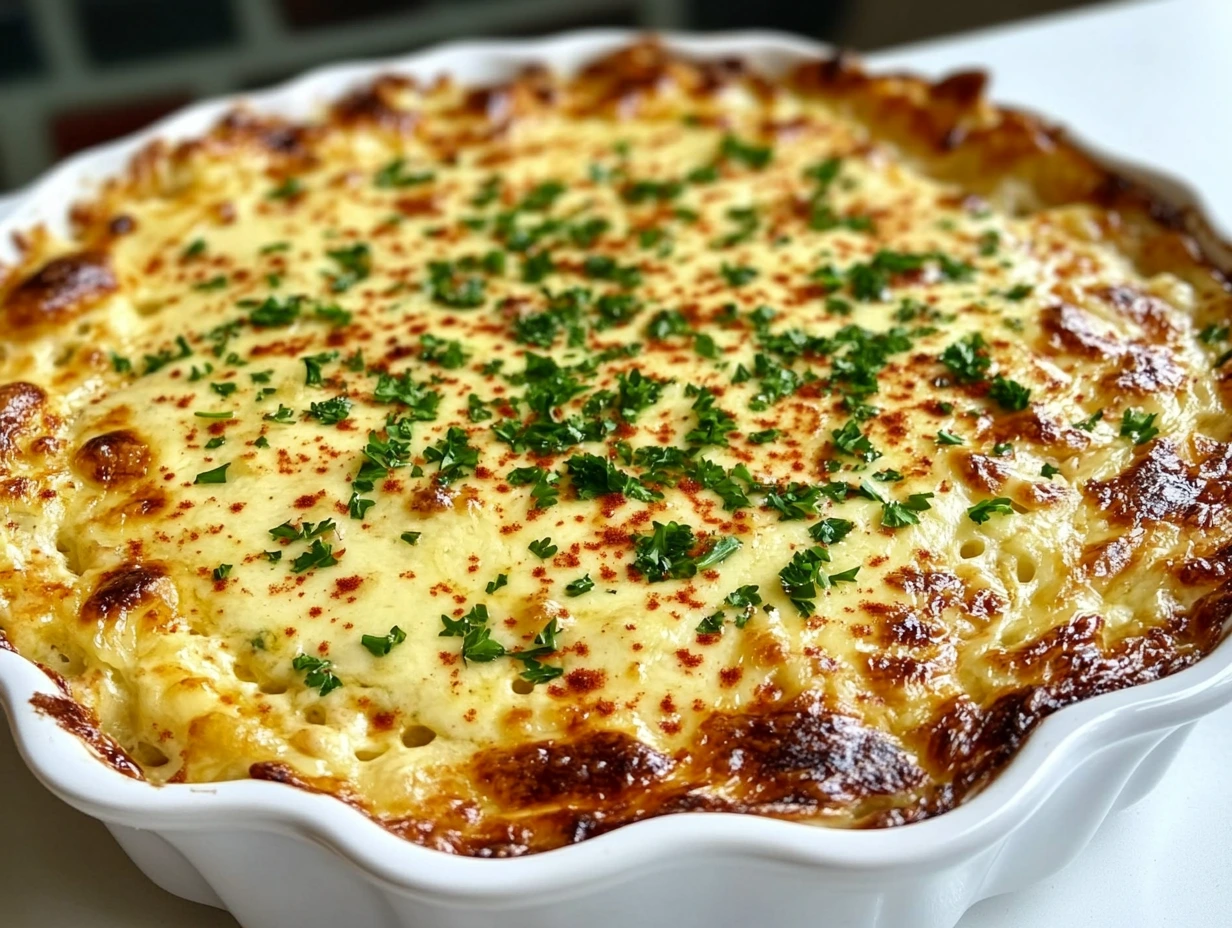
FAQs and The Perfect Garlic Dip Finale
By now, your kitchen is probably filled with the heavenly aroma of roasted garlic and bubbling cheese, and your dip is ready to steal the show. But before you dive in (or serve it to an eager crowd), let’s address some common questions and wrap things up with a warm, cheesy conclusion.
FAQs About Baked Garlic Bread Dip
1. Can I make this dip ahead of time?
Absolutely! Prepare the dip up to the baking step, cover it tightly, and store it in the fridge for up to 24 hours. When you’re ready to serve, bake it straight from the fridge, but add an extra 5–7 minutes to the baking time.
2. Can I substitute any of the cheeses?
Yes! While mozzarella and Parmesan create the perfect texture and flavor balance, you can experiment with other cheeses like Gruyere or Fontina for a slightly nuttier taste. Just make sure they’re good melting cheeses for that gooey effect.
3. Is there a way to make this dip lighter?
If you’re looking to cut back on calories, swap the cream cheese for a reduced-fat version and use Greek yogurt instead of sour cream. It won’t be quite as rich, but it’ll still be packed with flavor.
4. What if I don’t have fresh parsley?
No problem! You can use dried parsley, but reduce the amount to about 2 tablespoons since dried herbs are more concentrated. Alternatively, fresh basil or chives make great substitutes.
5. Can I roast the garlic and shallots in advance?
Yes! Roasting garlic and shallots can be done up to 3 days ahead. Just store them in an airtight container in the fridge until you’re ready to use them.
6. What’s the best way to reheat leftovers?
Reheat leftovers in a 350°F oven for 10–15 minutes or until warmed through. You can also microwave individual portions, but the oven keeps the texture of the cheese topping crispy.
7. What can I serve with this dip if I don’t have bread or chips?
Get creative! Try roasted potato wedges, pretzels, or even large slices of bell pepper. The creamy, garlicky flavor complements just about anything.
Conclusion: Bring People Together with Every Bite
There you have it—your new go-to recipe for any occasion, whether it’s a holiday gathering, game day, or a cozy night in with family. This Creamy Baked Garlic Bread Dip is a showstopper that’ll have everyone scooping up seconds (and thirds). The combination of roasted garlic, creamy cheese, and fresh herbs creates a flavor explosion that’s as comforting as it is indulgent.
Print
Baked Garlic Bread Dip
- Author: David
- Total Time: 1 hour 40 minutes
Description
This creamy and cheesy baked dip is infused with roasted garlic and shallots, making it the ultimate savory indulgence. Perfect for gatherings or as a crowd-pleasing appetizer.
Ingredients
- 2 whole shallots, bottoms cut off
- 2 heads garlic, tops cut off
- 2 tbsp Olive oil
- 1 (8 oz) Block softened cream cheese
- 1 cup Sour cream
- 1 ½ cups Shredded mozzarella cheese (divided)
- ½ cup Grated Parmesan cheese
- ½ cup Fresh parsley (chopped, reserve some for topping)
- ½ tsp Salt
- ¼ tsp Pepper
- ½ tsp Red pepper flakes
Instructions
1️⃣ Roast the Garlic and Shallots:
Preheat your oven to 375°F.
Place the garlic heads and shallots on a sheet of foil. Drizzle with olive oil and sprinkle with a pinch of salt.
Wrap the foil tightly around the garlic and shallots, then roast for 1 hour or until soft.
2️⃣ Prepare the Roasted Garlic Paste:
Once roasted, let the garlic and shallots cool slightly. Squeeze the soft roasted garlic and shallots from their skins into a mixing bowl.
Mash them with a fork to create a paste-like consistency.
3️⃣ Mix the Dip Ingredients:
Add the softened cream cheese and sour cream to the bowl with the garlic-shallot paste. Mix until smooth.
Stir in ½ cup shredded mozzarella, Parmesan cheese, parsley, salt, pepper, and red pepper flakes. Mix well to combine.
4️⃣ Assemble the Dip:
Transfer the mixture to an 8 or 9-inch pie plate or baking dish. Spread it into an even layer and top with the remaining shredded mozzarella cheese.
5️⃣ Bake the Dip:
Lower the oven temperature to 350°F. Bake the dip for 20-25 minutes, or until the top is golden brown and bubbly.
6️⃣ Garnish and Serve:
Remove from the oven and garnish with fresh parsley and a sprinkle of red pepper flakes.
Serve hot with bagel chips, toasted bread, or pita chips for dipping.
Notes
- For extra flavor, mix in a teaspoon of Italian seasoning or a pinch of smoked paprika.
- To make ahead, prepare the dip (without baking), cover, and refrigerate for up to 24 hours. Bake just before serving.
- Leftovers can be stored in an airtight container and reheated in the oven or microwave.
- Prep Time: 15 minutes
- Cook Time: 1 hour 25 minutes
Nutrition
- Serving Size: 6-8

