There’s something undeniably comforting about a hot, cheesy sandwich pulled straight from the oven. And let me tell you—these Baked Italian Sub Sandwiches are everything you want in a quick, satisfying meal. Loaded with layers of savory deli meats, melted provolone cheese, tangy banana peppers, and all wrapped in a buttery, seasoned roll, this recipe is the kind of easy dinner you’ll come back to again and again.
Whether it’s a cozy weeknight dinner, a game day party, or you’re just feeding some very hungry people, this recipe checks all the boxes: it’s fast, it’s flavorful, and it’s guaranteed to please. And let’s be honest—there’s something magical about how all the flavors meld together in the oven. That crispy golden roll on the outside and the gooey melted cheese on the inside? Absolute perfection.
These are like your favorite deli sub—but warm, melty, and somehow even more comforting. I’ve made them for casual family dinners and even served them cut in halves or quarters for parties. Either way, they disappear fast!
Let’s walk through how to make these super simple Baked Italian Subs that are about to become a staple in your kitchen.
Ingredients You’ll Need
4 hoagie rolls (keep them hinged—don’t slice all the way through)
½ lb deli ham
½ lb salami
½ lb roast beef or cooked ground beef
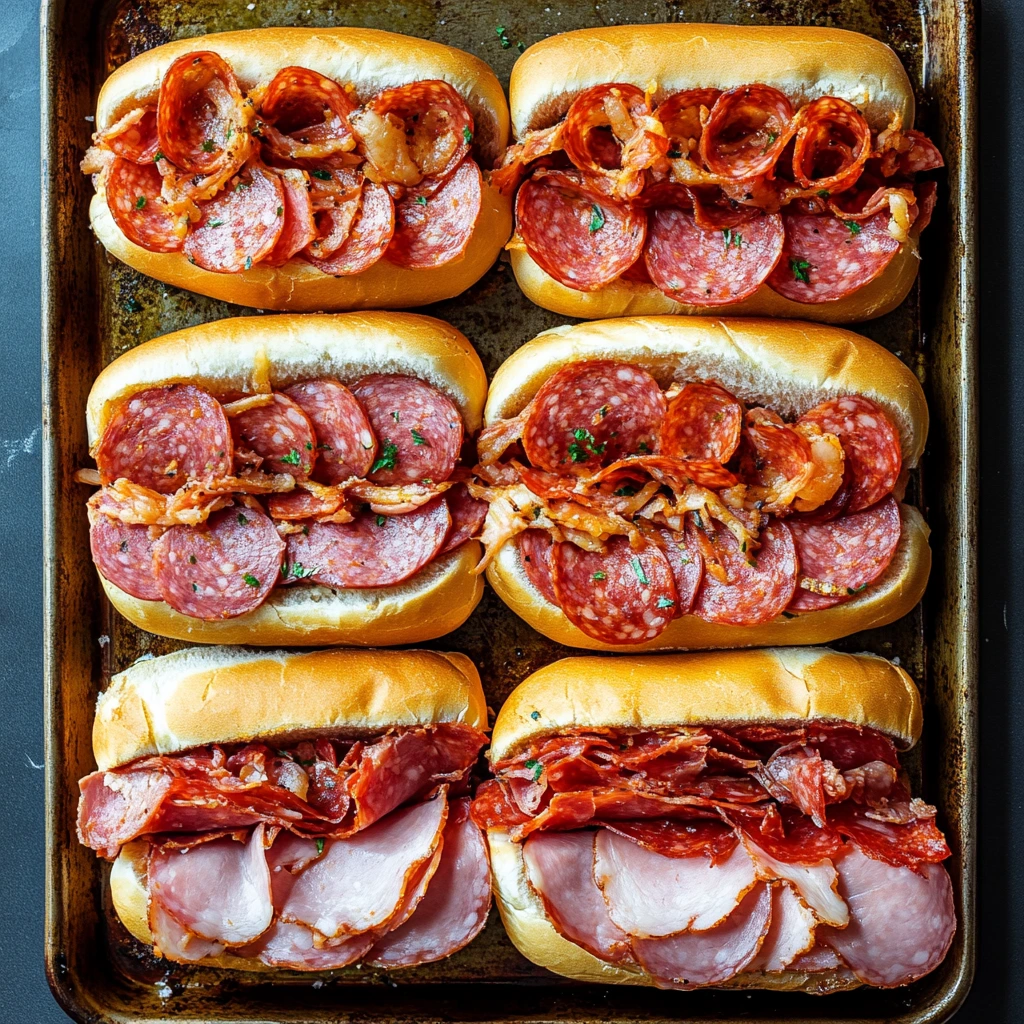
¼ lb sliced pepperoni (optional but delicious)
8 slices provolone or mozzarella cheese
½ cup pickled banana peppers or pepperoncini
½ cup sautéed onions (optional, but highly recommended)
1 tbsp Italian seasoning
2 tbsp melted butter
STEP-BY-STEP INSTRUCTIONS
Step 1: Preheat Your Oven
Start by preheating your oven to 375°F (190°C). I always line my baking sheet with parchment paper—not only does it make cleanup a breeze, but it also prevents any cheesy overflow from sticking to the pan.
Step 2: Prep Your Hoagie Rolls
Now take your hoagie rolls and carefully slice them lengthwise. The key here is to not cut all the way through. Think of it like a book that opens and closes—this helps hold all those delicious fillings in place while they bake.

Step 3: Layer on the Meats
Here comes the fun part: layering the meat! Add slices of ham, salami, and roast beef (or ground beef if that’s what you’re using) to each open roll. You really can’t go wrong with the order here—just make sure each sandwich gets a good, hearty layer of meat. If you’re feeling extra indulgent, throw in some sliced pepperoni for an extra punch of flavor.
Step 4: Add the Cheese
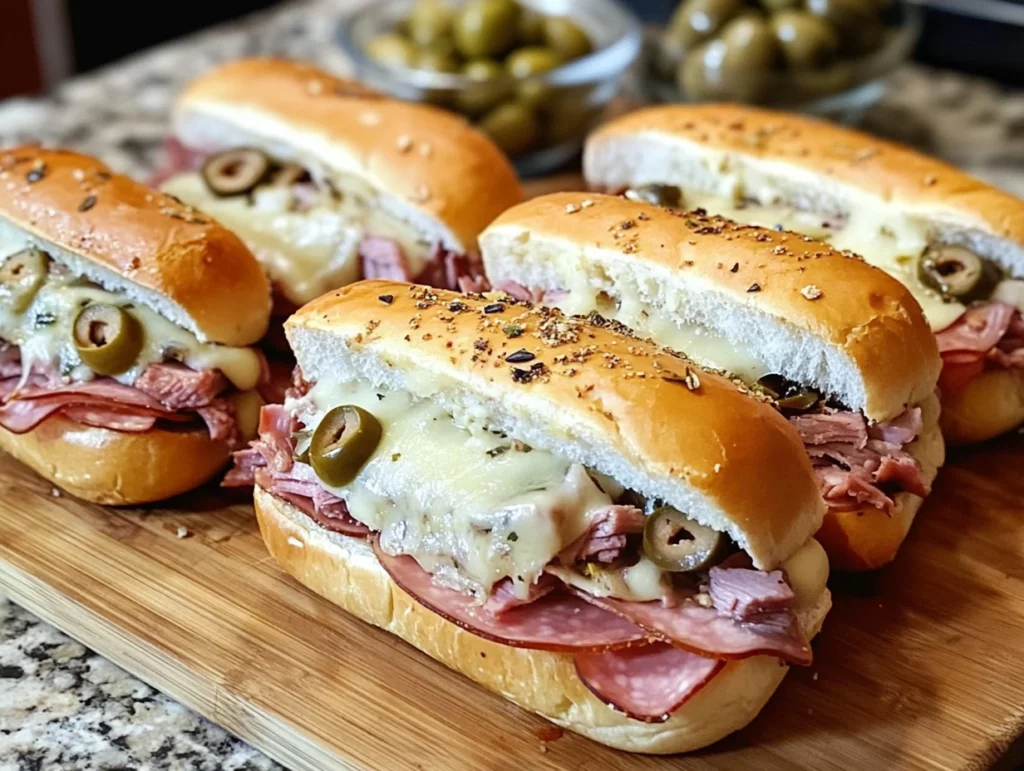
Top each sandwich with two slices of provolone or mozzarella. As they bake, the cheese gets beautifully melty and brings everything together in the best way.
Step 5: Toss in the Extras
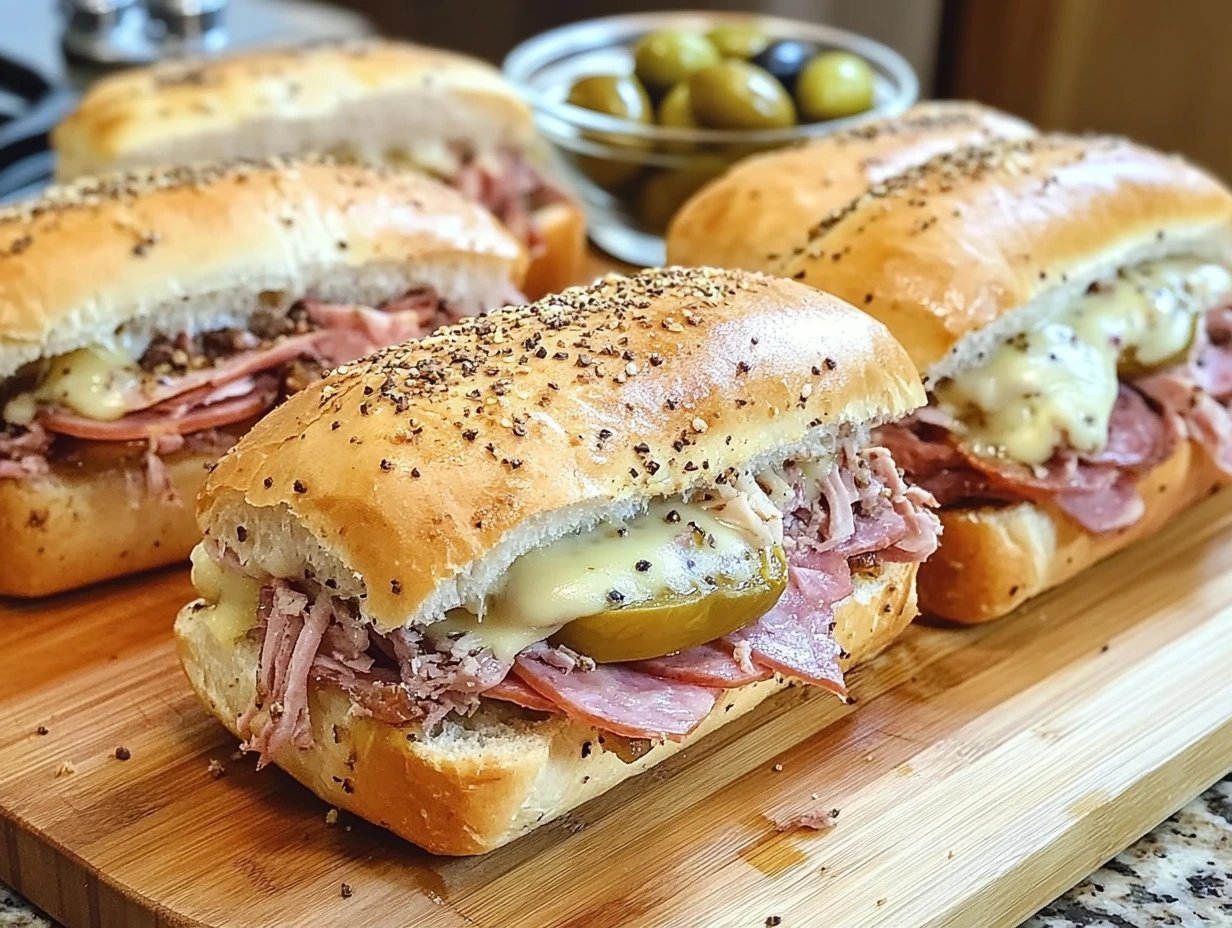
To finish off the filling, add your banana peppers and sautéed onions. These are optional, but I love the tang and texture they bring. If you’re serving these to kids or picky eaters, you can always let everyone customize their own.
Baked Italian Sub Sandwiches
Welcome back! Now that we’ve loaded up our hoagie rolls with all that meaty, cheesy goodness, it’s time to bring everything together in the oven. This is where the magic really happens—the cheese melts, the flavors meld together, and the tops of those rolls get a buttery, golden finish that’s just irresistible.
I love how effortless this next part is. It’s the kind of dinner you can throw in the oven and forget about for a few minutes while you toss together a quick salad or get the table set. And trust me, the aroma that fills your kitchen while these are baking? Worth every second of that short wait.
Let’s keep going and get these Baked Italian Subs ready to serve!
Step 6: Assemble on a Baking Sheet
Place all your filled hoagies onto your prepared baking sheet. Make sure they’re snug but not overlapping—you want the heat to circulate around them for even baking. Then, brush the tops of the rolls with the melted butter. This helps them crisp up in the oven and adds a rich, buttery flavor that takes them to the next level.
Sprinkle each roll generously with Italian seasoning. It’s a simple step, but it really adds that classic Italian sub flavor, tying everything together with herbs like oregano, basil, and thyme.
Step 7: Bake Covered First
Cover the subs loosely with foil. This allows the sandwiches to warm through without drying out the bread. Bake for about 10 to 15 minutes—just enough time to get that cheese nice and melty and the meat warmed all the way through.
Step 8: Uncover and Crisp
After the initial baking time, remove the foil and return the sandwiches to the oven for another 2 to 3 minutes. This final step gives the tops of the rolls that perfect golden-brown finish. They’ll be lightly crispy on the outside while staying soft and warm on the inside. Basically, sandwich perfection.
Step 9: Serve and Enjoy
Now it’s time to eat! Serve your hot subs right away. They pair beautifully with potato chips, olives, or a fresh green salad. If you want to dress them up even more, you can add shredded lettuce or tomato slices after baking for a fresh contrast to all that warm, savory goodness.
Helpful Tips and Variations
Make-Ahead Friendly: You can assemble these sandwiches ahead of time and store them in the fridge until you’re ready to bake. Just be sure to brush the butter on right before baking to keep the rolls from getting soggy.
Customize the Fillings: Not a fan of salami? Swap it out for turkey or smoked chicken. These subs are super flexible, so use whatever deli meats your family loves.
Turn Up the Heat: If you like a little spice, mix red pepper flakes into the Italian seasoning or use hot banana peppers instead of mild ones.
Mini Versions for Parties: Cut the hoagie rolls in half or use slider buns to make mini baked subs for parties or gatherings. They’re the perfect hand-held snack for game day or holiday spreads.
Cheese Options: Provolone and mozzarella are classic choices here, but feel free to experiment with others like sharp cheddar, pepper jack, or even a few spoonfuls of ricotta for a creamy twist.
Baked Italian Sub Sandwiches
We’ve layered, baked, and crisped our way to a seriously satisfying meal. Now, let’s talk about some of the most common questions that come up with this recipe. Whether you’re planning to make a big batch for a party or trying these for the first time on a busy weeknight, these tips will help you get the most out of your Baked Italian Sub Sandwiches.
Frequently Asked Questions
1. Can I make these subs ahead of time?
Yes, absolutely! You can assemble the sandwiches up to 24 hours ahead of baking. Just wrap them tightly in foil or plastic wrap and refrigerate. When you’re ready to bake, add the butter and seasoning, then follow the baking instructions. They’ll turn out just as delicious.
2. What’s the best way to reheat leftovers?
If you have leftovers (which doesn’t happen often in my house), the best way to reheat them is in the oven at 350°F for about 10 minutes. This helps re-crisp the bread and melt the cheese again without drying everything out. Avoid the microwave if you can—it tends to make the bread rubbery.
3. Can I freeze these sandwiches?
Yes, but with a small caveat. These sandwiches freeze best before baking. Assemble everything except the butter topping, wrap them tightly, and freeze for up to 2 months. When you’re ready to enjoy, thaw them in the fridge overnight, add the butter and seasoning, and bake as directed.
4. Are there any vegetarian alternatives?
You can definitely make a vegetarian version by skipping the meat and loading up on sautéed mushrooms, onions, spinach, and roasted red peppers. Add your cheese and bake as usual—it’s still packed with flavor and just as satisfying.
5. How can I make these gluten-free?
Use gluten-free hoagie rolls (many grocery stores now carry them in the freezer section), and double-check that your deli meats and seasoning are gluten-free. Everything else in the recipe is naturally gluten-free.
6. What sides go well with Italian subs?
These subs are super hearty, so I like to keep sides simple—think potato chips, a crunchy pickle, or a green salad with vinaigrette. You could also serve with pasta salad or a cup of tomato soup if you’re making them for lunch or dinner.
7. Can I add fresh veggies to the sandwich?
Definitely! While the sandwiches bake best with just meats and cheese, feel free to add fresh lettuce, tomato slices, cucumbers, or even avocado after baking. It gives the sandwich a fresh, deli-style crunch.
Final Thoughts
These Baked Italian Sub Sandwiches have quickly become one of my go-to meals when I need something warm, filling, and fuss-free. They’re incredibly easy to customize, which means everyone at the table can enjoy their perfect version. And because you can prep them ahead, they’re just as ideal for busy weeknights as they are for parties or casual get-togethers.
The crispy edges of the bread, the melty layers of cheese, and that punch of flavor from the banana peppers and Italian seasoning—there’s really nothing better. Once you try these baked subs, I promise they’ll be on repeat in your kitchen too.
Give them a try this week and let me know how they turn out! Did you stick to the classic combo, or add your own twist? I’d love to hear what variations you come up with—leave a comment and share your favorite version!
Print
Baked Italian Sub Sandwiches
- Author: Andrew Recipes
Description
These warm and melty Baked Italian Sub Sandwiches are packed with deli meats, gooey cheese, tangy peppers, and topped with seasoned buttery rolls. They’re perfect for an easy weeknight dinner, game day snack, or feeding a hungry crowd. Baking the subs melds all the flavors together and gives the bread a slightly crispy, golden finish.
Ingredients
4 hoagie rolls (keep them hinged, don’t slice all the way through)
½ lb deli ham
½ lb salami
½ lb roast beef or cooked ground beef
¼ lb sliced pepperoni (optional)
8 slices provolone or mozzarella cheese
½ cup pickled banana peppers or pepperoncini
½ cup sautéed onions (optional)
1 tbsp Italian seasoning
2 tbsp melted butter
Instructions
1️⃣ Preheat your oven to 375°F (190°C). Line a baking sheet with parchment paper for easy cleanup.
2️⃣ Carefully slice each hoagie roll lengthwise, making sure not to cut all the way through. You want the roll to open like a book so it holds together.
3️⃣ Begin layering in the fillings. Add slices of ham, salami, and roast beef to each roll. If using, add sliced pepperoni for extra flavor.
4️⃣ Top the meat with two slices of provolone or mozzarella cheese per sandwich.
5️⃣ Add banana peppers and sautéed onions, if using, to enhance flavor and texture.
6️⃣ Arrange the prepared subs on the baking sheet. Brush the tops of the rolls with melted butter and sprinkle Italian seasoning generously over each.
7️⃣ Cover the sandwiches loosely with foil and bake for 10 to 15 minutes, or until the cheese is melted and the sandwiches are warmed through.
8️⃣ Remove the foil and bake for an additional 2 to 3 minutes to crisp the tops of the rolls.
9️⃣ Serve the subs hot, ideally with a side of chips, olives, or a fresh salad.
Notes
You can mix and match deli meats to suit your preference, or add extras like tomatoes or shredded lettuce after baking for a fresh touch. These subs are also great made ahead and refrigerated until baking time. For a spicy kick, add a few red pepper flakes with the Italian seasoning.

