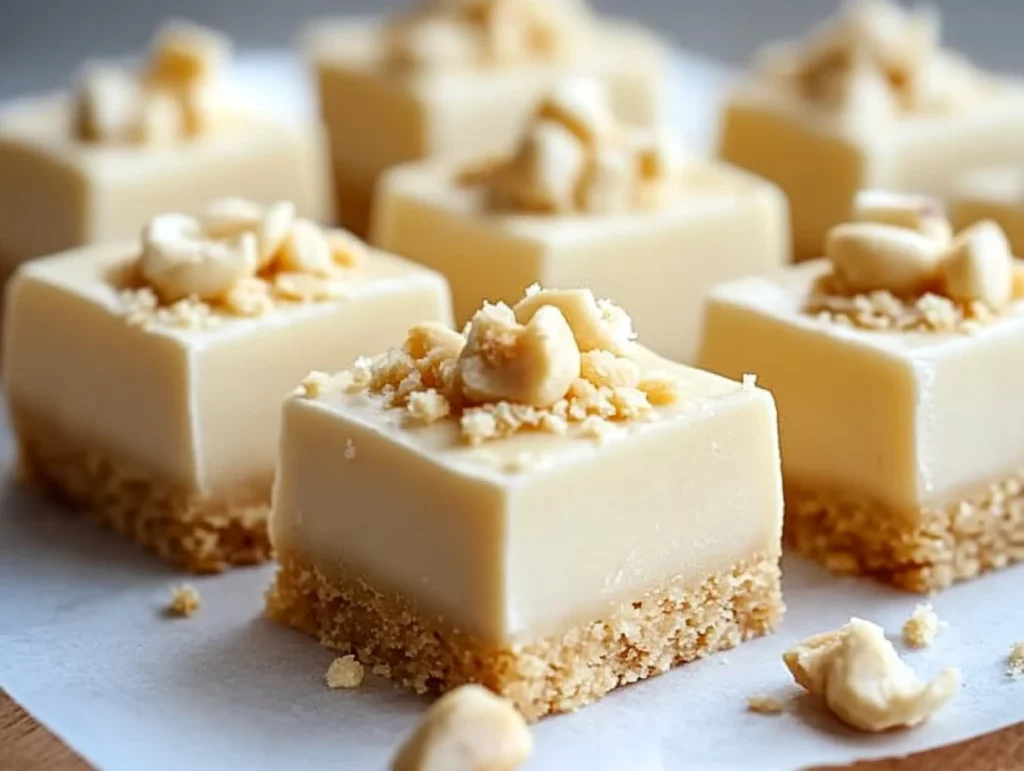
If you’re a fan of creamy, melt-in-your-mouth treats that are packed with flavor and easy to make, then this banana fudge is about to become your new go-to dessert. The combination of ripe banana, rich white chocolate, and the subtle touch of vanilla makes this fudge an irresistible indulgence that you’ll want to whip up time and time again. Plus, it’s a fantastic way to use up those overripe bananas you might have lying around — no waste, just sweet, sweet deliciousness.
I first stumbled upon this banana fudge recipe during a random recipe scroll one evening, looking for something different and easy to make. The blend of banana and white chocolate caught my attention immediately, and I knew I had to give it a try. What resulted was a creamy, velvety treat that was hard to resist, even for my family who’s not always on board with banana-flavored desserts. It’s one of those recipes that will have you savoring every bite and then reaching for another piece, convinced you’ll stop at just one (but you won’t).
This banana fudge is not only delicious, but it’s also a versatile recipe. Whether you’re in the mood for a crunchy texture or prefer it smooth, the optional chopped nuts add a wonderful element of texture, and the base is easy to customize. So, let’s get started with making this delightful fudge!
Ingredients You’ll Need:
- 1 ripe banana, mashed
- 2 cups white chocolate chips (or milk/dark chocolate chips if you prefer a variation)
- 1/2 cup sweetened condensed milk
- 1/4 cup unsalted butter
- 1/4 teaspoon salt
- 1/2 teaspoon vanilla extract
- 1/4 cup chopped nuts (optional, for extra texture)
Step 1: Prepare Your Pan
Before you get into the fun part (the melting and mixing!), the first thing you want to do is line your pan. Take an 8×8-inch square baking dish and line it with parchment paper or foil. The overhang from the parchment or foil will be a lifesaver later on, making it super easy to lift out your fudge once it has chilled and set. Plus, no sticky mess at the bottom of the pan!
Once that’s done, set the pan aside and get ready to start melting your chocolate.

Step 2: Melt the Chocolate
In a medium-sized saucepan, combine your white chocolate chips, sweetened condensed milk, and unsalted butter. You want to heat this over low to medium heat, stirring continuously. As the butter melts, the chocolate chips will slowly begin to soften and melt into the mixture. Keep stirring until everything is completely smooth, and you don’t see any lumps of chocolate or butter.
The smell of melting white chocolate will make you want to dive right into the pan, but hold off for a moment! This mixture needs to cool down slightly before we add the banana. Once it’s smooth and glossy, you’re ready for the next step.
Step 3: Add the Banana and Flavorings
Now comes the magic part — adding the mashed banana! Remove the pan from the heat, and then stir in your mashed banana, salt, and vanilla extract. The banana adds such a creamy and natural sweetness that balances beautifully with the rich white chocolate. It’s the perfect match! If you want to add chopped nuts for a little extra crunch, fold them into the mixture at this stage as well.
I absolutely love the addition of nuts in this recipe, especially chopped walnuts or even a handful of crushed peanuts. It adds such a nice contrast to the creamy texture of the fudge, but if you’re more of a smooth fudge person, you can totally skip the nuts. This fudge is delicious both ways!

Step 4: Set the Fudge
Now it’s time to transfer your banana fudge mixture into the prepared pan. Pour it into the pan and spread it out evenly, making sure the surface is smooth. You can use a spatula to do this, gently tapping the pan on the counter a few times to get rid of any air bubbles. At this point, the fudge should look glossy and smooth, and you’ll want to make sure the mixture is evenly distributed in the pan for perfect, uniform squares later on.
Once it’s nice and even, you’re ready for the most important part — chilling!
Let’s Finish That Banana Fudge and Add Some Extra Tips
Now that your banana fudge is in the pan and ready for the chilling process, the hard part is almost over! But, we still need to get this fudge perfectly set, cut into squares, and ready to serve. The best part? This recipe is so simple that you’ll have it mastered in no time. Let’s dive into the final steps, plus a few helpful tips to make sure your banana fudge is a success every time.

Step 5: Chill the Fudge
Once your fudge mixture is spread evenly in the pan, it’s time for it to chill and firm up. Place the pan in the fridge and let it set for at least 2 hours. During this time, the fudge will firm up, making it easy to slice into perfect squares. If you’re in a hurry (and I totally get it—sometimes I just can’t wait!), you could stick it in the freezer for about an hour. Just keep in mind that the texture will be a little firmer if frozen compared to when chilled in the fridge.
It’s important to give the fudge enough time to fully set before cutting, or else it might be too soft and sticky to slice neatly. Trust me, it’s worth the wait to get those perfectly cut squares.
Step 6: Cut and Serve
Once your fudge has chilled and is firm to the touch, it’s time to lift it out of the pan using the overhang of parchment or foil. Gently pull it out and place it on a cutting board. Use a sharp knife to cut the fudge into small squares. The size of the squares is totally up to you, but I suggest keeping them bite-sized so they’re perfect for popping in your mouth. This fudge is rich and sweet, so smaller pieces are often better for sharing.
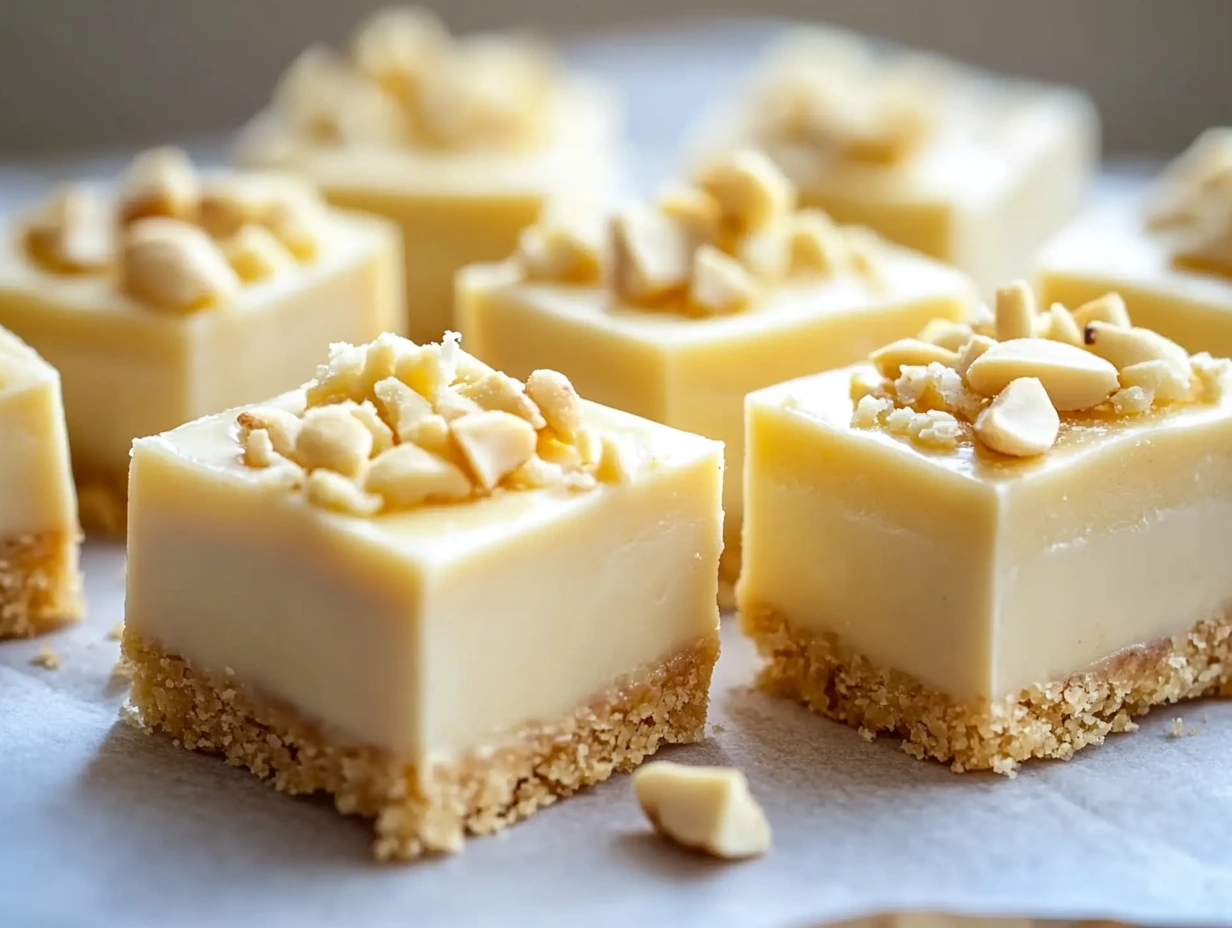
After cutting, you’ll see that the fudge has a beautiful creamy texture with a slight golden hue, and each bite will have the perfect balance of banana and white chocolate. Honestly, cutting into it is probably the hardest part—because once you do, there’s no stopping at just one square!
A Few More Tips to Make Your Banana Fudge Even Better
While this banana fudge recipe is already a winner, here are a few tips and variations to take it up a notch:
Chocolate Variations: As I mentioned earlier, you can easily swap out the white chocolate for milk or dark chocolate chips if you prefer a different flavor. The milk chocolate will give the fudge a sweeter taste, while dark chocolate provides a nice contrast to the banana’s natural sweetness. The best part is, the fudge will still have that creamy texture, no matter which chocolate you choose.
Nutty Add-ins: If you love a bit of crunch, add more than just the usual nuts. Try chopped pecans, almonds, or even cashews for something a little different. If you’re feeling extra creative, a handful of mini marshmallows or a sprinkle of toffee bits would make an incredible addition for added texture and flavor.
Flavored Extracts: While vanilla is the classic choice here, you could also experiment with almond extract or a dash of cinnamon to elevate the flavors. A tiny touch of almond extract can add a unique twist that pairs perfectly with the banana.
Storage Tip: If, by some miracle, you have leftovers, store them in an airtight container in the fridge. The fudge will last up to a week, but I doubt it’ll stick around for that long! If you want to keep it for a little longer, you can freeze the fudge in a freezer-safe container. Just be sure to wrap it tightly to prevent freezer burn. When you’re ready to enjoy it again, let it thaw for a bit before cutting into squares.
Step 7: Enjoy and Share the Love
Once your fudge is cut and ready to serve, it’s time to dig in. Serve it up at a party, bring it as a sweet treat to a gathering, or just keep it all for yourself when that sweet tooth hits (no judgment here!). It’s the kind of dessert that’s perfect for sharing with family or friends, but be warned—it’s so addictive you might find yourself hoarding it in the fridge!
Whether it’s for a special occasion or just because you need a little sweet indulgence, this banana fudge is bound to be a crowd-pleaser. It’s got everything—creamy, sweet, and just the right amount of banana flavor, all wrapped up in a melt-in-your-mouth fudge. Your family and friends will be begging you for the recipe, so be prepared to share this one.
FAQ and Final Thoughts on Your Perfect Banana Fudge
Now that you’ve learned how to make this creamy, melt-in-your-mouth banana fudge, you might have a few lingering questions. Don’t worry — I’ve got you covered with some of the most common FAQs, along with a few extra tips to help you perfect the recipe. After that, we’ll wrap things up with some final thoughts on why this fudge is truly a must-try dessert!
FAQ Section
1. Can I use frozen bananas for this fudge?
Yes! If you have ripe bananas in the freezer, go ahead and use them. Just make sure to thaw them completely and mash them well before adding them to the fudge mixture. The flavor will still be great, but it might have a slightly different texture. Fresh bananas are preferred for the best results, but frozen ones can work in a pinch.
2. Can I use a different type of chocolate besides white chocolate?
Absolutely! While the white chocolate creates a creamy, sweet base that pairs perfectly with the banana, you can experiment with milk or dark chocolate chips if you prefer a different flavor. Just keep in mind that the overall sweetness of the fudge will change depending on the chocolate you use. Dark chocolate will give you a more bittersweet contrast, while milk chocolate will make it sweeter.
3. What if I don’t want to use condensed milk?
Sweetened condensed milk is a key ingredient for giving this fudge its creamy texture, but if you’re looking for an alternative, you can try using heavy cream or regular milk mixed with sugar. Keep in mind, though, that the texture might not be as rich or firm as the version made with sweetened condensed milk. The fudge may need a little longer to set or may be a touch softer.
4. How do I store this banana fudge?
To keep your fudge fresh, store it in an airtight container in the fridge. It will stay good for up to a week (though, let’s be honest, it probably won’t last that long!). If you want to keep it for longer, you can freeze the fudge. Just make sure to wrap it tightly with plastic wrap or foil and store it in a freezer-safe container. Let it thaw in the fridge before serving.
5. Can I add other mix-ins besides nuts?
Definitely! This fudge is super versatile. Try adding mini marshmallows, chocolate chunks, crushed graham crackers, or even a swirl of peanut butter for a fun twist. Just make sure to fold in your mix-ins after adding the mashed banana and before setting the fudge in the pan. Keep in mind that adding extra ingredients may change the texture slightly, but it will still be delicious!
6. How do I know when the fudge is fully set?
The best way to know your fudge is ready to cut is to gently press your finger on the surface — it should feel firm and not stick to your finger. If it feels soft or gooey, give it a little more time in the fridge. You can also check the sides of the fudge; they should pull away from the pan slightly when it’s properly set.
7. Can I make this fudge ahead of time for a party or event?
Yes! In fact, this fudge is the perfect make-ahead dessert. It stores well in the fridge for several days, so you can prepare it a few days in advance. This makes it a great option for parties, potlucks, or holiday gatherings. Just be sure to cut it into squares right before serving for the freshest look.
Final Thoughts on This Delicious Banana Fudge
There you have it — the perfect recipe for creamy, irresistible banana fudge that combines the sweetness of ripe bananas with the rich flavor of white chocolate. Whether you’re making it for a special occasion or simply to enjoy as a sweet treat, this fudge is guaranteed to be a hit. The smooth texture, rich flavor, and versatility make it one of those desserts that’s both easy to make and hard to stop eating!
As you try out the recipe, don’t be afraid to get creative. Swap out the chocolate for your favorite variety, add a handful of nuts for extra crunch, or experiment with different extracts and mix-ins. This banana fudge is flexible enough to suit any craving, and it’s always a crowd-pleaser.
I encourage you to give this recipe a try, and don’t forget to share your experience! If you’ve made this fudge and added your own twists or variations, I’d love to hear about it in the comments. I’m always excited to see how other people put their own spin on my recipes.
Happy fudge-making! I’m sure this treat will become a staple in your dessert rotation.
Print
Banana Fudge
- Author: Andrew Recipes
Description
This creamy, melt-in-your-mouth banana fudge blends the sweet richness of white chocolate with the natural flavor of ripe banana. The smooth texture, accented by a hint of vanilla and the optional crunch of chopped nuts, creates a delightful treat that’s perfect for satisfying your sweet tooth. Simple to make and packed with flavor, this fudge is a great way to use up ripe bananas while indulging in a decadent dessert.
Ingredients
- 1 ripe banana, mashed
- 2 cups white chocolate chips (or milk/dark chocolate chips for variation)
- 1/2 cup sweetened condensed milk
- 1/4 cup unsalted butter
- 1/4 teaspoon salt
- 1/2 teaspoon vanilla extract
- 1/4 cup chopped nuts (optional, for texture)
Instructions
Prepare Your Pan:
Line an 8×8-inch square pan with parchment paper or foil, leaving some overhang to make it easier to remove the fudge once it’s set.
Melt the Chocolate:
In a medium-sized saucepan, combine the white chocolate chips, sweetened condensed milk, and butter. Heat over low-medium heat, stirring continuously until the mixture is smooth and fully melted.
Add the Banana and Flavorings:
Remove the pan from heat and stir in the mashed banana, salt, and vanilla extract until fully combined. If using nuts, fold them into the mixture at this stage for extra texture.
Set the Fudge:
Pour the fudge mixture into the prepared pan and spread it out evenly. Smooth the top with a spatula and gently tap the pan on the counter to remove any air bubbles.
Chill:
Refrigerate the fudge for at least 2 hours, or until fully set and firm.
Cut and Serve:
Lift the fudge out of the pan using the parchment or foil overhang. Cut into small squares and serve. Store leftovers in an airtight container in the fridge to keep them fresh.
Notes
- You can use milk or dark chocolate chips for a variation in flavor, depending on your preference.
- For a richer texture, consider using chunky peanut butter or chopped walnuts in place of or in addition to the nuts.
- This fudge can be stored in the fridge for up to a week, but it’s so delicious, it might not last that long!

