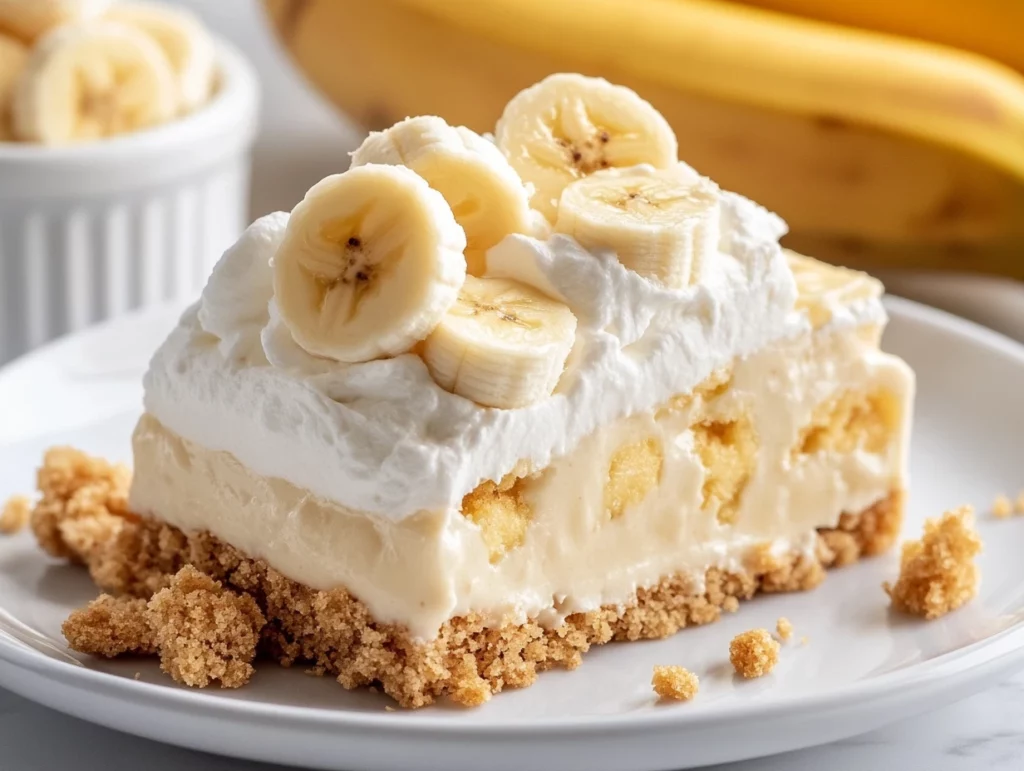
There’s just something about banana pudding that feels like a warm hug from Grandma’s kitchen, isn’t there? Now, imagine that nostalgic flavor tucked into a soft, fluffy yellow cake—yes, it’s as irresistible as it sounds. This Banana Pudding Poke Cake takes two timeless classics and merges them into one ultra-satisfying dessert that’s perfect for sharing. Whether you’re headed to a summer potluck, planning a casual brunch, or just want something sweet in the fridge for those “just because” cravings, this cake checks all the boxes.
I first stumbled upon this idea when trying to think of a no-fuss dessert for a last-minute family BBQ. I had a box of yellow cake mix, some instant banana pudding, and half a tub of whipped topping staring me down. After a quick brainstorm and a little inspiration from Southern church cookbooks, this gem of a recipe was born. And let me just say—it disappeared faster than anything else on the table that day.
What makes this cake extra special is the way the banana pudding seeps into the poked holes of the warm cake. It creates the most moist, luscious texture without being heavy or overly rich. Topped with fluffy whipped topping and a generous sprinkle of crushed vanilla wafers, every bite is like a banana cream dream.
So let’s jump into making it! You won’t believe how easy (and satisfying) this cake is from start to finish.

Ingredients You’ll Need:
1 box yellow cake mix (plus eggs, oil, and water as listed on the box)
2 (3.4-ounce) boxes of instant banana pudding mix
4 cups cold milk (whole or 2% both work great)
1 (8-ounce) tub frozen whipped topping, thawed
20 vanilla wafers, crushed
Baking the Cake & Preparing the Pudding
Step 1: Bake the Yellow Cake
Start by preparing your yellow cake according to the directions on the box. Usually, that means mixing the cake mix with eggs, oil, and water. Pour the batter into a greased and floured 9×13-inch baking pan and slide it into the oven. Bake it until the top is golden and a toothpick inserted in the center comes out clean—this usually takes about 28–32 minutes, depending on your oven.
Once the cake is baked, place the pan on a wire rack and let it cool for just a couple of minutes. You want it to be warm, but not too hot, when you add the pudding. That slight warmth helps the pudding soak in better without turning gummy.
Step 2: Poke the Cake
Using the handle of a wooden spoon (or anything similar—just make sure it’s about the size of a dime in diameter), poke holes all over the surface of the cake. Space them about 1 to 1.5 inches apart and push the handle all the way to the bottom of the cake. This is where all the magic happens! Those little tunnels become pockets of creamy banana pudding, making every slice extra indulgent.
Step 3: Make the Banana Pudding
In a large bowl, whisk together the two packages of instant banana pudding with 4 cups of cold milk. Whisk it thoroughly until there are no lumps left and the mixture is smooth and pourable. It’s important to work quickly here, since instant pudding begins to thicken fast.
Step 4: Pour the Pudding Over the Cake
Immediately after mixing, spoon or gently pour the pudding over the poked cake. Make sure you aim for the holes so the pudding sinks into every crevice. Use the back of a spoon to spread the pudding evenly across the top, leveling it out. You want it to look smooth and even before it heads to the fridge.
Step 5: Chill to Set
Cover the cake with plastic wrap or foil and place it in the fridge. Let it chill for at least two hours—this allows the pudding to set and the flavors to meld beautifully with the cake. If you’re planning ahead, you can let it chill overnight and finish it the next day.
Finishing Your Banana Pudding Poke Cake: Toppings, Tips & Easy Variations
Now that your cake has been chilling and soaking up all that delicious banana pudding, it’s time for the best part—topping it off! This final layer is what takes this dessert from good to absolutely unforgettable. Think of it as the “frosting” moment, but so much simpler and creamier.
One of the reasons I love this cake so much (aside from how amazing it tastes) is how easy it is to customize. Whether you’re a die-hard banana fan or someone who likes a little twist on the classics, there are a few simple ways to make it your own. But before we dive into the fun extras, let’s finish assembling the cake.
Topping & Finishing Touches
Step 6: Spread the Whipped Topping
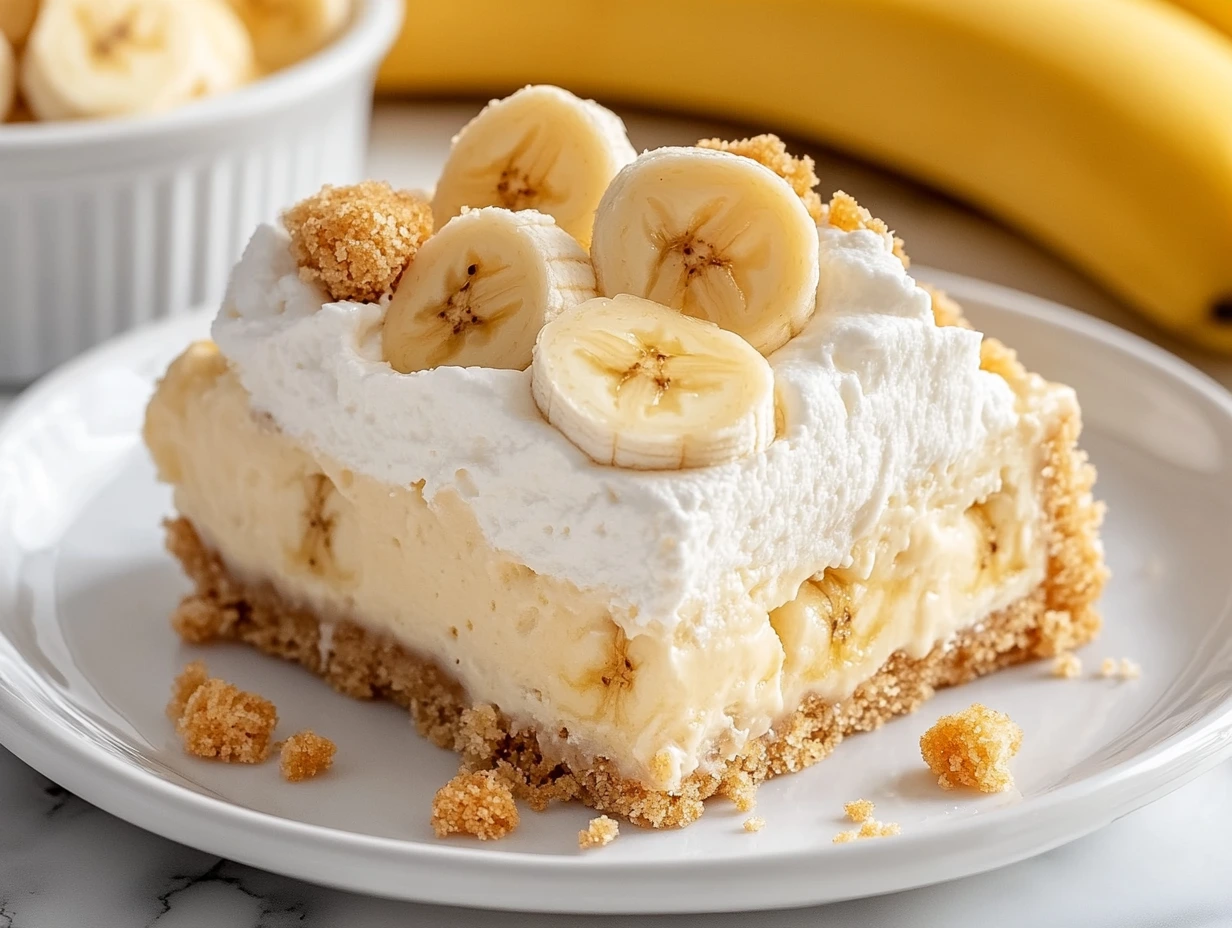
Once your cake is fully chilled and the pudding has set, it’s time to add the whipped topping. Grab your thawed 8-ounce tub of whipped topping (like Cool Whip) and spread it evenly across the top of the pudding layer. You’ll want to be gentle here so the pudding doesn’t shift underneath. Use a spatula or the back of a spoon to get those soft swirls—we’re going for fluffy and cloud-like.
If you’re feeling fancy, you can even pipe the topping using a large star tip for a decorative finish. But honestly, a simple, smooth layer is just as pretty, especially once we sprinkle on those cookies.
Step 7: Sprinkle Crushed Vanilla Wafers
Now, crush about 20 vanilla wafers. You can use a zip-top bag and rolling pin for easy cleanup. You want some small crumbs but also a few bigger chunks for that perfect crunch. Sprinkle them generously over the whipped topping, making sure every bite gets a little cookie goodness.
This final step not only adds texture, but it really brings home that classic banana pudding flavor that everyone loves. If you’re serving the cake at a party, sprinkle the cookies just before serving to keep them crisp.
Helpful Tips to Make It Even Better
Add Fresh Bananas
If you want even more banana flavor, you can slice up a fresh banana or two and fold them into the pudding just before pouring it over the cake. But here’s the catch: fresh bananas will brown over time, so if you’re prepping ahead, it’s best to add them just before serving.
Make It Ahead
One of the biggest perks of this cake? It’s make-ahead friendly. You can assemble it up to the pudding step and let it chill overnight. Just hold off on the whipped topping and cookie crumbs until just before serving to keep everything fresh and pretty.
Lighter Topping Option
Looking for a lighter or less sweet topping? Try blending half the tub of whipped topping with homemade whipped cream or use a stabilized whipped cream instead. It gives a fresher flavor and still holds up well in the fridge.
Want a Different Crunch?
Not a fan of vanilla wafers or just want to switch things up? Crushed Golden Oreos or even graham cracker crumbs work beautifully as a topping. Both give a similar sweet crunch and pair nicely with the banana flavor.
Serving Suggestions
This cake is best served chilled and sliced into squares. It’s rich but light at the same time, so it pairs well with a cup of coffee or a cold glass of milk. Great for brunches, family get-togethers, or really any event where you need a no-fuss crowd-pleaser.
Banana Pudding Poke Cake: FAQs & Final Thoughts
You’ve baked, poked, poured, and topped—and now your Banana Pudding Poke Cake is ready to be devoured! But before you grab that first slice (or maybe while you’re enjoying it), let’s go over some of the most frequently asked questions I get about this recipe. Whether it’s storage, substitutions, or simple troubleshooting, these tips will help make sure your cake turns out perfectly every time.
Frequently Asked Questions
1. Can I use homemade banana pudding instead of instant?
Absolutely! If you prefer a from-scratch banana pudding, go for it. Just make sure it’s still pourable when you spoon it over the cake, and that it sets up well in the fridge. Keep in mind that homemade pudding will add a bit more prep time, but it can bring in even richer flavor.
2. How long does this cake last in the fridge?
This cake will stay fresh in the refrigerator for up to 4 days, tightly covered. The texture might change slightly as the cake continues to absorb the pudding, but it’s still delicious. Just be aware that the vanilla wafers may soften over time.
3. Can I freeze Banana Pudding Poke Cake?
Freezing isn’t recommended for this one. The pudding and whipped topping tend to separate once thawed, and the texture can get a little watery. For best results, enjoy it fresh and chilled from the fridge.
4. What other toppings can I use besides vanilla wafers?
You can try crushed Golden Oreos, graham crackers, or even toasted coconut for a fun twist. Just be sure to add any toppings right before serving to keep them crisp.
5. Can I make this gluten-free?
Yes! Use a gluten-free yellow cake mix and double-check your pudding mix and toppings to ensure they’re gluten-free. Many instant pudding brands are gluten-free, but always read the labels to be safe.
6. What’s the best way to slice and serve it?
Use a sharp knife dipped in hot water to get clean slices, especially if the cake has been chilled overnight. A spatula works great for lifting the pieces out of the pan without making a mess.
7. Can I use a different flavor of pudding?
You sure can! Vanilla, cheesecake, or even coconut pudding are great alternatives if banana isn’t your favorite or if you just want to try something new. Feel free to get creative with it.
Final Thoughts: The Dessert That Feels Like a Hug
This Banana Pudding Poke Cake is everything I love in a dessert—it’s nostalgic, creamy, and downright irresistible. But maybe best of all, it’s easy. You don’t need to be a baking expert to pull this off, and the end result always looks like you went the extra mile.
It’s also the kind of recipe that adapts well to your needs. Whether you’re feeding a crowd, making it a day ahead, or tweaking it with your own favorite flavors, this cake fits the bill. You can keep it classic with banana pudding and vanilla wafers, or dress it up with whipped cream rosettes and fresh banana slices just before serving.
Print
Banana Pudding Poke Cake
- Author: Andrew Recipes
Description
A light and tender yellow cake transformed into a creamy banana pudding dessert. Punctured to allow rich banana pudding to seep throughout, then topped with fluffy whipped topping and crunchy vanilla wafers, this 9×13-inch cake is perfect chilled for potlucks, brunches or family gatherings.
Ingredients
1 box yellow cake mix, plus eggs, oil and water called for on the package
2 (3.4-ounce) packages instant banana pudding mix
4 cups cold milk (whole or 2%)
8-ounce tub frozen whipped topping, thawed
20 vanilla wafers, crushed
Instructions
Prepare the cake batter according to package directions for a 9×13-inch cake, pouring it into a greased and floured baking pan. Bake until golden and a toothpick inserted into the center comes out clean. Allow the cake to rest for just a couple of minutes on a wire rack so it’s warm but not piping hot.
Using the handle of a wooden spoon, poke evenly spaced holes all over the surface of the cake, pushing down to the bottom so the pudding can settle into every slice.
In a mixing bowl whisk together the instant banana pudding mixes with the cold milk until no lumps remain and the mixture is smooth but still pourable. Immediately spoon and gently pour the pudding over the cake, filling each hole and spreading any extra over the top. Smooth with the back of a spoon so the pudding layer is level.
Cover the pan and refrigerate for at least two hours, or until the pudding is fully set and the cake is chilled through.
Once the cake has cooled and the pudding has firmed, spread the thawed whipped topping in an even layer over the surface. Sprinkle the crushed vanilla wafers generously on top for added crunch and a classic presentation. Keep refrigerated until ready to serve.
Notes
For extra banana flavor and texture, fold in thin slices of fresh banana into the pudding before pouring over the cake, but add these only when serving to prevent browning.
Make-ahead convenience: assemble through the pudding step and refrigerate overnight, then add whipped topping and wafers just before serving.
To lighten the topping, blend half the whipped topping with an equal part of whipped cream or use a stabilized whipped cream in place of Cool Whip.

