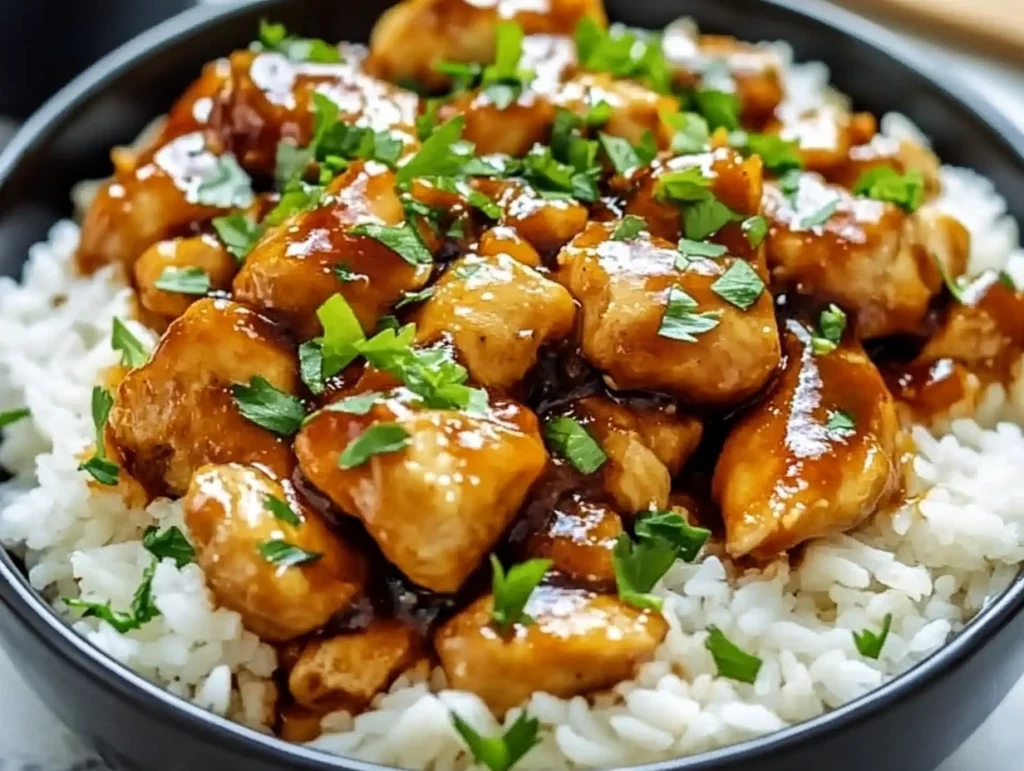
There’s something so satisfying about a dinner that’s equal parts smoky, sweet, and downright comforting—and this Honey BBQ Chicken & Rice delivers all three without tying you to the stove for ages. As someone who’s juggled late workdays, school pick-ups, and the occasional “What’s for dinner?” panic, I can’t tell you how liberating it feels to pop everything into one pan and let it do its magic. Plus, that mesquite BBQ sauce mixed with a touch of honey gives each bite just the right balance of tang and sweetness—trust me, it’s worth every sticky-fingered moment.
This recipe was born from one of those nights when the freezer was half-empty, but I still wanted something crowd-pleasing for friends who were dropping by. I had chicken, rice, and freezer veggies on hand—classic “pantry raid” ingredients—and the result was such a hit that it’s since become a weekly staple in my kitchen. Whether you’re feeding a crew of four or simply want tasty leftovers for lunch, this dish delivers big flavor with minimal cleanup.
Below you’ll find everything you need to know: a clear ingredients list, step-by-step instructions, and a few of my go-to tips that make the process even smoother. Let’s dive in and get dinner on the table!
Ingredients
1 lb boneless, skinless chicken thighs or breasts, cut into bite-sized pieces
1 cup long-grain white rice, rinsed and drained
2 cups low-sodium chicken broth
½ cup mesquite-flavored BBQ sauce
¼ cup honey
1 cup mixed vegetables (peas, carrots, corn, bell peppers), fresh or frozen
2 Tbsp vegetable or olive oil, divided

Seasonings:
1 tsp garlic powder
1 tsp onion powder
½ tsp smoked paprika
½ tsp salt (or to taste)
¼ tsp black pepper (or to taste)
Garnish (Optional):
2–3 green onions, thinly sliced
2 Tbsp fresh parsley, chopped
Extra drizzle of BBQ sauce

STEPS
1️⃣ Prep & Season
Start by cutting your chicken into roughly 1″ cubes—if you’re using thighs, you can leave those pieces just a touch larger so they stay juicy. In a small bowl, whisk together the garlic powder, onion powder, smoked paprika, salt, and pepper. Give your rinsed and drained rice a good shake to remove excess starch, then set it aside. This little prep work means you’ll breeze through the cooking process later—and who doesn’t love a little shortcut?
2️⃣ Sear the Chicken
Heat 1 tablespoon of oil in a large skillet or Dutch oven over medium-high heat. Sprinkle half of your seasoning mix over the chicken pieces and toss to coat evenly. Working in batches if necessary (crowding the pan steams instead of sears), place the chicken in a single layer. Let each side cook for about 3–4 minutes until it’s golden—don’t worry if it’s not cooked through at this stage; you’ll finish it off in the rice. Transfer the seared chicken to a plate and set it aside.

3️⃣ Toast the Rice
Without wiping out the pan, add the remaining tablespoon of oil. Stir in the rice along with the rest of the seasoning blend. Toast the rice for 1–2 minutes, stirring constantly, until the grains develop a lightly translucent edge and the air fills with that nutty aroma. This toasting step might feel extra, but it really deepens the flavor and prevents the rice from clumping together later. Plus, watching those rice crystals shimmer is oddly satisfying.
Honey BBQ Chicken & Rice: Sweet, Smoky, and Totally Satisfying
We’ve already seasoned, seared, and toasted our way through the first few steps of this crave-worthy one-pan dinner—and now it’s time to bring it all together with that rich, flavorful honey BBQ sauce. This next part is where the magic really happens. As everything simmers together, the rice soaks up all that sweet, tangy flavor from the sauce and broth, and the chicken becomes incredibly tender. Add in the veggies, and you’ve got yourself a colorful, hearty meal that looks just as good as it tastes.
One of the reasons I love this recipe so much (aside from how ridiculously tasty it is) is how customizable it can be. Whether you want to sneak in extra veggies, swap the rice, or make it vegetarian, there’s tons of flexibility here—and I’ll include a few of my favorite variations and tips as we go. But first, let’s finish cooking!

STEPS
4️⃣ Build the Sauce
Now that your rice is lightly toasted and seasoned, it’s time to bring in the big flavor. Pour in the chicken broth, BBQ sauce, and honey, scraping the bottom of the pan with a wooden spoon to lift any browned bits from the chicken or rice—that’s pure flavor gold right there. Stir well to combine everything and let it come just to a gentle boil. This base will infuse the rice with a smoky-sweet depth that makes every bite sing.
5️⃣ Simmer Together
Once your sauce starts to bubble, reduce the heat to low. Carefully nestle the seared chicken pieces into the rice, making sure they’re evenly distributed. Then cover the pan tightly with a lid. (If your pan doesn’t have a tight-fitting lid, foil works in a pinch.) Let it all simmer undisturbed for 15 minutes—this is when the rice cooks through and the flavors marry beautifully.
It’s important not to lift the lid during this step. I know it’s tempting to peek, but trust me: the steam is doing important work. You want that rice to stay fluffy and moist, and opening the lid too soon can throw off the cooking time.
6️⃣ Add the Veggies & Finish
After 15 minutes, sprinkle your mixed vegetables evenly over the top of the rice and chicken—don’t stir just yet. Whether you’re using frozen veggies straight from the bag or freshly chopped ones, the steam will warm them through quickly. Cover the pan again and let everything cook for 5 more minutes. By the end of this step, the rice should be tender, the veggies vibrant and warm, and the chicken cooked through to a safe 165 °F (74 °C).
Remove the pan from heat and let it rest, covered, for 5 minutes. This little breather gives the rice time to firm up slightly and absorb any remaining liquid—plus, it makes fluffing the rice much easier.
7️⃣ Serve & Garnish
Now comes the fun part! Uncover the pan and use a fork to gently fluff the rice, mixing in the vegetables as you go. The color alone will have you swooning—golden chicken, bright veggies, and that glossy honey BBQ sheen. For extra flavor (and visual appeal), sprinkle on some thinly sliced green onions, chopped fresh parsley, and maybe even a light drizzle of BBQ sauce. Serve it hot, straight from the pan, and watch it disappear.

Tips & Variations for the Perfect One-Pan Dinner
Whether you’re a seasoned home cook or someone just dipping their toes into meal prep, this recipe can flex to fit your needs. Here are some of my go-to ideas to make it your own:
Brown Rice Swap: Want to use brown rice? Go for it—just add an extra 10–15 minutes of simmer time (about 40 minutes total), and make sure the liquid fully covers the rice.
Vegetarian Version: Swap the chicken for cubed tofu or tempeh. Pan-sear the tofu until golden before adding it to the pan. It holds up beautifully and still soaks in the BBQ flavor.
Veggie Add-Ins: Don’t feel limited to peas and carrots. I’ve tossed in chopped bell peppers, zucchini, and even broccoli florets with great results. Just keep the veggie pieces small so they cook through evenly during that final steam.
Make-Ahead Tip: You can prep the seasoned chicken and rinsed rice ahead of time—store them in separate containers in the fridge, and when dinnertime rolls around, just pick up where you left off.
Feeding a Crowd? Double the recipe and cook it in a large Dutch oven or oven-safe skillet. It scales up easily and makes for great leftovers.
With these options in your back pocket, you can turn this recipe into a reliable favorite that works no matter what’s in your fridge. It’s cozy enough for a family dinner but crowd-pleasing enough for game nights or casual gatherings.
Honey BBQ Chicken & Rice: One-Pan Comfort Food You’ll Make Again and Again
We’ve made it to the final stretch! By now, your kitchen probably smells incredible, and your pan is filled with golden, juicy chicken nestled into tender rice and colorful veggies. This Honey BBQ Chicken & Rice recipe is one of those dishes that feels like it should have taken hours—but in reality, it’s ready in under 60 minutes with only one pan to wash. That’s my kind of weeknight win.
Before we wrap things up, let’s cover a few common questions that might pop up the first time you make this dish. Whether you’re wondering about storage, substitutions, or how to make it ahead, I’ve got you covered.
FAQ: Your Honey BBQ Chicken & Rice Questions Answered
Can I use chicken breasts instead of thighs?
Yes! Chicken breasts work just as well. Just be careful not to overcook them—since they’re leaner, they can dry out faster than thighs. I like to cut them slightly smaller and monitor the internal temp closely.
What’s the best BBQ sauce for this recipe?
A mesquite-flavored BBQ sauce adds that smoky depth that pairs perfectly with the honey. That said, any BBQ sauce you love will work. Just stick to a thicker variety to avoid a watery sauce.
Can I use brown rice?
Absolutely, but it does need more cooking time. Plan for about 40 minutes of simmering instead of 15. Also, be sure the liquid (broth, BBQ sauce, and honey combined) fully covers the rice.
Is this recipe freezer-friendly?
Yes—leftovers freeze well for up to 2 months. Store in airtight containers and reheat gently on the stovetop or microwave with a splash of water or broth to help rehydrate the rice.
Can I add cheese?
Sure! If you’re into a cheesy BBQ vibe, a sprinkle of shredded cheddar or Monterey Jack at the end can be a fun twist. Add it after the final simmer so it melts into the rice.
What’s the best way to reheat leftovers?
Add a splash of broth or water to the pan and reheat on the stove over low heat. Cover it to help trap the steam, which keeps the rice moist. Microwave also works—just stir halfway through and add that extra splash of liquid.
Can I make this in the oven?
Yes, if you prefer an oven-baked version, assemble everything in a Dutch oven or oven-safe pan, cover tightly, and bake at 350°F for about 25–30 minutes. Add the veggies for the last 5–10 minutes of baking.
Final Thoughts: A New Go-To for Busy Nights
This Honey BBQ Chicken & Rice recipe has quickly earned a spot in my regular rotation—and for good reason. It’s hearty, flavorful, and flexible enough to suit whatever ingredients you’ve got on hand. Plus, with just one pan to clean, it checks all the boxes for a stress-free dinner that feels like more effort than it really is.
I love how the sweet-and-smoky BBQ sauce plays off the savory chicken and rice, and the burst of color from the vegetables gives it that perfect finishing touch. And whether I’m serving it to my family on a quiet weeknight or doubling it up for a casual dinner with friends, it always disappears fast.
Print
Honey BBQ Chicken & Rice
- Author: Andrew Recipes
Description
A comforting one-pan meal that combines tender, smoky-sweet chicken with fluffy, flavorful rice and veggies—all in under an hour. Perfect for busy weeknights or casual gatherings, this dish comes together easily and packs big, crowd-pleasing flavor.
Ingredients
Main Ingredients
1 lb boneless, skinless chicken thighs or breasts, cut into bite-sized pieces
1 cup long-grain white rice, rinsed and drained
2 cups low-sodium chicken broth
½ cup mesquite-flavored BBQ sauce
¼ cup honey
1 cup mixed vegetables (peas, carrots, corn, and bell peppers), fresh or frozen
2 Tbsp vegetable or olive oil, divided
Seasonings
1 tsp garlic powder
1 tsp onion powder
½ tsp smoked paprika
½ tsp salt, or to taste
¼ tsp black pepper, or to taste
Garnish (Optional)
2–3 green onions, thinly sliced
2 Tbsp fresh parsley, chopped
Extra drizzle of BBQ sauce
Instructions
1️⃣ Prep & Season
Cut chicken into 1″ cubes (leave thighs slightly larger if using).
In a small bowl, mix garlic powder, onion powder, smoked paprika, salt, and pepper.
Rinse rice under cold water until it runs clear; drain and set aside.
2️⃣ Sear the Chicken
Heat 1 Tbsp oil in a large skillet or Dutch oven over medium-high heat.
Sprinkle half the seasoning over the chicken and toss to coat.
Add chicken in a single layer (work in batches if needed) and sear 3–4 minutes per side, until golden but not fully cooked.
Remove chicken and set aside.
3️⃣ Toast the Rice
In the same pan, add remaining 1 Tbsp oil.
Stir in the rice and remaining seasoning blend.
Toast rice for 1–2 minutes, stirring constantly, until edges turn translucent and fragrant.
4️⃣ Build the Sauce
Pour in chicken broth, BBQ sauce, and honey, scraping up any browned bits from the bottom.
Stir to combine and bring just to a boil.
5️⃣ Simmer Together
Reduce heat to low, nestle the seared chicken into the rice mixture, then cover tightly.
Cook undisturbed for 15 minutes.
6️⃣ Add the Veggies & Finish
Evenly sprinkle mixed vegetables over the rice and chicken.
Recover and cook for 5 more minutes, until rice is tender, veggies are heated through, and chicken reaches 165 °F (74 °C).
Remove from heat and let rest, covered, for 5 minutes.
7️⃣ Serve & Garnish
Uncover and gently fluff rice to distribute veggies.
Top with sliced green onions, chopped parsley, and an extra drizzle of BBQ sauce, if desired.
Serve hot straight from the pan!
Notes
Make-Ahead: Prep and season the chicken and rice ahead of time; store separately in the fridge for up to 24 hours. When ready, simply toast, build, and cook.
Protein Swap: Substitute tofu or tempeh for a vegetarian twist—pan-sear until crisp before simmering.
Rice Variations: Brown rice can be used; increase simmer time to 40 minutes and ensure liquid covers rice.
Veggie Mix-Ins: Stir in chopped bell pepper, zucchini, or broccoli florets for extra color and nutrition.
Storage & Reheat: Leftovers keep well in an airtight container for up to 3 days. Reheat gently on the stovetop with a splash of broth or water to revive moisture.

