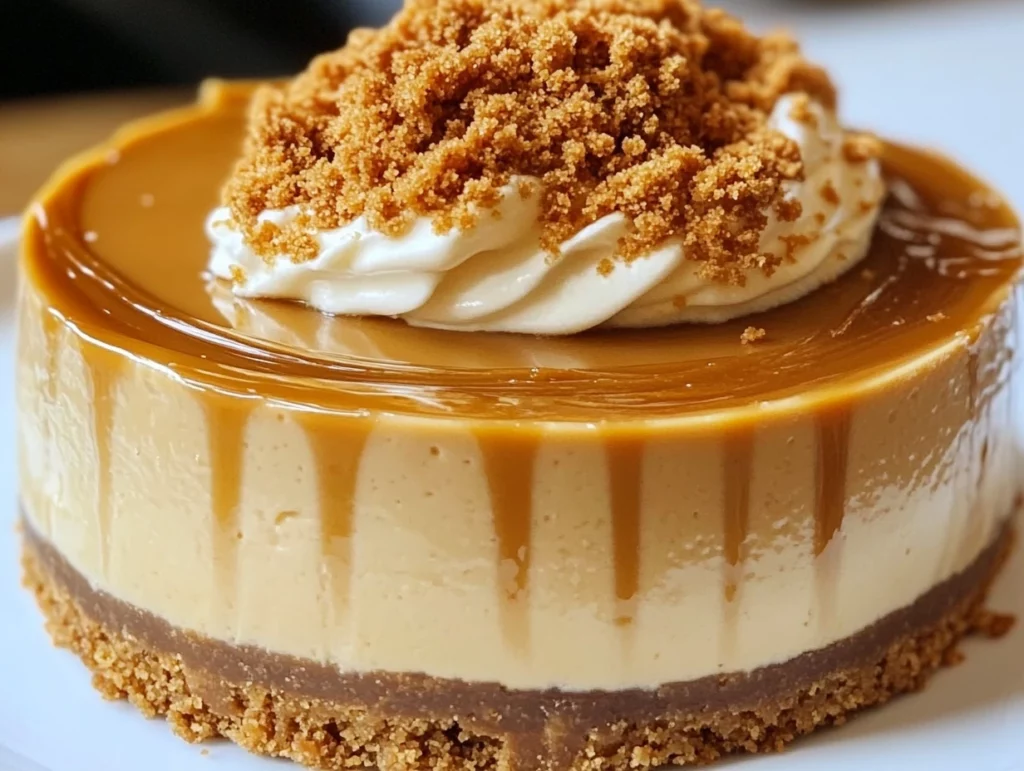
If you’ve ever had the pleasure of tasting Biscoff cookies, you know that they’re not just any cookie. The deep caramelized flavor, spiced with hints of cinnamon, creates the perfect balance of sweet and savory that keeps you coming back for more. Now, imagine taking that flavor and turning it into a cheesecake. Yes, you heard that right. A rich, creamy Biscoff Cookie Butter Cheesecake that’s so decadent, it might just become your new favorite dessert.
I stumbled upon the idea for this cheesecake after having a craving for something sweet, and I thought, “Why not combine two of the best things in the world—Biscoff cookies and cheesecake?” It was a game-changer. The buttery Biscoff crust gives a nice, crisp base that’s paired perfectly with the ultra-creamy filling. To take things over the top, you top it all off with a drizzle of Biscoff cookie butter and whipped cream. Trust me, it’s a combination that will make you wonder why you didn’t think of it sooner.
Ingredients You’ll Need
Before we dive into making this cheesecake, let’s talk about the ingredients. Some are standard for any cheesecake, while others will bring that signature Biscoff flavor to the forefront. Here’s a quick rundown of what you’ll need:
For the Crust:
2 cups crushed Biscoff cookies (about 20 cookies)
1/4 cup granulated sugar
6 tbsp unsalted butter, melted
For the Filling:
16 oz cream cheese, softened
1/2 cup Biscoff cookie butter (plus extra for topping)
1/2 cup powdered sugar
1 tsp vanilla extract
1 cup heavy whipping cream, whipped to stiff peaks
Optional Toppings:
Whipped cream
Crushed Biscoff cookies
Drizzled Biscoff cookie butter
Caramel sauce
As you can see, the ingredients are simple yet packed with flavor. The real star here is the Biscoff cookie butter—it’s the key to giving this cheesecake that distinct, irresistible flavor that Biscoff lovers crave.
Steps to Make the Biscoff Cookie Butter Cheesecake
Let’s dive right into the process of making this cheesecake. It might sound like a lot of steps, but don’t worry! It’s surprisingly easy to put together, and the result is absolutely worth it. Let’s start with the crust.
Step 1: Prepare the Biscoff Cookie Crust
The crust is one of the most important parts of this cheesecake because it sets the stage for that buttery Biscoff flavor. To start, grab a mixing bowl and add the crushed Biscoff cookies, granulated sugar, and melted butter. The melted butter will help bind the crumbs together, so it’s essential to get this part right.
Mix everything until the texture resembles wet sand. You should be able to press it into the pan without it falling apart. Now, take your 9-inch springform pan or pie dish and press the mixture firmly into the bottom. You can use the back of a spoon or even the bottom of a glass to ensure that it’s evenly spread and compacted.
Once the crust is set, place it in the fridge to chill while we work on the filling. This helps it firm up and ensures that it holds its shape when you slice into the cheesecake later.

Step 2: Make the Cheesecake Filling
Now comes the fun part: the filling! In a large mixing bowl, beat the softened cream cheese until it’s smooth and creamy. This is important because a smooth cream cheese base will give you the best texture for your cheesecake.
Next, add in the Biscoff cookie butter, powdered sugar, and vanilla extract. Beat everything together until it’s well combined and you have a silky mixture. You can taste it at this point and adjust the sweetness if needed, depending on your preference.
The final step for the filling is to gently fold in the whipped heavy cream. Be sure to fold and not mix too vigorously to maintain the airiness of the whipped cream. This step is what gives your cheesecake that light and airy texture, so don’t skip it!
Step 3: Assemble the Cheesecake
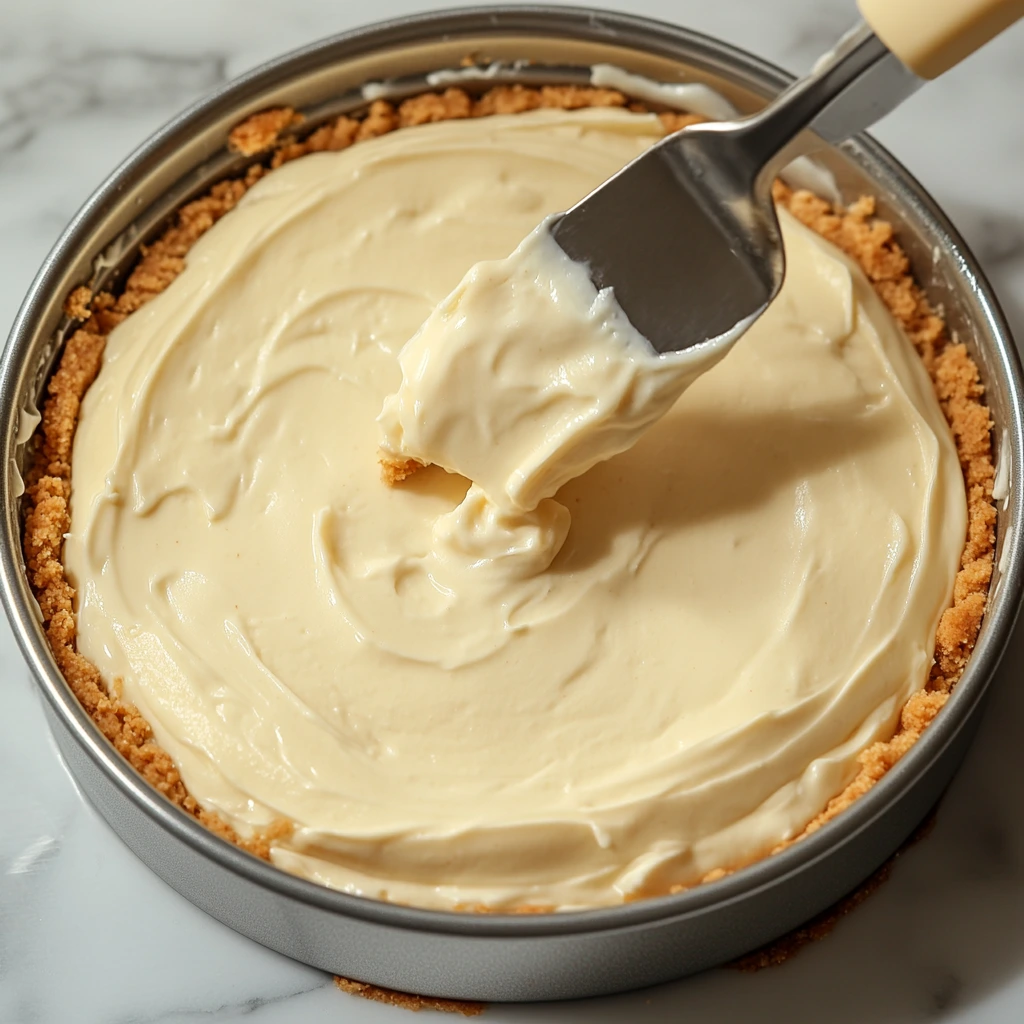
Once your crust has chilled and your filling is ready, pour the cheesecake mixture over the crust. Use a spatula to spread it evenly and smooth out the top. Don’t worry about being perfect here—it’s all about getting an even layer.
Gently tap the pan on the counter to release any air bubbles. This ensures that your cheesecake will set nicely and have a smooth surface.
Step 4: Chill the Cheesecake
Now, this part is crucial—patience is key! Cover the cheesecake with plastic wrap and place it in the fridge to chill for at least 4–6 hours. If you’re in a rush, you can speed up the process by freezing it for about 2–3 hours. But, in my opinion, letting it chill slowly in the fridge will give you the best texture and flavor.
While you’re waiting, it’s the perfect time to think about how you want to top your cheesecake. The options are endless, but I always love a drizzle of Biscoff cookie butter, whipped cream, and some crushed Biscoff cookies on top for extra crunch.

Biscoff Cookie Butter Cheesecake: The Sweet Finale
Now that your cheesecake has chilled to perfection, it’s time to add the finishing touches and prepare to indulge in what is undoubtedly one of the best cheesecakes you’ll ever taste. In Part 1, we covered the crust and filling, but the real magic happens when we add those final layers of flavor and texture. Let’s jump into the steps to elevate your Biscoff Cookie Butter Cheesecake and make it shine!
Steps to Finish Your Cheesecake
Step 5: Drizzle with Biscoff Cookie Butter
The moment you’ve been waiting for—the Biscoff cookie butter drizzle. This step is completely optional, but if you’re as obsessed with Biscoff as I am, you’ll want to go all in.
Take the extra Biscoff cookie butter you set aside earlier and gently heat it in the microwave for about 10–15 seconds. This softens it just enough to make it drizzle beautifully over your cheesecake. You can either pour it directly from the jar or use a spoon to drizzle it artfully over the top of the cheesecake.
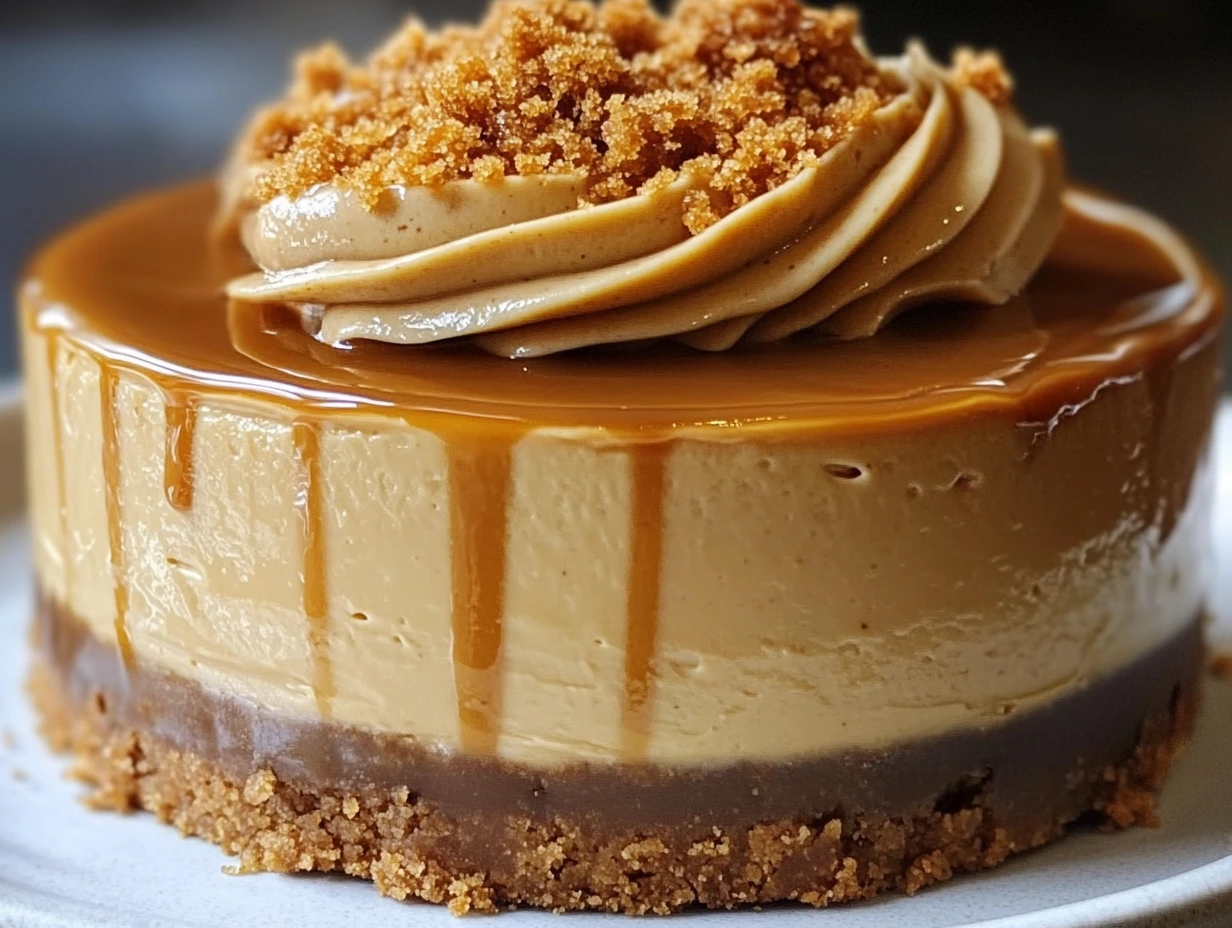
The cookie butter should cascade in sweet ribbons across the smooth surface, adding a burst of caramelized flavor to every bite.
Step 6: Add the Toppings
Now, let’s get creative with those toppings. Whipped cream is an absolute must for this cheesecake, as it provides a perfect light contrast to the richness of the filling. Dollop a generous amount of whipped cream around the edges or in the center, depending on your preference.
For a bit of extra crunch, scatter some crushed Biscoff cookies on top. The texture of the cookies adds a delightful contrast to the creamy filling. If you want to take it up another notch, consider drizzling a bit of caramel sauce alongside the Biscoff cookie butter. The caramel adds a sweet, buttery richness that pairs so well with the spiced cookie flavor.
Step 7: Slice and Serve
This is the best part—cutting into the cheesecake! Once you’ve added your toppings, it’s time to serve. If you’ve used a springform pan, carefully release the sides and transfer the cheesecake to a serving platter. If you’ve made it in a pie dish, just slice it directly from the dish. Either way, the cheesecake should come out beautifully, with a smooth, creamy filling and that perfectly crunchy crust.
When cutting your cheesecake, make sure your knife is clean between cuts. This will help keep those slices neat and make your dessert look even more impressive.
The best way to serve this cheesecake is chilled, so I recommend letting it sit in the fridge until you’re ready to enjoy it. That way, the texture remains firm and velvety—just the way a cheesecake should be.
Tips for Perfecting Your Biscoff Cookie Butter Cheesecake
While this cheesecake is straightforward to make, here are a few tips to ensure it turns out perfectly every time:
Be patient when chilling: As tempting as it may be to rush the chilling process, the cheesecake needs at least 4-6 hours in the fridge (or 2-3 hours in the freezer) to set properly. This is crucial for getting that smooth, sliceable texture.
Use room temperature cream cheese: This helps to avoid lumps in your filling and gives you a smoother, creamier texture when you mix it with the other ingredients.
Whip the cream to stiff peaks: When whipping the heavy cream, make sure it forms stiff peaks. This will give your cheesecake the light, airy texture that’s a hallmark of a great cheesecake.
Adjust the toppings to your taste: The optional toppings—whipped cream, crushed Biscoff cookies, caramel sauce—are there for you to get creative. You can customize them to suit your tastes or even skip them altogether if you prefer a more minimalist approach.
Use a springform pan for easy release: If you have one, a springform pan makes removing the cheesecake a lot easier. Simply run a knife around the edge to loosen it before releasing the pan sides. This ensures your cheesecake comes out looking pristine.
Biscoff Cookie Butter Cheesecake: FAQs and Final Thoughts
You’ve followed the steps, and your Biscoff Cookie Butter Cheesecake is looking absolutely delicious. Now, before you serve it up to your friends or family, let’s address some common questions that might pop up. After all, we want this dessert to be a breeze for you to make, no stress involved!
Frequently Asked Questions
1. Can I use a different type of cookie for the crust?
Absolutely! While the Biscoff cookies are a key part of this cheesecake’s signature flavor, you can swap them out for other cookies if you’d like. Graham crackers, digestive biscuits, or even speculoos cookies would work as great alternatives. Keep in mind that the flavor and texture will vary depending on the cookie, but you’ll still end up with a tasty crust.
2. Can I make this cheesecake ahead of time?
Yes! This cheesecake actually benefits from sitting in the fridge for a few hours (or overnight). In fact, I highly recommend making it the day before you plan to serve it. This gives the flavors a chance to meld together, and it will have the perfect texture after chilling. Just be sure to store it in the fridge and cover it well with plastic wrap.
3. Is it necessary to use a springform pan?
Using a springform pan makes it easier to remove the cheesecake without damaging its shape, but it’s not strictly necessary. If you don’t have one, you can use a regular pie dish or a tart pan, but you’ll need to be extra careful when serving to make sure it doesn’t stick. If you go the pie dish route, slicing directly from the dish is your best bet.
4. How long does the cheesecake need to chill?
The cheesecake needs to chill for at least 4–6 hours in the fridge to set properly. If you’re in a rush, you can freeze it for 2-3 hours for a quicker result, but I recommend giving it the full chill time if you can. This will ensure the cheesecake firms up nicely and has that smooth, creamy texture when you slice into it.
5. Can I freeze this cheesecake?
Yes, you can freeze this cheesecake, but be sure to wrap it tightly in plastic wrap and then foil to prevent freezer burn. When you’re ready to serve, let it thaw in the fridge for several hours before cutting into it. Freezing might change the texture slightly, but it should still taste fantastic!
6. How can I make the cheesecake even more indulgent?
If you’re feeling extra indulgent, you can drizzle some caramel sauce along with the Biscoff cookie butter for an extra layer of sweetness. Adding extra toppings like chopped chocolate, nuts, or even a bit of sea salt can also enhance the flavor profile and give it a more complex taste.
7. Can I use a different type of cream cheese (like low-fat or non-dairy)?
While I always recommend using full-fat cream cheese for the best texture and flavor, you can experiment with low-fat or non-dairy options if you’d prefer. Keep in mind that the flavor and texture may vary. If you use a non-dairy cream cheese, make sure it has a similar consistency to regular cream cheese for the best results.
Conclusion: A Cheesecake Worth Sharing
And there you have it—the perfect Biscoff Cookie Butter Cheesecake. From its buttery, spiced crust to its rich, creamy filling, this dessert is a crowd-pleaser through and through. Whether you’re serving it for a special occasion or simply indulging in a sweet treat, it’s sure to impress everyone lucky enough to try it.
Don’t be afraid to get creative with the toppings, experiment with the flavors, or even make a few adjustments to suit your tastes. The beauty of this cheesecake is that it’s versatile and forgiving, all while delivering that satisfying Biscoff flavor we love so much.
If you decide to try this cheesecake (and I hope you do!), I’d love to hear how it turns out. Leave a comment below to share your thoughts, variations, or any questions you may have. Happy baking—and enjoy every creamy, crunchy bite!
PrintBiscoff Cookie Butter Cheesecake
- Author: Andrew Recipes
Description
This indulgent Biscoff Cookie Butter Cheesecake brings together the irresistible flavors of Biscoff cookies and creamy cheesecake for a decadent dessert experience. The buttery, spiced Biscoff crust is the perfect base for a smooth, rich filling made with Biscoff cookie butter and whipped cream. Topped with more cookie butter, whipped cream, and crushed cookies, this cheesecake is a sweet treat that is sure to satisfy any dessert lover.
Ingredients
For the Crust:
2 cups crushed Biscoff cookies (about 20 cookies)
1/4 cup granulated sugar
6 tbsp unsalted butter, melted
For the Filling:
16 oz cream cheese, softened
1/2 cup Biscoff cookie butter (plus extra for topping)
1/2 cup powdered sugar
1 tsp vanilla extract
1 cup heavy whipping cream, whipped to stiff peaks
Optional Toppings:
Whipped cream
Crushed Biscoff cookies
Drizzled Biscoff cookie butter
Caramel sauce
Instructions
In a mixing bowl, combine the crushed Biscoff cookies, granulated sugar, and melted butter. Mix until the texture resembles wet sand. Press the mixture firmly into the bottom of a 9-inch springform pan or pie dish. Use the back of a spoon or the bottom of a glass to press it evenly. Chill the crust in the fridge while you prepare the filling.
In a large mixing bowl, beat the softened cream cheese, Biscoff cookie butter, powdered sugar, and vanilla extract until smooth and creamy. Gently fold in the whipped heavy cream until fully incorporated and the mixture is light and airy.
Pour the filling over the chilled crust and spread it evenly with a spatula. Smooth the top and tap the pan gently on the counter to remove any air bubbles.
Cover the cheesecake with plastic wrap and refrigerate for at least 4–6 hours, or until set. For a faster setting, freeze for 2–3 hours.
Once set, drizzle additional Biscoff cookie butter over the top of the cheesecake. Garnish with whipped cream, crushed Biscoff cookies, or a drizzle of caramel sauce if desired.
Carefully remove the cheesecake from the springform pan or slice directly from the pie dish. Slice and serve chilled for the ultimate creamy experience. Enjoy!
Notes
Be sure to let the cheesecake chill for at least 4–6 hours to allow the filling to set properly. For a quicker result, freezing the cheesecake for 2–3 hours will also work.
If you want to take the cheesecake to the next level, feel free to drizzle caramel sauce along with the cookie butter for extra sweetness and flavor.
You can adjust the amount of cookie butter on top based on how much of the Biscoff flavor you want to showcase. Adding whipped cream and crushed cookies provides a delightful contrast in texture.

