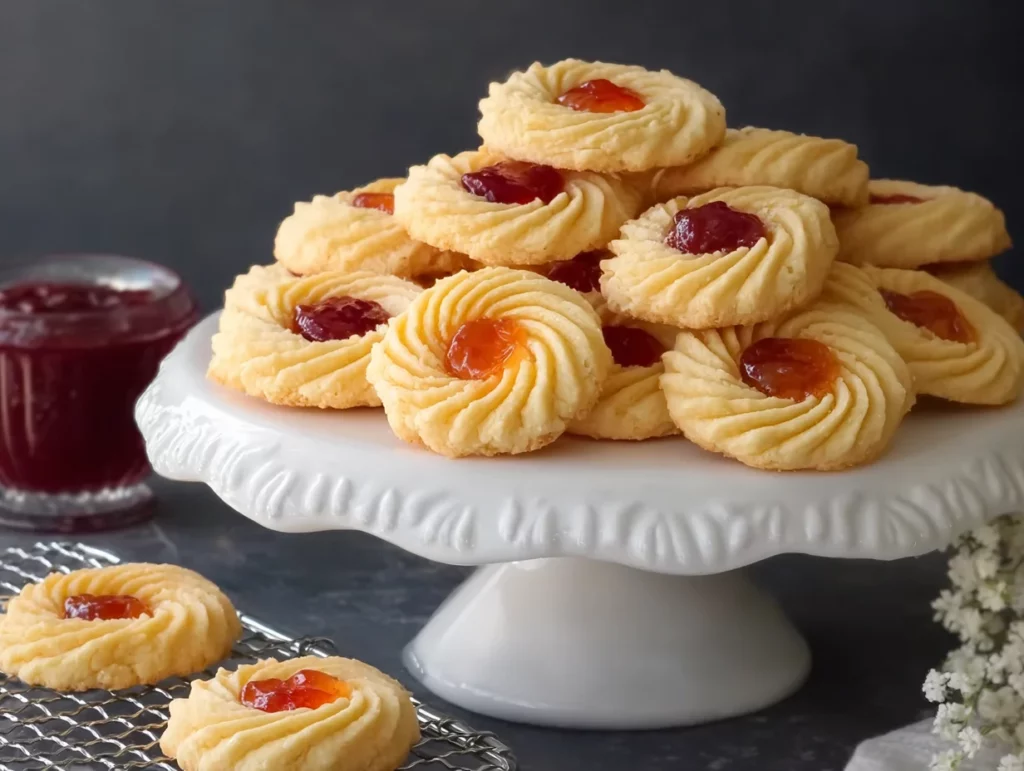
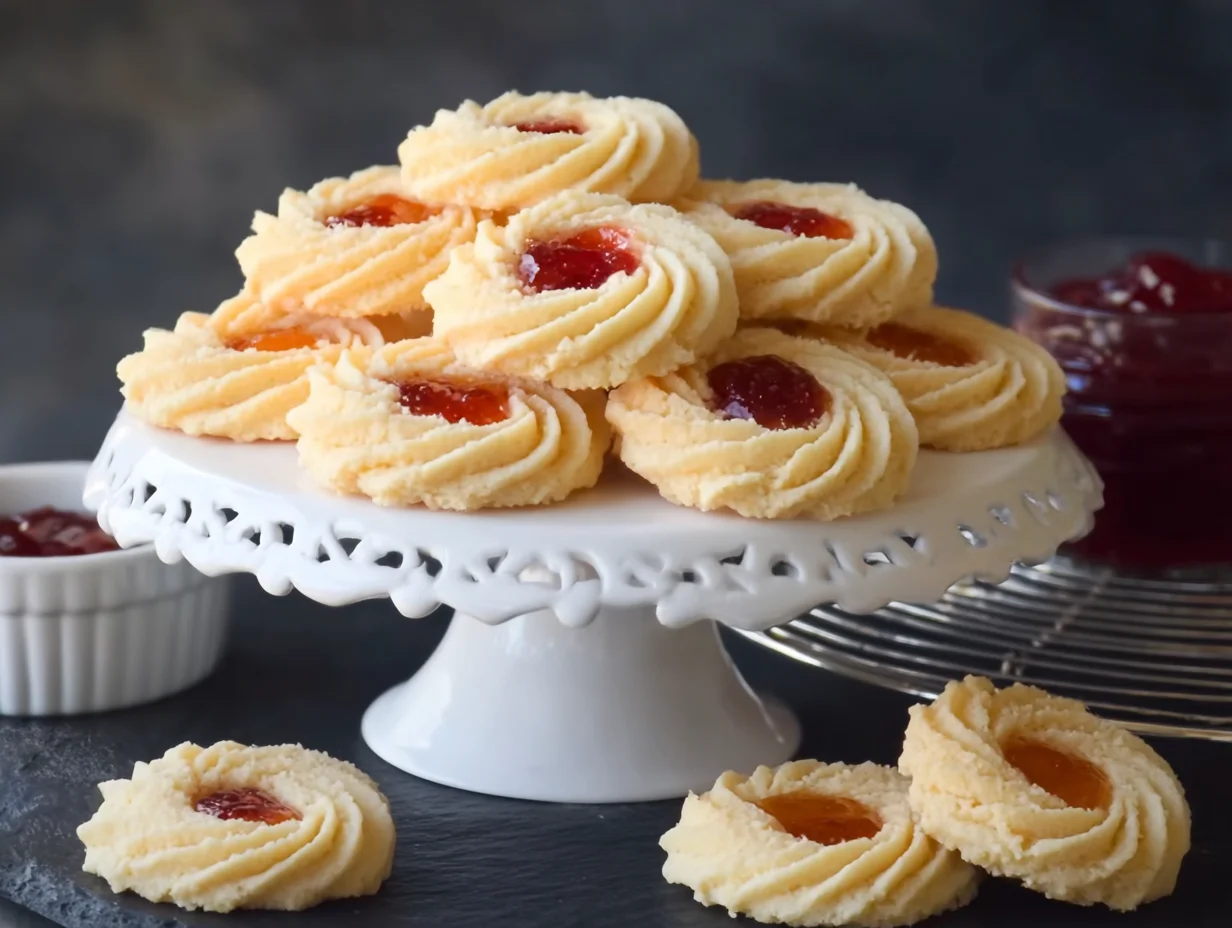
There’s just something so nostalgic about a tin of butter cookies. You know the kind — nestled in little paper cups, with delicate edges and a soft snap when you bite into them. Whether you grew up sneaking an extra cookie when no one was looking or always found a tin at your grandma’s house during the holidays, these buttery beauties have a special place in many hearts.
Today, I’m sharing my go-to Butter Cookies Recipe that’s not only incredibly easy but also gives you those crisp edges and rich, buttery flavor we all know and love. This recipe comes together with just a handful of pantry staples, making it perfect for holiday baking, cookie swaps, or simply a quiet moment with a cup of coffee.
One of the things I love most about these cookies is how versatile they are. The dough is sturdy enough for piping — so go ahead and get fancy with those swirls — but soft enough to melt in your mouth once baked. You can even add a drizzle of chocolate or a dusting of sanding sugar if you’re feeling extra festive. Whether you make them simple or decorative, these cookies always impress.
Let’s get started with the first steps of this delightful recipe.
Ingredients You’ll Need
1 cup unsalted butter, softened
⅔ cup granulated sugar
1 large egg
1 teaspoon vanilla extract
2¼ cups all-purpose flour
¼ teaspoon salt
STEP 1: Preheat and Prepare
Before we dive into mixing up our cookie dough, go ahead and preheat your oven to 350°F (175°C). Line a baking sheet with parchment paper or a silicone baking mat — this will keep your cookies from sticking and make cleanup a breeze. If you’re planning to bake in batches (which I usually do), line a couple of trays so you can keep things moving.
STEP 2: Cream the Butter and Sugar
Now for the fun part! In a large mixing bowl, cream together 1 cup of softened unsalted butter and ⅔ cup of granulated sugar until the mixture is light and fluffy. This takes about 2 to 3 minutes using an electric mixer on medium speed.
This step is key — it’s what gives the cookies their tender, airy texture. If you rush this part, you might end up with a denser cookie, so take your time and make sure the butter and sugar are well incorporated.

STEP 3: Add the Egg and Vanilla
Once your butter and sugar are beautifully whipped, add in 1 large egg and 1 teaspoon of vanilla extract. Mix until the egg is fully blended into the batter.
The vanilla not only adds flavor, but it also enhances the rich, buttery notes in the dough. If you want to experiment a little, you can also add ¼ teaspoon of almond extract here for a slightly nutty depth — totally optional, but super delicious if you like almond-flavored cookies.
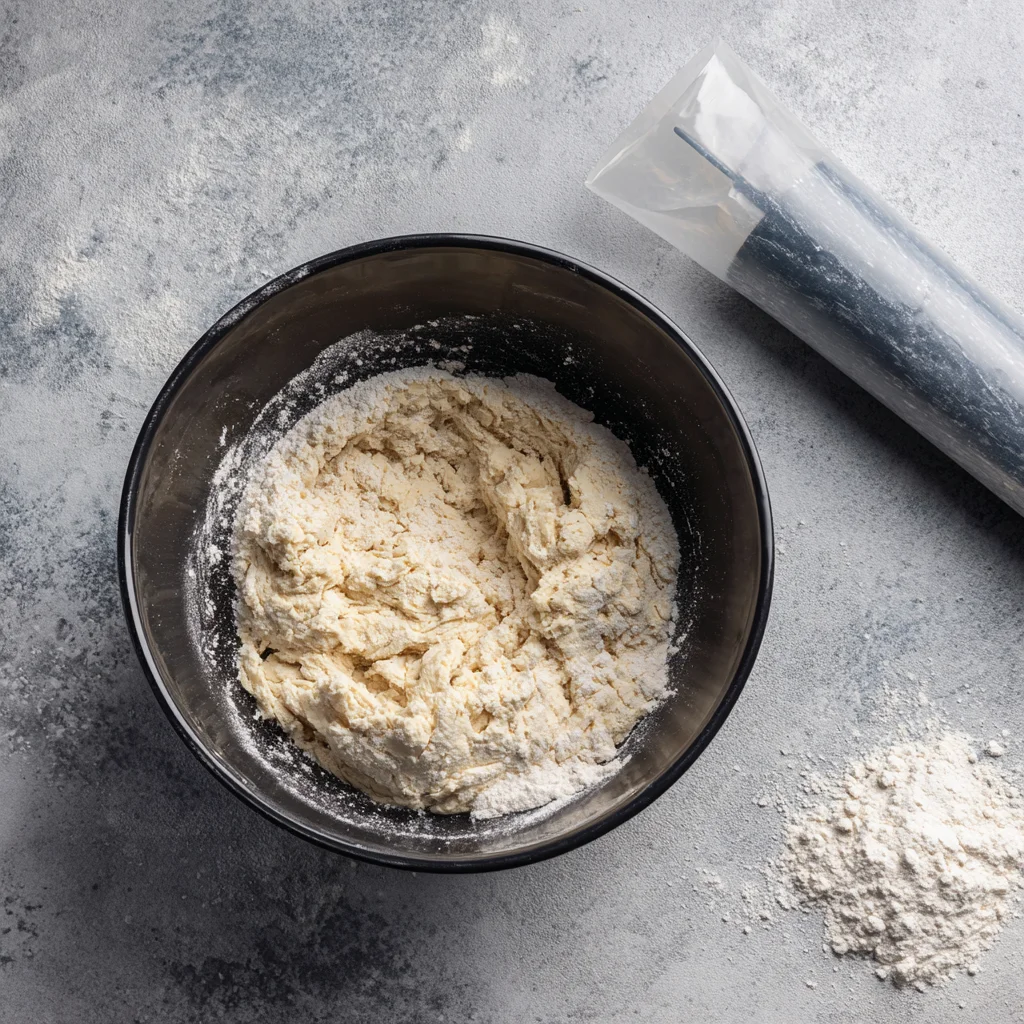
STEP 4: Mix in the Dry Ingredients
Next, you’ll want to gradually add in 2¼ cups of all-purpose flour and ¼ teaspoon of salt. I like to do this in two or three additions, mixing on low speed each time until just combined.
Be careful not to overmix here — we want the dough to come together into a soft, cohesive ball, but we don’t want to develop too much gluten, or the cookies could end up a little tough.
Once your dough is ready, you can go ahead and move on to shaping. And that’s where things get really fun.
How to Shape and Bake Perfect Butter Cookies Every Time
Now that we’ve mixed up our buttery, tender dough, it’s time for the best part — shaping and baking! One of the reasons I keep coming back to this butter cookie recipe is how beautifully it holds its shape. Whether you’re using a piping bag, a cookie press, or even rolling and cutting with cookie cutters, this dough behaves like a dream.
If you’re planning to make these for the holidays, you can go all out with festive shapes and sprinkles. But honestly? Even a simple swirl piped from a star tip is enough to impress your guests. The golden edges and delicate texture do most of the talking.
Let’s pick up where we left off — shaping and baking these lovely cookies to golden perfection.
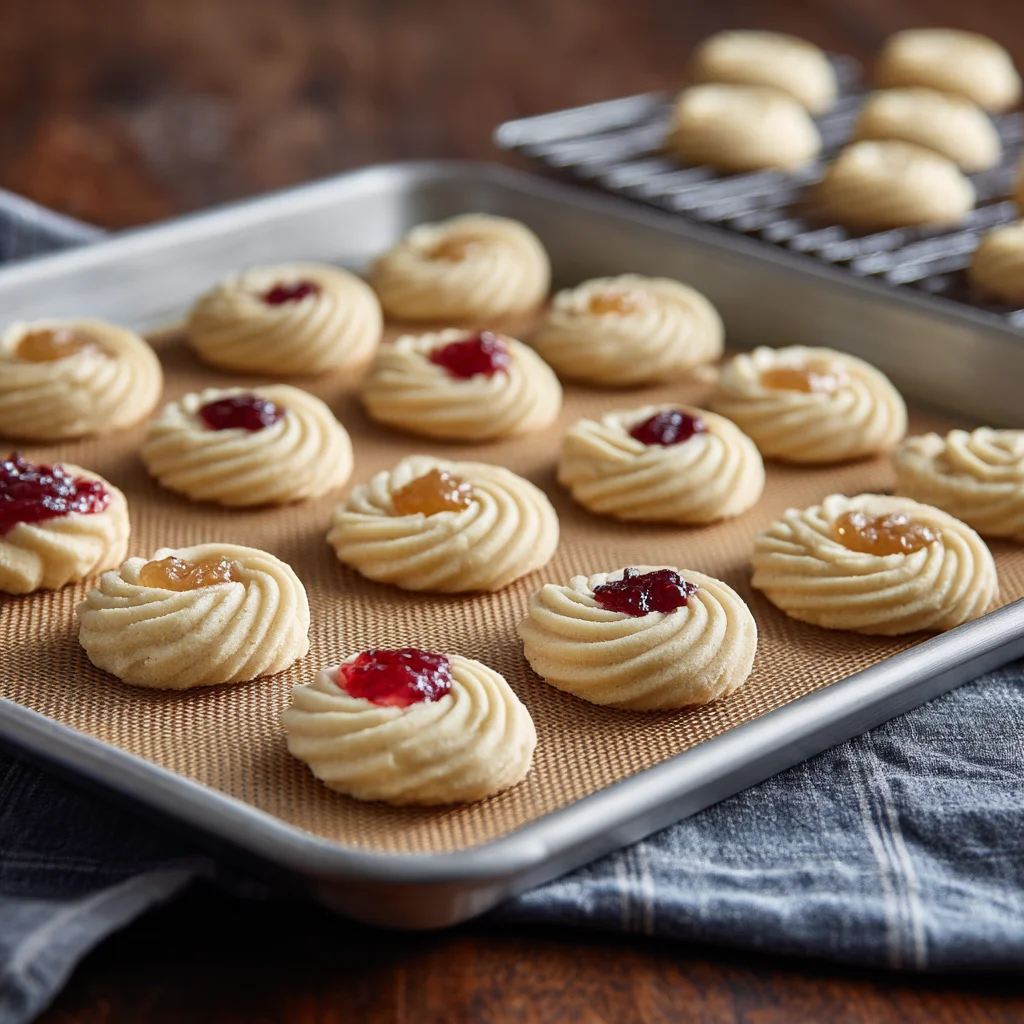
STEP 5: Shape the Dough
Here’s where your creativity can shine a little! For that classic butter cookie look, I recommend using a piping bag fitted with a large star tip (Wilton 1M or 2D works great). Fill the bag with your prepared dough, then pipe swirls, rings, or rosettes onto your parchment-lined baking sheet. Make sure to space them about an inch apart — they don’t spread a ton, but a little room helps them bake evenly.
Tip: If your dough is feeling too firm to pipe, let it sit at room temperature for 5 to 10 minutes to soften slightly. Butter can firm up quickly, especially if your kitchen is cool, so don’t be afraid to give it a little time.
Optional Variations:
Use a cookie press for quick, uniform shapes.
Roll the dough into a log, chill, and slice into rounds.
Use small cookie cutters if you chilled the dough for 15–20 minutes.
STEP 6: Bake to Golden Perfection
Place your shaped cookies into the preheated 350°F oven and bake for 10 to 12 minutes, or until the edges are just starting to turn a light golden brown.
Watch closely around the 10-minute mark, as every oven is a little different. The goal is to bake them just long enough to set and crisp up, without browning too much — that golden edge is what gives them their signature snap.
Once they’re done, remove the cookies from the oven and let them cool on the baking sheet for a few minutes. They’re a little delicate while warm, so don’t move them too quickly. After a few minutes, transfer them to a wire rack to cool completely.
STEP 7: Add a Finishing Touch (Optional but Fun!)
Once your cookies are cool, you can keep things classic — or go a little extra. Here are a few simple ways to level them up:
Dip half of each cookie in melted chocolate, then sprinkle with chopped nuts or sanding sugar.
Dust lightly with powdered sugar for a snowy holiday look.
Add festive sprinkles before baking for a pop of color.
Mix in a few citrus zest shavings to the dough (lemon or orange are great).
These cookies are beautiful on their own, but if you’re gifting them or making them for a party, a little flair goes a long way.
Storage Tips
Butter cookies keep really well, which is another reason I make them often around the holidays. Just store them in an airtight container at room temperature for up to one week. If you want to make them ahead of time, you can also freeze the unbaked dough or even the baked cookies. Just let them come to room temp before serving.
To freeze the dough:
Shape or pipe the cookies onto a baking sheet.
Freeze until solid.
Transfer to a freezer-safe bag or container.
When ready to bake, add 1–2 extra minutes to the bake time (no need to thaw!).
Quick Troubleshooting Tips
Dough too stiff to pipe? Let it soften at room temperature.
Cookies spreading too much? Chill the dough for 15–20 minutes before piping.
Edges browning too quickly? Your oven might run hot — try lowering the temp slightly or rotating the tray halfway through.
Cookies too soft? Bake 1–2 minutes longer for a crispier texture.
Butter Cookies FAQ + Final Thoughts for Perfect Bakes Every Time
By now, you’ve seen how simple and satisfying it is to make these buttery, crisp cookies from scratch. Whether you’re baking them for a cookie exchange, packaging them up for a sweet holiday gift, or just treating yourself to a cozy afternoon snack, this butter cookie recipe is one you’ll come back to again and again.
Before we wrap things up, I wanted to share a few of the most common questions I’ve gotten over the years about making butter cookies. From storage tips to flavor swaps, this section has you covered.
Frequently Asked Questions
1. Can I make the dough ahead of time and bake later?
Absolutely. The dough can be made up to 2 days in advance and stored in the refrigerator. Just let it sit at room temperature for 10–15 minutes before piping or shaping, as it will firm up in the fridge.
2. Why did my butter cookies spread too much during baking?
This usually happens if the butter is too soft or the dough wasn’t chilled enough before baking. Try chilling the shaped cookies for 10–15 minutes before popping them in the oven.
3. Can I use salted butter instead of unsalted?
Yes, you can — just reduce or omit the added salt in the recipe. Keep in mind that different brands of salted butter contain varying amounts of salt, so the final flavor might change slightly.
4. What other flavorings can I add to the dough?
These cookies are super versatile. In addition to vanilla, you can add almond extract, lemon zest, orange zest, or even a touch of cinnamon for a warm twist. Start with ¼ teaspoon of any additional extract or spice, then adjust to taste.
5. Can I freeze the baked cookies?
Yes! Once fully cooled, butter cookies freeze well. Place them in a freezer-safe container with parchment paper between layers. They’ll keep for up to 2 months. Thaw at room temperature before serving.
6. My piped cookies lost their shape. What went wrong?
This could be from overmixing the dough or baking at too low of a temperature. Make sure you’re creaming the butter and sugar properly (not too long), and always bake in a fully preheated oven.
7. How can I make these cookies extra crispy?
For a crispier texture, bake the cookies for 1–2 minutes longer, just until the edges are more golden brown. Be careful not to overdo it, though — they can go from golden to too dark quickly.
Final Thoughts: Your New Go-To Cookie Recipe
Classic butter cookies are proof that sometimes the simplest recipes are the best. With just six ingredients, you can create a cookie that’s elegant, versatile, and full of rich, buttery flavor. I’ve made these cookies more times than I can count — for school events, family get-togethers, or just when I want the house to smell amazing.
What I love most is how easily this recipe adapts. You can keep it simple or dress it up with chocolate, sprinkles, or your favorite flavors. It’s a perfect base recipe to make your own — and once you try it, I have a feeling you’ll be making these on repeat.
If you try this butter cookie recipe, I’d love to hear how it went! Leave a comment below and let me know if you added your own twist — or stuck with the classic version. Either way, happy baking, and enjoy every buttery bite.
Print
Butter Cookies Recipe
- Author: Andrew Recipes
Description
These classic butter cookies are crisp, delicate, and rich with buttery flavor. With a simple dough made from just a few pantry staples, they’re perfect for holidays, gifting, or enjoying with a cup of tea or coffee. The cookies hold their shape beautifully, making them ideal for piping or pressing into festive designs.
Ingredients
1 cup unsalted butter, softened
⅔ cup granulated sugar
1 large egg
1 teaspoon vanilla extract
2¼ cups all-purpose flour
¼ teaspoon salt
Instructions
Preheat the oven to 350°F. Line a baking sheet with parchment paper or a silicone baking mat.
In a large mixing bowl, cream the softened butter and sugar together until light and fluffy. This usually takes about 2 to 3 minutes with an electric mixer.
Add the egg and vanilla extract, mixing until well incorporated and smooth.
Gradually add the flour and salt to the butter mixture, mixing just until a soft dough forms. Do not overmix.
For shaped or piped cookies, transfer the dough into a piping bag fitted with a large star tip. Pipe the dough into swirls, circles, or desired shapes onto the prepared baking sheet, spacing them about an inch apart. If the dough is too stiff to pipe, allow it to soften slightly at room temperature.
Bake for 10 to 12 minutes or until the edges are just turning golden. Remove from the oven and let the cookies cool on the baking sheet for a few minutes before transferring them to a wire rack to cool completely.
Notes
For extra flavor, you can add a hint of almond extract or dip the cooled cookies in melted chocolate. If you prefer a crispier texture, bake a minute or two longer until the edges deepen in color. The dough can be chilled for 15 to 20 minutes if you’re using cookie cutters or prefer a firmer texture for handling. Store butter cookies in an airtight container at room temperature for up to one week.

