
There’s just something so satisfying about a warm, cheesy bite-sized snack that’s loaded with flavor and ready in under 30 minutes. Whether you’re feeding hungry kids after school, looking for a fun game day treat, or just craving something savory and snackable—Cheesy Pepperoni Roll-Ups check all the boxes. They’re buttery, gooey, and packed with that irresistible pepperoni-and-cheese combo we all know and love.
I made these on a whim the first time because I had a can of crescent roll dough in the fridge, some leftover string cheese from the kids’ lunches, and pepperoni from pizza night. Let me tell you—they disappeared in minutes. Since then, they’ve become a go-to in our house. They’re kind of like mini pepperoni pizza rolls but even easier, thanks to store-bought dough and minimal prep.
These little roll-ups are not only incredibly tasty, but they’re also super customizable. Want it spicy? Toss in a few red pepper flakes. No mozzarella? Try cheddar or provolone. And they’re perfect with a side of warm marinara for dipping.
Let’s get into how to make them—you won’t believe how easy this is.
Ingredients You’ll Need
This recipe only requires a handful of ingredients, most of which you probably already have in your fridge or pantry:
1 can refrigerated crescent roll dough
32 slices pepperoni
4 mozzarella string cheese sticks, cut in half
2 tablespoons melted butter
½ teaspoon garlic powder
1 teaspoon dried Italian seasoning
Optional: marinara sauce for dipping
Seriously, that’s it. You can whip these up any time the craving strikes without a trip to the store.
STEP 1: Prep Your Oven and Dough
Start by preheating your oven to 375°F. While that’s heating up, go ahead and line a baking sheet with parchment paper—this helps the roll-ups bake evenly and makes cleanup a breeze.
Next, unroll your can of crescent dough and separate it into 8 individual triangles. If you’ve never worked with crescent dough before, don’t worry—it’s super user-friendly. Just follow the pre-cut lines and gently pull the pieces apart.
STEP 2: Load Up with Pepperoni and Cheese
At the wide end of each triangle, lay down 4 slices of pepperoni. This creates that zesty, meaty base layer. Then place one half of a mozzarella string cheese right on top of the pepperoni. The string cheese melts beautifully and gives you that delicious, gooey center we’re after.
If you’re feeling adventurous, you can sprinkle a few crushed red pepper flakes on the pepperoni for a spicy kick, or even add a bit of sliced jalapeño for heat-lovers.

STEP 3: Roll It Up!
Now comes the fun part. Starting from the wide end of the triangle, roll the dough toward the narrow point, just like you would a classic crescent roll. Try to tuck the sides in slightly as you roll to help keep the cheese and pepperoni sealed inside during baking.
Place each roll seam-side down on your prepared baking sheet to help them hold their shape in the oven.
STEP 4: Add Buttery Garlic Goodness
Before baking, you’ll want to dress up the tops of the roll-ups to give them even more flavor. Brush each one with melted butter, then sprinkle a mix of garlic powder and dried Italian seasoning over the top.
This simple step adds a golden, flavorful finish that makes these roll-ups smell and taste amazing straight out of the oven.
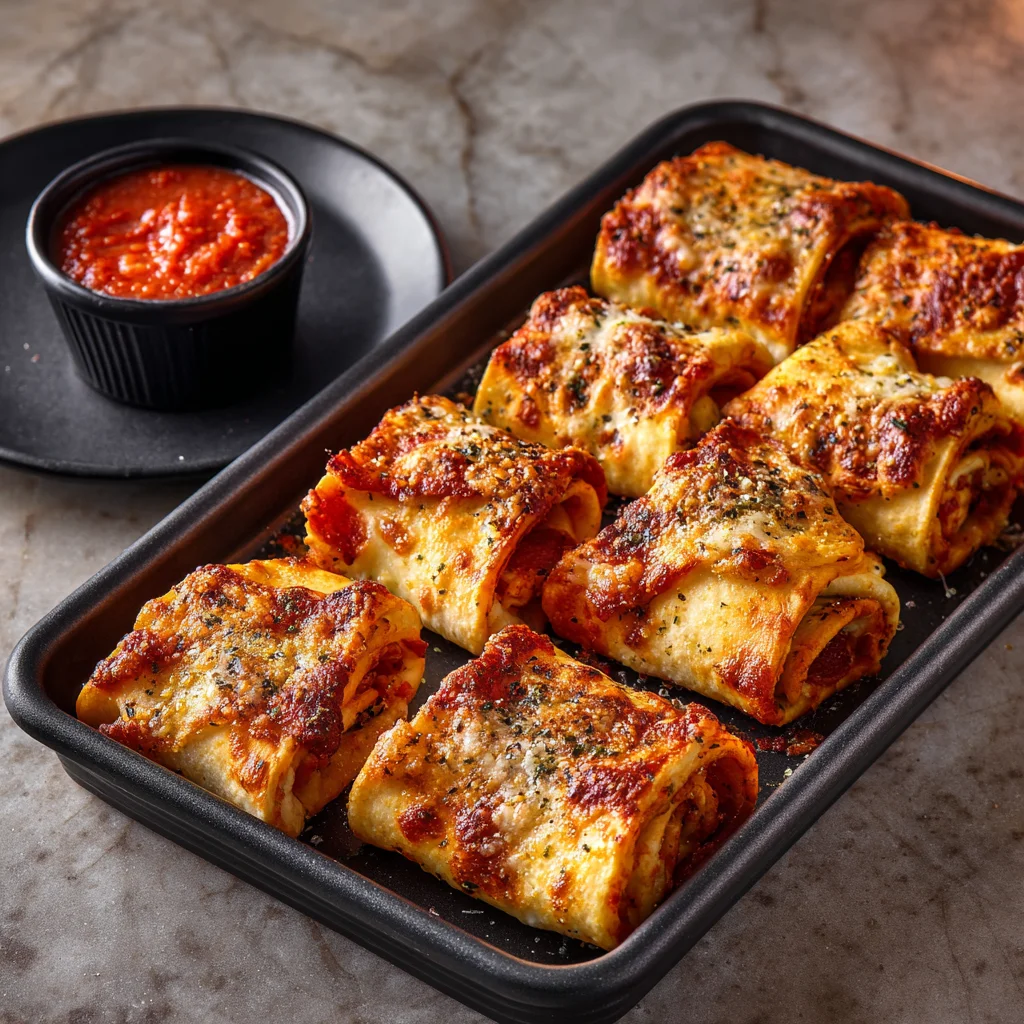
Cheesy Pepperoni Roll-Ups: Baked to Golden, Gooey Perfection
Now that you’ve got your Cheesy Pepperoni Roll-Ups assembled and ready to go, it’s time to let the oven work its magic. This is where everything comes together—the dough turns beautifully golden, the cheese gets melty and gooey, and the pepperoni releases all that savory flavor right into the roll.
Honestly, if you’re like me, you might start hovering by the oven just to catch a whiff of the buttery garlic and Italian seasoning as it starts to bake. Trust me—it smells as good as it tastes.
Let’s finish these up and get to the best part: eating them.

STEP 5: Bake Until Golden and Bubbling
Slide your baking sheet into the preheated 375°F oven and bake for 10 to 12 minutes. Keep an eye on them starting around the 10-minute mark.
You’re looking for that classic crescent roll color—a deep golden brown on top, with a slightly crisp texture around the edges. The cheese should be melted on the inside, but not oozing out (though if a little does escape, no one’s complaining).
Pro tip: Don’t overbake—the string cheese can start to harden if left in too long. Once they’re puffed up and golden, they’re ready to go.
STEP 6: Let Cool Slightly Before Serving
As tempting as it is to dive right in, let the roll-ups cool for about 3 to 5 minutes before serving. This gives the cheese a chance to settle a bit, making them easier to handle (and preventing any burned tongues).
Once they’re cool enough to touch, you can serve them just as they are or with a side of warm marinara sauce for dipping. The contrast of the tangy tomato sauce with the buttery roll and savory pepperoni? It’s everything.
Optional Variations You Can Try
One of the best things about this recipe is how easy it is to customize. Depending on your crowd (or what you’ve got in the fridge), here are a few ideas to make these your own:
Switch up the cheese – Provolone, cheddar, or pepper jack all work beautifully.
Add a little heat – Sprinkle red pepper flakes inside or use spicy pepperoni.
Add veggies – A thin slice of bell pepper or a few chopped olives inside can add a fun twist.
Make them mini – Cut the crescent triangles in half and use smaller pieces of cheese and pepperoni for bite-sized party snacks.
Air fryer option – These cook up great in the air fryer at 350°F for about 6-8 minutes. Perfect for a quick snack!
Reheating and Storing Leftovers
While these are definitely best fresh out of the oven, leftovers can still be delicious—if you have any, that is.
Storage: Place any extras in an airtight container in the fridge for up to 3 days.
Reheating: Pop them back in a 350°F oven for about 5-6 minutes, or use an air fryer to crisp them up again in 3-4 minutes. Avoid the microwave if you can—it tends to make the dough a bit soggy.
These make awesome next-day snacks or lunchbox additions, especially if you’ve got kiddos who love pizza-style anything.
Why We Love These So Much
Honestly, these Cheesy Pepperoni Roll-Ups check off all the boxes for me when it comes to an easy snack or appetizer. They’re:
Quick to make – Ready in under 25 minutes start to finish
Kid-approved – No arguments at the dinner table when these are involved
Perfect for parties – Whether it’s game day, movie night, or a casual get-together
Budget-friendly – You don’t need fancy ingredients to make something crave-worthy
Plus, they just look really cute on a platter. If you’re hosting, pile them high on a serving tray with a bowl of marinara in the center, and watch how fast they disappear.
In the final part of this post, I’ll answer a few common questions that pop up about this recipe and wrap it all up with a quick recap and final thoughts.
Cheesy Pepperoni Roll-Ups: FAQ and Final Thoughts
By now, you’ve seen just how simple and satisfying these Cheesy Pepperoni Roll-Ups are. They’re quick, delicious, and totally foolproof—even for those “what am I even making for dinner?” kind of nights. But before we wrap things up, let’s go over a few frequently asked questions that might pop into your head while you’re prepping (or devouring) your roll-ups.
Frequently Asked Questions
1. Can I make these ahead of time?
Yes! You can assemble the roll-ups a few hours in advance and store them covered in the refrigerator. When you’re ready, just pop them into the oven as directed. You may need to add an extra minute or two to the baking time since they’ll be chilled.
2. What’s the best cheese to use if I don’t have string cheese?
Mozzarella string cheese is super convenient and melts well, but you can also cut a block of mozzarella into sticks. Provolone, cheddar, or Monterey Jack work great, too—just aim for a shape that will roll easily inside the dough.
3. Can I freeze these?
Absolutely. Once baked, let them cool completely and then freeze in a single layer on a baking sheet. After they’re frozen, transfer them to a zip-top freezer bag. Reheat in the oven at 350°F for about 10-12 minutes or until heated through.
4. My cheese keeps leaking out—what can I do?
Try tucking the sides of the dough in as you roll and make sure the seam is facing down on the baking sheet. You can also pinch the ends closed to help seal in the cheese better. A little cheese leakage is normal (and kind of tasty), but this helps keep most of it inside.
5. Are these spicy?
Not at all! The standard pepperoni adds flavor but not much heat. If you want a spicier version, use hot pepperoni or sprinkle in some red pepper flakes before rolling.
6. What can I serve with these besides marinara sauce?
Ranch dressing, garlic butter, or even a creamy pesto dip all make great pairings. You can also serve them as part of a bigger appetizer spread with veggies and other finger foods.
7. Can I make a vegetarian version?
Definitely! Just skip the pepperoni and add some sautéed mushrooms, spinach, or roasted red peppers for a delicious meat-free option. Just don’t overload the filling or the dough might tear when rolling.
Final Thoughts: Why You’ll Keep Coming Back to This Recipe
Cheesy Pepperoni Roll-Ups are the kind of recipe that becomes a staple without even trying. They’re insanely easy to throw together, customizable based on whatever’s in your fridge, and practically guaranteed to be a crowd-pleaser every single time.
Whether you’re feeding a picky eater, throwing a game day party, or just craving something warm, cheesy, and comforting—these roll-ups deliver.
They’ve saved me more than once on nights when I needed something quick and satisfying, and I love how versatile they are. You can go classic with mozzarella and pepperoni, or get creative with different cheeses and fillings. And because they’re made with store-bought crescent dough, there’s no stress or fuss involved.
So the next time you’re looking for a snack or appetizer that’s big on flavor and low on effort, give these Cheesy Pepperoni Roll-Ups a try. And if you do make them, I’d love to hear how they turned out! Feel free to leave a comment, share your twist on the recipe, or let me know if they became a hit at your table too.
Print
Cheesy Pepperoni Roll-Ups
- Author: Andrew Recipes
Description
Cheesy Pepperoni Roll-Ups are a fun and flavorful snack or party appetizer that come together quickly with just a handful of ingredients. Using refrigerated crescent dough, each roll is packed with gooey melted cheese and zesty pepperoni, then baked to golden perfection. They’re easy to customize and perfect for dipping in marinara sauce or enjoying on their own.
Ingredients
1 can refrigerated crescent roll dough
32 slices pepperoni
4 mozzarella string cheese sticks, cut in half
2 tablespoons melted butter
½ teaspoon garlic powder
1 teaspoon dried Italian seasoning
Optional marinara sauce for dipping
Instructions
Preheat the oven to 375°F and line a baking sheet with parchment paper. Unroll the crescent dough and separate into individual triangles. Place 4 slices of pepperoni at the wide end of each triangle. Add one piece of string cheese on top. Roll up the dough, starting from the wide end, and tuck the sides to seal in the cheese and pepperoni.
Place each roll seam-side down on the baking sheet. Brush the tops with melted butter, then sprinkle with garlic powder and Italian seasoning. Bake for 10 to 12 minutes, or until golden brown and the cheese is melted inside.
Let cool slightly before serving. Serve warm with marinara sauce on the side if desired.
Notes
For a spicy twist, use spicy pepperoni or add a pinch of crushed red pepper before rolling. You can also swap in provolone or cheddar cheese for a different flavor profile. These roll-ups are best served warm but can be reheated in the oven or air fryer for a quick snack. Perfect for lunchboxes, game day, or an easy kid-friendly meal.

