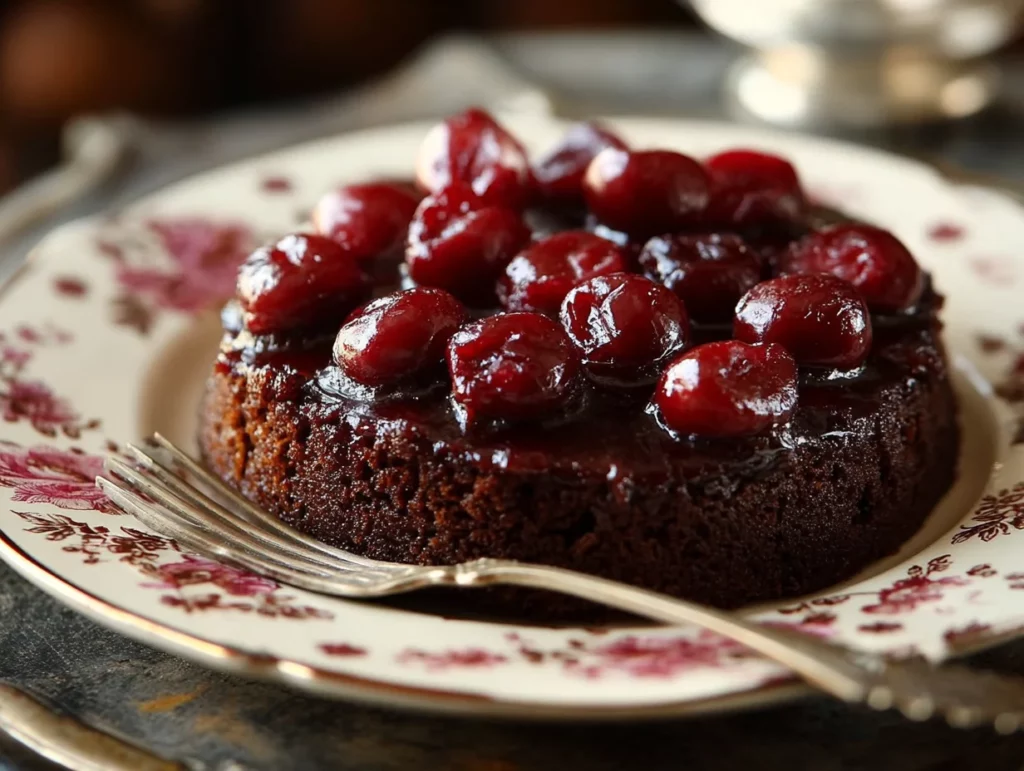
If you’re looking for a dessert that feels indulgent, looks beautiful, and is secretly super easy to make, this Chocolate Cherry Upside Down Cake is it. Rich, moist, and bursting with juicy cherry flavor, this cake is one of those “wow factor” recipes that tastes like it came from a fancy bakery — but you can whip it up in your own kitchen with minimal effort.
I’ve made a lot of upside-down cakes over the years (pineapple, peach, even cranberry), but this chocolate cherry version quickly became a family favorite. There’s just something magical about the combination of rich cocoa and sweet-tart cherries that makes each bite absolutely crave-worthy. And don’t even get me started on that glossy cherry topping — it’s the kind of thing that practically begs for a scoop of vanilla ice cream.
This cake also has the added bonus of being made with pantry staples and a can of cherry pie filling. So whether you’re planning a dinner party or just need a cozy weekend treat, this is the kind of recipe that’s ready when you are. Let’s get into it!
Why You’ll Love This Chocolate Cherry Upside Down Cake
Beautiful presentation with very little effort
Rich chocolate flavor enhanced with hot water (a baker’s trick!)
Perfectly moist and tender crumb
Uses cherry pie filling for convenience (but fresh cherries work too!)
Delicious warm or at room temperature
A hit at holidays, birthdays, or any casual get-together
Ingredients You’ll Need
Here’s a quick overview of what goes into this cake:
For the Cherry Topping:
1 can (21 oz) cherry pie filling
2 tablespoons unsalted butter, melted
2 tablespoons brown sugar
For the Chocolate Cake Batter:
1 cup all-purpose flour
1 cup granulated sugar
1/3 cup unsweetened cocoa powder
1 teaspoon baking soda
1/2 teaspoon baking powder
1/4 teaspoon salt
1/2 cup buttermilk
1/3 cup vegetable oil
1 egg
1 teaspoon vanilla extract
1/2 cup hot water
Let’s walk through the first few steps so you’re set up for success!
STEP-BY-STEP INSTRUCTIONS
Step 1: Prep the Pan and Oven
First things first, preheat your oven to 350°F (175°C). You’ll want to grease a 9-inch round cake pan, and I highly recommend lining the bottom with parchment paper. This helps the cake release easily once it’s baked — and trust me, you do not want to lose any of that gorgeous cherry topping.

Step 2: Make the Cherry Layer
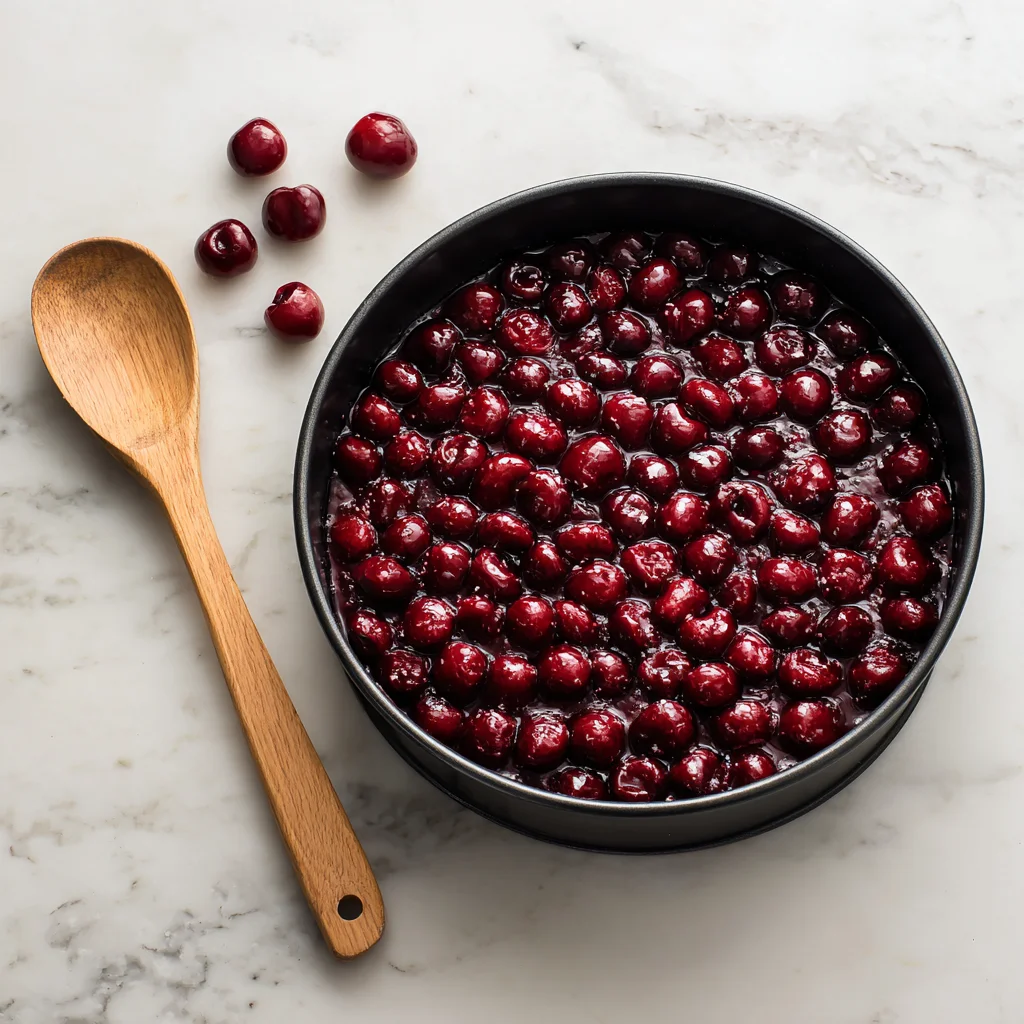
In a small bowl, stir together 2 tablespoons of melted butter and 2 tablespoons of brown sugar. Pour this into the bottom of your prepared pan and spread it out evenly.
Next, spoon in the cherry pie filling. Try to distribute the cherries evenly — you want every slice to get that juicy, jammy cherry goodness.
Tip: If you’re using fresh or frozen cherries, just toss them with a bit of sugar and cornstarch to mimic the consistency of pie filling. It’s a little more work but totally worth it if you’ve got fresh cherries on hand.
Step 3: Mix the Dry Ingredients
In a large mixing bowl, sift together:
1 cup all-purpose flour
1/3 cup unsweetened cocoa powder
1 cup granulated sugar
1 teaspoon baking soda
1/2 teaspoon baking powder
1/4 teaspoon salt
Give everything a good stir so it’s evenly combined.
Step 4: Add the Wet Ingredients
To the same bowl, add:
1/2 cup buttermilk
1/3 cup vegetable oil
1 egg
1 teaspoon vanilla extract
Mix until everything is just combined. You don’t want to overmix here — just stir until there are no dry patches left.
Note: If you don’t have buttermilk, you can make a quick substitute by mixing 1/2 cup milk with 1/2 tablespoon of vinegar or lemon juice. Let it sit for 5 minutes before using.
Step 5: Pour in the Hot Water
Now comes the secret weapon for ultra-moist chocolate cake: hot water. Slowly pour in 1/2 cup hot water, whisking gently as you go. The batter will be thin — that’s exactly what you want. It helps the cake stay soft and luscious after baking.
Baking, Finishing & Tips
Alright, now that we’ve got our chocolate batter ready and that luscious cherry layer set in the pan, it’s time for the part where the magic really happens — baking and flipping! This is where that gooey, caramelized cherry topping takes center stage and turns a humble cake into a showstopper.
One thing I absolutely love about this recipe is how forgiving it is. Even if the flip isn’t picture-perfect (been there), the rich chocolate and juicy cherries make up for it every single time. Plus, once it’s topped with a little whipped cream or a scoop of ice cream, no one’s noticing anything but how fast it’s disappearing.
Let’s dive into the second half of this decadent recipe.

Step 6: Combine and Pour
At this point, your chocolate cake batter should be smooth, slightly thin, and pourable. Carefully pour the batter over the cherry layer in your prepared cake pan. Use a spatula to gently spread the batter so it covers the cherries completely and evenly.
Tip: Pour slowly and start from the outer edges of the pan to avoid disturbing the cherry layer too much.
Step 7: Bake the Cake
Place your pan on the center rack of the oven and bake at 350°F (175°C) for 35 to 40 minutes. You’ll know it’s done when a toothpick inserted into the center of the cake comes out clean (just be sure to test through the cake layer, not the cherry topping).
The cake will puff up slightly and may have a bit of a dome, but that’s totally fine — it settles a bit as it cools.
Step 8: Cool and Invert
Let the cake cool in the pan for about 10 minutes. This gives it a chance to set without sticking or falling apart.
Once it’s slightly cooled:
Run a thin knife around the edges of the cake to loosen it.
Place your serving plate or cake stand upside down on top of the pan.
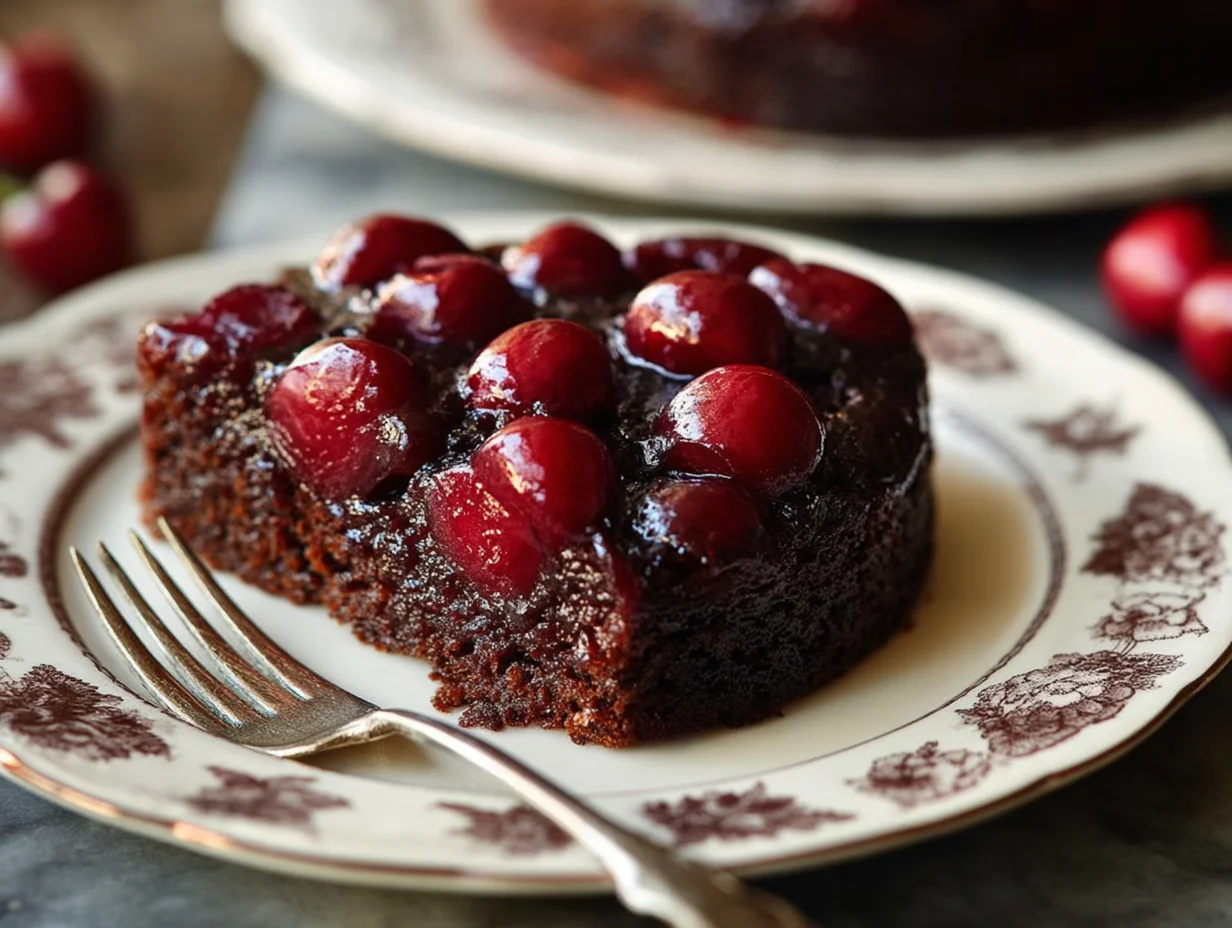
Carefully invert the cake so the cherry topping is now on top.
Gently lift the pan off — and prepare for oohs and aahs!
Note: If any cherries stick to the parchment or pan, just scoop them up and place them back on top of the cake — no one will know the difference.
Serving Suggestions
This cake is seriously good all on its own, but a little something extra doesn’t hurt:
Vanilla ice cream – The cold creaminess with the warm chocolate-cherry cake? Absolute perfection.
Whipped cream – A dollop of freshly whipped cream balances the richness beautifully.
Powdered sugar – A light dusting adds a touch of elegance, especially if you’re serving it for guests.
You can serve this cake warm, at room temperature, or even chilled, depending on your preference. It’s super versatile and holds up well if made a few hours in advance.
Tips for Success
Before we wrap up with FAQs in Part 3, here are a few extra tips to make sure your Chocolate Cherry Upside Down Cake turns out flawless every time:
Don’t skip the parchment paper. Cherries can get sticky and make removal tricky. That parchment layer is your best friend for a clean release.
Use hot water, not just warm. Hot water helps bring out the rich chocolate flavor and creates a moist crumb. Boiling water (just off the kettle) works best.
Let the cake cool before slicing. I know it’s tempting, but giving it a little time to settle ensures cleaner slices and a better texture.
Want to make it from scratch? Swap the cherry pie filling for about 2 cups of fresh or frozen cherries tossed with 1/4 cup sugar and 1 tablespoon cornstarch.
Make It Your Own
This cake is wonderfully adaptable. Here are a few fun ways to put your own spin on it:
Add chocolate chips to the batter for extra gooey richness.
Sprinkle in a touch of almond extract for a Black Forest cake vibe.
Use dark cocoa powder for an even deeper chocolate flavor.
Try different fruit toppings — raspberries, blackberries, or even pears could work with the chocolate base.
FAQs & Final Thoughts
We’ve walked through all the steps to make this dreamy Chocolate Cherry Upside Down Cake, from prepping that glossy cherry topping to flipping it onto the plate like a pro. Whether you’re baking for a holiday, a special dinner, or just because you’re in the mood for chocolate (which, let’s be honest, is always), this cake is sure to win over anyone lucky enough to grab a slice.
Before we wrap things up, I want to cover a few of the most common questions I’ve received about this cake. These tips can help troubleshoot anything that pops up, and maybe even inspire a few new ideas for your next bake.
FREQUENTLY ASKED QUESTIONS
1. Can I use fresh or frozen cherries instead of pie filling?
Absolutely. If you’d rather use fresh or frozen cherries, toss about 2 cups of pitted cherries with 1/4 cup granulated sugar and 1 tablespoon of cornstarch. This will give you a similar consistency to the canned filling. Just keep in mind that fresh cherries may result in a slightly less syrupy topping.
2. Do I have to use parchment paper?
Technically, no — but it makes a big difference. The parchment prevents sticking and ensures the cherry topping stays intact when you invert the cake. If you skip it, be sure to grease the pan thoroughly and know that some cherries may stick.
3. What if I don’t have buttermilk?
No worries! You can make a quick substitute: just mix 1/2 cup of regular milk with 1/2 tablespoon of white vinegar or lemon juice. Let it sit for 5 minutes before using — it’ll thicken slightly and work just like buttermilk in the batter.
4. Can I make this cake ahead of time?
Yes. This cake holds up well for about 1–2 days at room temperature, covered tightly. If you want to serve it warm, just pop individual slices in the microwave for 15–20 seconds before serving.
5. How should I store leftovers?
Keep any leftovers in an airtight container. You can store the cake at room temperature for a day or two, or in the refrigerator for up to 4–5 days. For best texture, let refrigerated slices come to room temp before eating.
6. Can I make this cake in a different pan?
A 9-inch round pan works best, but you could also use a square 8×8-inch pan. Just make sure it’s at least 2 inches deep to avoid overflow. Avoid using a springform pan — the cherry juices can leak out during baking.
7. What’s the best way to flip the cake without it falling apart?
Let the cake cool for about 10 minutes first. Then run a knife around the edges and use a flat plate that completely covers the pan. Place the plate on top, grip both the plate and pan firmly, and flip it all in one confident motion. Slowly lift the pan off, and you should be left with a beautiful cherry-topped cake.
Final Thoughts: Why This Cake Belongs in Your Recipe Box
I’ve made a lot of cakes over the years, but this Chocolate Cherry Upside Down Cake is one of those recipes I keep coming back to. It checks all the boxes: rich, moist, visually impressive, and just the right balance of fruity and chocolatey. Plus, it’s so simple to pull off — especially when you use the shortcut of cherry pie filling.
What I love most, though, is how easily it can be dressed up or down. Serve it as a casual weeknight dessert, or pair it with a fancy scoop of gelato for something more elegant. It’s also great for gifting — who wouldn’t want a homemade chocolate cherry cake delivered to their doorstep?
So if you’re craving something indulgent, but still easy enough to make on a whim, I hope you’ll give this recipe a try. And if you do, I’d love to hear how it turns out for you! Feel free to share your thoughts in the comments — or let me know if you try any fun twists, like swapping in berries or adding a splash of almond extract.
Print
Chocolate Cherry Upside Down Cake
- Author: Andrew Recipes
Description
This Chocolate Cherry Upside Down Cake is a rich, moist dessert that combines the deep flavor of chocolate cake with the sweet-tart juiciness of cherries. The cherries caramelize slightly during baking, creating a luscious, glossy topping when the cake is flipped. Perfect for special occasions or whenever you’re craving something indulgent and fruity.
Ingredients
For the cherry topping:
1 can (21 oz) cherry pie filling
2 tablespoons unsalted butter, melted
2 tablespoons brown sugar
For the chocolate cake batter:
1 cup all-purpose flour
1 cup granulated sugar
1/3 cup unsweetened cocoa powder
1 teaspoon baking soda
1/2 teaspoon baking powder
1/4 teaspoon salt
1/2 cup buttermilk
1/3 cup vegetable oil
1 egg
1 teaspoon vanilla extract
1/2 cup hot water
Instructions
1 Preheat the oven to 350°F (175°C). Lightly grease a 9-inch round cake pan and line the bottom with parchment paper for easy release.
2 In a small bowl, stir together the melted butter and brown sugar. Pour this mixture into the bottom of the prepared pan, spreading it evenly.
3 Spoon the cherry pie filling over the butter and sugar mixture, distributing the cherries evenly across the bottom of the pan.
4 In a large mixing bowl, sift together the flour, cocoa powder, sugar, baking soda, baking powder, and salt.
5 Add the buttermilk, vegetable oil, egg, and vanilla extract to the dry ingredients. Mix until just combined.
6 Slowly pour in the hot water, whisking gently until the batter is smooth. The batter will be thin, which helps make the cake moist.
7 Carefully pour the batter over the cherry layer in the pan, spreading it out evenly.
8 Bake for 35 to 40 minutes, or until a toothpick inserted into the center of the cake comes out clean.
9 Allow the cake to cool in the pan for about 10 minutes. Run a knife around the edges, then place a serving plate over the pan and invert to release the cake. Carefully lift the pan away, revealing the cherry topping.
10 Let the cake cool slightly before serving. It can be enjoyed warm or at room temperature. A scoop of vanilla ice cream or a dollop of whipped cream pairs beautifully.
Notes
Using cherry pie filling makes this recipe incredibly simple, but you can substitute with fresh or frozen pitted cherries tossed in a little sugar and cornstarch if you prefer a more homemade touch. Make sure not to skip the parchment paper—cherries can be sticky and may make removal tricky. The hot water in the batter enhances the cocoa, giving the cake a deep chocolate flavor and a soft, tender crumb.

