
If you’ve ever had a dessert that made you stop mid-bite and go, “Okay, wow,” this Coconut Cream Pie is exactly that. It’s everything you want in a summer dessert—cool, creamy, packed with coconut flavor, and topped with a dreamy cloud of whipped cream. Think buttery graham cracker crust, silky coconut custard, and just enough toasted coconut on top to make you feel like you’re on a beach somewhere with a gentle breeze and a slice of heaven in hand.
Now, I know pie can sound intimidating—especially one with a custard filling—but trust me when I say this recipe is surprisingly simple. It’s totally doable for a weeknight sweet tooth or a weekend gathering, and it makes such a beautiful presentation with its fluffy whipped topping and toasted coconut garnish. This has become one of my go-to make-ahead desserts for potlucks and summer BBQs. Not only does it chill beautifully overnight, but the flavor somehow gets even better the next day. Win-win!
Let’s walk through it together, step by step. I’ll also share a couple of helpful tips along the way to make sure your pie comes out perfect every single time.
Building the Foundation – Crust & Filling Prep
This pie is all about layers of flavor and texture, and we’re starting strong with a buttery graham cracker crust. If you’ve got ten minutes and a handful of pantry staples, you’re halfway there.
Ingredients You’ll Need
For the crust:
1 ½ cups graham cracker crumbs (about 10–12 graham crackers, crushed)
¼ cup granulated sugar
6 tablespoons unsalted butter, melted
For the filling:
2 cups whole milk
1 can (13.5 oz) full-fat coconut milk
3 large egg yolks
¾ cup granulated sugar
¼ cup cornstarch
¼ teaspoon salt
2 teaspoons vanilla extract
1 teaspoon coconut extract (optional, but highly recommended)
1 cup shredded coconut (plus more for garnish)
STEP 1: Make the Crust
Preheat your oven to 350°F (175°C). While it’s warming up, grab a medium mixing bowl and combine your graham cracker crumbs, sugar, and melted butter. Stir until the mixture looks like wet sand and is evenly moistened—this is going to press together beautifully in your pie dish.
Next, press the crumb mixture into the bottom and up the sides of a 9-inch pie plate. I like to use the bottom of a measuring cup to really pack it in tightly and get smooth edges. Once your crust is pressed in evenly, pop it into the oven and bake for 8 to 10 minutes, just until it’s lightly golden and smells incredible.
Set it aside to cool completely while you work on that luscious coconut filling.

STEP 2: Prepare the Coconut Cream Filling
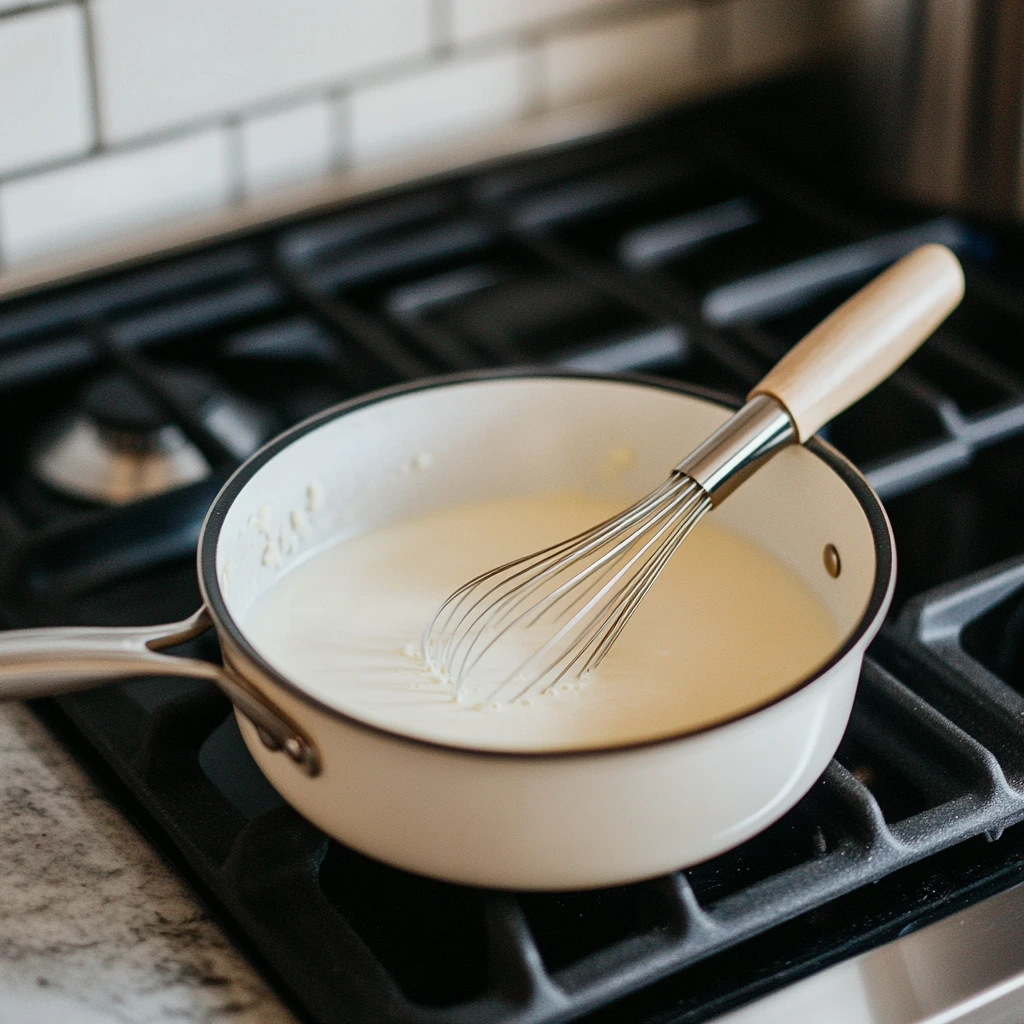
Now for the star of the show—the coconut custard. In a medium saucepan, whisk together the whole milk, coconut milk, egg yolks, sugar, cornstarch, and salt. Make sure it’s smooth before you turn the heat on. This helps avoid any clumps or lumps later.
Place the pan over medium heat and whisk constantly. It takes about 8 to 10 minutes for the mixture to thicken and come to a gentle boil. Don’t walk away here—custard needs your full attention. Once it’s thick enough to coat the back of a spoon and you’ve reached a gentle boil, keep cooking for another 1 to 2 minutes to ensure the cornstarch is fully activated. You’ll know it’s ready when it’s glossy and thick.
Remove the pan from heat and stir in the vanilla extract, the optional coconut extract (which I highly recommend if you want an extra punch of coconut), and the shredded coconut. The coconut bits give the filling an amazing texture that’s both creamy and slightly chewy—so good.
Pour the hot filling into your cooled crust and spread it evenly. Then, gently press a piece of plastic wrap directly onto the surface of the custard. This keeps it from forming a skin while it chills. Pop the whole thing into the fridge and let it set for at least 2 to 3 hours. If you have the time, chilling overnight is even better.
Whipped Topping, Toasted Coconut & Expert Tips
Now that your pie is chilling and the creamy coconut filling is doing its thing in the fridge, it’s time to talk about one of the most satisfying parts of this dessert: the whipped topping and that irresistible sprinkle of toasted coconut. There’s something about topping a pie with homemade whipped cream that takes it from “pretty” to “absolutely stunning,” and the flavor difference is undeniable.
This part of the recipe comes together super quickly, and you don’t need anything fancy—just a cold bowl, some heavy cream, and a hand or stand mixer. Whether you’re prepping this for a summer BBQ, Easter dessert table, or just because you’re craving something coconutty and cool, this final touch is what makes the pie truly shine.
Topping It Off – Whipped Cream and Toasted Coconut
Ingredients You’ll Need for the Topping
For the whipped topping:
1 ½ cups heavy whipping cream
2 tablespoons powdered sugar
1 teaspoon vanilla extract
To garnish:
Extra shredded coconut for toasting
STEP 3: Make the Whipped Cream
Once your filling is nice and set—it should feel firm but still creamy—it’s time to make the whipped cream. First, make sure your cream is cold. I even like to pop the bowl and beaters into the fridge for 10 minutes beforehand. Cold tools help the cream whip up faster and hold its shape better.
In your chilled mixing bowl, combine the heavy whipping cream, powdered sugar, and vanilla extract. Using an electric mixer, beat the mixture on high speed for about 3 to 4 minutes, or until stiff peaks form. You’ll know you’ve hit stiff peaks when you pull the beaters out and the whipped cream stands up without collapsing.
Once your whipped cream is ready, carefully remove the plastic wrap from your chilled pie. Spread the whipped cream over the filling using a spatula or the back of a spoon, creating soft peaks or swirls. You can also use a piping bag with a star tip for a more decorative look, but rustic swirls look just as pretty.
STEP 4: Toast the Coconut Garnish
Toasted coconut adds just the right touch of crunch and a deeper coconut flavor. It’s a small step, but it really makes a big difference in both flavor and appearance.
To toast the coconut, preheat your oven to 350°F if it’s not already hot. Spread about ¼ cup of shredded coconut (or more if you like!) onto a baking sheet in an even layer. Bake for 5 to 7 minutes, stirring once or twice, until the coconut is golden and fragrant. Keep a close eye on it—coconut can go from golden to burnt really quickly.
Once toasted, let the coconut cool slightly, then sprinkle it generously over the whipped cream topping. It adds such a beautiful contrast in color and that irresistible toasted flavor that just screams “tropical treat.”
Extra Tips for Perfect Coconut Cream Pie
Now that you’ve built your pie from the crust up, here are a few helpful tips I’ve picked up along the way to make sure your Coconut Cream Pie turns out as dreamy as possible every single time.
Chill for Clean Slices: I mentioned it before, but it’s worth repeating—chilling your pie for a full 3 hours (or overnight if you can) will make slicing much easier. A fully set filling gives you that clean, picture-perfect wedge.
Add Coconut Extract if You Can: It’s optional, but coconut extract really enhances the coconut flavor without overwhelming the custard. If you want your pie to taste like it came from a fancy bakery, this is the secret.
Use Full-Fat Coconut Milk: The rich texture and flavor from full-fat coconut milk make a noticeable difference. Light coconut milk just doesn’t deliver the same creaminess.
Toasted Coconut on Top = Game Changer: It’s not just for looks! That slight crunch and toasted flavor elevate this pie to another level.
Make Ahead for Parties: This pie is actually better the next day, which makes it perfect for entertaining. You can assemble everything the night before, including the whipped topping, and just garnish with toasted coconut right before serving.
FAQ & Final Thoughts
So by now, your Coconut Cream Pie is fully assembled—golden graham cracker crust, silky coconut custard, a soft cloud of whipped cream, and that irresistible sprinkle of toasted coconut. Whether it’s chilling in the fridge waiting to be devoured or already half-gone because no one could wait, I hope you’re as excited about this recipe as I am.
Before we wrap things up, let’s tackle a few of the most common questions that tend to pop up with this kind of pie. These answers will help ensure your pie turns out perfect every time, even if you’re making it for the first time or trying a few ingredient swaps.

Frequently Asked Questions
Can I make this pie ahead of time?
Absolutely! In fact, it’s even better when made a day ahead. The filling sets perfectly, the crust holds its texture, and the flavors meld beautifully. Just hold off on toasting and adding the coconut garnish until right before serving for best results.
Can I use a store-bought crust instead of homemade?
Yes, you can. A pre-made graham cracker crust works in a pinch and will still taste great. That said, the homemade version adds a lot of flavor and texture, and it only takes a few minutes to make—so if you have the time, it’s worth it.
Is there a dairy-free option?
You can swap the whole milk with an unsweetened plant-based milk like almond or oat, and use full-fat coconut milk for the entire liquid base. For the whipped topping, try coconut whipped cream or a dairy-free whipped topping available in most grocery stores. The texture might vary slightly, but the flavor will still be rich and coconut-forward.
Can I freeze Coconut Cream Pie?
Technically, yes—but with some caveats. The custard texture can change slightly after freezing, becoming a bit more grainy. If you do freeze it, wrap it tightly and avoid adding the whipped cream until after it’s thawed. Thaw overnight in the fridge and add fresh whipped topping just before serving.
How long will leftovers last in the fridge?
Leftover Coconut Cream Pie should be stored in the refrigerator and will keep well for up to 4 days. Just make sure it’s covered loosely with plastic wrap or stored in an airtight container to keep the whipped topping from drying out.
Can I use sweetened coconut instead of unsweetened?
Yes, sweetened shredded coconut works just fine. It will make the filling slightly sweeter, so if you’re sensitive to sweetness, you could reduce the granulated sugar in the filling by 1–2 tablespoons.
What’s the best way to toast coconut without burning it?
Keep a close eye on it and stir it halfway through baking. It usually only takes 5–7 minutes in a 350°F oven. Alternatively, you can toast it in a dry skillet over medium heat—just stir constantly and remove it from the heat as soon as it turns golden.
Final Thoughts: Make It Your Own
There’s something so special about a dessert that feels both indulgent and light, and Coconut Cream Pie strikes that perfect balance. It’s sweet but not overly sugary, creamy without being heavy, and has that tropical flair that makes it stand out from the usual dessert lineup.
Once you’ve made it once, don’t be afraid to experiment. Add a layer of sliced bananas at the bottom of the crust for a tropical twist. Mix in some crushed pineapple with the filling. Try a chocolate cookie crust for a completely different flavor combo. This recipe is flexible and forgiving—and always crowd-pleasing.
If you do make this Coconut Cream Pie, I’d love to hear how it turns out for you! Drop a comment, share your variations, or let me know if you used a shortcut or two. Whether you’re making it for a special occasion or just because it’s Tuesday, I hope it brings as much joy to your table as it has to mine.
Print
Coconut Cream Pie
- Author: Andrew Recipes
Description
A luscious and tropical dessert, this Coconut Cream Pie combines a buttery graham cracker crust with a rich, creamy coconut filling and a fluffy whipped topping. It’s the perfect make-ahead treat for summer gatherings, holidays, or anytime you’re craving a cool, coconutty indulgence.
Ingredients
For the crust:
1 1/2 cups graham cracker crumbs (about 10–12 graham crackers, crushed)
1/4 cup granulated sugar
6 tbsp unsalted butter, melted
For the filling:
2 cups whole milk
1 can (13.5 oz) coconut milk (full-fat for creaminess)
3 large egg yolks
3/4 cup granulated sugar
1/4 cup cornstarch
1/4 tsp salt
2 tsp vanilla extract
1 tsp coconut extract (optional, for extra coconut flavor)
1 cup shredded coconut (plus more for garnish)
For the whipped topping:
1 1/2 cups heavy whipping cream
2 tbsp powdered sugar
1 tsp vanilla extract
Instructions
1️⃣ Preheat the oven to 350°F (175°C). In a medium bowl, combine the graham cracker crumbs, sugar, and melted butter until evenly moistened. Press the mixture firmly into the bottom and up the sides of a 9-inch pie dish. Bake the crust for 8 to 10 minutes until lightly golden. Remove and let it cool completely on a wire rack.
2️⃣ In a medium saucepan, whisk together the whole milk, coconut milk, egg yolks, granulated sugar, cornstarch, and salt until the mixture is smooth. Place over medium heat and cook, whisking constantly, until the mixture thickens and comes to a gentle boil, about 8 to 10 minutes. Continue to cook for 1 to 2 more minutes to fully activate the thickening. Remove from heat and stir in the vanilla extract, coconut extract if using, and shredded coconut. Pour the hot filling into the cooled pie crust and spread evenly. Cover the surface with plastic wrap, pressing it directly onto the filling to prevent a skin from forming. Refrigerate for at least 2 to 3 hours or until fully set.
3️⃣ In a large mixing bowl, combine the heavy whipping cream, powdered sugar, and vanilla extract. Beat with an electric mixer on high speed until stiff peaks form, about 3 to 4 minutes. Once the pie is chilled and set, remove the plastic wrap and spread the whipped cream over the top.
4️⃣ To garnish, sprinkle toasted shredded coconut over the whipped topping. To toast coconut, spread it on a baking sheet and bake at 350°F for 5 to 7 minutes, stirring occasionally, until golden and fragrant. Serve the pie chilled and store any leftovers in the refrigerator.
Notes
Chilling is key to getting clean slices, so give the pie enough time to set. The coconut extract is optional but enhances the tropical flavor. For a firmer filling, consider chilling overnight. This pie is a wonderful make-ahead dessert that tastes even better the next day.

