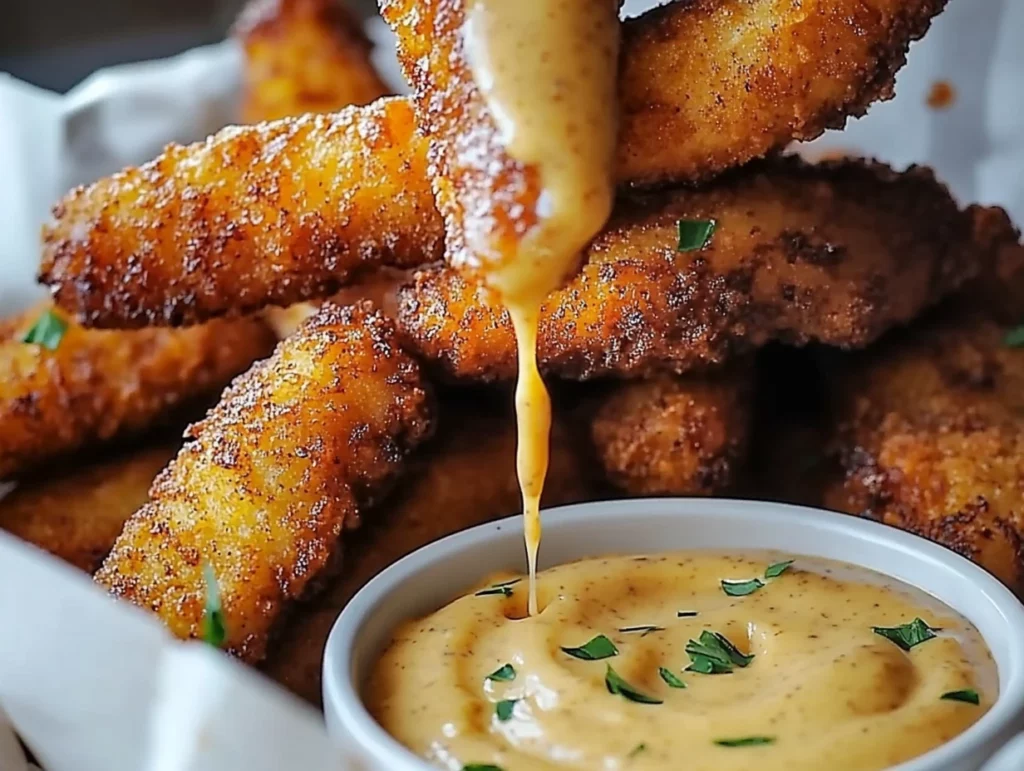
There’s something undeniably comforting about a crispy chicken tender, don’t you think? Whether it’s for a family dinner, a party platter, or just a little snack, they’ve got that perfect balance of crunchy coating and juicy chicken inside. And when you dip them into a sweet and tangy honey mustard sauce, well, that’s when the magic happens.
I can remember the first time I made these crispy chicken tenders. My kids were practically bouncing off the walls with excitement, and when they tasted that golden crunch, it was like they discovered a whole new world of flavor. We made them for dinner, and I had to do a double batch because they disappeared so quickly! That’s when I knew this recipe was a keeper. The crispy chicken, paired with the honey mustard dip, became an instant family favorite.
So, if you’re craving a fun, tasty, and relatively simple dish, I’ve got you covered with this recipe. Let’s dive into how to make these crispy chicken tenders that everyone will love—whether it’s for dinner or the next game day.
Ingredients You’ll Need
Before we get cooking, let’s talk about what you’ll need to pull off these crispy chicken tenders and their honey mustard dip.
For the Chicken Tenders:
1 pound of chicken tenders (or you can use chicken breasts sliced into strips)
1 cup of all-purpose flour
2 large eggs, beaten
1 cup of breadcrumbs (Panko breadcrumbs will give you that extra crispiness!)
1/2 cup of grated Parmesan cheese (optional, but it adds a nice flavor boost)
1 teaspoon of garlic powder
1 teaspoon of smoked paprika (optional, but trust me, it adds a lovely smoky depth)
1/2 teaspoon of salt
1/4 teaspoon of black pepper
Vegetable oil, for frying
For the Honey Mustard Dip:
1/4 cup of honey
1/4 cup of Dijon mustard
1 tablespoon of mayonnaise (optional, if you want a creamy dip)
1 teaspoon of lemon juice (optional, but it brings a tangy kick that pairs perfectly with the sweetness)
Prepare the Breading Stations
Step 1: Set Up Your Breading Stations
To make the breading process easier, we’re going to set up a little assembly line. In one shallow bowl, place the flour. In a second bowl, beat the eggs until smooth. In the third bowl, combine the breadcrumbs, Parmesan cheese (if you’re using it), garlic powder, smoked paprika, salt, and pepper.
Each station is going to help you coat the chicken perfectly, so get them ready before starting. Trust me, this makes the process so much smoother.

Step 2: Bread the Chicken Tenders
Now, it’s time to coat those chicken tenders. First, pat the chicken dry with paper towels—this step helps the breading stick. Take one chicken tender at a time and dredge it in the flour, shaking off any excess. Next, dip the chicken into the beaten eggs, making sure to let the excess drip off. Finally, coat the chicken with the breadcrumb mixture, pressing gently to ensure it sticks evenly.
If you like a super crispy coating (who doesn’t?), try using Panko breadcrumbs. They create a lighter, crunchier texture.
Step 3: Fry the Chicken Tenders
Once all your chicken tenders are breaded and ready to go, it’s time to fry them up! Heat about 1/2 inch of vegetable oil in a large skillet over medium-high heat. When the oil is hot (you can test this by dropping a small breadcrumb into the oil—if it sizzles, it’s ready), start frying the chicken tenders in batches.
Make sure not to overcrowd the pan—this will help them cook evenly and get that perfect golden brown color. Fry each side for about 3-4 minutes, or until the chicken is golden and crispy. The internal temperature of the chicken should reach 165°F (74°C). Once done, transfer the chicken tenders to a plate lined with paper towels to drain any excess oil.
And just like that, you’ve got your crispy chicken tenders! But we’re not quite finished yet…
Crispy Chicken Tenders with Honey Mustard Dip: Perfecting the Dip and Final Tips
Now that your crispy chicken tenders are ready to go, let’s take them to the next level with the most essential part of this dish—the honey mustard dip. The best part? It’s so simple to make, yet it brings everything together perfectly. You’ll want to have this dip on hand for every tender, so let’s jump in!
Make the Honey Mustard Dip
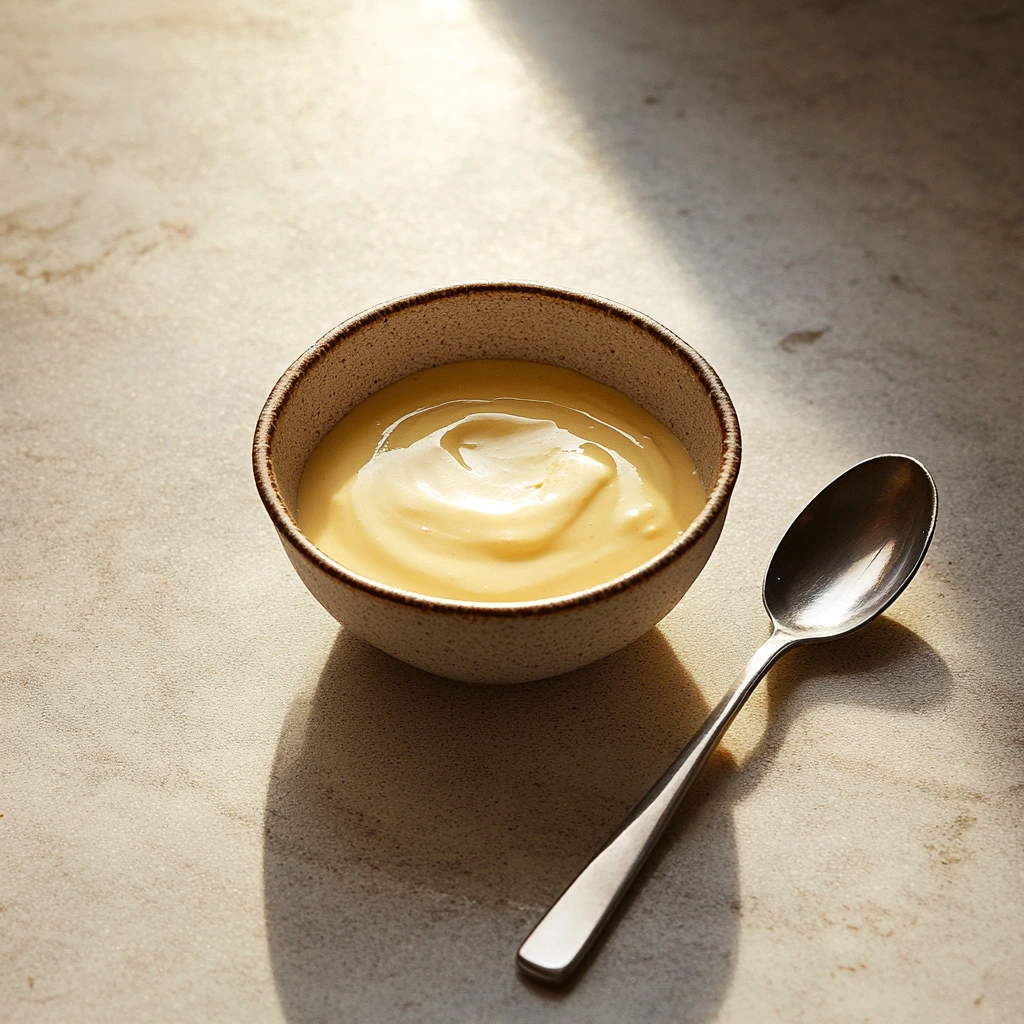
Step 1: Whisk Together the Ingredients
The honey mustard dip is all about balancing sweetness and tanginess, and I’ve got the perfect formula for that! In a small bowl, combine the honey and Dijon mustard. If you want a little extra creaminess, add a tablespoon of mayonnaise (this step is optional, but it’s a game-changer for a smooth, velvety dip). Finally, stir in a teaspoon of lemon juice for that tangy kick.
Mix everything together until the sauce is smooth, then taste it. If you prefer it sweeter, feel free to add a little more honey. If you want more of a tang, a little extra mustard or lemon juice will do the trick.
Step 2: Adjust and Serve
Once everything is mixed together, give the dip another quick taste test. Adjust as needed to suit your preferences—everyone’s taste is a little different! When you’re happy with the balance, you’ve got your honey mustard dip ready to go.
Now, I like to serve this dip on the side, so everyone can dunk their crispy chicken tenders into the sauce as much as they like. It’s always a hit at any table!
Tips and Variations for Perfect Chicken Tenders
While this recipe is already a winner on its own, there are a few little tips and variations to make it even better.
For Extra Crispy Tenders:
If you want your tenders to have a light, ultra-crunchy texture, Panko breadcrumbs are your best friend. They’re larger and airier than regular breadcrumbs, which gives the coating a delightful crunch. You can also add a little grated Parmesan to the breadcrumb mixture to amp up the flavor.
For a Healthier Option:
If you’re looking to skip the frying, you can bake these tenders instead! Preheat your oven to 400°F (200°C), then line a baking sheet with parchment paper or a silicone baking mat. Place the breaded chicken tenders on the sheet and bake for about 15-20 minutes, flipping halfway through, until they’re golden brown and cooked through. It’s a great way to enjoy the same flavors with less oil.
Add Some Spice:
If you love a little heat, you can spice up both the tenders and the dip. For the tenders, sprinkle some cayenne pepper or chili powder into the breadcrumb mixture. For the dip, a dash of hot sauce or a pinch of cayenne will give it a nice kick without overpowering the balance of sweetness and tang.
Make It a Meal:
These chicken tenders aren’t just for snacking—they can also be turned into a full meal! Serve them alongside some crispy French fries, a simple salad, or even a plate of macaroni and cheese for a comforting, all-in-one dinner. You could also use the tenders to make a chicken tender sandwich by placing them on a bun with a little extra honey mustard dip. Yum!
Storing and Reheating Leftovers
If you happen to have any leftovers (which I doubt will happen), here’s how to store them so they stay crispy. Allow the tenders to cool completely before placing them in an airtight container. They’ll keep in the fridge for up to 3 days.
When you’re ready to eat them again, avoid microwaving them if you want to keep that crispy coating. Instead, reheat the tenders in a 400°F (200°C) oven for about 10 minutes, flipping halfway through, until they’re heated through and the coating is crispy once more.

Serving Suggestions
Crispy chicken tenders are incredibly versatile and can be served in a variety of ways. Here are a few ideas to keep things exciting:
As an appetizer: Serve the tenders with the honey mustard dip at your next party or gathering. They’re always a crowd-pleaser!
In a salad: Slice up the tenders and toss them into a salad with some mixed greens, cherry tomatoes, cucumbers, and a light vinaigrette. The crispy tenders add a fun crunch to the dish!
In a wrap: For a quick lunch or dinner, place the chicken tenders in a tortilla wrap with lettuce, tomato, and a drizzle of honey mustard sauce. Roll it up for a delicious, handheld meal.
With these tips and variations, you can customize this recipe to fit any occasion or craving. Whether you’re keeping it classic or adding a twist, these crispy chicken tenders with honey mustard dip are guaranteed to be a hit!
Crispy Chicken Tenders with Honey Mustard Dip: FAQ and Final Thoughts
We’ve reached the final part of our crispy chicken tender journey, and I’m so glad you’re still with me! By now, you’ve hopefully learned everything you need to make the crispiest, most delicious chicken tenders paired with a perfect honey mustard dip. But I know there are always some lingering questions when it comes to cooking, so I’ve gathered a few of the most frequently asked questions about this recipe. Let’s dive into those and get all your doubts cleared up.
FAQ Section
1. Can I use chicken breasts instead of chicken tenders?
Absolutely! If you can’t find chicken tenders or prefer using chicken breasts, that works perfectly fine. Just slice the chicken breasts into strips, making sure they’re about the same size so they cook evenly. You may need to adjust the cooking time slightly since chicken breasts can vary in thickness, but the process is the same.
2. How can I make the chicken tenders crispy without frying them?
If you want to bake the tenders instead of frying them, you can still achieve a crispy result! Preheat your oven to 400°F (200°C) and line a baking sheet with parchment paper or a silicone baking mat. Place the breaded chicken tenders on the baking sheet and bake for 15-20 minutes, flipping halfway through. This method gives you a healthier option while still maintaining that satisfying crunch.
3. Can I freeze the breaded chicken tenders?
Yes, you can absolutely freeze these chicken tenders before frying them! After breading the chicken, arrange the tenders in a single layer on a baking sheet and freeze them for about 30 minutes. Once they’re firm, transfer them to an airtight container or freezer bag for up to 3 months. When you’re ready to cook them, fry or bake from frozen, just add a few extra minutes to the cooking time.
4. How long can I store leftover chicken tenders?
Leftover chicken tenders will keep in the fridge for up to 3 days. Be sure to let them cool completely before storing them in an airtight container. To reheat, avoid the microwave (which can make them soggy) and opt for reheating in the oven at 400°F (200°C) for about 10 minutes, flipping halfway through. This will help keep the coating crispy.
5. Can I make the honey mustard dip in advance?
Yes, the honey mustard dip can be made ahead of time. Simply prepare the dip and store it in an airtight container in the fridge for up to a week. It might thicken slightly as it sits, so just give it a little stir before serving. If you want to adjust the flavor, feel free to add more honey, mustard, or lemon juice to taste.
6. What other dipping sauces can I serve with the chicken tenders?
While honey mustard is the perfect match, there are plenty of other dipping sauce options that go great with crispy chicken tenders. Try serving them with ranch dressing, barbecue sauce, buffalo sauce, or even a creamy garlic aioli. The options are endless, so feel free to get creative!
7. Can I make these chicken tenders gluten-free?
Yes, you can easily make this recipe gluten-free by swapping the all-purpose flour and breadcrumbs for gluten-free alternatives. Look for gluten-free flour and Panko breadcrumbs, or use crushed gluten-free cornflakes for a crunchy coating. Just be sure to check the ingredients in your honey mustard dip to make sure everything is gluten-free.
Conclusion
Now that we’ve covered all the tips, tricks, and questions, it’s time to enjoy your crispy chicken tenders with honey mustard dip! Whether you’re making them for a family dinner, a party, or just a cozy snack, this recipe is sure to be a crowd-pleaser. The golden, crunchy coating paired with that sweet and tangy dip is a combination that’s hard to beat.
I hope you’ve enjoyed this step-by-step guide and found some helpful tips to customize the recipe to your liking. Don’t be afraid to get creative with different dipping sauces or serving ideas—this dish is incredibly versatile. And if you try any fun variations, be sure to share them in the comments!
So, what are you waiting for? Grab your ingredients, fire up the skillet (or oven), and get cooking. These crispy chicken tenders are waiting to steal the show at your next meal!
Print
Crispy Chicken Tenders with Honey Mustard Dip
- Author: Andrew Recipes
Description
These Crispy Chicken Tenders are golden, crunchy, and packed with flavor, making them a perfect snack or meal for all ages. The crispy breadcrumb coating is complemented by the savory chicken inside, and when paired with the sweet and tangy honey mustard dip, the combination is irresistible. Whether served as an appetizer, party food, or a family dinner, these chicken tenders are sure to be a hit.
Ingredients
For the Chicken Tenders:
- 1 pound chicken tenders (or chicken breasts sliced into strips)
- 1 cup all-purpose flour
- 2 large eggs, beaten
- 1 cup breadcrumbs (Panko for extra crispiness)
- 1/2 cup grated Parmesan cheese (optional, for extra flavor)
- 1 teaspoon garlic powder
- 1 teaspoon smoked paprika (optional)
- 1/2 teaspoon salt
- 1/4 teaspoon black pepper
- Vegetable oil, for frying
For the Honey Mustard Dip:
- 1/4 cup honey
- 1/4 cup Dijon mustard
- 1 tablespoon mayonnaise (optional, for creaminess)
- 1 teaspoon lemon juice (optional, for a tangy kick)
Instructions
Prepare the Breading Stations:
In one shallow bowl, place the flour. In a second bowl, beat the eggs. In a third bowl, combine the breadcrumbs, Parmesan cheese (if using), garlic powder, smoked paprika, salt, and pepper.
Bread the Chicken Tenders:
Pat the chicken tenders dry with paper towels. Dredge each tender in the flour, shaking off any excess. Dip the floured chicken into the beaten eggs, letting any excess drip off. Coat the chicken in the breadcrumb mixture, pressing gently to ensure an even coat.
Fry the Chicken Tenders:
Heat about 1/2 inch of vegetable oil in a large skillet over medium-high heat. Add the breaded chicken tenders in batches, ensuring they don’t overcrowd the pan. Cook for 3–4 minutes per side, or until golden brown and the internal temperature reaches 165°F (74°C). Transfer the cooked tenders to a plate lined with paper towels to drain excess oil.
Make the Honey Mustard Dip:
In a small bowl, whisk together the honey, Dijon mustard, mayonnaise (if using), and lemon juice until smooth. Taste and adjust the sweetness or tanginess as desired.
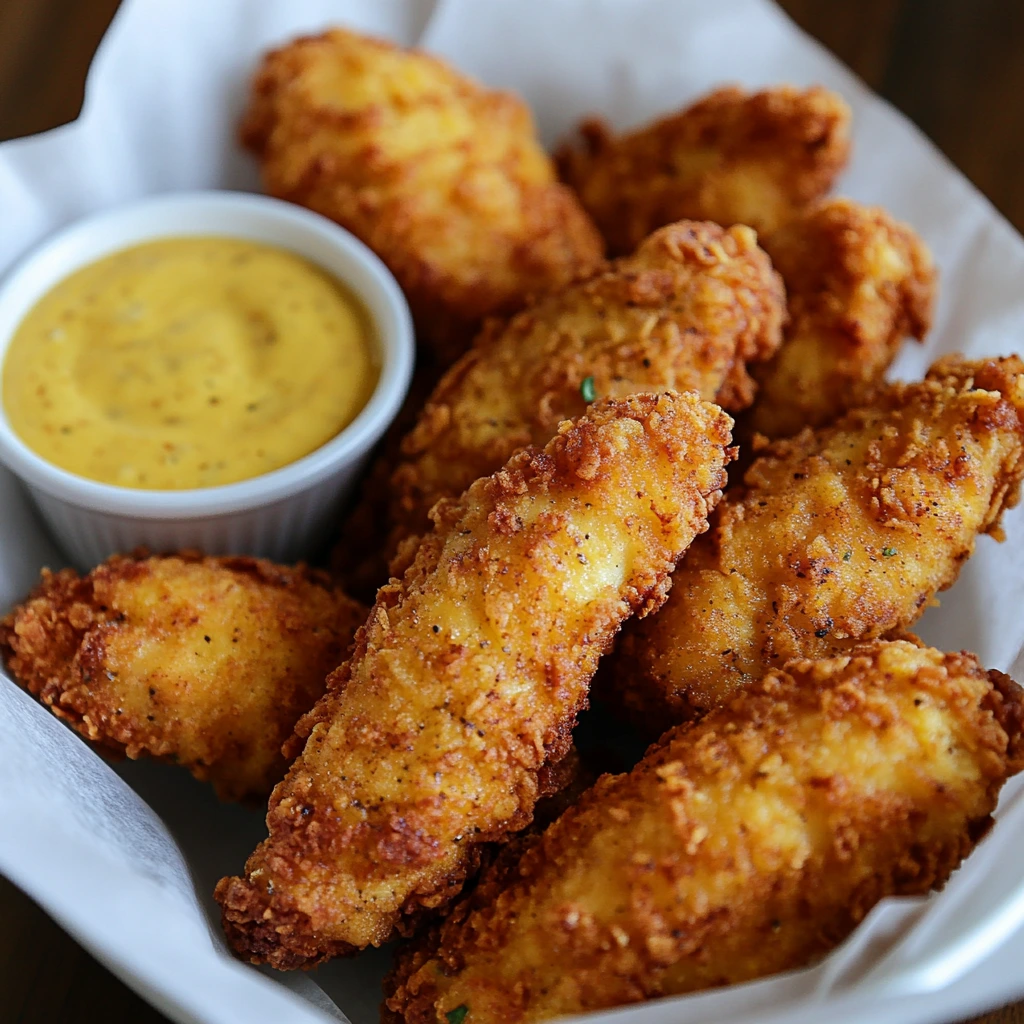
Serve:
Arrange the crispy chicken tenders on a serving platter. Serve warm with the honey mustard dip on the side.
Notes
For an even crispier texture, you can use Panko breadcrumbs, which give a lighter, crunchier coating.
If you want a spicier dip, feel free to add a touch of hot sauce or cayenne pepper to the honey mustard sauce.
For a healthier option, you can bake the breaded chicken tenders in a preheated oven at 400°F (200°C) for 15–20 minutes, flipping halfway through, until they’re golden brown and cooked through.
These chicken tenders are also great for meal prep, and they can be reheated in the oven to maintain their crispiness.

