
If your mornings are anything like mine—rushed, chaotic, and usually involving someone asking where their other shoe is—then you’re going to fall in love with these Loaded Turkey Bacon Hash Brown Muffins. They’re everything you want in a breakfast: crispy, savory, filling, and best of all, portable. I mean, who has time to sit down for eggs and toast when you’re trying to get out the door with coffee in one hand and a backpack in the other?
What I love most about these little muffin cups is how versatile and make-ahead friendly they are. You can prep them on a Sunday, pop them in the fridge or freezer, and reheat as needed. They’re also a huge hit with kids—and by “huge hit,” I mean my picky 6-year-old actually ate one without a bribe. That’s a win in my book.
Let’s be honest, breakfast doesn’t always feel like the most exciting meal of the day. But when you add a crispy hash brown crust, smoky turkey bacon, melty cheddar cheese, and a colorful mix of bell peppers and green onions? Suddenly breakfast becomes the thing you’re looking forward to most.
Whether you’re feeding a family, meal prepping for the week, or just want something more exciting than a granola bar, these muffins check all the boxes. So grab your muffin tin and let’s get baking!
Ingredients You’ll Need
3 cups frozen shredded hash browns, thawed and drained
1 tablespoon olive oil
Salt and pepper to taste
6 slices turkey bacon, cooked and chopped
5 large eggs
½ cup milk
½ cup shredded cheddar cheese
¼ cup diced bell peppers
2 tablespoons chopped green onions
Non-stick cooking spray
STEP 1: PREPARE YOUR MUFFIN TIN AND CRUST
First things first—preheat your oven to 375°F and generously spray your muffin tin with non-stick cooking spray. You want to make sure those crispy hash brown cups come out easily once they’re baked.
In a large mixing bowl, combine the thawed and drained hash browns with a tablespoon of olive oil, and season with a pinch of salt and pepper. This step is key: make sure your hash browns are well-drained. If they’re holding too much moisture, they’ll steam instead of crisp up, and we definitely want that golden, crispy texture for the crust.
Now, scoop the hash browns into the muffin tin. Press them firmly into the bottom and slightly up the sides of each muffin cup. Think of it like you’re creating little nests for the filling to sit in. Pop the tin in the oven and bake for about 15 to 20 minutes, or until the edges start turning golden and lightly crispy.

STEP 2: WHIP UP THE EGG MIXTURE
While the crusts are baking, whisk together the eggs and milk in a medium-sized bowl. You want the mixture to be smooth and well-combined—no big streaks of yolk or white.
Next, stir in the cooked and chopped turkey bacon (make sure it’s nice and crispy), shredded cheddar cheese, diced bell peppers, and chopped green onions. This filling is packed with protein, flavor, and just enough color to make breakfast feel a little fancy—even if you’re still in pajamas at 10 a.m.
By the time you’ve mixed everything together, your hash brown crusts should be about ready to come out of the oven. Pull the muffin tin out carefully and get ready to fill those golden nests with the egg mixture.

How to Finish and Customize Your Loaded Turkey Bacon Hash Brown Muffins
Now that your crispy hash brown nests are golden and ready, it’s time to bring everything together and get these muffins into their final, delicious form. One of the best parts about this recipe is how easy it is to tweak based on what you have on hand or what your family loves most. Prefer sausage over turkey bacon? Want to sneak in some spinach or mushrooms? Totally doable.
This second part of the recipe is where the magic really happens. The egg mixture gets poured into the hash brown crusts, bakes to a fluffy perfection, and becomes the perfect grab-and-go breakfast—or even brunch option.
Let’s finish what we started.
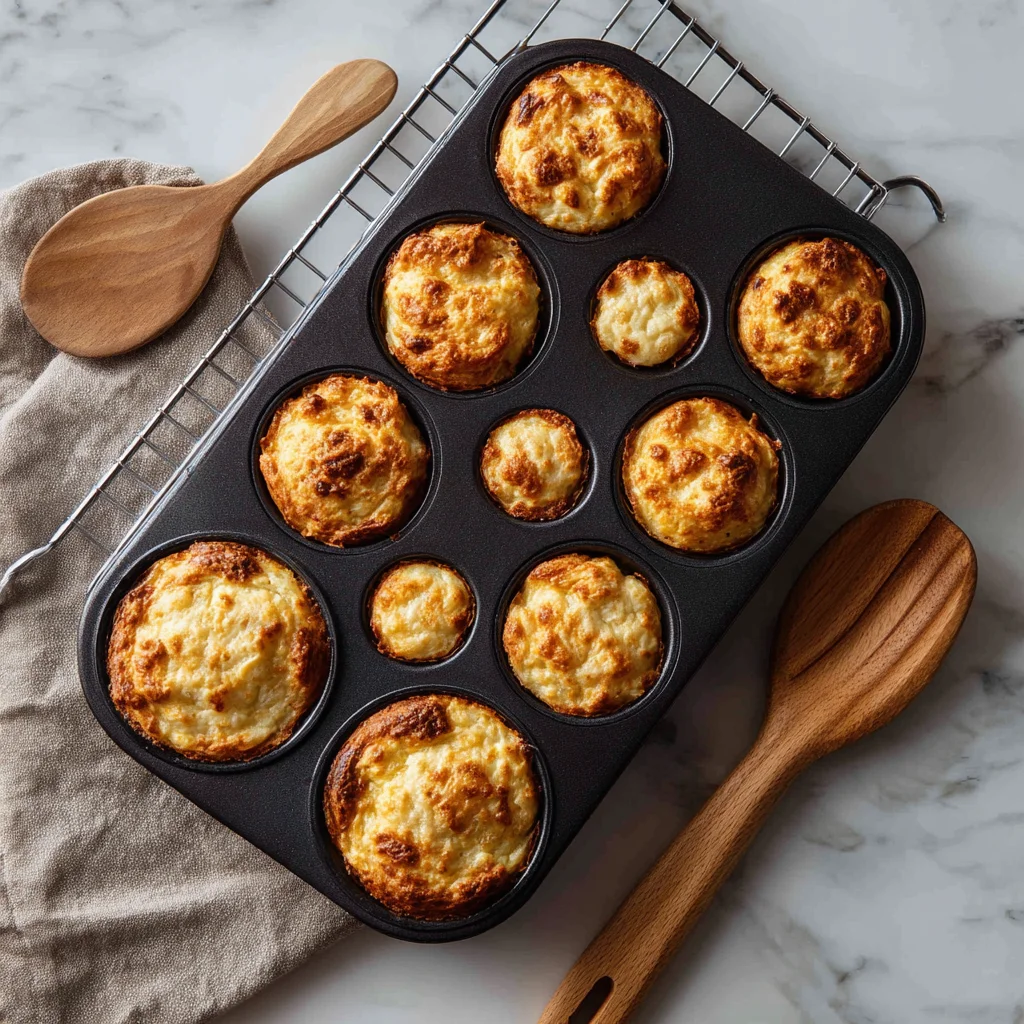
STEP 3: FILL AND BAKE
Carefully spoon the egg mixture into the pre-baked hash brown cups, dividing it evenly between each one. Make sure to give the mixture a little stir before each scoop to keep the cheese and veggies evenly distributed. You want each muffin to be loaded with flavor in every bite.
Once all the cups are filled, slide the muffin tin back into the oven. Bake for another 15 to 18 minutes, or until the eggs are fully set and the tops are slightly golden. If you give the pan a gentle shake and the centers don’t jiggle, you’re good to go.
Pro tip: If you like a bit of extra cheese (who doesn’t?), sprinkle a little more cheddar on top during the last few minutes of baking. It’ll melt into a bubbly, golden topping that takes these muffins over the top.
Once they’re done baking, let the muffins cool in the pan for about 5 minutes. This helps them set up just enough to come out of the tin easily without falling apart. Run a butter knife gently around the edges if needed to help loosen them.
STEP 4: SERVE OR STORE
These muffins are amazing warm right out of the oven, but they’re just as tasty reheated for a quick weekday breakfast. Serve them on their own or alongside a small bowl of fruit, a dollop of Greek yogurt, or even a spoonful of salsa if you like a little kick in the morning.
If you’re making them ahead, let them cool completely before storing. You can place them in an airtight container in the fridge for up to 4 days, or freeze them individually wrapped for up to 2 months. To reheat, pop one in the microwave for about 30–45 seconds if it’s from the fridge, or about 1–2 minutes from frozen.
Helpful Tips and Easy Variations
Now that you’ve got the basics down, let’s talk about how to make these muffins work for everyone in your household. Here are a few ideas to make them your own:
Cheese Swap: Not a fan of cheddar? Try Monterey Jack, mozzarella, or pepper jack for a little extra spice.
Add Veggies: Diced mushrooms, chopped spinach, or even shredded zucchini (just squeeze out the water first!) are great additions.
Spice It Up: Add a dash of hot sauce or a pinch of red pepper flakes to the egg mixture if you like a little heat.
Go Vegetarian: Skip the turkey bacon and add more veggies or a plant-based sausage instead.
Make Mini Muffins: Use a mini muffin tin for bite-sized versions—just reduce the baking time slightly and keep an eye on them.
Another great trick? If you’re hosting a brunch, make a double batch with a mix of fillings. Label them with little flags or markers so guests can choose their favorites. They look adorable on a platter and disappear fast!
FAQ and Final Thoughts on Loaded Turkey Bacon Hash Brown Muffins
By now, you’ve seen just how simple and satisfying these Loaded Turkey Bacon Hash Brown Muffins can be. They’re the perfect mix of crispy, cheesy, and protein-packed—ideal for mornings when you need something hearty but don’t have time to cook from scratch. But before we wrap up, let’s go over a few common questions that come up when making these delicious little breakfast bites.

Frequently Asked Questions
1. Can I use fresh potatoes instead of frozen hash browns?
Yes, you can. Just be sure to shred them finely and squeeze out as much moisture as possible with a clean towel or cheesecloth. Otherwise, the crusts may turn soggy instead of crispy.
2. What’s the best way to reheat these muffins?
For best results, reheat them in the microwave for 30–45 seconds if stored in the fridge, or about 1–2 minutes if frozen. You can also reheat in the oven at 350°F for about 10 minutes for a slightly crispier texture.
3. Can I make these dairy-free?
Absolutely. Just use your favorite dairy-free milk (like almond or oat milk) and swap in a dairy-free shredded cheese. The muffins will still hold together and taste great.
4. How do I know when the eggs are fully cooked?
The muffins are done when the centers are set and no longer jiggly. A toothpick inserted in the middle should come out clean. Keep an eye on the tops—they should be lightly golden.
5. Can I make these vegetarian?
Yes! Just leave out the turkey bacon or replace it with a plant-based alternative or extra veggies. Mushrooms, spinach, and chopped tomatoes are great add-ins.
6. Do I need to grease the muffin tin even if it’s non-stick?
Yes—greasing the tin with non-stick spray is still a good idea. The hash browns can stick a bit, especially around the edges, so a quick spray helps them release cleanly.
7. How long do these muffins last in the fridge?
Stored in an airtight container, they’ll stay fresh in the fridge for up to 4 days. For longer storage, freeze them individually and reheat as needed.
Final Thoughts
Whether you’re looking for a quick weekday breakfast, a kid-friendly brunch idea, or a freezer-stash option for busy mornings, these Loaded Turkey Bacon Hash Brown Muffins have you covered. They’re hearty, flavorful, and endlessly customizable—plus, they just make mornings easier.
There’s something so satisfying about grabbing one of these warm, crispy muffins and knowing you’ve already got breakfast taken care of. And once you’ve tried them, don’t be surprised if they become a regular part of your routine like they have in my house.
If you give this recipe a try, I’d love to hear how it goes! Share your favorite variations, let me know what your family thought, or tag me if you make a batch. Bonus points if you try out a new combo like pepper jack and jalapeños or sausage and spinach.
Print
Delicious Loaded Turkey Bacon Hash Brown Muffins
- Author: Andrew Recipes
Description
These loaded turkey bacon hash brown muffins are a hearty and flavorful breakfast option that’s easy to make ahead and perfect for busy mornings. Crispy hash browns form the base, while a savory mix of turkey bacon, eggs, and cheese fills each muffin cup for a satisfying, protein-packed bite. They’re great on their own or paired with a simple fruit salad or yogurt.
Ingredients
3 cups frozen shredded hash browns, thawed and drained
1 tablespoon olive oil
Salt and pepper to taste
6 slices turkey bacon, cooked and chopped
5 large eggs
½ cup milk
½ cup shredded cheddar cheese
¼ cup diced bell peppers
2 tablespoons chopped green onions
Non-stick cooking spray
Instructions
Preheat the oven to 375°F and spray a muffin tin with non-stick cooking spray.
In a mixing bowl, toss the hash browns with olive oil, salt, and pepper. Press the hash browns into the bottom and sides of each muffin cup to form a crust. Bake for 15 to 20 minutes or until the edges start to turn golden and crisp.
While the hash brown crusts bake, whisk together the eggs and milk in a separate bowl. Stir in the turkey bacon, cheddar cheese, bell peppers, and green onions.
Remove the muffin tin from the oven and pour the egg mixture evenly into each hash brown crust. Return the tin to the oven and bake for another 15 to 18 minutes, or until the egg is set and the tops are slightly golden.
Let the muffins cool for a few minutes in the tin before gently removing them. Serve warm or store in the fridge for quick weekday breakfasts.
Notes
Make sure to squeeze out any excess moisture from the hash browns before using them to ensure the crust becomes crisp. These muffins can be customized with your favorite veggies or cheese and are freezer-friendly. Simply reheat in the microwave or oven for a quick and nourishing meal.

