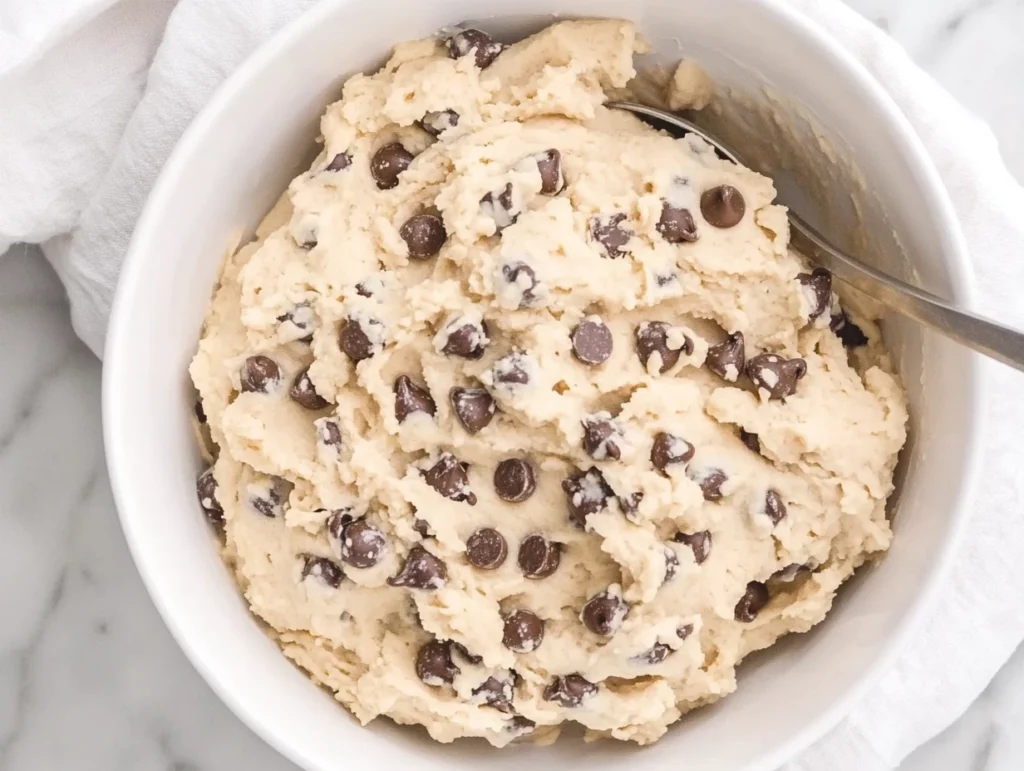
Over the years, I’ve tested dozens of versions—some too crumbly, others too sweet. But this one strikes the perfect balance: a tender, moist dough that holds its shape when scooped, yet still melts on your tongue. The secret? Heat-treating the flour to eliminate any bacteria risk, plus a touch of heavy cream to bring it all together. And because I can’t resist a little option for those living dairy-free, I’ve included simple swaps so virtually anyone can enjoy it.
In this three-part series, I’ll guide you through every step, share my favorite mix-in ideas, and answer common questions about making edible cookie dough at home. Let’s dive in—grab your mixer and parchment-lined baking sheet, and let’s get rolling!

STEPS
- 1.Heat-treat the flour.** Preheat your oven to 300°F (150°C) and line a rimmed baking sheet with parchment paper. Evenly spread the flour in a thin layer and bake for 5–7 minutes, keeping a close eye to prevent any browning. This critical step ensures the flour is safe to eat without altering its flavor. Once done, remove the sheet and let the flour cool completely—this will take about 10–15 minutes.
- Cream the butter and sugars. While the flour cools, attach the paddle to your stand mixer (or grab your handheld mixer). Add the softened butter, light brown sugar, and granulated sugar. Beat on medium-high speed for 2–3 minutes until the mixture is light, airy, and pale in color. You’ll know it’s ready when you can pause the mixer and the sugar crystals have mostly dissolved into the butter, leaving a fluffy base.
- Add vanilla and cream. Turn the mixer speed down to low and pour in the vanilla extract. Let it incorporate for about 10 seconds, then drizzle in the heavy cream. Continue mixing on low until the batter is smooth and just holds together—this gentle addition of cream ensures the dough stays moist without becoming runny.
- Incorporate the flour and salt. Keep the mixer on low. Gradually add the cooled, heat-treated flour in two or three batches, sprinkling in a pinch of salt with each addition. Mix just until no streaks of flour remain; over-mixing at this stage can lead to a tougher dough. Pause after each addition to scrape down the sides of the bowl, ensuring an even, tender crumb
Fold in the chocolate chips. Transfer your tender dough into a large mixing bowl. Using a sturdy wooden spoon or silicone spatula, gently fold in the mini semi‐sweet chocolate chips until they’re evenly distributed. The goal here is to avoid crushing the chips or over‐working the dough. You want those little nuggets of chocolate intact for the perfect bite every time.
Chill the dough. Cover the bowl tightly with plastic wrap or an airtight lid. Pop it into the refrigerator for at least 30 minutes. Chilling firms up the butter, which makes the dough easier to scoop and helps it hold its shape—whether you’re slicing it into bars, rolling it into balls, or scooping generous mounds for baking later.
Shape and serve (no‐bake). Once chilled, you have a few serving options:
Scoop and serve: Use a 1-inch cookie scoop to portion the dough into bite-sized rounds. Place them on a tray and serve immediately, or press lightly to flatten into mini “cookies.”
Roll into truffles: For an elegant presentation, roll scooped dough between your palms to form smooth, shiny truffles. Dust them with a pinch of sea salt or finely chopped nuts.
Slice into bars: Press the chilled dough into an 8×8-inch pan lined with parchment paper. Use a sharp knife to slice into bars or squares for a grab-and-go treat.
Bake if desired. If you can’t resist the lure of freshly baked cookies, preheat your oven to 350°F (175°C). Place scooped dough balls on a parchment-lined baking sheet, spacing them about 2 inches apart. Bake for 8–10 minutes, or until the edges are just turning golden. Let cool on the baking sheet for 5 minutes before transferring to a wire rack.
Pro Tips & Variations
Dairy-free swap: Replace sweet cream butter with your favorite vegan butter, and use plant‐based cream or milk. Opt for dairy‐free chocolate chips to keep it entirely vegan without sacrificing flavor.
Mix-in magic: While the mini chips are adorable on their own, you can swap up to ½ cup of them for any of the following:
Chopped nuts (pistachios, pecans, or walnuts) for extra crunch
Sprinkles for a funfetti twist (great for parties!)
Crushed pretzels to introduce a salty‐sweet contrast
Toffee bits for caramelized sweetness
Flavor boosts: Stir in a pinch of cinnamon or a drop of almond extract alongside the vanilla for a unique flavor profile. A tablespoon of cocoa powder turns this into an edible brownie dough!
Storage solutions:
Refrigerator: Keep your dough in an airtight container for up to 5 days. This lets you scoop fresh bites whenever the craving strikes.
Freezer: Portion the dough into balls or bars, then freeze on a tray for 1 hour. Transfer frozen pieces to a freezer-safe bag or container. They’ll keep up to 2 months—just thaw overnight in the fridge before serving.
Serving suggestions:
Pair with a tall glass of cold milk for the ultimate nostalgic snack.
Offer alongside coffee or tea at your next brunch or book club gathering.
Dollop on top of ice cream sundaes for an edible dough “crumble” topping.
1. Is it really safe to eat raw flour?
Yes—when you heat-treat the flour as instructed, you eliminate any potential bacteria without changing the flavor or texture. Spread the flour on a baking sheet and bake at 300°F for 5–7 minutes, watching closely to prevent browning. Once cooled, it’s just as safe as store-bought cookie dough.
2. How long will this dough keep in the fridge or freezer?
Refrigerated in an airtight container, the dough stays fresh for up to 5 days. For longer storage, shape into balls or bars, freeze on a tray for about an hour, then transfer to a freezer-safe bag. You can store frozen portions for up to 2 months—just thaw in the refrigerator overnight before serving.
3. Can I bake this dough into cookies?
Absolutely! Scoop chilled dough balls onto a parchment-lined baking sheet, spacing them about 2 inches apart, and bake at 350°F for 8–10 minutes. The edges should be lightly golden while the centers remain soft. Let them rest on the sheet for 5 minutes before transferring to a wire rack.
4. What’s the best way to make this recipe dairy-free?
Swap the sweet cream butter for a vegan stick butter, and use plant-based cream (such as coconut or oat creamer). Choose dairy-free chocolate chips—many brands offer semi-sweet or dark varieties. The flavor and texture remain wonderfully rich and creamy.
5. My dough turned out too dry—what went wrong?
If your dough seems crumbly, it likely needs more moisture. Make sure you measured the flour properly (spoon into the cup, then level off) and didn’t skip the heavy cream. You can stir in an extra teaspoon or two of cream or a drop of milk until the dough comes together.
6. Can I mix in other flavors or add-ins?
Definitely! Swap up to ½ cup of the mini chips for chopped nuts, toffee bits, crushed pretzels, or sprinkles. You can also stir in a pinch of cinnamon, a drop of almond extract, or a tablespoon of cocoa powder to transform it into edible brownie dough. Just fold gently to keep the dough tender.
7. What’s the secret to perfectly round dough balls?
Chilling is key—firm dough scoops and rolls much more smoothly. Use a small cookie scoop for uniform portions, then roll between lightly greased or cool, clean hands. If the dough sticks, dip your palms in a bit of granulated sugar or flour to prevent clinging.
Conclusion
There you have it—the ultimate, foolproof edible chocolate chip cookie dough that’s as safe as it is indulgent. From the satisfying ritual of heat-treating flour to the endless possibilities for mix-ins, this recipe delivers nostalgia by the spoonful. Whether you’re sharing truffle-like bites at a party, sneaking nightly spoonfuls straight from the bowl, or baking fresh cookies for your family, this dough has you covered.
I can’t wait to hear how you customize yours! Drop a comment below with your favorite mix-in combos or variation tips, and tag me in your photos if you try rolling these into truffles or baking them into warm cookies. Happy scooping—and here’s to sweet, safe, cookie-dough bliss!
Print
Edible Chocolate Chip Cookie Dough
- Author: Andrew Recipes
Description
This egg-free, heat-treated flour cookie dough delivers all the nostalgia of raw cookie dough without the risk. Sweet brown and granulated sugars are creamed into rich butter, then balanced with a splash of cream and vanilla. Mini semi-sweet chocolate chips fold in at the end, creating irresistible bites perfect for dipping, scooping by the spoonful or baking into chewy cookies.
Ingredients
1¾ cups all-purpose flour
1 cup salted sweet cream butter, softened
¾ cup light brown sugar, packed
½ cup granulated sugar
1½ teaspoons vanilla extract
2 tablespoons heavy cream
¼ teaspoon salt
1½ cups mini semi-sweet chocolate chips
Instructions
Preheat the oven to 300°F and line a baking sheet with parchment paper. Evenly spread the flour in a thin layer on the prepared sheet and bake for 5 to 7 minutes, watching closely to ensure it does not brown. Remove from the oven and let it cool completely before using.
While the flour cools, beat the softened butter with both sugars and the vanilla extract in a stand mixer or with a handheld mixer on medium-high speed until the mixture is light and fluffy. Reduce the mixer speed to low, pour in the heavy cream, and mix until fully incorporated.
With the mixer still on low, add the cooled, heat-treated flour in two or three additions along with the salt, mixing just until no streaks of flour remain. Stop before over-mixing to keep the dough tender.
Transfer the dough to a bowl and gently fold in the mini chocolate chips with a wooden spoon until they are evenly distributed. Cover the dough with plastic wrap or a reusable lid and chill in the refrigerator for at least 30 minutes to firm up.
Scoop or slice as desired and serve straight from the bowl, rolled into truffle-size balls, or bake into cookies at 350°F for 8–10 minutes if you’d like a freshly baked treat.
Notes
Heat-treating the flour is essential for safety—if your oven runs hot, reduce the time and keep a close eye to prevent any toasting. For a dairy-free version, substitute vegan butter, plant-based milk or cream, and dairy-free chocolate chips.
To add mix-ins, swap up to ½ cup of the mini chips for chopped nuts, colorful sprinkles, or crushed pretzels. Dough will keep in an airtight container in the refrigerator for up to 5 days or freeze in portions for up to 2 months; simply thaw in the fridge before enjoying.

