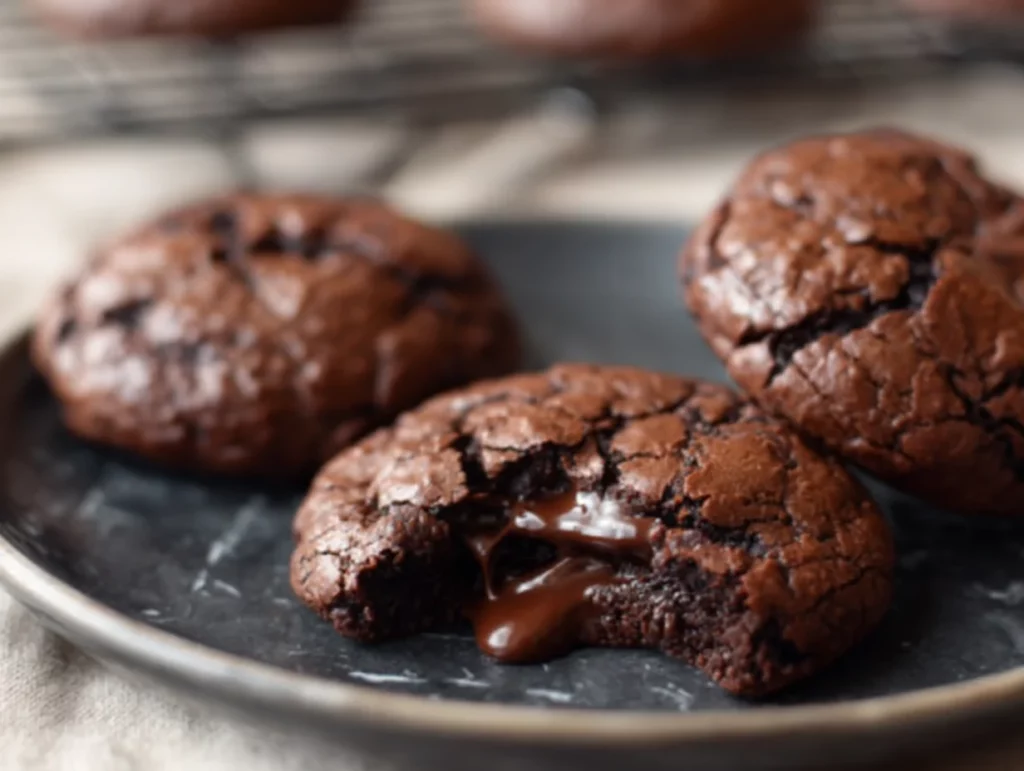
There are few things in life more satisfying than a warm, gooey chocolate dessert—and these Fudgy Chocolate Lava Cookies might just top the list. Imagine the irresistible texture of a lava cake, with its rich, molten center, but in the convenient, hand-held form of a cookie. That’s exactly what you get here: shiny crackly tops, crisp edges, and soft, fudgy middles that ooze warm chocolate the moment you take a bite.
This recipe is one of my go-tos when I need to impress guests without pulling out the mixer or spending an entire afternoon in the kitchen. The prep is quick, the ingredients are simple, and the results? Totally next-level.
Now, I’ll be honest—this recipe came to life after one of those nights where the sweet tooth hits hard, but the energy is low. I didn’t want a full-blown dessert that required chill time or layering or frosting. I just wanted a seriously good chocolate fix, fast. And wow, did these deliver.
The magic really lies in the texture—those crackly tops are thanks to whipping the eggs and sugar, and the molten center? That’s a hidden chocolate chunk baked into the heart of each cookie. It’s like a little surprise in every bite.
Ready to dive in? Let’s get started with the first few steps.
Ingredients You’ll Need
1 cup semi-sweet chocolate chips
2 tablespoons butter
1 teaspoon vanilla extract
2 large eggs
⅔ cup granulated sugar
¼ cup all-purpose flour
2 tablespoons unsweetened cocoa powder
¼ teaspoon baking powder
¼ teaspoon salt
6 chocolate chunks or squares (for the gooey center)
Making the Fudgy Chocolate Cookie Dough
These cookies come together in three simple stages: melting the chocolate, whipping the eggs and sugar, and combining everything to make that thick, glossy dough.
Step 1: Preheat and Prep
Start by preheating your oven to 350°F (175°C). Line a baking sheet with parchment paper to make cleanup a breeze and ensure the cookies don’t stick.
Step 2: Melt Chocolate and Butter
In a heatproof bowl, melt 1 cup of semi-sweet chocolate chips and 2 tablespoons of butter together until smooth. You can do this in the microwave in 20-second bursts, stirring between each, or over a double boiler on the stove. Once melted and silky, set it aside to cool slightly—just for a minute or two—then stir in 1 teaspoon of vanilla extract.
Tip: Letting the mixture cool just a bit keeps the eggs from scrambling in the next step. You want warmth, not heat.

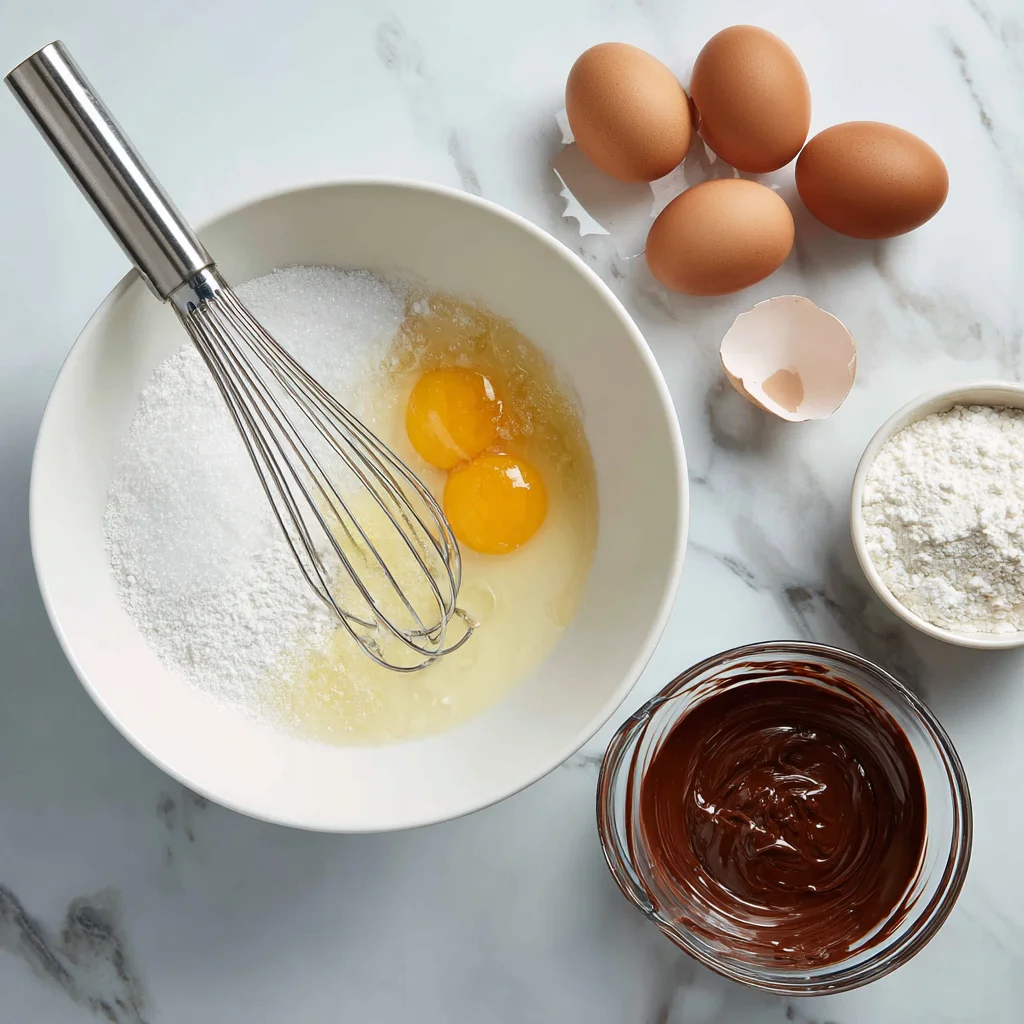
Step 3: Whip Eggs and Sugar
In a separate mixing bowl, whisk together 2 large eggs and ⅔ cup granulated sugar for about 1 to 2 minutes, until the mixture is light, a bit frothy, and slightly thickened. This step is important—it’s what gives the cookies their signature crackly tops and a touch of chew.
Slowly pour in the cooled chocolate mixture and whisk until fully combined. The batter should start to look glossy and smooth, almost like thick brownie batter.
![]()
Step 4: Combine Dry Ingredients
In another small bowl, sift together:
¼ cup all-purpose flour
2 tablespoons unsweetened cocoa powder
¼ teaspoon baking powder
¼ teaspoon salt
Add the dry ingredients to the chocolate mixture and stir until just combined. Don’t overmix—you want to keep the batter thick and rich. The dough should be quite thick at this point, more like a soft scoopable fudge than traditional cookie dough.
If it feels too soft to shape, you can pop it in the fridge for 10–15 minutes to firm up slightly, but usually, it’s ready to go as is.
Fudgy Chocolate Lava Cookies with Gooey Center and Crackly Top
Welcome back! Now that we’ve whipped up our thick, glossy cookie dough packed with melted chocolate and just the right amount of cocoa powder, it’s time for the fun part—stuffing and baking.
This next section is where the magic really happens. By tucking a piece of chocolate into the center of each dough ball, we’re essentially giving each cookie a lava cake-style surprise. Once they hit the oven, that hidden chocolate melts into a rich, gooey center, while the outer edges bake up perfectly crisp with those irresistible crackly tops.
Let’s keep going and get these cookies in the oven.
Step 5: Stuff Each Cookie with Chocolate
Using a medium cookie scoop or a spoon, scoop out even portions of the dough—about 2 tablespoons per cookie. Flatten each portion slightly in your palm (don’t worry if it’s sticky—just work quickly).
Place one chocolate chunk or square in the center of each flattened dough portion. Then, wrap the dough around the chocolate piece, rolling it gently between your hands to seal the chocolate completely inside. You want to make sure no chocolate is peeking out so it stays molten in the middle after baking.
Set each cookie dough ball on your prepared baking sheet, leaving about 2 inches between them. They will spread slightly as they bake.
Pro Tip: If your dough is feeling too soft to roll easily, pop it in the fridge for 10–15 minutes. This helps make shaping easier and also enhances that shiny, crackly top during baking.
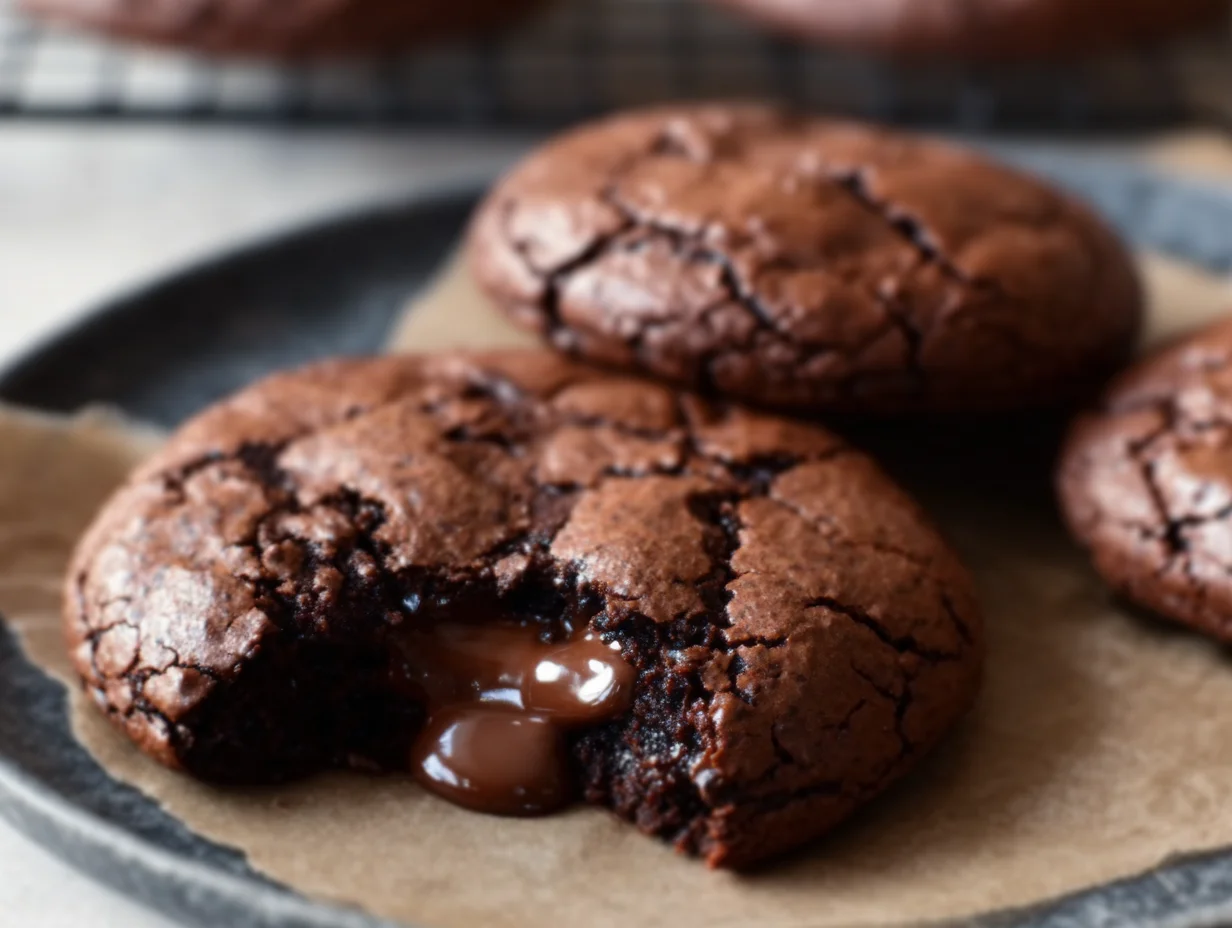
Step 6: Bake to Perfection
Place the tray in your preheated 350°F oven and bake for 9 to 11 minutes.
You’ll know they’re done when the tops look shiny and crackly, but the centers still feel soft when gently touched. That softness is key—it means the center will still be gooey once cooled slightly.
Don’t overbake! These cookies are meant to be soft and fudgy, not firm all the way through.
Once out of the oven, let them rest on the baking sheet for about 5 minutes. This helps them firm up just enough to move without breaking. Then, transfer them to a wire rack to finish cooling—or go ahead and enjoy one warm if you just can’t wait (trust me, no one ever waits).
Tips for the Best Lava Cookies Every Time
Want that professional bakery feel at home? Here are a few tried-and-true tips I always use when baking these lava cookies:
Use high-quality chocolate. Whether it’s the chips in the batter or the chunk in the center, the better the chocolate, the richer the cookie. Look for chocolate around 60–70% cocoa for the perfect balance.
Don’t skip the egg whipping step. This isn’t just busy work—it’s how you get that shiny top and slightly chewy texture. One to two minutes of whisking makes a big difference.
Chill the dough if needed. Especially if your kitchen runs warm, even 10 minutes in the fridge can help the dough firm up enough to roll and bake evenly.
Double the batch. This recipe makes about 6 cookies—but trust me, they go fast. The dough doubles easily and can be kept in the fridge for up to 24 hours before baking.
For a dessert upgrade, serve warm with vanilla ice cream. You’ll get that hot-cold contrast that makes this dessert feel downright fancy with almost no extra effort.
Easy Variations to Try
One of the best things about this recipe is how adaptable it is. If you’re feeling creative (or want to cater to different tastes), here are a few ideas to change things up:
Peanut Butter Lava Cookies: Use a small spoonful of peanut butter instead of chocolate in the center. It adds a salty-sweet twist that’s totally addictive.
Salted Caramel Center: Swap the chocolate chunk for a soft caramel candy and sprinkle a bit of flaky salt on top before baking.
Espresso Infused: Add ½ teaspoon of instant espresso powder to the dry ingredients for a mocha flavor that deepens the chocolate.
Mint Chocolate: Use dark chocolate mint squares in the center for a refreshing after-dinner version.
These tweaks are super simple, and each one brings a slightly different flavor profile to the cookie. But honestly? The classic version is hard to beat.
Fudgy Chocolate Lava Cookies with Gooey Center and Crackly Top
We’ve melted, whisked, baked, and (hopefully) snuck a warm cookie straight from the tray. But before you wrap things up and head to the kitchen to make your own batch, let’s take a quick look at some common questions that pop up when making these Fudgy Chocolate Lava Cookies.
Whether you’re planning to serve them right away or prepping ahead for a party, these tips will help you nail it every time.
Frequently Asked Questions
1. Can I make the dough ahead of time?
Yes! The dough can be made ahead and chilled for up to 24 hours in the fridge. In fact, chilling the dough enhances the flavor and helps create that beautiful crackly top. Just let it sit at room temperature for 10–15 minutes before shaping if it becomes too firm.
2. What kind of chocolate works best for the center?
Look for chocolate chunks or squares that melt well—like baking chocolate or a good-quality chocolate bar cut into pieces. Avoid chocolate chips for the center, as they’re made to hold their shape and won’t give you that lava-like melt.
3. How should I store these cookies?
Once cooled, store the cookies in an airtight container at room temperature for up to 3 days. To get that gooey center back, just pop one in the microwave for 10 to 15 seconds before eating.
4. Can I freeze the cookie dough?
Absolutely. You can shape the dough balls (with the chocolate inside), then freeze them on a tray. Once solid, transfer them to a zip-top bag and freeze for up to 2 months. When ready to bake, let them sit at room temperature while the oven preheats, and add an extra 1–2 minutes to the bake time.
5. Can I make these cookies gluten-free?
Yes, just substitute the all-purpose flour with your favorite 1:1 gluten-free baking flour. The texture may vary slightly, but the cookies will still be delicious and gooey.
6. Why didn’t my cookies have a shiny top?
The crackly, shiny top comes from whipping the eggs and sugar properly. Be sure to whisk them for 1–2 minutes until they’re light and slightly thick before adding the melted chocolate mixture.
7. Can I make mini versions of these cookies?
Definitely! Just use smaller portions of dough and mini chocolate pieces. Reduce the baking time to 6–8 minutes, keeping an eye on them so they stay fudgy in the middle.
Final Thoughts: A Cookie Worth the Craving
If you’ve made it this far, you’re clearly as big a fan of chocolate as I am. These Fudgy Chocolate Lava Cookies check all the boxes—crispy edges, shiny tops, rich flavor, and that perfectly gooey center that makes every bite feel like a little celebration.
They’re easy enough for a weeknight treat but special enough to serve at a dinner party. And honestly? Watching someone take their first bite and see that molten chocolate center ooze out never gets old.
So go ahead—make a batch, pour yourself a cold glass of milk (or hot coffee), and enjoy every fudgy bite. And if you try any fun variations or serving ideas, I’d love to hear about them! Leave a comment and let me know how they turned out.
Print
Fudgy Chocolate Lava Cookies with Gooey Center and Crackly Top
- Author: Andrew Recipes
Description
These Fudgy Chocolate Lava Cookies are a chocolate lover’s dream—crispy on the edges with a shiny, crackly top and a rich, molten center that oozes with every bite. They bring the indulgence of a lava cake into cookie form, making them perfect for satisfying sweet cravings or impressing guests with minimal effort.
Ingredients
1 cup semi-sweet chocolate chips
2 tablespoons butter
1 teaspoon vanilla extract
2 large eggs
⅔ cup granulated sugar
¼ cup all-purpose flour
2 tablespoons unsweetened cocoa powder
¼ teaspoon baking powder
¼ teaspoon salt
6 chocolate chunks or squares (for the gooey center)
Instructions
1 Preheat the oven to 350°F and line a baking sheet with parchment paper. In a heatproof bowl, melt the chocolate chips and butter together until smooth. Let cool slightly, then stir in the vanilla.
2 In a separate bowl, whisk the eggs and sugar for about 1 to 2 minutes until light and slightly thickened. Slowly pour in the melted chocolate mixture and whisk to combine.
3 In another bowl, sift together the flour, cocoa powder, baking powder, and salt. Add the dry ingredients to the wet mixture and stir just until combined. The batter will be thick and glossy.
4 Scoop out portions of dough and flatten slightly. Place one chocolate chunk in the center of each, then wrap the dough around it to seal. Place the cookie balls on the prepared baking sheet, spacing them a couple of inches apart.
5 Bake for 9 to 11 minutes until the tops are crackly and shiny but the centers are still soft. Remove from the oven and let the cookies rest on the baking sheet for 5 minutes before transferring to a wire rack.
Notes
These cookies are best enjoyed warm when the center is at its gooey peak. For a fresh-out-of-the-oven effect later, microwave for 10 to 15 seconds. Use high-quality chocolate for the best flavor and texture. The dough can be chilled for up to 24 hours before baking, which helps deepen the flavor and enhance the crackly top. For an extra touch, serve with a scoop of vanilla ice cream or a dusting of powdered sugar.

