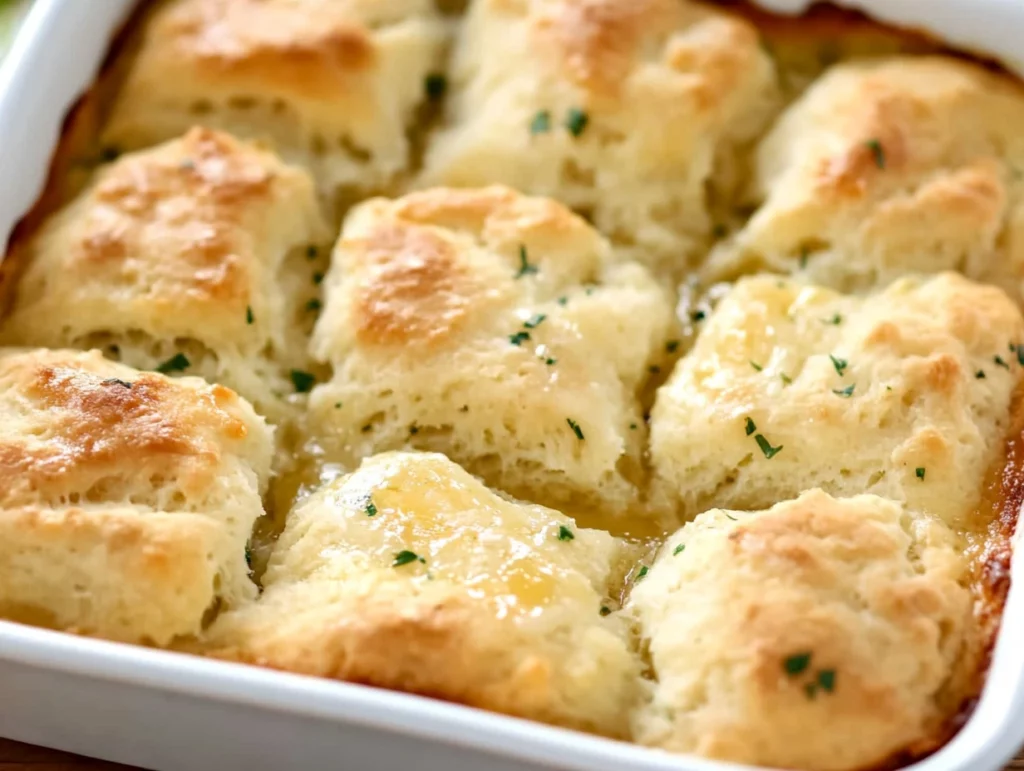
There’s something so undeniably comforting about a buttery, golden biscuit straight from the oven. And when that biscuit has been baked in a pool of melted garlic butter? Well, you know you’re in for something truly special.
These Garlic Butter Swim Biscuits have earned a permanent spot in my recipe rotation, and honestly, it only took one bite to understand why. They’re soft and fluffy on the inside, have perfectly crisp edges, and each piece is soaked in garlicky, buttery goodness. I served them once with a big bowl of creamy tomato soup, and my family basically forgot the soup existed—they were all about these biscuits.
Even better? They come together with simple pantry ingredients, and there’s no rolling, no biscuit cutters, and definitely no fuss. You just mix the dough, pour it into a pool of melted butter, and let your oven work its magic.
If you’ve never tried “swim biscuits” before, get ready—this recipe might just change how you feel about homemade biscuits forever.
Let’s jump into the first steps of this easy, satisfying recipe.
Ingredients You’ll Need
For the Biscuits:
2 ½ cups all-purpose flour
1 tablespoon granulated sugar
1 tablespoon aluminum-free baking powder
2 teaspoons salt
2 teaspoons garlic powder
1 ¾ cups buttermilk (up to 2 cups as needed)
4 cloves garlic, finely minced
½ cup (1 stick) salted butter
For the Garlic Butter Topping:
¼ cup salted butter, melted
1 teaspoon dried parsley flakes
½ teaspoon garlic powder
STEP-BY-STEP INSTRUCTIONS
Step 1: Preheat and Prep Your Pan
Start by preheating your oven to 450°F. You’ll want it nice and hot to get that crisp, golden crust. Spray a 9×9 inch glass or ceramic baking dish with nonstick cooking spray. This keeps the biscuits from sticking—though the butter helps with that too.

Step 2: Mix Your Dry Ingredients
In a medium mixing bowl, combine the flour, sugar, baking powder, salt, and garlic powder. Give it a good stir to evenly distribute everything. Don’t skip the garlic powder here—it’s part of what gives these biscuits that deep, savory flavor.
Step 3: Add the Buttermilk and Garlic
Next, stir in the buttermilk and the minced garlic. The mixture should come together into a thick, sticky dough. If it feels a bit dry, don’t hesitate to splash in a little more buttermilk—up to 2 full cups total. The dough should be soft but not runny.
Tip: Buttermilk gives these biscuits their signature tang and tenderness, so try not to substitute unless absolutely necessary. If you’re in a pinch, a mix of milk with a tablespoon of lemon juice or vinegar can stand in.

Step 4: Melt the Butter
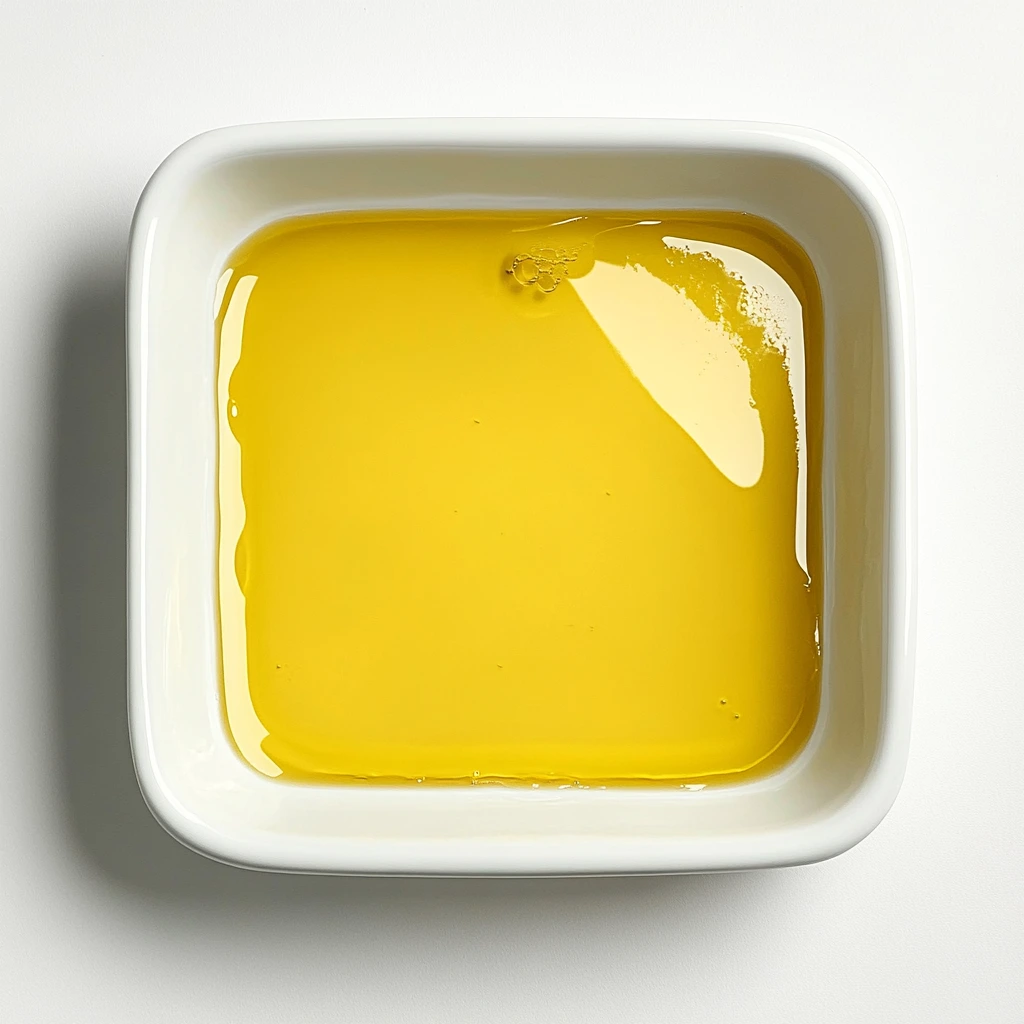
Now melt your stick of butter (that’s ½ cup) in a microwave-safe dish. Once fully melted, pour it straight into the bottom of your prepared baking dish. This is what makes them “swim” biscuits—the dough bakes in that golden puddle, and it’s every bit as amazing as it sounds.
Step 5: Add the Dough to the Dish
Spoon the biscuit batter into the baking dish, right on top of the melted butter. Use a spatula or your (clean) hand to gently spread it out evenly. The dough will be sticky, so spraying your hand with a little nonstick spray can really help smooth things over without a mess.
Garlic Butter Swim Biscuits: Crispy, Buttery Edges with a Tender Center
Welcome back! Now that your biscuit dough is nestled into that golden pool of butter, it’s time for the magic to happen in the oven. This next part is where everything comes together—the crispy, golden tops, the tender, buttery layers inside, and that final brushed-on garlic butter that seals the deal.
One thing I love about this recipe is how low-effort, high-reward it is. You don’t need to chill the dough or worry about layering butter like with traditional biscuits. The melted butter on the bottom creates that signature “fried-like” crisp edge, while the buttermilk and garlic work together to give you a soft, rich bite every time.
Let’s get those biscuits baking!
Step 6: Score the Dough
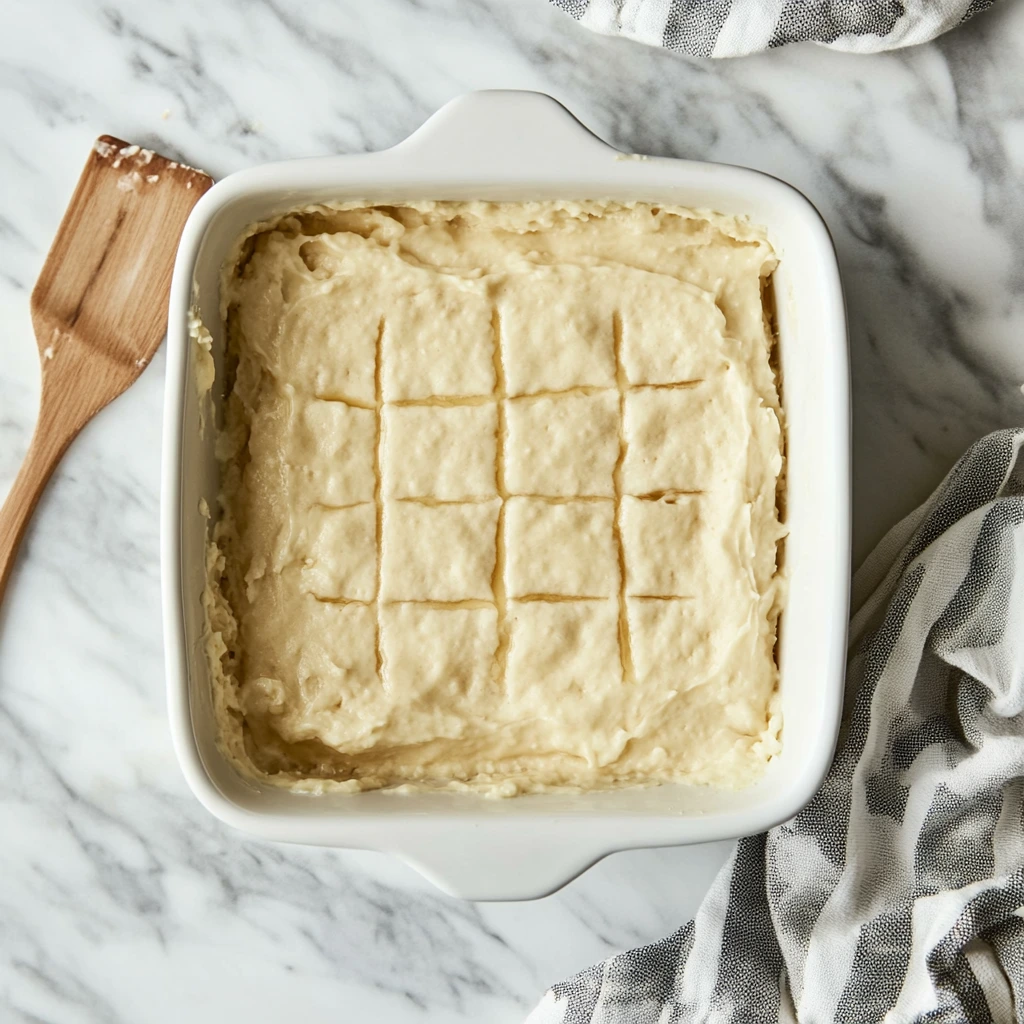
Before baking, use a knife to gently score the dough into 9 squares. This makes it easier to cut later and helps the biscuits bake evenly. You don’t need to cut all the way through—just enough to outline the portions.
Scoring now gives you that rustic, pull-apart look once they’re done baking. It’s a simple step that makes a big difference in presentation and ease.
Step 7: Bake Until Golden and Set
Slide your dish onto the middle rack of the oven and bake for 25 to 30 minutes. I recommend rotating the dish halfway through to ensure even browning. Your kitchen will start to smell incredible—like a cross between garlic bread and a biscuit bakery.
The tops should turn a lovely golden brown, and the edges will get nice and crispy thanks to the butter. Press lightly on the center—if it springs back, you’re good to go. A toothpick inserted into the middle should come out clean, without any raw dough sticking to it.
Tip: If the tops are browning too quickly before the centers are fully baked, loosely tent the dish with foil during the last 5-10 minutes. This helps them cook through without over-browning.
Step 8: Make the Garlic Butter Topping
While your biscuits are finishing up in the oven, go ahead and prepare that simple—but super flavorful—butter topping.
In a small bowl, melt the ¼ cup of salted butter. Stir in 1 teaspoon of dried parsley flakes and ½ teaspoon of garlic powder. That’s it! It’s an easy add-on, but this step really takes things up a notch in terms of flavor and looks.
Step 9: Brush and Serve
Once your biscuits are baked and still warm, take a pastry brush and coat the tops with your garlic butter mixture. Don’t be shy—let the butter soak into those crispy tops. The dried parsley adds a little color and the garlic powder adds a last layer of savoriness that makes these biscuits irresistible.
Now cut along those scored lines and serve them warm. The bottoms will have that crispy, buttery texture (thanks to the “swimming” method), while the centers are tender and fluffy.
Tips & Variations
Add Cheese: Mix ½ to 1 cup of shredded cheddar or parmesan into the dough for cheesy garlic biscuits. It’s a crowd favorite every time.
Roasted Garlic Option: If you’re a garlic lover, try swapping out the raw minced garlic with a few cloves of roasted garlic. Mash it up and stir it into the batter for a deeper, richer flavor.
Spicy Twist: Add a pinch of red pepper flakes to the topping butter for a little kick.
Make It a Meal: These are fantastic with soups like creamy tomato, potato leek, or chicken and wild rice. They also make an amazing side with fried chicken or pork chops.
These biscuits aren’t just a side dish—they’re a conversation starter. I’ve made them for holidays, family dinners, and even as a snack with a slab of butter and a drizzle of honey. However you serve them, they never last long.
Garlic Butter Swim Biscuits: Your Go-To Side for Every Comfort Meal
If you’ve followed along so far, your kitchen should now smell amazing, and your biscuits should be cooling slightly, ready to serve. These garlic butter swim biscuits are one of those simple pleasures that hit the table warm and never make it back to the kitchen. Whether it’s a cozy weeknight dinner or a special occasion, they fit right in—and steal the show.
Before we wrap up, I want to answer a few common questions that might pop up as you’re making these biscuits, especially if it’s your first time baking anything “swimming” in butter.

FREQUENTLY ASKED QUESTIONS
1. Can I use unsalted butter instead of salted butter?
Absolutely. If you’re using unsalted butter, you might want to add a small pinch of salt to the melted butter in the dish and the topping, just to balance the flavor. The salted butter does give the biscuits a richer, more seasoned taste, but it’s an easy adjustment.
2. What if I don’t have buttermilk?
You can make a quick buttermilk substitute by adding 1 tablespoon of white vinegar or lemon juice to a measuring cup, then filling it with milk until you reach 1 ¾ or 2 cups. Let it sit for 5–10 minutes before using. It’s not exactly the same, but it works in a pinch.
3. Can I use garlic powder instead of fresh garlic in the batter?
Yes, you can. If you don’t have fresh garlic on hand, add an extra ½ teaspoon of garlic powder to the dry ingredients. The fresh garlic adds texture and deeper flavor, but garlic powder still gives you that classic taste.
4. How do I store leftover biscuits?
Store any leftovers in an airtight container at room temperature for up to 2 days, or refrigerate them for up to 4 days. Reheat them in the oven or toaster oven to revive that crispy bottom. Microwaving is fine too, but you’ll lose the texture a bit.
5. Can I freeze these biscuits?
Yes! Once cooled completely, wrap the biscuits individually or place them in a freezer-safe bag. Freeze for up to 2 months. Reheat them directly from frozen in a 350°F oven for about 10–12 minutes, or until warmed through.
6. Why are they called “swim” biscuits?
The term comes from the way the biscuit dough is poured directly into melted butter—almost as if the biscuits are “swimming” in it while baking. This technique creates an incredibly crispy crust on the outside and soft, fluffy insides.
7. Can I make this recipe in a different pan size?
You can use an 8×8 dish if that’s what you have on hand, but the biscuits will be a little taller and may need a couple of extra minutes in the oven. You could also double the recipe for a 9×13 pan—just keep an eye on the baking time and rotate the pan if needed.
Final Thoughts: Why You’ll Keep Coming Back to This Recipe
These garlic butter swim biscuits are more than just a side dish—they’re a comfort food staple. They’ve got everything you want in a biscuit: buttery richness, bold garlic flavor, and a perfectly soft center with just the right amount of crisp around the edges.
They’re also incredibly forgiving. Don’t have buttermilk? Sub it. No fresh garlic? Use powder. Want to add cheese or herbs? Go for it. This is one of those recipes you can truly make your own.
I love baking these on Sunday afternoons with a pot of soup simmering on the stove. They come out of the oven golden and bubbling, and before they even hit the table, someone’s already sneaking a piece from the pan. That’s when you know you’ve got a keeper.
If you try these biscuits, I’d love to hear how they turned out for you. Did you tweak anything? Serve them with something special? Leave a comment and let me know—these are the kind of recipes that get even better when shared.
Print
Garlic Butter Swim Biscuits
- Author: Andrew Recipes
Description
These Garlic Butter Swim Biscuits are rich, fluffy, and soaked in savory garlic butter, making them irresistibly golden and flavorful. Baked in a pool of butter, they develop a crispy edge and a tender, buttery interior. Perfect as a side for soups, stews, or on their own as a comforting snack.
Ingredients
For the biscuits:
2 ½ cups all-purpose flour
1 tablespoon granulated sugar
1 tablespoon aluminum-free baking powder
2 teaspoons salt
2 teaspoons garlic powder
1 ¾ cups buttermilk (up to 2 cups as needed)
4 cloves garlic, finely minced
½ cup (1 stick) salted butter
For the garlic butter topping:
¼ cup salted butter, melted
1 teaspoon dried parsley flakes
½ teaspoon garlic powder
Instructions
1️⃣ Preheat the oven to 450°F and spray a 9×9 inch glass or ceramic baking dish with nonstick cooking spray.
2️⃣ In a medium bowl, mix together the flour, sugar, baking powder, salt, and garlic powder until well combined.
3️⃣ Add the buttermilk and minced garlic to the dry ingredients. Stir until a thick, sticky batter forms. Add a bit more buttermilk if the batter appears too dry.
4️⃣ Melt the butter in a microwave-safe bowl, then pour it into the prepared baking dish.
5️⃣ Pour the biscuit batter directly into the dish, over the melted butter. Gently spread the dough evenly; spraying your hand with nonstick spray helps with this.
6️⃣ Score the dough into 9 squares using a knife. This will make it easier to cut once baked.
7️⃣ Bake on the middle rack for 25–30 minutes, rotating the dish halfway through. The biscuits should be golden on top and spring back when touched. Insert a toothpick to ensure they’re baked through—it should come out clean.
8️⃣ While the biscuits bake, mix the melted butter, parsley flakes, and garlic powder for the topping.
9️⃣ Once the biscuits are done and still warm, brush the garlic butter topping over them. Cut along the scored lines and serve warm.
Notes
For extra garlic flavor, you can increase the garlic powder or add roasted garlic to the batter. These biscuits pair wonderfully with chili, creamy soups, or fried chicken. They’re best served fresh but can be reheated in the oven to revive their crisp edges.

