
There’s something so comforting about pizza—cheesy, saucy, and endlessly customizable. But sometimes, you want all that goodness in a handheld version that’s quick to make and even easier to eat. Enter: Homemade Easy Cheesy Pizza Pockets. These little pockets are golden and crisp on the outside, gooey and savory on the inside, and they hit the spot whether it’s dinner time, snack time, or game day.
I’ve been making these for a while now, and they’ve definitely earned their spot on our go-to recipe list. What I love most? You can whip them up with just a few ingredients you probably already have in the fridge. And they’re totally customizable—perfect for picky eaters or cleaning out leftover veggies and meats. One batch of these and suddenly you’re the weeknight dinner hero.
Whether you’re feeding a crowd of hungry kids, hosting a casual get-together, or just craving something comforting and cheesy, this recipe delivers. Plus, it’s way more satisfying (and dare I say, tastier) than the frozen kind from the store.
Let’s dive in!
Ingredients You’ll Need
Here’s what you’ll need to pull together a batch of these cheesy pizza pockets:
For the Dough:
1 can (13.8 oz) refrigerated pizza dough (or your favorite homemade pizza dough)
For the Filling:
¾ cup pizza sauce
1½ cups shredded mozzarella cheese
½ cup mini pepperoni or diced regular pepperoni (optional)
¼ cup Parmesan cheese (optional)
1 tsp Italian seasoning
For Finishing:
1 tbsp olive oil or melted butter (for brushing the tops)
Optional Add-ins:
Cooked sausage
Bell peppers
Mushrooms
Olives
You can totally make this recipe your own—swap in cooked bacon, use cheddar instead of mozzarella, or go full veggie if that’s your thing. The base is super forgiving and works with whatever you’ve got on hand.
STEPS: Let’s Get Cooking!
Step 1: Prep Your Oven and Baking Sheet
Start by preheating your oven to 400°F (200°C). Line a baking sheet with parchment paper so nothing sticks and cleanup is a breeze.

Step 2: Roll Out the Dough
Grab your refrigerated pizza dough and roll it out on a lightly floured surface. Try to shape it into a rectangle. Once it’s rolled out evenly, use a sharp knife or pizza cutter to slice the dough into 8 equal squares or rectangles. You can make them larger or smaller depending on how big you want your pockets.
Step 3: Add the Filling
Now for the fun part—filling them up! On one side of each rectangle:
Spoon about 1 tablespoon of pizza sauce.
Add a generous handful of mozzarella cheese (go ahead, no one’s judging).
Add a few mini pepperonis, or your choice of fillings like sautéed mushrooms or cooked sausage.
Sprinkle with a little Parmesan cheese and Italian seasoning for an extra flavor boost.
Keep the fillings on one half of the dough so it’s easy to fold over and seal.
Step 4: Fold and Seal
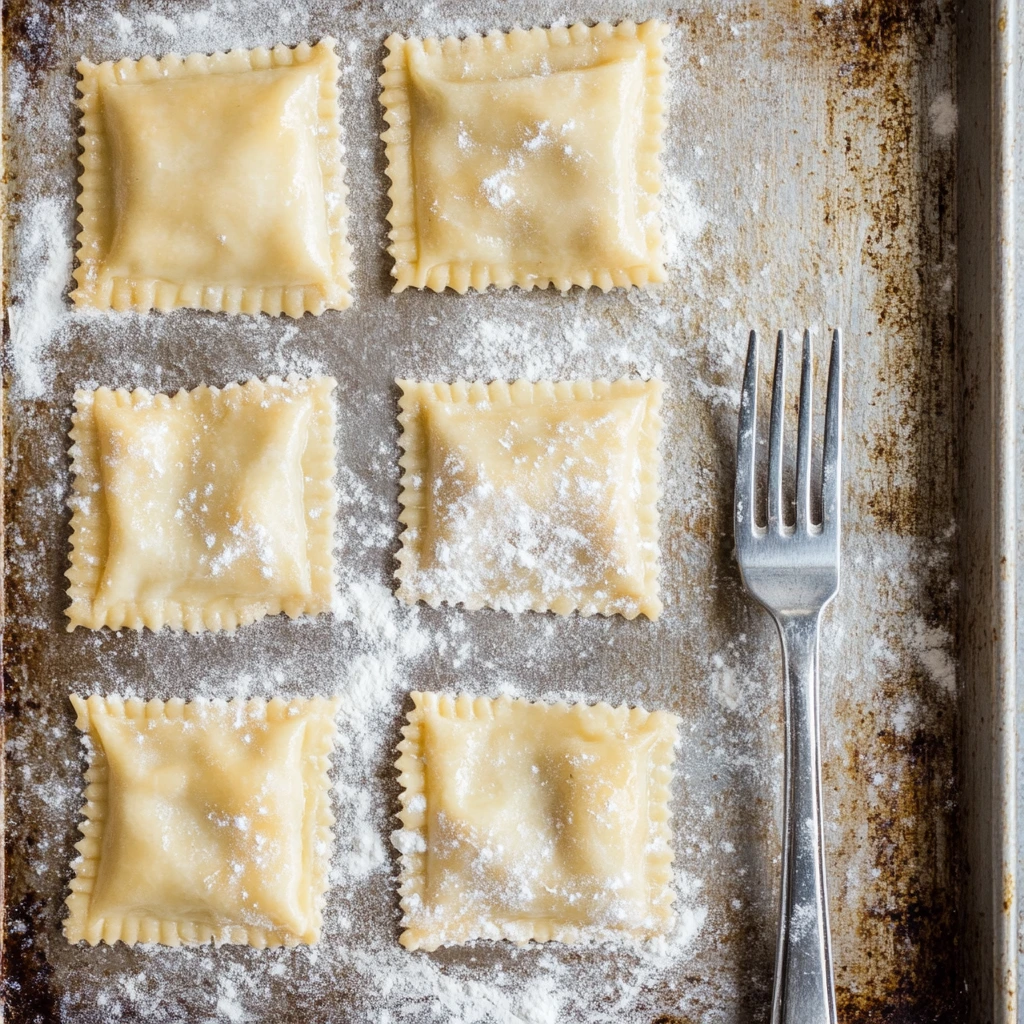
Carefully fold the dough over the filling to create a pocket shape. Use a fork to crimp the edges shut—this helps seal everything inside and gives it that classic pizza pocket look. If any sauce leaks out, just wipe it away and keep going. It doesn’t need to be perfect to be delicious.
Homemade Easy Cheesy Pizza Pockets: Bake, Serve & Customize Like a Pro
Now that we’ve prepped and filled our pizza pockets, it’s time to get them golden and crispy in the oven. This is where the magic happens! That buttery, flaky crust pairs perfectly with the melted cheese and flavorful fillings inside. You’re just a few simple steps away from a warm, homemade snack that rivals any frozen version.
What I love most about this part is how versatile it can be—add a little cheese on top, play around with different spices, or even brush with garlic butter for a garlicky twist. These pockets can be as simple or as loaded as you like, depending on your mood and what you’ve got in the fridge.
Let’s get baking!
Step 5: Brush with Butter or Olive Oil
Before sliding your pockets into the oven, brush the tops with olive oil or melted butter. This helps them bake up golden brown and gives them that irresistible sheen.
If you’re feeling fancy, sprinkle a little extra Parmesan cheese or Italian seasoning on top. Even a bit of garlic powder adds a nice punch of flavor and makes your kitchen smell amazing while they bake.
Step 6: Bake Until Golden
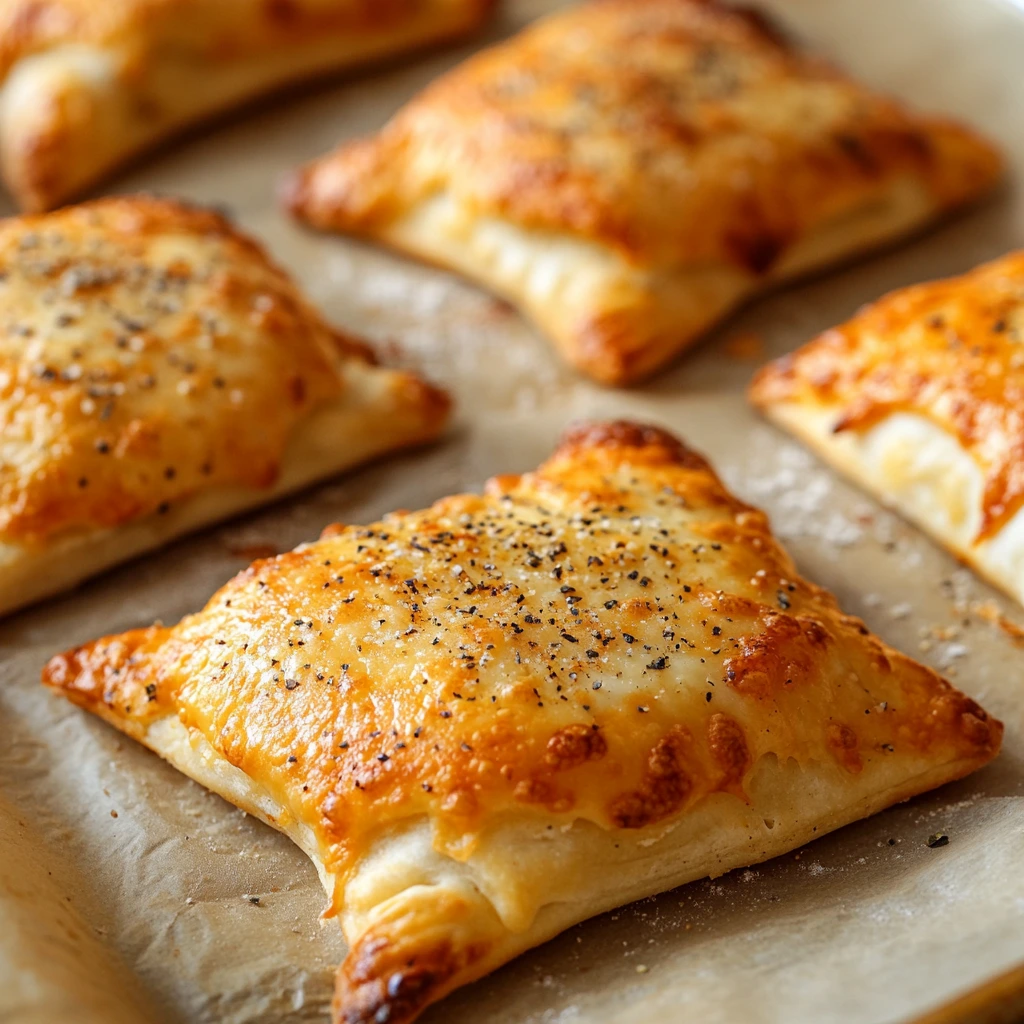
Pop the tray into your preheated oven and bake at 400°F (200°C) for 15–18 minutes, or until the pockets are beautifully golden and crisp on the outside.
Keep an eye on them toward the end of the baking time. Every oven is a little different, and you want them to be lightly browned and fully cooked but not too dark.
Step 7: Let Cool Before Serving
Once they’re out of the oven, let them cool on the baking sheet for about 5 minutes before serving. This helps the filling set up a bit so you don’t burn your mouth with molten cheese (yes, I’ve made that mistake more than once).
Serve them as-is or with a side of extra pizza sauce for dipping. Ranch dressing or marinara also work great as dipping sauces, especially for kids who like options.
Tips for Perfect Pizza Pockets Every Time
Making these is super easy, but here are a few little tricks I’ve picked up along the way to make sure they turn out just right every single time:
Don’t Overfill: It’s tempting to stuff them full of toppings, but too much can make them hard to seal and lead to leaks during baking. Stick to a modest amount—you’ll still get all the flavor!
Use Cold Dough: If you’re working with homemade dough, keep it slightly chilled when shaping. Warm dough gets sticky and tough to handle.
Seal the Edges Well: A fork is your best friend here. Crimp the edges tightly so the filling stays where it belongs.
Customize Away: These are a great way to use up leftovers. Leftover roasted veggies? Cooked bacon? Some spinach? Throw it in! Just make sure any wet ingredients are well-drained so your dough doesn’t get soggy.
Make Ahead and Freeze: These freeze beautifully! After baking, let them cool completely, then wrap individually in foil or plastic wrap and freeze. To reheat, pop them in the oven or air fryer until heated through—no need to thaw.
Flavor Variations to Try
These pizza pockets are a total blank canvas. Here are some of our favorite combinations to switch things up:
Meat Lovers: Pepperoni, sausage, bacon, and mozzarella
Veggie Delight: Mushrooms, bell peppers, black olives, and onions
BBQ Chicken: Shredded chicken, BBQ sauce, red onion, and cheddar cheese
Spinach Alfredo: Chopped spinach, alfredo sauce, and mozzarella
Breakfast Pockets: Scrambled eggs, cheese, and cooked bacon or sausage
And if you’ve got kids helping in the kitchen, let them each fill their own pocket—it’s a fun way to get everyone involved and excited about dinner.
Homemade Easy Cheesy Pizza Pockets: FAQs and Final Thoughts
Alright, we’ve rolled, stuffed, sealed, and baked our way to cheesy, golden perfection. Whether you’re serving these for a casual dinner, prepping ahead for freezer meals, or just looking for something fun and delicious, these homemade pizza pockets are a clear winner.
Before we wrap things up, let’s go through a few of the most frequently asked questions. These are the ones I get the most from friends and family when I share this recipe, and they’ll help make sure your pizza pocket experience is just as easy and satisfying as it should be.

FAQs About Homemade Pizza Pockets
1. Can I freeze pizza pockets for later?
Absolutely! Let them cool completely after baking, then wrap each one individually in foil or plastic wrap. Store them in a freezer-safe bag or container for up to 2 months. When you’re ready to eat, reheat in a 375°F oven or air fryer for about 10–15 minutes, or until hot and crisp.
2. Can I use homemade dough instead of store-bought?
Yes, definitely. If you have a favorite pizza dough recipe, go for it! Just make sure to roll it out evenly and avoid making it too thick, so it bakes up crisp and not doughy.
3. What other cheeses work besides mozzarella?
Mozzarella melts beautifully, but you can mix it up! Try provolone, cheddar, gouda, or even a blend of Italian cheeses. Just make sure it’s a good melting cheese for that perfect gooey center.
4. How do I prevent them from getting soggy?
A few tips: Don’t overdo the sauce, and make sure any vegetables or meats you add are cooked and well-drained. If your fillings are watery, the crust can turn soggy. Baking on parchment paper helps too!
5. Can I make these gluten-free?
Yes! Just swap the dough for your favorite gluten-free pizza dough. The rest of the ingredients are typically gluten-free, but double-check labels—especially on pepperoni and sauces—to be safe.
6. Are these good for kids’ lunchboxes?
They’re perfect! Just bake, cool, and store in the fridge. You can reheat them in the morning or send them cold—they taste great either way. Pack with a side of sauce for dipping and a few carrot sticks, and you’ve got a lunch kids actually look forward to.
7. What’s the best way to reheat leftovers?
If you’re not freezing them, you can store leftovers in the fridge for up to 3 days. Reheat in a toaster oven or air fryer for the best texture. A microwave works in a pinch, but the crust won’t stay as crisp.
Final Thoughts: Why You’ll Love These Again and Again
There’s just something so satisfying about homemade pizza pockets. They’re comforting, customizable, and surprisingly easy to pull off, even on busy weeknights. You can keep it simple with cheese and pepperoni or go all out with fun, creative fillings. And the best part? Everyone gets their own little pocket of goodness.
In our house, these have become a staple for Friday movie nights, quick lunches, and even breakfast variations (hello, scrambled egg and sausage pockets). I love that they’re freezer-friendly and totally adaptable to what we have in the fridge. It’s the kind of recipe you’ll keep coming back to because it just works.
Print
Homemade Easy Cheesy Pizza Pockets
- Author: Andrew Recipes
Description
These homemade pizza pockets are a delicious, fun-to-make alternative to store-bought snacks. Stuffed with gooey cheese, savory sauce, and your favorite toppings, they bake up golden and crisp in just minutes. Perfect for quick dinners, game-day snacks, or a kid-friendly treat.
Ingredients
Dough
1 can (13.8 oz) refrigerated pizza dough (or homemade dough)
Filling
¾ cup pizza sauce
1½ cups shredded mozzarella cheese
½ cup mini pepperoni or diced regular pepperoni (optional)
¼ cup Parmesan cheese (optional)
1 tsp Italian seasoning
Finishing
1 tbsp olive oil or melted butter (for brushing)
Optional Fillings
Cooked sausage
Bell peppers
Mushrooms
Olives
Instructions
Preheat oven to 400°F (200°C). Line a baking sheet with parchment paper.
Roll out pizza dough on a lightly floured surface and cut into 8 rectangles or squares.
Add fillings to one side of each dough piece: Spread 1 tbsp of pizza sauce, add a generous sprinkle of mozzarella and any other toppings. Sprinkle with a bit of Parmesan and Italian seasoning.
Fold dough over to form a pocket and crimp the edges with a fork to seal.
Brush tops with olive oil or butter. Sprinkle with a little extra seasoning or cheese if desired.
Bake for 15–18 minutes, or until golden brown and crisp.
Let cool for a few minutes before serving. Serve with extra pizza sauce for dipping.
Notes
You can customize the filling based on what you have on hand—these pockets are great for using up leftover ingredients. They also freeze well; just cool completely, then wrap and store. Reheat in the oven or air fryer for best results.

