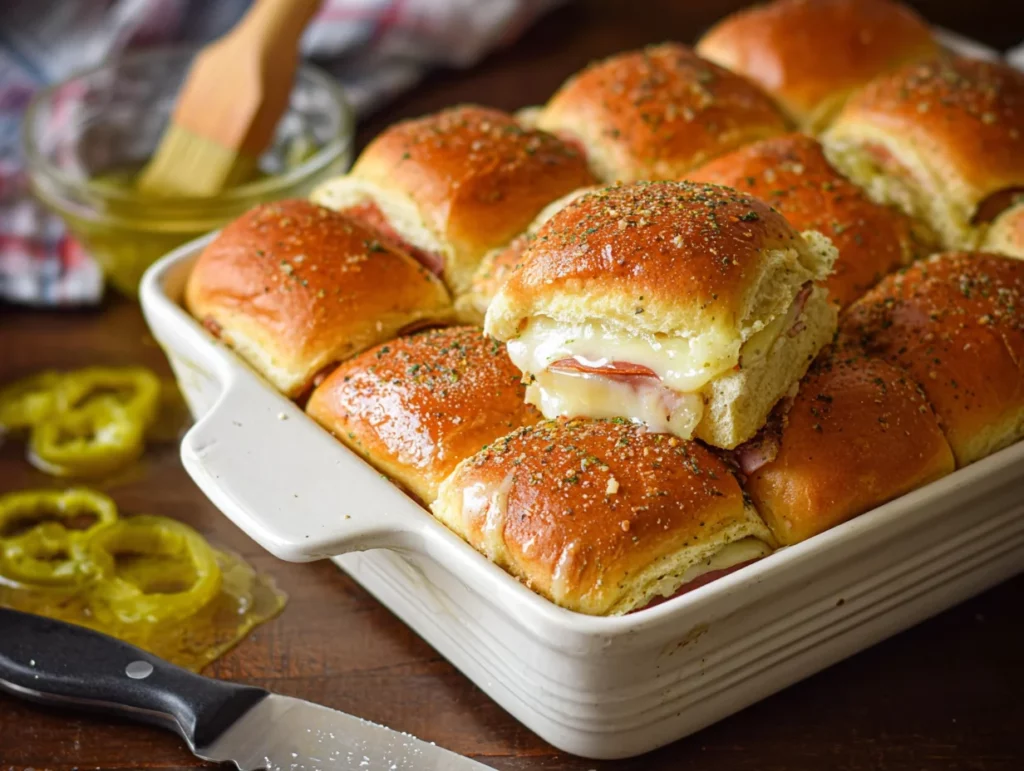
There’s something magical about sliders—those little bites of comfort that somehow pack all the flavor of a full-sized sandwich into a couple of handheld bites. And when you take a beloved deli classic like a Hot Italian Sub and turn it into a gooey, oven-baked slider? Game over.
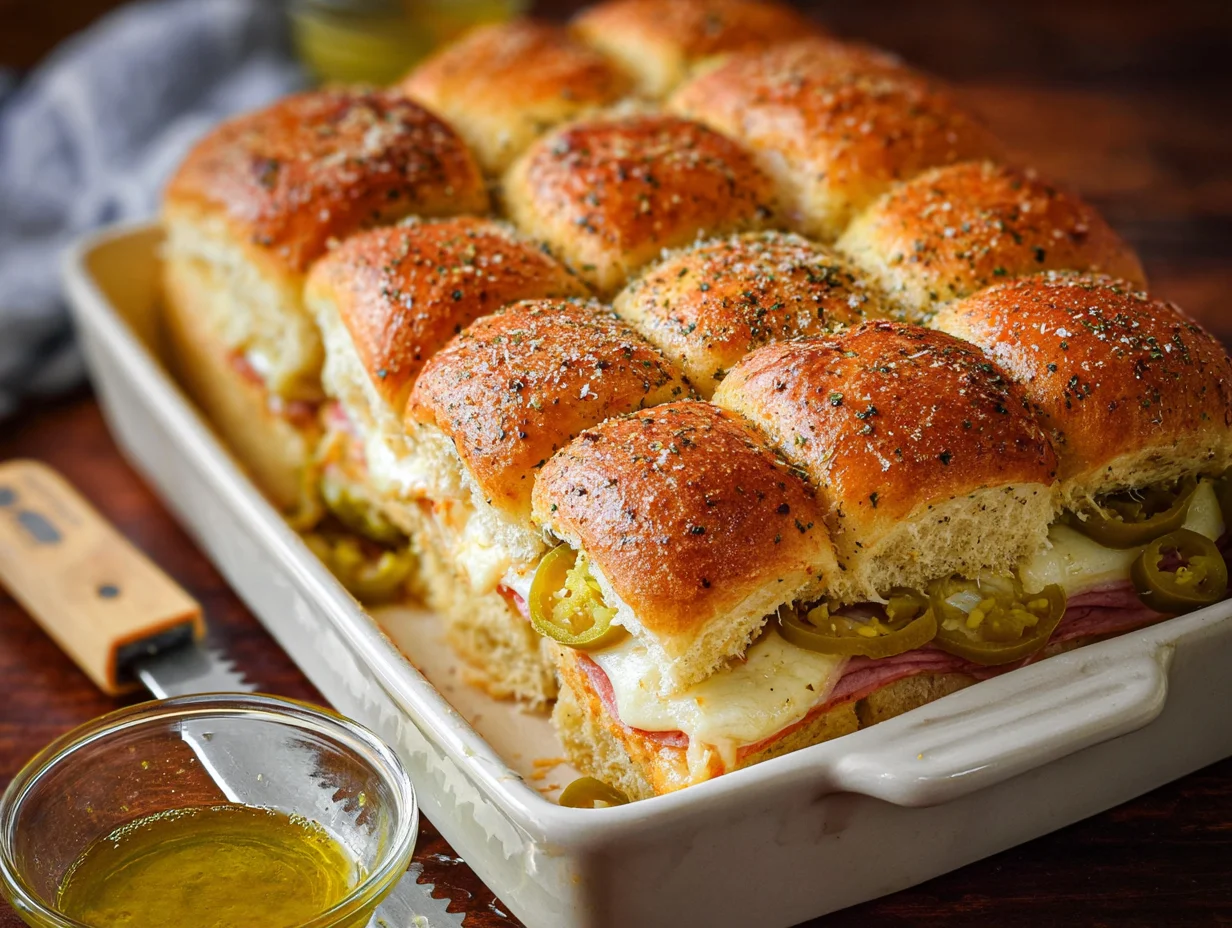
These Hot Italian Sub Sliders are everything you love about a classic Italian sandwich—savory deli meats, melty provolone, tangy banana peppers—layered inside buttery, soft rolls and baked to golden, cheesy perfection. They’re easy to prep, totally customizable, and perfect for everything from game day snacking to laid-back weeknight dinners.
I’ve made these sliders more times than I can count—mostly for parties, but also for those nights when the family is craving something warm, hearty, and a little indulgent. The best part? They’re ready in just about 30 minutes from start to finish. Whether you’re feeding a crowd or just want something cozy and quick, these sliders never disappoint.
Let’s jump into the recipe and get those ovens preheated!
Ingredients You’ll Need
Here’s everything you’ll need to make a batch of these crowd-pleasing sliders:
For the Sliders:
12 slider rolls or Hawaiian rolls
¼ cup mayonnaise
¼ cup Dijon mustard
6 slices Genoa salami
6 slices deli ham
6 slices pepperoni
6 slices provolone cheese
¼ cup sliced banana peppers
¼ cup thinly sliced red onion (optional)
For the Topping:
¼ cup unsalted butter, melted
1 teaspoon Italian seasoning
½ teaspoon garlic powder
1 tablespoon grated Parmesan cheese
STEP-BY-STEP INSTRUCTIONS
Step 1: Preheat the Oven and Prep Your Dish
Start by preheating your oven to 350°F (175°C). Lightly grease a 9×13-inch baking dish so your sliders don’t stick. I usually use a quick spray of non-stick cooking spray or brush a little olive oil on the bottom.

Step 2: Slice the Slider Rolls
Take your 12 slider rolls and slice them horizontally as one full piece—don’t separate them into individual rolls just yet. Think of it like slicing a loaf of bread into a top and bottom half. Place the bottom half of the rolls into your greased baking dish.
Tip: Hawaiian rolls work great for this recipe, but any soft dinner rolls will do the trick. The sweetness from the Hawaiian rolls contrasts perfectly with the savory meats and cheese.
Step 3: Spread the Sauces
Now it’s time to flavor the inside. Mix together ¼ cup mayonnaise and ¼ cup Dijon mustard in a small bowl (or just spread them individually if you like). Slather the mixture generously over the cut sides of both the top and bottom halves of the rolls. This step adds creaminess and a bit of tang that complements the meats beautifully.
Step 4: Layer on the Meats and Cheese
Let the layering begin! Start by placing:
6 slices Genoa salami
6 slices deli ham
6 slices pepperoni
You can slightly overlap them to make sure every bite gets a little of everything. After the meats, add:
6 slices provolone cheese (they’ll melt down into that ooey-gooey perfection)
¼ cup banana peppers
And if you’re using them, ¼ cup thinly sliced red onion for a bit of bite.
This combo gives the sliders that bold Italian sub flavor—salty, spicy, cheesy, and just a little tangy.
Step 5: Cap It Off
Gently place the top half of the slider rolls back on top to complete your little sandwiches. Try to line them up so they bake evenly and stay together when you slice them later.
Hot Italian Sub Sliders: The Ultimate Party-Perfect Mini Sandwiches
In Part 1, we layered up our rolls with all the delicious Italian sub fixings—salami, ham, pepperoni, provolone, banana peppers, and just the right touch of mustard and mayo. Now, it’s time for the finishing touches that really make these sliders shine: a buttery, herb-infused topping and a quick trip to the oven.
This part is what transforms your sliders from good to completely irresistible. That golden, garlicky crust on top adds so much flavor and texture—it’s honestly hard to stop at just one. And once you see how easy it is to put together, you’ll be adding this slider topping to all your baked sandwich recipes.
Let’s get back into the kitchen and wrap up these hot Italian beauties.
Step 6: Make the Garlic Butter Topping
In a small bowl, combine the following:
¼ cup melted unsalted butter
1 teaspoon Italian seasoning
½ teaspoon garlic powder
1 tablespoon grated Parmesan cheese
Give everything a good stir until well mixed. This simple combo smells incredible and brings so much savory flavor to the table.
If you want to take it up a notch, you could add a pinch of red pepper flakes or a little extra Parmesan on top right before baking. Totally optional—but highly recommended if you like a bit of heat or an extra cheesy finish.
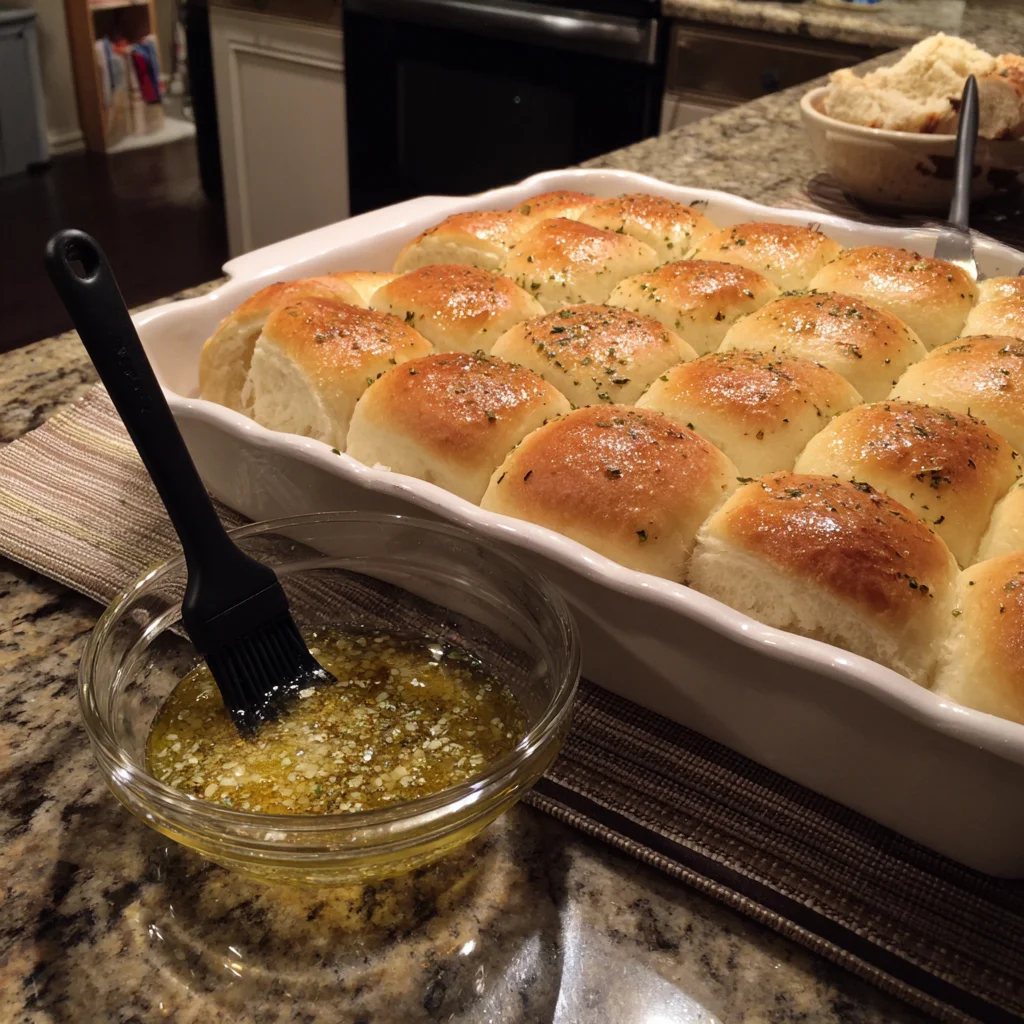
Step 7: Brush It On
Using a pastry brush (or even a spoon if that’s what you’ve got handy), generously brush the butter mixture all over the tops of the rolls. Make sure to get into the edges and corners—you want every slider to soak up that garlicky, herby goodness.
This is what’s going to give your sliders that perfectly golden, slightly crisp top once baked.
Step 8: Bake to Perfection
Cover your baking dish with foil and pop it into your preheated 350°F (175°C) oven. Bake covered for 15 minutes—this helps everything get warm and melty without drying out the bread.
Then, remove the foil and bake for an additional 5 to 7 minutes, just until the tops are golden brown and the cheese is perfectly melted.
At this point, your kitchen will smell like a little Italian sandwich shop—and it’s honestly the best kind of torture while you wait.
Step 9: Let Them Rest, Then Slice
Once the sliders are out of the oven, let them rest for a few minutes in the pan. This helps everything set up a bit, so the cheese doesn’t ooze out the second you slice into them.
Then, using a sharp knife, slice the sliders along the seams into individual servings and serve them warm.
Tips & Variations
These sliders are super versatile, so don’t be afraid to make them your own! Here are a few of my favorite ways to switch things up:
Mix Up the Meats: Try swapping in capicola, turkey, or even roast beef. You can stick to one or layer two or three together—whatever you like.
Go Spicy: Use hot banana peppers or add a drizzle of spicy Italian dressing inside the sandwich before baking.
Cheese Options: Mozzarella, fontina, or sharp provolone all work well. Use what you have on hand or what you love most.
Make Ahead Friendly: These can be assembled earlier in the day, covered tightly with foil, and stored in the fridge until you’re ready to bake. Just be sure to let them sit at room temp for about 10–15 minutes before baking so they warm up a bit.
Leftovers? No Problem: Reheat leftover sliders in the oven at 300°F for about 10 minutes or pop them in the air fryer for a few minutes to get them warm and crispy again.
Hot Italian Sub Sliders: The Ultimate Party-Perfect Mini Sandwiches
We’ve layered, brushed, baked, and sliced—and by now, your house probably smells amazing and you’ve got a hot tray of cheesy, golden sliders just waiting to be devoured. Before we wrap things up, I wanted to answer a few of the most common questions I’ve gotten about this recipe. Whether you’re planning for a crowd or just making these for a cozy night in, these tips should help you get the best results every single time.
FREQUENTLY ASKED QUESTIONS
1. Can I make these sliders ahead of time?
Absolutely! You can assemble the sliders (up to the point before baking), cover the dish tightly with foil, and refrigerate for up to 6–8 hours. When ready to bake, let them sit at room temperature for about 10–15 minutes, then follow the baking instructions. They’re perfect for prepping in the morning and baking just before guests arrive.
2. What’s the best way to reheat leftovers?
Leftover sliders reheat really well. To keep them from getting soggy, pop them in a 300°F oven or air fryer for about 5–10 minutes, until warmed through and slightly crispy on top. Avoid microwaving if you can—it tends to make the bread a bit rubbery.
3. Can I freeze these sliders?
Yes, you can! If you’re making a double batch or have leftovers, let the cooked sliders cool completely, wrap them tightly in foil or plastic wrap, and freeze. Reheat straight from frozen in a 325°F oven for about 20–25 minutes or until hot in the center.
4. I don’t eat pork—can I still make this recipe?
Totally! Swap out the pork-based deli meats for alternatives like turkey, roast beef, chicken breast, or even vegetarian deli slices. You can still use the same seasonings and cheeses to keep the flavor bold and satisfying.
5. What can I use instead of banana peppers?
If you’re not a fan of banana peppers or just don’t have any on hand, try using pickled jalapeños for some heat, roasted red peppers for sweetness, or even thin slices of dill pickles for tang. You can also leave them out completely if you prefer a milder slider.
6. Can I use different bread instead of slider rolls?
Yes! While slider rolls or Hawaiian rolls are the most convenient, you can also use dinner rolls or any soft sandwich buns. Just make sure they fit well in your baking dish and can be sliced as a group for easy assembly.
7. How can I make these sliders even crispier on top?
If you like a little extra crunch, uncover the sliders a few minutes earlier during the final bake and even broil them for 1–2 minutes right at the end. Just watch closely so they don’t burn—the cheese and butter topping can go from golden to too dark pretty quickly.
FINAL THOUGHTS
If you’re looking for a warm, cheesy, satisfying recipe that’s just as perfect for parties as it is for easy weeknight dinners, these Hot Italian Sub Sliders are it. They’re packed with bold flavors, super simple to throw together, and always a hit with both kids and adults.
One of my favorite things about this recipe is how adaptable it is. You can mix up the meats, play with different cheeses, add more or less heat—it’s the kind of recipe that invites creativity and still turns out delicious every time.
So the next time you’re hosting friends, planning your game day menu, or just craving something cozy and satisfying, give these sliders a try. And if you do, I’d love to hear how they turned out for you! Feel free to leave a comment, share your own twists, or tag your creation online—I always enjoy seeing how others make these their own.
Print
Hot Italian Sub Sliders
- Author: Andrew Recipes
Description
Hot Italian Sub Sliders are a mini version of the beloved deli classic, featuring layers of savory deli meats, melted provolone, and zesty banana peppers all baked inside soft slider rolls. Brushed with an herbed garlic butter, these sliders come out of the oven golden, gooey, and packed with bold Italian flavor. They’re ideal for parties, game days, or an easy weeknight meal.
Ingredients
12 slider rolls or Hawaiian rolls
¼ cup mayonnaise
¼ cup Dijon mustard
6 slices Genoa salami
6 slices deli ham
6 slices pepperoni
6 slices provolone cheese
¼ cup sliced banana peppers
¼ cup thinly sliced red onion (optional)
For the topping
¼ cup unsalted butter, melted
1 teaspoon Italian seasoning
½ teaspoon garlic powder
1 tablespoon grated Parmesan cheese
Instructions
1 Preheat the oven to 350°F (175°C) and lightly grease a 9×13-inch baking dish.
2 Slice the slider rolls horizontally as a whole slab, keeping the tops and bottoms attached. Place the bottom half in the baking dish.
3 Spread the mayonnaise and Dijon mustard evenly over the cut sides of the buns.
4 Layer the salami, ham, and pepperoni evenly across the bottom buns. Add provolone cheese, banana peppers, and red onion if using.
5 Place the top half of the buns over the layered fillings to complete the sliders.
6 In a small bowl, combine the melted butter, Italian seasoning, garlic powder, and Parmesan cheese.
7 Brush the butter mixture over the tops of the buns, covering evenly.
8 Cover the baking dish with foil and bake for 15 minutes. Remove the foil and bake an additional 5 to 7 minutes, until the tops are golden and the cheese is melted.
9 Let the sliders rest for a couple of minutes before slicing and serving warm.
Notes
You can switch up the meats by adding capicola, turkey, or roast beef. For a spicier version, use hot banana peppers or a drizzle of spicy Italian dressing. These sliders can be assembled a few hours in advance and baked just before serving. Leftovers reheat well in the oven or air fryer.

