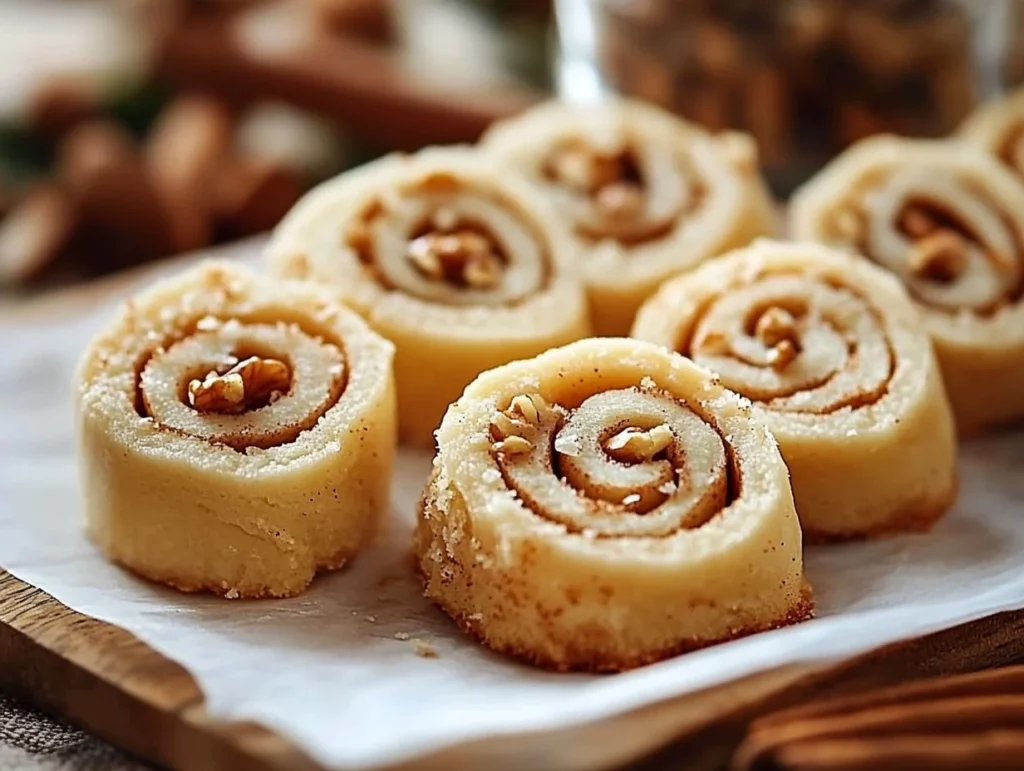
There’s just something undeniably nostalgic about a recipe that brings both comfort and elegance to the table. These Italian Nut Roll Cookies are exactly that kind of treat. With a tender, buttery dough wrapped around a spiced nut filling, they strike a perfect balance between rustic charm and holiday-worthy sophistication. Whether you’re planning a festive cookie tray, prepping for a family gathering, or just looking for something special to pair with your afternoon coffee, these cookies are about to become a fast favorite.
I first discovered a variation of these cookies years ago at a holiday cookie swap. One bite and I was hooked. I’m talking layers of flaky, buttery pastry wrapped around a gooey nut center, all finished with a delicate glaze that adds just the right amount of sweetness. I asked for the recipe on the spot (as one does) and have been making my own version ever since—tweaked, tested, and now totally foolproof.
These cookies are surprisingly simple to make, especially when you break the process down into a few easy steps. Let’s start with the dough, because let’s be honest—good cookies start with great dough.
Ingredients You’ll Need
Let’s break it down into the three main components: the dough, the filling, and the glaze. You probably have most of these ingredients in your pantry already!
For the dough:
3 cups all-purpose flour
1/2 teaspoon baking powder
1/4 teaspoon salt
1 cup unsalted butter, softened
3/4 cup granulated sugar
3 large eggs
1 teaspoon vanilla extract
For the nut filling:
2 cups finely chopped walnuts (or pecans)
1/2 cup brown sugar, packed
1/4 cup honey (or maple syrup)
1 teaspoon cinnamon (optional)
2 tablespoons milk
Optional glaze:
1 cup powdered sugar
2–3 tablespoons milk
1/2 teaspoon vanilla extract
STEP 1: Make the Dough
In a medium bowl, whisk together the flour, baking powder, and salt. This is your dry mixture, and you’ll want it well combined to ensure an even texture throughout the dough.
In a large mixing bowl, cream the softened butter and granulated sugar until the mixture is light and fluffy—this should take about 2–3 minutes with a hand mixer. Next, beat in the eggs one at a time, making sure each egg is fully incorporated before adding the next. Stir in the vanilla extract.
Now it’s time to bring everything together. Gradually mix the dry ingredients into the wet ingredients. I like to do this in batches so the flour doesn’t go flying everywhere (been there, cleaned that). You’ll know it’s ready when the dough comes together and feels soft but not sticky.
Divide the dough into two equal portions. Flatten each into a disk, wrap tightly in plastic wrap, and pop them in the fridge for at least an hour. This rest time is crucial—it firms up the dough so it’s easier to roll and helps the cookies hold their shape while baking.

STEP 2: Make the Nut Filling
While the dough is chilling, you can get the filling ready. This is where the magic happens—sweet, sticky, nutty goodness with just a hint of spice.
In a mixing bowl, combine the chopped nuts, brown sugar, honey (or maple syrup if you prefer a slightly different sweetness), cinnamon (optional but highly recommended), and milk. Stir it all together until the mixture is moist and well combined.
Tip: Make sure your nuts are finely chopped—larger chunks can tear the dough when rolling. A food processor can be super helpful here, or you can go old-school with a sharp knife and a bit of patience.

STEP 3: Roll, Fill, and Roll Again
Preheat your oven to 350°F (175°C) and line a baking sheet with parchment paper.
Lightly flour your work surface and roll out one portion of dough into a rectangle about 1/8 inch thick. Don’t worry too much about perfection here—rustic edges are part of the charm!
Spread half of the nut filling evenly over the dough, leaving about a 1/2-inch border around the edges. This helps prevent the filling from spilling out when you roll it up.
Starting from the long edge, roll the dough into a tight log, just like you would with cinnamon rolls. Pinch the seam and ends to seal everything in.
Repeat the same process with the second half of the dough and remaining filling.

Baking and Finishing the Perfect Italian Nut Roll Cookies
Alright, so by now your kitchen smells like sweet, nutty heaven and you’ve got two beautiful dough logs rolled and ready to slice. This next part is where it all comes together—into buttery, golden bites that are just as perfect for a holiday platter as they are with a cup of coffee on a quiet afternoon.
These cookies are so rewarding to bake. As soon as they hit the oven, the scent of cinnamon, honey, and toasted nuts starts to fill the air. And trust me, they look just as lovely as they taste—especially if you choose to finish them with that light vanilla glaze. Let’s walk through the final steps to get these cookies from your baking sheet to your cookie jar.
STEP 4: Slice and Bake
Once your logs are all rolled up and sealed, it’s time to slice.
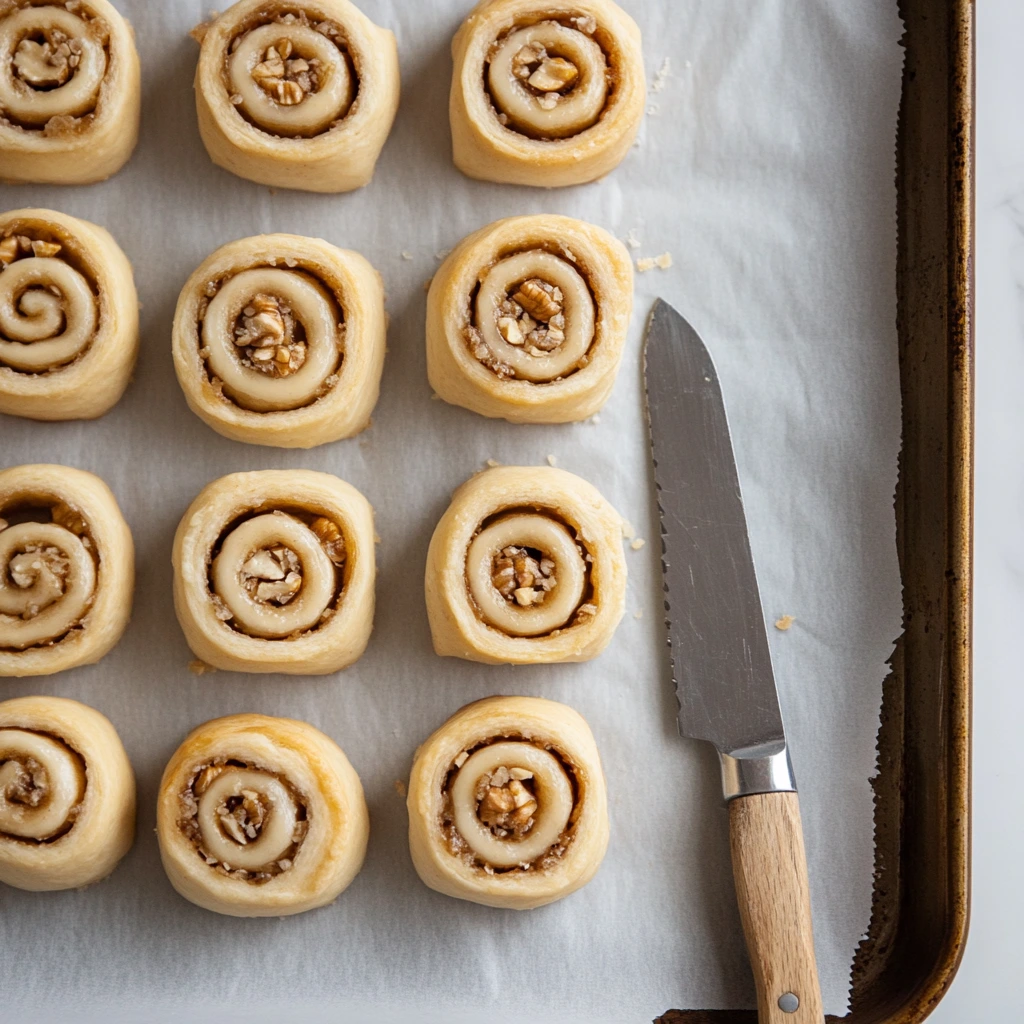
Using a sharp knife, cut each log into 1-inch pieces. You should end up with little pinwheel-style cookies that show off that beautiful spiral of dough and nut filling. Arrange each piece cut-side down on a parchment-lined baking sheet. Make sure to give them a little room to expand—you don’t want them crowding each other.
Pop the tray into your preheated oven (350°F / 175°C) and bake for 12 to 15 minutes, or until the edges are golden and the bottoms are lightly browned. Keep an eye on them during the last few minutes—every oven is different, and these cookies can go from golden to too dark pretty quickly.
When they’re done, remove them from the oven and let them cool on the baking sheet for a couple of minutes before transferring them to a wire rack to cool completely.
STEP 5: Add the Glaze (Optional but Delicious)
While the cookies are cooling, you can whip up a quick glaze if you want that extra finishing touch. It’s a simple combo of powdered sugar, milk, and vanilla extract that adds just the right amount of sweetness without overpowering the rich, nutty flavor inside.
To make the glaze:
Whisk together 1 cup of powdered sugar, 2–3 tablespoons of milk (start with less and add more as needed), and 1/2 teaspoon of vanilla extract until smooth. You want it to be pourable but not too runny.
Once the cookies are completely cool, drizzle the glaze over the tops. You can use a spoon for a more rustic look or a piping bag (or zip-top bag with the corner snipped) for cleaner lines.
Let the glaze set for about 15 minutes before serving or storing.

Tips for Success and Easy Variations
Here are a few extra tips I’ve picked up after baking these cookies more times than I can count:
Chill the dough well: Don’t skip the chill time! Cold dough is much easier to roll and helps the cookies hold their shape in the oven.
Keep your surface floured: Lightly dust your rolling area and rolling pin to prevent sticking. If the dough starts to get too soft while rolling, pop it back in the fridge for a few minutes.
Try different nuts: Walnuts and pecans are the classics here, but don’t be afraid to try hazelnuts or even almonds. Just make sure they’re finely chopped so the filling spreads evenly.
Go glaze-free for a more rustic cookie: These are just as delicious without the glaze, especially if you want a slightly less sweet treat.
Make them ahead: These cookies freeze beautifully! Once baked (and glazed, if using), you can store them in an airtight container in the freezer for up to a month. Just thaw at room temperature when ready to enjoy.
Make It Your Own
This dough is incredibly versatile, so if you’re in the mood to experiment, go for it! Here are a few ideas to get you started:
Add a citrus twist: A bit of orange or lemon zest in the dough or filling adds a lovely brightness.
Spice it up: A pinch of nutmeg or cardamom in the filling can really enhance the flavor.
Sweeten the deal: Swap the honey for maple syrup or even a splash of molasses for a deeper, more complex sweetness.
And if you’re feeling creative, you could even do a chocolate variation—think mini chocolate chips added to the nut filling or a drizzle of melted chocolate instead of the glaze. There’s really no wrong way to make these your own.
Italian Nut Roll Cookies FAQ + Final Thoughts
By now, your house probably smells like a cozy holiday bakery, and you’ve got a tray of gorgeous nut roll cookies cooling on the counter (or maybe already half-eaten—no judgment here). Before we wrap things up, I want to answer a few questions that tend to come up whenever I share this recipe. Whether you’re new to baking or just want to make sure your cookies turn out perfectly, these tips should help you along the way.
Frequently Asked Questions
1. Can I make the dough ahead of time?
Absolutely! The dough can be made up to 2 days in advance. Just keep it tightly wrapped in plastic and refrigerated. When you’re ready to roll it out, let it sit at room temperature for 10–15 minutes so it softens slightly and is easier to work with.
2. Can I freeze these cookies?
Yes! These cookies freeze beautifully, both before and after baking. To freeze before baking, roll and fill the dough logs, then wrap them tightly in plastic wrap and freeze. Thaw in the fridge overnight, slice, and bake as usual. To freeze baked cookies, just wait until they’re completely cool (and glazed, if desired), then store in an airtight container with parchment between layers.
3. What other nuts can I use?
Walnuts and pecans are traditional, but hazelnuts and almonds work well too. Just make sure to finely chop whatever nuts you use so the filling spreads easily and rolls smoothly.
4. My dough is too sticky—what should I do?
If your dough feels sticky when rolling, sprinkle a little flour on your surface and rolling pin. You can also chill the dough a bit longer—especially if your kitchen is warm. Colder dough is much easier to handle and won’t stick as easily.
5. Do I have to use the glaze?
Nope! The glaze is totally optional. These cookies are delicious on their own, with a simple dusting of powdered sugar, or even just plain. The glaze does add a nice touch of sweetness and makes them extra pretty, but it’s not necessary for flavor or texture.
6. Can I make these gluten-free?
You can try using a 1:1 gluten-free flour blend in place of the all-purpose flour. I recommend choosing a blend that includes xanthan gum to help with structure. The texture might be slightly different, but they should still taste great.
7. How should I store these cookies?
Once cooled, store them in an airtight container at room temperature. They’ll stay fresh for about 4–5 days. If you’ve added glaze, make sure it’s fully set before stacking the cookies.
Final Thoughts: A Cookie Worth Sharing (and Keeping for Yourself)
There’s just something about baking a recipe like this that feels extra special. Maybe it’s the buttery, flaky dough or the sweet nutty filling… or maybe it’s just that moment when you take a bite and everything feels warm and homey. These Italian Nut Roll Cookies are the kind of treat that people remember—perfect for holiday cookie trays, family traditions, or simply a cozy afternoon snack.
What I love most about this recipe is how flexible and forgiving it is. Whether you keep it classic or add your own twist, you really can’t go wrong. And if you’re baking these to share, don’t be surprised if people ask for the recipe (just like I did all those years ago).
If you try this recipe, I’d love to hear how it went! Did you stick with walnuts, or try something new? Did you go for the glaze, or keep it simple? Leave a comment and let me know—your tweaks and tips might just inspire someone else.
Happy baking!
Print
Italian Nut Roll Cookies
- Author: Andrew Recipes
Description
These Italian Nut Roll Cookies are a delightful treat, perfect for the holidays or any special occasion. Made with a buttery dough and a rich, sweet nut filling, each bite is a balance of flaky pastry and warm, spiced nuttiness. Finished with an optional glaze, these cookies offer both classic comfort and elegant charm.
Ingredients
For the dough:
3 cups all-purpose flour
1/2 teaspoon baking powder
1/4 teaspoon salt
1 cup unsalted butter, softened
3/4 cup granulated sugar
3 large eggs
1 teaspoon vanilla extract
For the nut filling:
2 cups finely chopped walnuts (or pecans)
1/2 cup brown sugar, packed
1/4 cup honey (or maple syrup)
1 teaspoon cinnamon (optional)
2 tablespoons milk
For the glaze (optional):
1 cup powdered sugar
2–3 tablespoons milk
1/2 teaspoon vanilla extract
Instructions
In a medium bowl, whisk together the flour, baking powder, and salt. In a separate large mixing bowl, cream the butter and sugar until light and fluffy. Beat in the eggs one at a time, then add the vanilla extract. Gradually incorporate the dry ingredients into the wet mixture until a soft dough forms. Divide the dough in half, wrap each portion in plastic wrap, and refrigerate for at least 1 hour.
While the dough chills, prepare the nut filling. In a bowl, mix together the chopped walnuts, brown sugar, honey, cinnamon if using, and milk until the mixture is moist and well combined.
Preheat the oven to 350°F (175°C) and line a baking sheet with parchment paper. On a lightly floured surface, roll out one portion of dough into a rectangle about 1/8 inch thick. Spread half of the nut filling evenly over the dough, leaving a 1/2-inch border around the edges. Roll the dough tightly into a log starting from the long edge, then pinch the seam and ends to seal. Repeat with the remaining dough and filling.
Slice each log into 1-inch pieces and arrange them cut-side down on the prepared baking sheet. Bake for 12 to 15 minutes, or until the edges are golden brown. Allow the cookies to cool on a wire rack.
If desired, prepare the glaze by whisking together the powdered sugar, milk, and vanilla extract until smooth. Drizzle over the cooled cookies for a sweet finish.
Notes
These cookies can be customized with different nuts such as almonds or hazelnuts for a unique twist. For a crispier texture, bake a few minutes longer. They also freeze well, making them a convenient make-ahead option for holiday trays or gift boxes. The glaze adds a lovely touch, but they’re equally delicious without it.

