
A Spicy, Cheesy Delight for Every Occasion
If you love the bold, creamy flavors of jalapeño poppers, but want something even easier to prepare for a gathering, this Jalapeño Popper Cheese Ball is the perfect solution! With a mix of rich cream cheese, crispy bacon, spicy jalapeños, and sharp cheddar, this cheese ball delivers all the flavors of your favorite appetizer in one delicious, dippable form.
It’s the ultimate crowd-pleaser, perfect for:
✔️ Game day snacks
✔️ Holiday parties
✔️ Potlucks and gatherings
✔️ Casual family nights
With just 15 minutes of prep and an hour to chill, this cheese ball is an easy make-ahead appetizer that’s packed with creamy, cheesy, and spicy goodness.
Why You’ll Love This Recipe
✔️ Quick & Easy – Takes just 15 minutes of prep and the rest of the time is spent chilling!
✔️ Bold, Spicy, and Cheesy – A perfect balance of creamy cheese, crispy bacon, and fiery jalapeños.
✔️ Great for Sharing – Serves a crowd and makes for an eye-catching party centerpiece.
✔️ Keto-Friendly – Serve with low-carb dippers like celery, bell peppers, or pork rinds!
Now, let’s dive into what you need and how to make it!
Ingredients You’ll Need
To create this flavor-packed cheese ball, you’ll need a few simple ingredients:
For the Cheese Ball:
✔️ Cream Cheese (16 oz) – Softened for easy mixing.
✔️ Sour Cream (4 tbsp) – Adds a smooth, tangy texture.
✔️ Garlic Powder (½ tsp) – Enhances the savory flavor.
✔️ Jalapeños (2 large) – Seeds and stems removed, finely chopped.
✔️ Sharp Cheddar Cheese (1 cup, shredded) – Adds a bold, cheesy kick.
✔️ Bacon (3 strips, cooked & chopped) – Because everything is better with bacon!
✔️ Salt & Pepper (to taste) – Adjust seasoning as needed.
For the Coating:
✔️ Bacon (2 strips, cooked & finely chopped) – A crispy, smoky finish.
✔️ Jalapeño (1, finely chopped) – Adds a spicy crunch.
✔️ Shredded Cheddar Cheese (½ cup, chopped) – Coats the outside with extra cheesiness.
✔️ Green Onions (2, sliced thin) – A fresh pop of color and flavor.
✔️ Pecans (⅓ cup, finely chopped) – Adds a crunchy, nutty texture.
💡 Pro Tip: Want extra spice? Leave some of the jalapeño seeds in for an extra kick! 🌶️🔥
Step 1: Mixing the Cheese Ball Base
1️⃣ In a large mixing bowl, use a hand mixer to beat the cream cheese and sour cream together until smooth and fluffy.
2️⃣ Add the garlic powder, chopped jalapeños, shredded cheddar cheese, crumbled bacon, salt, and pepper.
3️⃣ Mix everything together until fully combined. The mixture should be thick, creamy, and well blended.
💡 Pro Tip: For a smokier flavor, swap regular bacon for crispy turkey bacon or use smoked gouda instead of cheddar!

Step 2: Shaping the Cheese Ball
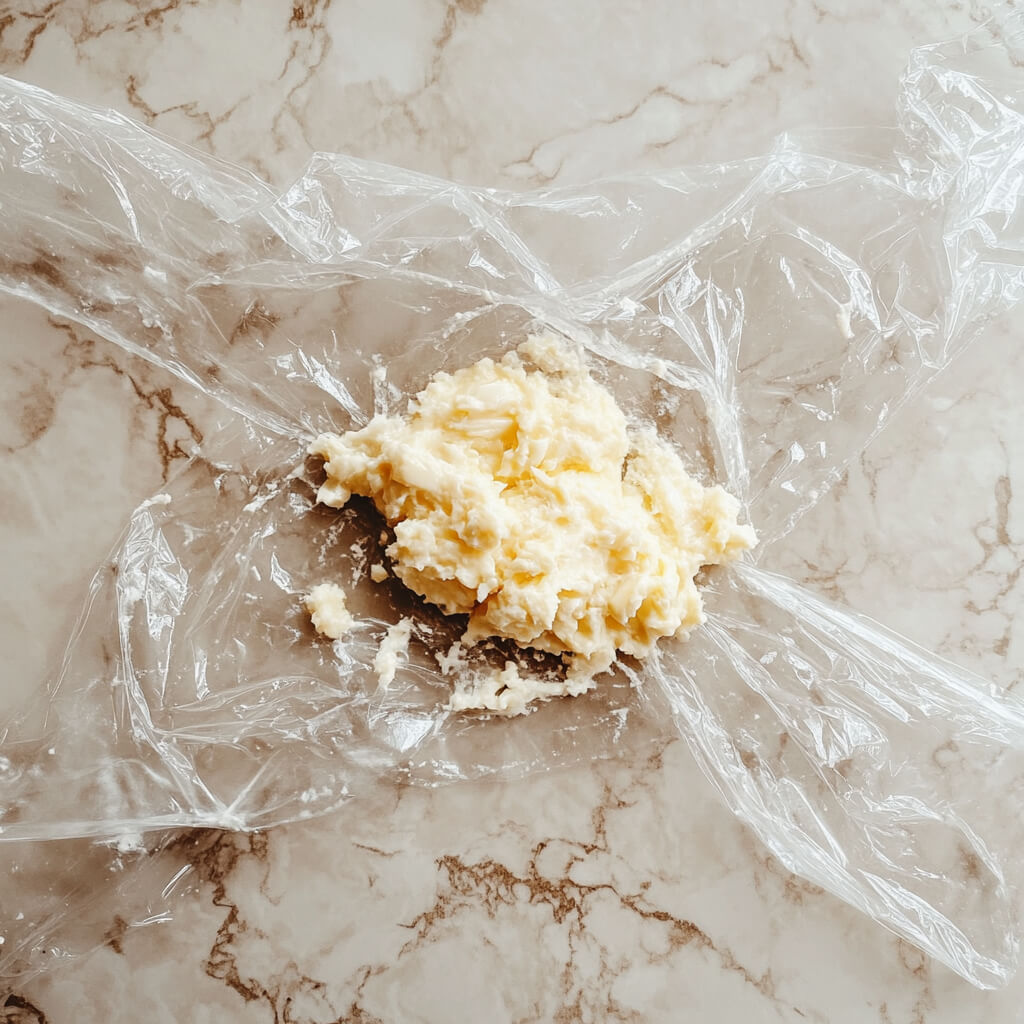
1️⃣ Lay two long strips of plastic wrap in an ‘X’ shape on a flat surface.
2️⃣ Spoon the cream cheese mixture into the center of the plastic wrap.
3️⃣ Gather the edges of the plastic wrap and twist the top tightly to form a round cheese ball shape.
4️⃣ Transfer to the refrigerator and chill for at least 1 hour to firm up.
This chilling step is crucial because it helps the cheese ball hold its shape and makes it easier to coat later.
Part 2: Rolling, Coating, and Serving Your Cheese Ball
Now that your cheese ball has chilled and firmed up in the fridge, it’s time for the final touches! This step is where we coat it with a delicious mix of crispy bacon, shredded cheddar, chopped jalapeños, and crunchy pecans.
Let’s dive into the coating and serving process to make this the ultimate party appetizer!
Step 3: Preparing the Coating
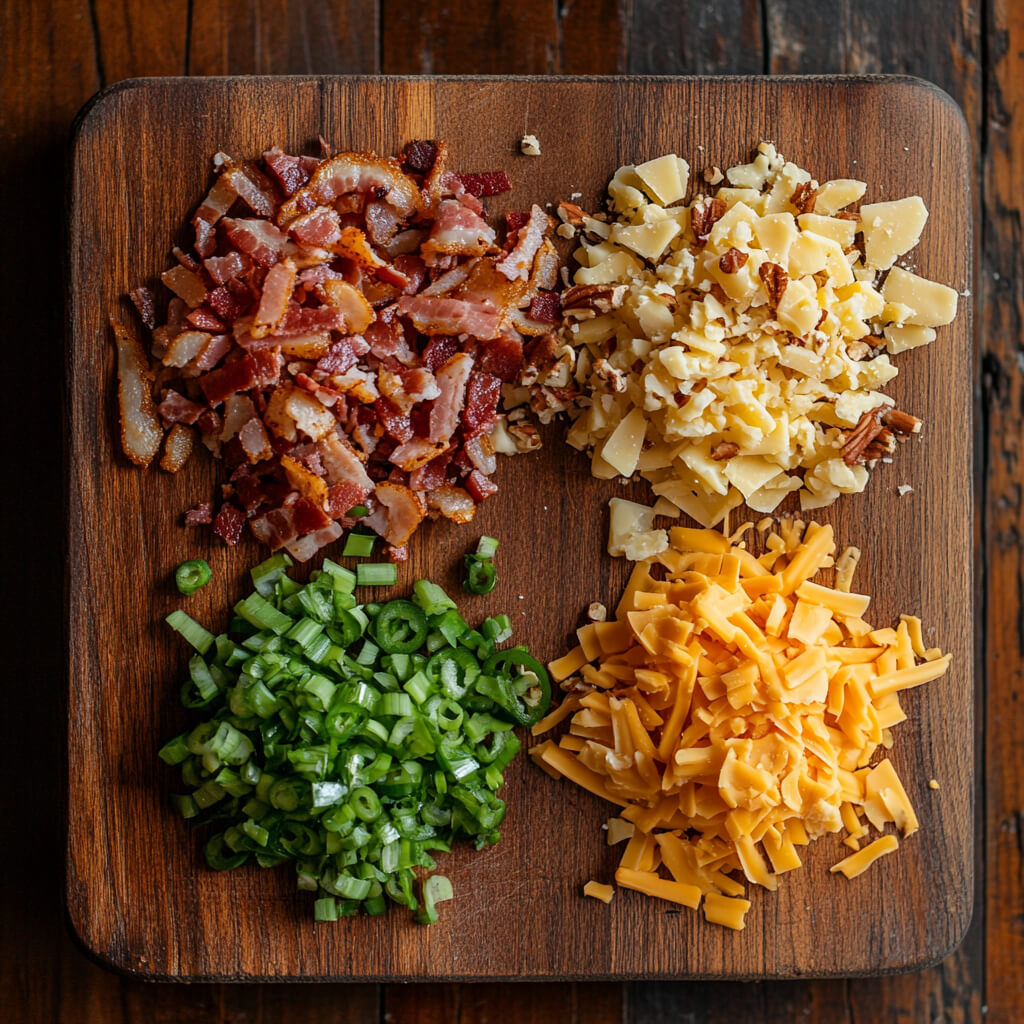
Before unwrapping the cheese ball, prepare your crispy, cheesy, and spicy coating.
Coating Ingredients:
✔️ 2 strips cooked bacon, finely chopped – For extra crunch and smokiness.
✔️ 1 jalapeño, finely chopped – Adds color and fresh, spicy heat.
✔️ ½ cup shredded cheddar cheese, chopped – Makes the cheese ball even cheesier!
✔️ 2 green onions, thinly sliced – Adds freshness and color.
✔️ ⅓ cup pecans, finely chopped – Gives the coating a nutty crunch.
💡 Pro Tip: If you don’t like pecans, swap them for crushed walnuts, almonds, or even crushed Ritz crackers for a different texture!
How to Coat the Cheese Ball:
1️⃣ Spread the coating mix onto a large plate or flat surface in an even layer.
2️⃣ Remove the cheese ball from the fridge and carefully unwrap it from the plastic wrap.
3️⃣ Roll the cheese ball over the coating mixture, pressing gently to make sure it sticks to all sides.
4️⃣ Use your hands to fill in any gaps, ensuring an even, beautiful coating all around.
💡 Pro Tip: For a smoother finish, press the coating gently onto the ball instead of rolling it too hard!
Step 4: Serving Your Jalapeño Popper Cheese Ball
Now that your cheese ball is fully coated and ready, it’s time to serve it up!
Best Dippers for Your Cheese Ball:
✔️ Crackers – Ritz, Club crackers, wheat thins, or buttery round crackers.
✔️ Veggies – Celery sticks, sliced bell peppers, cucumber rounds, and carrot sticks.
✔️ Pork Rinds – A great low-carb and keto-friendly option!
✔️ Pretzels – Mini pretzel sticks or pretzel crisps for a salty, crunchy bite.
✔️ Toasted Baguette Slices – For an elevated, fancy appetizer feel.
💡 Pro Tip: Want to make this a spread instead of a ball? Shape it into a log instead of a round ball, and serve it as a dip with a knife!

FAQs, Tips, and Final Thoughts
Now that your Jalapeño Popper Cheese Ball is coated, served, and ready to enjoy, let’s go over some common questions, storage tips, and fun variations to customize this cheesy delight!
FAQ Section
❓ Can I make this cheese ball ahead of time?
Absolutely! In fact, it’s even better when made a day in advance because the flavors blend together beautifully. Just wrap it tightly in plastic wrap and refrigerate until ready to coat and serve.
❓ How do I store leftovers?
Store any leftover cheese ball in an airtight container or wrapped tightly in plastic wrap. It will stay fresh in the refrigerator for up to 5 days.
❓ Can I freeze a cheese ball?
Yes! Wrap it in plastic wrap and aluminum foil, then place it in a freezer-safe bag. Freeze for up to 1 month. Thaw overnight in the fridge before serving.
❓ What can I use instead of pecans?
If you’re not a fan of nuts, try using:
✔️ Crushed Ritz crackers or pretzels for crunch.
✔️ Chopped sunflower seeds for a nut-free option.
✔️ Extra bacon bits for even more smoky goodness!
❓ Is this cheese ball keto-friendly?
Yes! Just skip the pecans and serve with pork rinds or low-carb veggie dippers like celery and bell peppers.
❓ Can I make this spicier?
🔥 Want extra heat? Try:
✔️ Keeping some jalapeño seeds in the mix.
✔️ Adding a pinch of cayenne pepper or red pepper flakes.
✔️ Using pepper jack cheese instead of cheddar!
Fun Variations to Try
This cheese ball recipe is super versatile, so you can mix it up with different ingredients:
🌶️ Buffalo Ranch Cheese Ball – Swap jalapeños for hot sauce and add a little ranch seasoning.
🧄 Garlic & Herb Cheese Ball – Replace jalapeños with fresh chives, parsley, and minced garlic.
🥓 Bacon & Ranch Cheese Ball – Stir in a packet of ranch seasoning for a zesty twist.
🍗 BBQ Chicken Cheese Ball – Mix in shredded chicken and a drizzle of BBQ sauce.
💡 Pro Tip: Want to serve individual portions? Roll the cheese mixture into bite-sized balls, coat them in toppings, and serve with toothpicks!
Final Thoughts: The Perfect Party Appetizer!
The Jalapeño Popper Cheese Ball is creamy, spicy, cheesy, and packed with flavor—a guaranteed crowd-pleaser for any occasion. Whether you’re hosting a game night, holiday party, or potluck, this easy appetizer will have everyone coming back for more!
✨ Ready to impress your guests? Make this cheese ball ahead of time, pair it with your favorite dippers, and watch it disappear in minutes!
🧀 What’s your favorite way to serve a cheese ball? Let us know in the comments below! Happy snacking! 🎉🔥
Print
Jalapeno Bacon Cheese Ball – The Ultimate Party Snack Recipe
- Total Time: 1 hour 15 minutes
- Yield: 6–8 servings 1x
Description
A spicy, creamy, and savory cheese ball packed with cheddar, bacon, and jalapeños, then rolled in a crunchy, flavorful coating. Perfect for parties, game nights, or any appetizer table!
Ingredients
For the Cheese Ball:
- 16 ounces cream cheese, softened
- 4 tablespoons sour cream
- ½ teaspoon garlic powder
- 2 large jalapeños, seeds/stems removed, finely chopped
- 1 cup shredded sharp cheddar cheese
- 3 strips cooked bacon, chopped
- Salt & pepper, to taste
For the Coating:
- 2 strips cooked bacon, finely chopped
- 1 jalapeño, seeds/stems removed, finely chopped
- ½ cup shredded cheddar cheese, chopped
- 2 green onions, sliced thin
- ⅓ cup pecans, finely chopped
Instructions
1️⃣ Make the Cheese Mixture:
- Using a hand mixer, beat cream cheese and sour cream until smooth and fluffy.
- Add garlic powder, chopped jalapeños, shredded cheddar, cooked bacon, salt, and pepper. Mix until fully combined.
2️⃣ Shape the Cheese Ball:
- Lay two long strips of plastic wrap in an ‘X’ shape on a flat surface.
- Spoon the cream cheese mixture into the center.
- Bring up the edges of the plastic wrap, twisting at the top to form a ball shape.
- Refrigerate for at least 1 hour to firm up.
3️⃣ Prepare the Coating:
- Spread the bacon, jalapeño, shredded cheddar, green onions, and pecans on a flat surface.
4️⃣ Coat the Cheese Ball:
- Unwrap the chilled cheese ball and roll it onto the prepared coating ingredients, gently pressing to adhere.
5️⃣ Serve & Enjoy:
- Transfer to a serving platter and serve with celery, peppers, crackers, pork rinds, or chips.
Notes
- Want it spicier? Add a dash of cayenne pepper or use extra jalapeños in the mix.
- Nut-free option: Replace pecans with crushed tortilla chips or more bacon for added crunch.
- Make it ahead: Prepare and store wrapped in plastic for up to 3 days before serving.
- Storage: Keep leftovers covered in the fridge for up to 5 days.
- Prep Time: 15 minutes
- Cook Time: 1 hour

