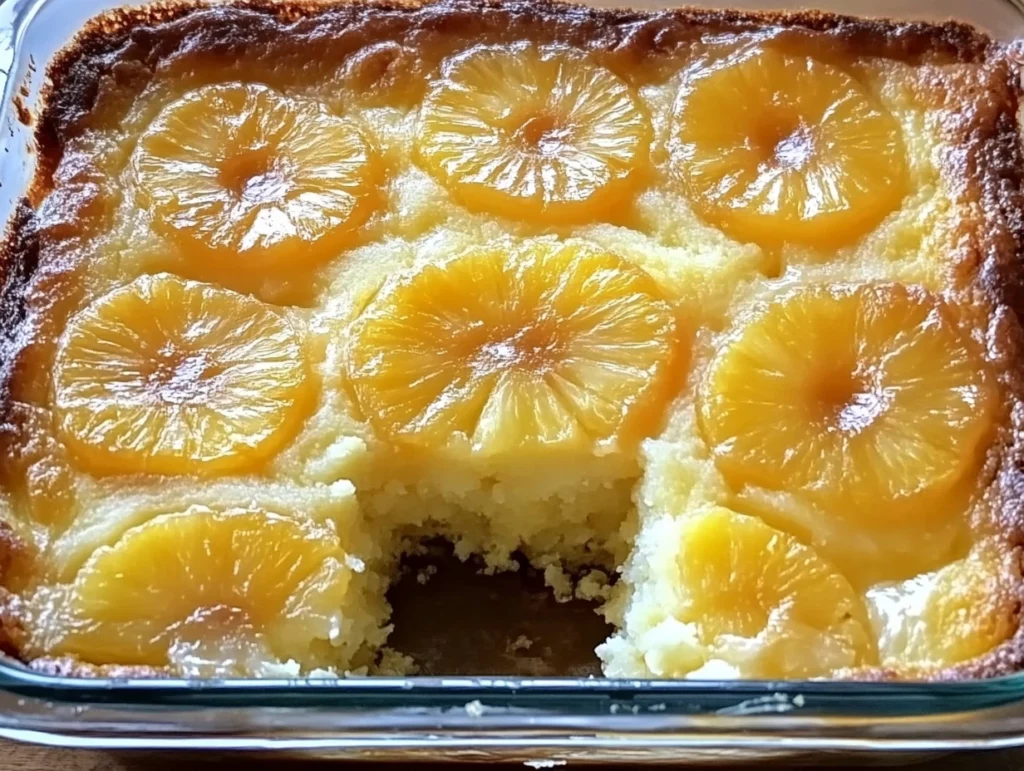
There’s just something about pineapple in desserts that instantly transports me to a sunnier, happier place. Maybe it’s the vibrant yellow color or that sweet, tangy burst of flavor, but I can never resist a slice of pineapple cake—especially when it’s warm and gooey and the top is beautifully caramelized with brown sugar and butter. This Juicy Pineapple Heaven Cake has quickly become a go-to favorite in my kitchen, and let me tell you why: it’s ridiculously easy to make, looks like something straight out of a bakery, and tastes like a little slice of summer in every bite.
Whether you’re baking for a crowd or just want something sweet to brighten up your weekend, this cake is one of those desserts that looks impressive but takes minimal effort. It’s got that retro, pineapple-upside-down cake vibe, but it’s made with a few modern shortcuts that save time without skimping on flavor. We’re using a box of yellow cake mix here, which gives us a perfectly fluffy base every single time, and by adding crushed pineapple (with all that sweet juice), sour cream, and a touch of vanilla, we turn it into something totally irresistible.
Now let’s dive into the magic behind this cake, step by step.
Ingredients You’ll Need
Serves: 8–10
For the Cake:
1 box yellow cake mix (or your favorite homemade yellow cake base)
1 can (20 oz) crushed pineapple, undrained
1/2 cup sour cream
1/2 cup vegetable oil
4 large eggs
1 tsp vanilla extract
For the Topping:
1/2 cup unsalted butter, melted
1 cup packed brown sugar
6–8 pineapple rings (fresh or canned, drained)
Maraschino cherries (optional, but classic)
STEP 1: Preheat the Oven
Go ahead and preheat your oven to 350°F (175°C). Trust me, having it hot and ready will help everything bake evenly right from the start. You’ll want to grease your baking pan really well—either a 9×13-inch pan for more traditional squares, or a round cake pan if you’re feeling fancy. Either works beautifully, but make sure to get into all the corners so the cake releases cleanly later.

STEP 2: Prepare the Topping
This topping is the secret to that signature look and taste. In a small bowl, mix together the melted butter and brown sugar until it forms a rich, gooey paste. Pour and spread it evenly over the bottom of your prepared pan—this will become the top once the cake is flipped!
Now for the fun part: arrange your pineapple rings right on top of that brown sugar mix. I usually use about six or seven rings depending on the pan size, spacing them out evenly. If you want to go full nostalgic (and I totally recommend it), pop a maraschino cherry into the center of each ring. It’s colorful, cute, and totally classic.
STEP 3: Make the Cake Batter
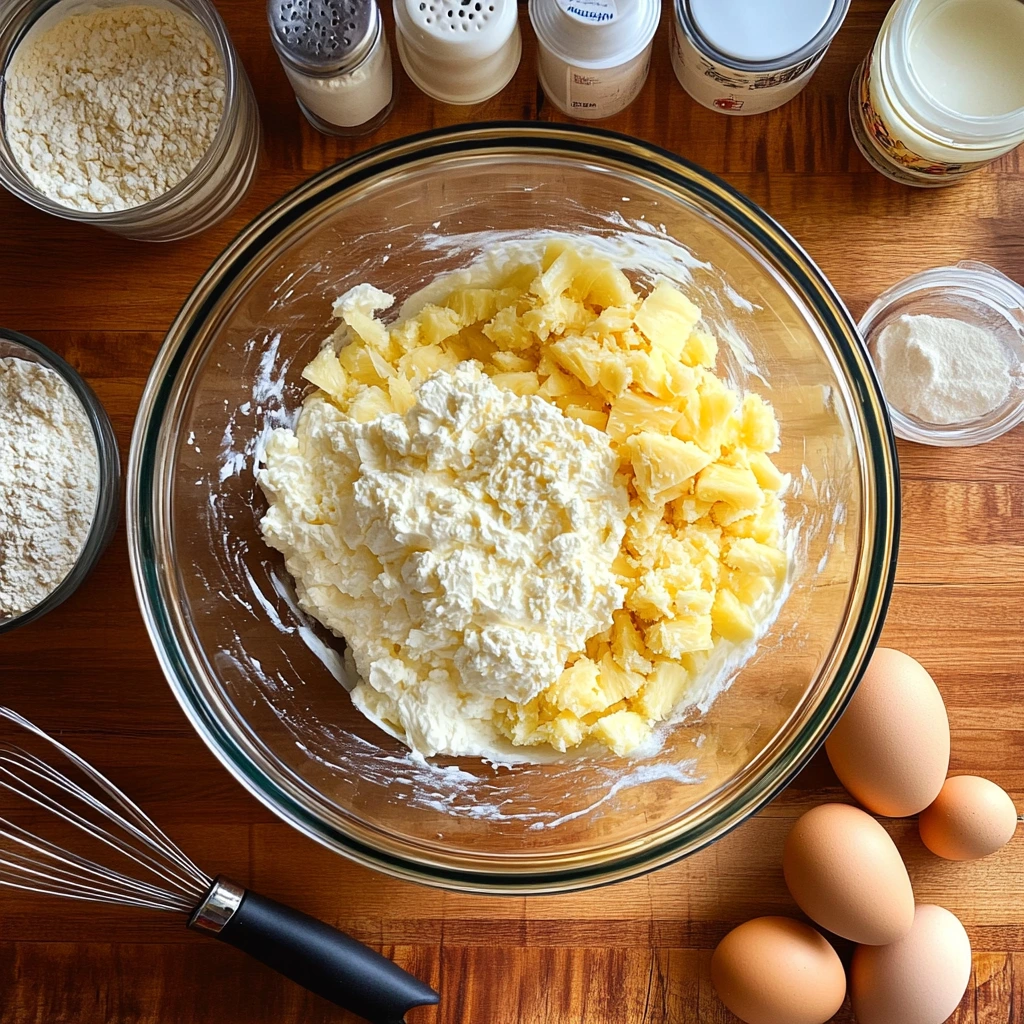
In a large mixing bowl, combine the yellow cake mix, crushed pineapple (don’t drain it—those juices are key!), sour cream, oil, eggs, and vanilla extract. You can use a hand mixer or just a good old-fashioned whisk. Beat until smooth and well-blended, making sure there are no dry streaks or lumps.
What I love about this batter is how the pineapple adds moisture and flavor, while the sour cream gives it that tender, velvety texture that makes every bite melt in your mouth. It smells amazing even before it hits the oven.
Juicy Pineapple Heaven Cake: A Sweet and Simple Tropical Dessert
Alright, now that we’ve got our rich, pineapple-infused cake batter ready and our buttery, brown sugar topping beautifully arranged in the pan, it’s time to bring everything together. This is the part where the real magic happens—when the sweet pineapple juices caramelize with the brown sugar in the oven and soak into the fluffy cake. And trust me, your kitchen is about to smell amazing.
This cake is not only stunning once it’s flipped out of the pan, but it’s also surprisingly low-effort for something that looks like it belongs on a dessert table at a fancy brunch or holiday gathering. Whether you’re making it for Easter, a summer barbecue, or just a midweek pick-me-up, you’re going to love how simple and delicious this next part is.
Let’s get baking!
STEP 4: Assemble and Bake
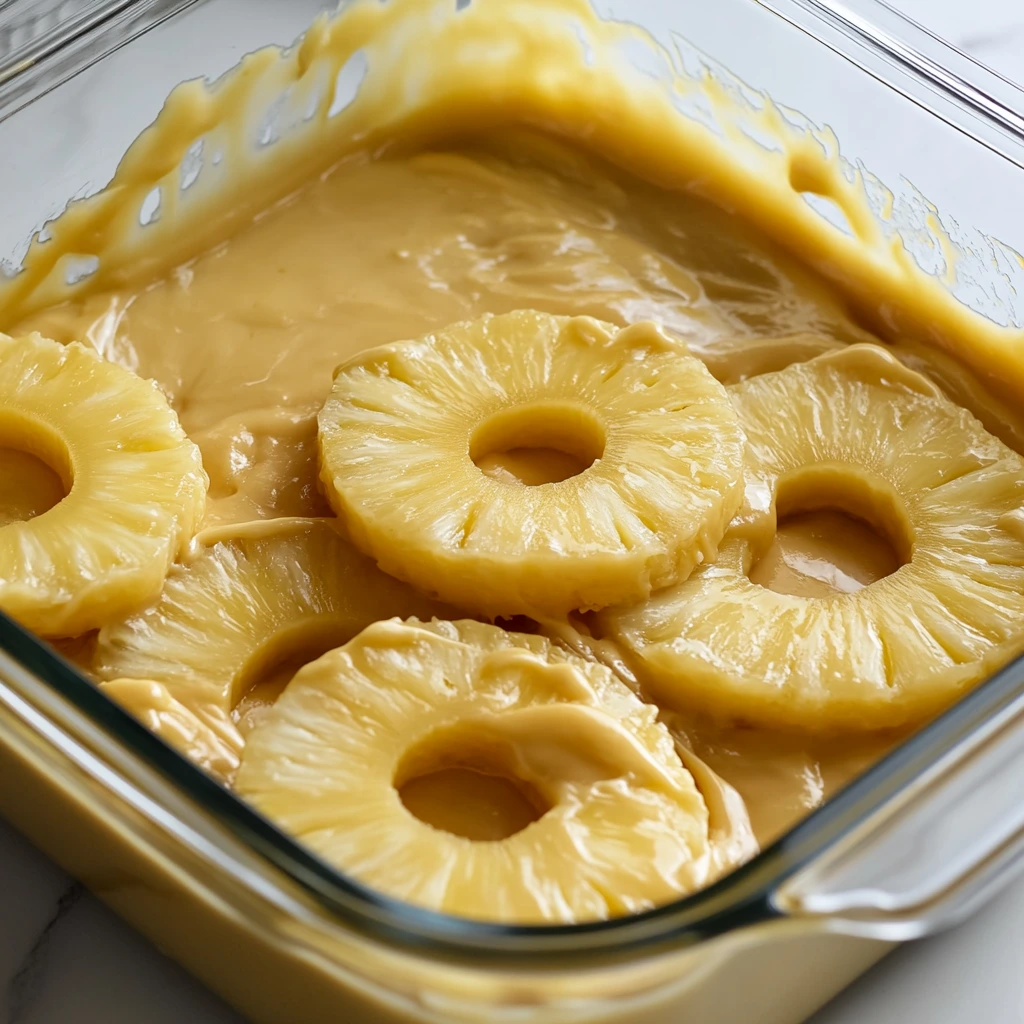
Now that your pineapple slices and brown sugar-butter mixture are sitting pretty at the bottom of the pan, go ahead and pour the prepared batter gently over the top. Use a spatula or the back of a spoon to spread it out evenly—just try not to disturb the pineapple layer underneath.
Place the cake in your preheated 350°F (175°C) oven, and bake for 35 to 45 minutes. Oven times can vary, so start checking around the 35-minute mark. You’ll know it’s done when the top is golden brown and a toothpick inserted into the center comes out clean.
Now, I know it’s tempting to peek and poke, but try to avoid opening the oven too often—it can cause the cake to sink or bake unevenly. Instead, just let that sweet aroma fill the kitchen while you clean up or prep something to serve on the side, like whipped cream or vanilla ice cream.
STEP 5: Cool and Invert
Once the cake is baked and your house smells like a tropical dream, remove it from the oven and let it cool in the pan for about 10 minutes. This gives the cake a chance to set slightly so it holds together when you flip it.
Next, run a knife around the edges of the cake to loosen it from the pan. This is especially helpful if any of the brown sugar topping bubbled up the sides. Now comes the fun (and slightly nerve-wracking) part: carefully invert the cake onto a serving platter. Do this by placing your platter over the top of the pan, then holding both firmly and flipping in one swift motion. Let the pan sit inverted for a minute or two if needed—this gives the topping time to release fully onto the cake.
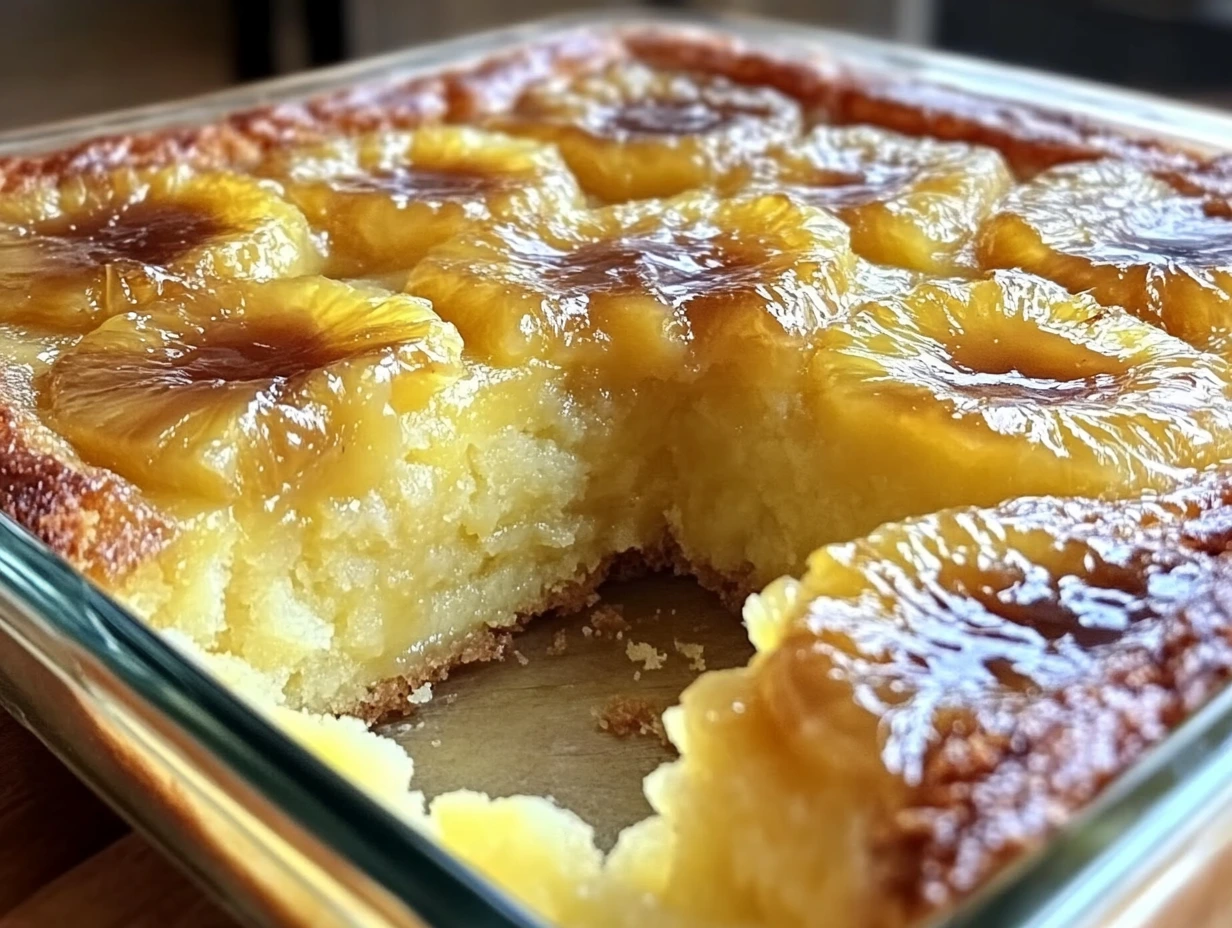
When you lift the pan, you’ll reveal that golden, glossy pineapple topping, caramelized and glistening, with the cherries perfectly centered like little jewels.
STEP 6: Serve and Enjoy
Let the cake cool slightly before slicing—this allows the crumb to firm up just enough to cut cleanly while still being warm and soft. It’s absolutely delicious as-is, but if you want to go the extra mile, serve it with a scoop of vanilla ice cream or a generous dollop of whipped cream. The contrast between the warm cake and the cool creaminess is just dreamy.
This cake is a hit at family get-togethers, and every time I serve it, someone asks for the recipe. The best part? It tastes just as good (if not better) the next day. The flavors meld overnight, and the cake stays incredibly moist thanks to all that juicy pineapple.
Tips and Variations
Here are a few easy ways to make this recipe your own, depending on what you’ve got on hand or what flavors you’re craving:
Use Fresh Pineapple: If you’re using fresh pineapple instead of canned rings, make sure it’s ripe and slice it thinly so it softens during baking. Just be sure to remove the core—it can be too tough in baked desserts.
Add Coconut: For a more tropical twist, try sprinkling a handful of sweetened shredded coconut into the cake batter before baking. It adds texture and flavor without overpowering the pineapple.
Poke Cake Style: After baking but before inverting, you can poke a few holes into the top of the cake and drizzle a bit of reserved pineapple juice over it. This adds even more moisture and pineapple flavor.
Rum Kick: Want a grown-up version? Add a tablespoon of dark rum or coconut rum to the batter for a subtle kick that pairs perfectly with pineapple and brown sugar.
Juicy Pineapple Heaven Cake: A Sweet and Simple Tropical Dessert
At this point, you’ve got a gorgeous, golden pineapple cake that’s just begging to be served. The caramelized brown sugar topping, the perfectly baked cake layers, and those iconic pineapple rings with cherries—this dessert checks all the boxes for flavor, texture, and visual appeal.
Now before we wrap things up, I want to take a moment to answer some of the most common questions that come up when making this cake. Whether it’s your first time baking it or you’re just looking for a few expert tips, these FAQs should help make your Pineapple Heaven Cake experience as smooth and stress-free as possible.
Frequently Asked Questions
1. Can I make this cake ahead of time?
Yes! In fact, this cake tastes even better the next day. Once it’s cooled completely, cover it tightly and store it in the refrigerator. When you’re ready to serve, let it come to room temperature or warm individual slices in the microwave for a few seconds.
2. Can I use fresh pineapple instead of canned?
Absolutely. Just make sure it’s ripe and thinly sliced so it softens while baking. You can still add a bit of pineapple juice to the batter if you want to keep the moisture level similar to using canned pineapple.
3. What’s the best pan to use for this recipe?
A standard 9×13-inch baking pan works best for easy slicing and serving. You can also use a deep round cake pan if you want a more traditional upside-down cake look—just keep an eye on baking time, which may vary slightly depending on the pan depth.
4. How should I store leftovers?
Cover leftover cake with foil or plastic wrap and store it in the fridge for up to 4–5 days. If you prefer it warm, pop a slice in the microwave for about 15–20 seconds before serving.
5. Can I freeze this cake?
Yes, you can freeze the cake once it’s fully cooled. Wrap it tightly in plastic wrap and then in foil, and freeze for up to 2 months. Thaw in the refrigerator overnight and bring to room temperature before serving.
6. Do I have to use maraschino cherries?
Not at all! They’re mainly for presentation and a pop of color. If you’re not a fan, you can skip them entirely or substitute with something else you like, such as halved strawberries or even dried cranberries for a different twist.
7. Can I make this gluten-free?
Yes, just use a gluten-free yellow cake mix and make sure all other ingredients are certified gluten-free. The texture may be slightly different, but it should still turn out moist and delicious.
Final Thoughts
This Juicy Pineapple Heaven Cake is truly one of those desserts that checks every box—it’s beautiful, easy to make, and packed with flavor. It feels nostalgic yet fresh, and it’s versatile enough for everything from casual gatherings to holiday celebrations.
What I love most about this recipe is how forgiving it is. Whether you use canned or fresh pineapple, make it the night before or serve it warm right out of the oven, it always manages to steal the show. And because it starts with a cake mix, it takes out all the guesswork and leaves you with a reliable, crowd-pleasing result every single time.
If you try this recipe, I’d love to hear how it turned out for you! Feel free to leave a comment, share any fun twists you made (maybe coconut flakes? a splash of rum?), or let me know if your family loved it as much as mine does. There’s always room for another slice of pineapple heaven.
Until next time—happy baking!
Have you tried serving this cake with a homemade whipped cream topping or maybe a drizzle of caramel sauce? Let me know what worked for you!
Print
Juicy Pineapple Heaven Cake
- Author: Andrew Recipes
Description
This moist and flavorful pineapple cake brings tropical sweetness and classic comfort together in one delicious bite. With a rich brown sugar glaze, vibrant pineapple rings, and a soft, tender crumb, this cake is as beautiful as it is satisfying. It’s perfect for potlucks, holidays, or anytime you want to impress with minimal effort.
Ingredients
For the Cake:
1 box yellow cake mix (or homemade equivalent)
1 can (20 oz) crushed pineapple, undrained
1/2 cup sour cream
1/2 cup vegetable oil
4 large eggs
1 tsp vanilla extract
For the Topping:
1/2 cup unsalted butter, melted
1 cup packed brown sugar
6–8 pineapple rings (fresh or canned, drained)
Maraschino cherries (optional, for garnish)
Instructions
Step 1: Preheat the Oven
Preheat your oven to 350°F (175°C). Grease a 9×13-inch baking pan or round cake pan thoroughly to prevent sticking.
Step 2: Prepare the Topping
Mix the melted butter and brown sugar in a small bowl until smooth. Spread this mixture evenly over the bottom of the prepared pan. Arrange the pineapple rings over the brown sugar layer, placing a maraschino cherry in the center of each ring for a classic presentation.
Step 3: Make the Cake Batter
In a large bowl, combine the cake mix, crushed pineapple with juice, sour cream, oil, eggs, and vanilla extract. Beat until the batter is smooth and well blended.
Step 4: Assemble and Bake
Pour the batter over the pineapple topping in the pan, spreading it gently to form an even layer. Bake for 35–45 minutes, or until a toothpick inserted into the center comes out clean.
Step 5: Cool and Invert
Let the cake cool in the pan for 10 minutes. Run a knife around the edges, then carefully invert the cake onto a serving platter so the pineapple topping is on top.
Step 6: Serve
Allow the cake to cool slightly before slicing. Serve warm or at room temperature. This cake pairs wonderfully with a scoop of vanilla ice cream or a dollop of whipped cream.
Notes
For an extra moist cake, you can poke small holes in the top after baking and drizzle with reserved pineapple juice before inverting. If using fresh pineapple, make sure it’s ripe and thinly sliced for the best texture. This cake stores well and tastes even better the next day.

