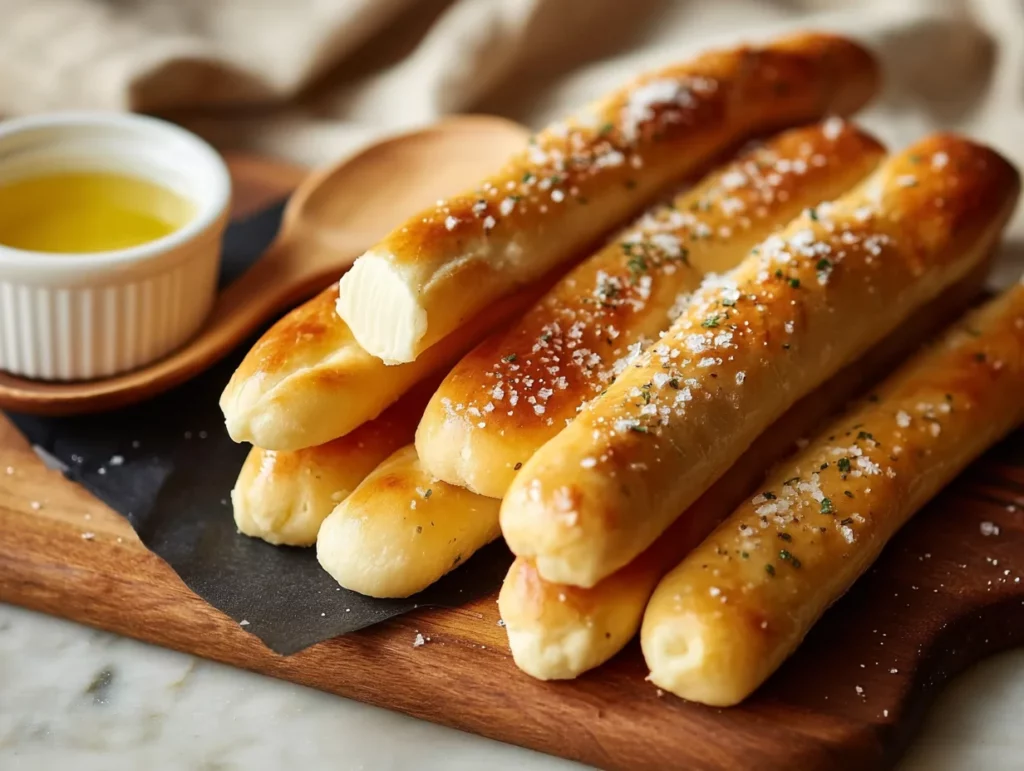
There’s something undeniably comforting about a warm, soft breadstick—especially the kind that comes from the basket at Olive Garden. If you’ve ever found yourself reaching for “just one more,” you’re definitely not alone. Today, I’m sharing a homemade version of Olive Garden Breadsticks that’s about to change your dinner game forever. These are golden, buttery, and just the right amount of garlicky… pretty much everything you’d want in a breadstick.
I first started experimenting with this recipe after a family dinner out when my kids kept raving more about the breadsticks than their actual meals (typical, right?). I thought, “Why not try making them at home?”—and let me tell you, the results were dangerously good. These breadsticks are soft and fluffy on the inside, with a light chew on the outside and that signature garlic-butter topping that’s impossible to resist. Whether you’re serving them with spaghetti, soup, or just enjoying them as a snack (guilty), they’re always a hit.
So let’s dive in! I’ll walk you through the first few steps of making these restaurant-style breadsticks right in your own kitchen.
Ingredients You’ll Need
Before we jump into the mixing, here’s what you’ll need to gather:
For the Dough:
1 cup warm water (about 110°F)
2 ¼ teaspoons active dry yeast
2 tablespoons granulated sugar
3 tablespoons unsalted butter, softened
1 ½ teaspoons salt
3 cups all-purpose flour
For the Topping:
3 tablespoons unsalted butter, melted
½ teaspoon garlic powder
½ teaspoon salt (or garlic salt, if preferred)
STEP 1: Activate the Yeast
This step is key for getting those fluffy breadsticks! In the bowl of your stand mixer (or a large mixing bowl if you’re going old school), combine the warm water, yeast, and sugar. Give it a quick stir and let it sit for about 5 to 10 minutes. You’re looking for the mixture to become foamy—that’s your sign that the yeast is alive and ready to work its magic.
Tip: Make sure your water isn’t too hot or too cold. Around 110°F is perfect—think warm bath water. If the water’s too hot, it can kill the yeast, and then you’ll end up with dense breadsticks (no thank you).
STEP 2: Mix the Dough
Once your yeast is nice and bubbly, it’s time to add the remaining dough ingredients: the softened butter, salt, and all-purpose flour. Start mixing on low speed until the dough starts to come together. Once it does, bump up the speed and knead the dough for 8 to 10 minutes, or until it’s smooth and elastic.
No stand mixer? No problem. You can do this by hand—just turn the dough out onto a floured surface and knead it the old-fashioned way. It’s a little extra effort, but totally doable.

STEP 3: Let It Rise
After kneading, shape the dough into a ball and place it in a lightly greased bowl. Cover it with a damp towel or plastic wrap and let it rise in a warm spot for about 1 to 1 ½ hours. You’re looking for the dough to double in size.
Pro Tip: If your kitchen is on the cooler side, pop the bowl into your (turned-off) oven with the oven light on. It creates a nice warm environment that’s perfect for rising dough.
STEP 4: Shape the Breadsticks
Once your dough has puffed up, gently punch it down to release the air. Divide it into 10 to 12 equal pieces, depending on how big or small you want your breadsticks. Roll each piece into a rope about 7 inches long, and place them on a parchment-lined baking sheet. Be sure to leave a little space between each one—they’ll puff up more during the second rise.
Cover them loosely and let them rest for another 30 to 40 minutes, until they look nice and puffy again.
Homemade Olive Garden Breadsticks – Baked to Buttery Perfection
Alright, if your kitchen is already starting to smell a little yeasty and cozy, you’re right on track. In Part 1, we mixed, kneaded, and shaped our dough into those classic rope-like breadsticks, and now it’s time to finish the job. This next part is where all that pillowy softness and buttery garlic goodness comes to life. You’re just a few steps away from those warm, melt-in-your-mouth breadsticks that taste just like Olive Garden’s (if not better).
Let’s jump right back in and get to the good part—baking and buttering!
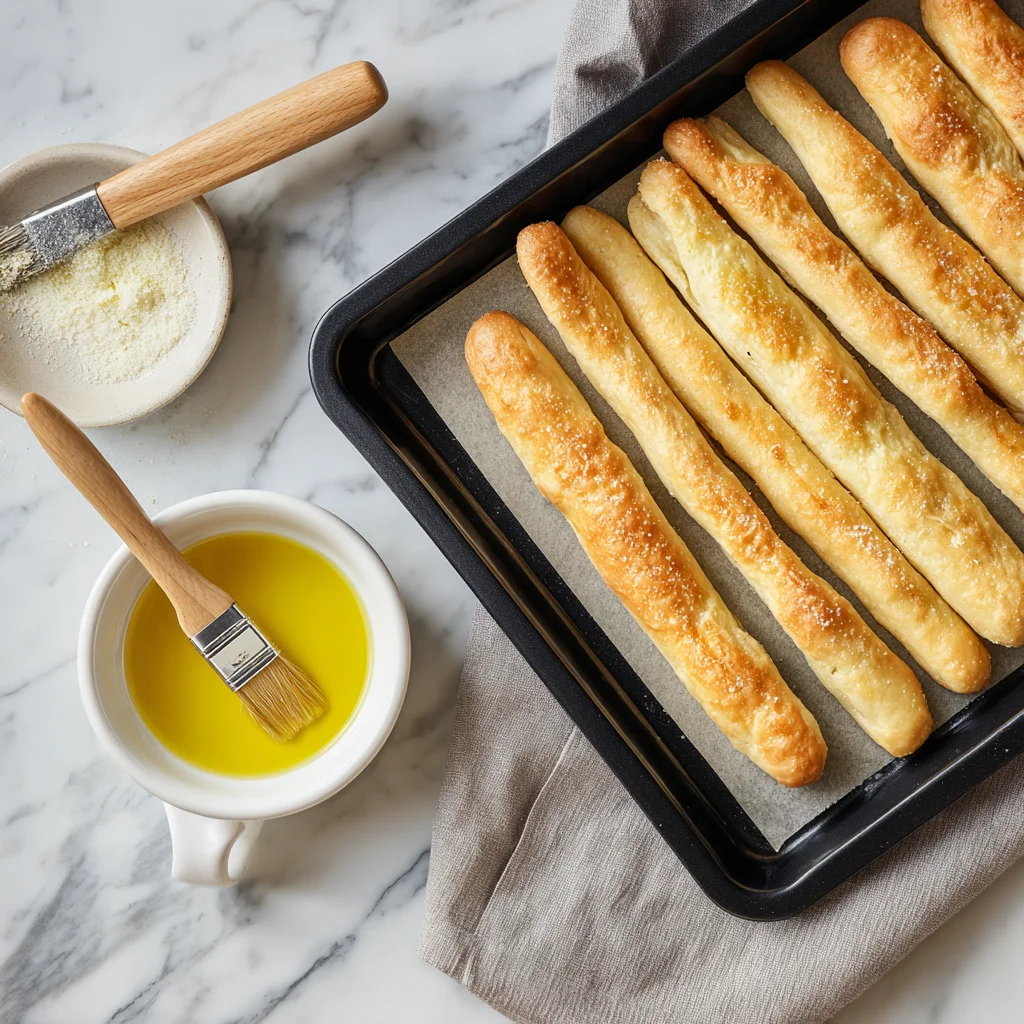
STEP 5: Bake the Breadsticks
Once your shaped dough has had its second rise and looks beautifully puffed, it’s time to bake. Preheat your oven to 400°F and slide the baking sheet onto the center rack.
Bake for 12 to 14 minutes, or until the tops are just lightly golden. You’re not looking for a super dark crust here—keeping them soft and golden is key to that Olive Garden feel.
Tip: Don’t overbake! If they get too brown, they’ll lose that soft texture that makes them so addicting. I usually set a timer for 12 minutes and keep an eye on them from there. Every oven is different, so a quick peek around the 11-minute mark doesn’t hurt.
STEP 6: Brush with Garlic Butter
Here’s the part that makes these breadsticks truly irresistible.
While the breadsticks are baking, melt 3 tablespoons of unsalted butter in a small bowl. Stir in ½ teaspoon of garlic powder and ½ teaspoon of salt (or go with garlic salt if you like things extra savory).
As soon as the breadsticks come out of the oven, brush them generously with the garlic butter mixture. Don’t be shy here—the more you brush on, the more that flavor soaks into every bite.
Pro Tip: Want even more flavor? Double the topping and brush them once when they come out of the oven, and again just before serving. That second hit of warm butter right before they hit the table? Game-changer.
Bonus Tips for Perfect Breadsticks Every Time
There’s something so satisfying about pulling a tray of golden breadsticks out of the oven and seeing them glisten with butter. To make sure yours turn out perfect every time, here are a few tips I’ve picked up after making these more times than I can count:
Use fresh yeast: If your yeast doesn’t get foamy in Step 1, toss it and start again. It’s the foundation for a fluffy, well-risen dough.
Don’t skimp on the rise time: It’s tempting to rush through it, but allowing the dough to rise fully (both times) makes a huge difference in the texture.
Garlic salt vs. plain salt: If you love that extra kick of garlic, using garlic salt instead of plain salt in the topping adds even more flavor.
Serve warm: These are at their absolute best fresh out of the oven. If you’re serving later, a quick reheat in the oven (about 5 minutes at 350°F) will bring them right back to life.
Try a cheesy twist: For a fun variation, sprinkle a little grated Parmesan on top of the breadsticks right after brushing on the butter. It adds a delicious salty bite and looks beautiful too.
Serving Ideas
These copycat Olive Garden breadsticks are honestly so good, they can stand on their own. But if you’re building a full meal around them, here are a few of my favorite pairings:
Spaghetti with meat sauce – Classic combo and always a crowd-pleaser.
Homemade fettuccine Alfredo – Rich, creamy pasta and soft garlic bread? Yes, please.
Hearty soups like minestrone or chicken gnocchi – Dip, bite, repeat.
Fresh salad with Italian dressing – Just like at the restaurant, only cozier.
Honestly, I’ve even served these with a bowl of warm marinara for dipping and called it dinner on a busy weeknight. No one ever complains.
Your Olive Garden Breadsticks Questions Answered
You’ve mixed, kneaded, shaped, baked, and brushed—and by now, your kitchen probably smells like a little slice of Olive Garden heaven. These homemade breadsticks are buttery, soft, and just the right amount of garlicky. And the best part? They’re easier to make than you might think.
Before we wrap things up, let’s talk through a few frequently asked questions that come up when making these copycat Olive Garden breadsticks at home. Whether you’re a first-timer or just looking to perfect your technique, these tips will help make sure your breadsticks turn out bakery-worthy every time.
Frequently Asked Questions
1. Can I use instant yeast instead of active dry yeast?
Yes! If you’re using instant yeast, you can skip the proofing step (where you let it sit in water to get foamy). Just mix it directly with the dry ingredients and proceed with the rest of the recipe. Your rise times may be a little shorter, so keep an eye on the dough.
2. What’s the best way to store leftover breadsticks?
Store any leftovers in an airtight container or resealable plastic bag at room temperature for up to 2 days. To reheat, wrap them in foil and warm them in a 350°F oven for about 5 minutes. They’ll taste almost as good as fresh out of the oven.
3. Can I freeze the dough?
Absolutely! After the first rise, shape the dough into breadsticks and place them on a baking sheet. Freeze until solid, then transfer to a freezer-safe bag. When ready to use, let them thaw and rise before baking as usual. It’s a great make-ahead option.
4. How do I get that perfectly soft texture?
The key is not overbaking. You want the tops just lightly golden—if they bake too long, they’ll become crusty rather than soft. Also, brushing them with butter right out of the oven helps lock in moisture.
5. Can I make these gluten-free?
While this recipe hasn’t been tested with gluten-free flour, you can try substituting a 1:1 gluten-free baking blend. Keep in mind that texture may vary slightly, and the dough might be a bit more delicate to handle.
6. What if I don’t have a stand mixer?
No problem. You can absolutely make this dough by hand. It’ll just take a little extra elbow grease during the kneading step, but the results are just as delicious.
7. Is there a way to make them spicier or more flavorful?
Definitely. Add a pinch of crushed red pepper flakes or Italian seasoning to the garlic butter for a flavor boost. Or try brushing them with herbed butter for a more savory, aromatic twist.
Final Thoughts: Warm Breadsticks, Happy Table
There’s something about pulling a tray of warm, golden breadsticks from the oven that just makes any meal feel a little more special. Whether you’re serving these alongside a hearty bowl of pasta, a cozy fall soup, or just as a snack for hungry kids (or yourself!), these homemade Olive Garden breadsticks bring that comforting restaurant-style touch straight into your kitchen.
I love how simple and customizable this recipe is—it’s the kind of recipe that becomes a go-to in your rotation because it never fails to impress. Plus, that garlic butter? Worth every brush stroke.
If you give this recipe a try, I’d love to hear how it turns out! Did you add Parmesan? Make a double batch for the freezer? Drop a comment below and let me know how you served them. And if you’re anything like my family, don’t be surprised if these breadsticks become the most-requested side dish at every dinner from here on out.
Print
Olive Garden Breadsticks
- Author: Andrew Recipes
Description
These soft, buttery breadsticks are inspired by the famous Olive Garden classic. They’re slightly chewy on the outside, pillowy on the inside, and brushed with a savory garlic butter that makes them completely irresistible. Whether served with pasta, soup, or as a snack on their own, these breadsticks bring that warm, restaurant-style touch right to your home kitchen.
Ingredients
For the dough
1 cup warm water (about 110°F)
2 ¼ teaspoons active dry yeast
2 tablespoons granulated sugar
3 tablespoons unsalted butter, softened
1 ½ teaspoons salt
3 cups all-purpose flour
For the topping
3 tablespoons unsalted butter, melted
½ teaspoon garlic powder
½ teaspoon salt (or garlic salt, if preferred)
Instructions
In the bowl of a stand mixer or a large mixing bowl, combine warm water, yeast, and sugar. Let the mixture sit for about 5 to 10 minutes until foamy.
Add the softened butter, salt, and flour to the yeast mixture. Mix until a dough begins to form, then knead for 8 to 10 minutes until smooth and elastic. If kneading by hand, turn the dough out onto a floured surface.
Place the dough in a greased bowl, cover with a damp towel or plastic wrap, and let rise in a warm area for about 1 to 1 ½ hours, or until doubled in size.
Punch down the dough and divide it into 10 to 12 equal pieces. Roll each piece into a rope about 7 inches long. Arrange on a parchment-lined baking sheet, spacing them slightly apart.
Cover the shaped dough and let rest for another 30 to 40 minutes until puffy.
Preheat oven to 400°F. Bake the breadsticks for 12 to 14 minutes, or until lightly golden on top.
While the breadsticks bake, mix the melted butter with garlic powder and salt. As soon as the breadsticks come out of the oven, brush them generously with the garlic butter mixture.
Notes
For a more authentic texture, avoid over-baking so the breadsticks stay soft. You can double the butter topping for an extra indulgent finish. These are best served warm but can be stored in an airtight container and reheated in the oven for a few minutes to refresh. Add a sprinkle of grated Parmesan for a cheesy twist.

