There’s just something magical about food that’s handmade, warm, and filled with melty cheese—especially when it comes to pupusas. These thick, griddled corn tortillas are stuffed with savory fillings and cooked until crispy on the outside and tender on the inside. I’m telling you, if comfort food had a passport, pupusas would be stamped on every page.
Today, we’re diving into a classic recipe for cheese pupusas, with tips for adding beans or pork if you’re feeling a little adventurous. But even if you’ve never made these before, don’t worry! I’ll walk you through every step, from mixing the masa to getting that perfect golden-brown crust.
And here’s the best part—they only take about 35 minutes from start to finish. Whether you’re cooking for your family on a weeknight or hosting a weekend get-together, these pupusas are guaranteed to impress. Plus, they’re naturally gluten-free and super easy to customize. Let’s get started!
Why You’ll Love This Pupusa Recipe
Pupusas are a beloved staple in Salvadoran cuisine for good reason—they’re simple, satisfying, and absolutely packed with flavor. The dough is made with just three ingredients, and the filling can be as basic or bold as you like.
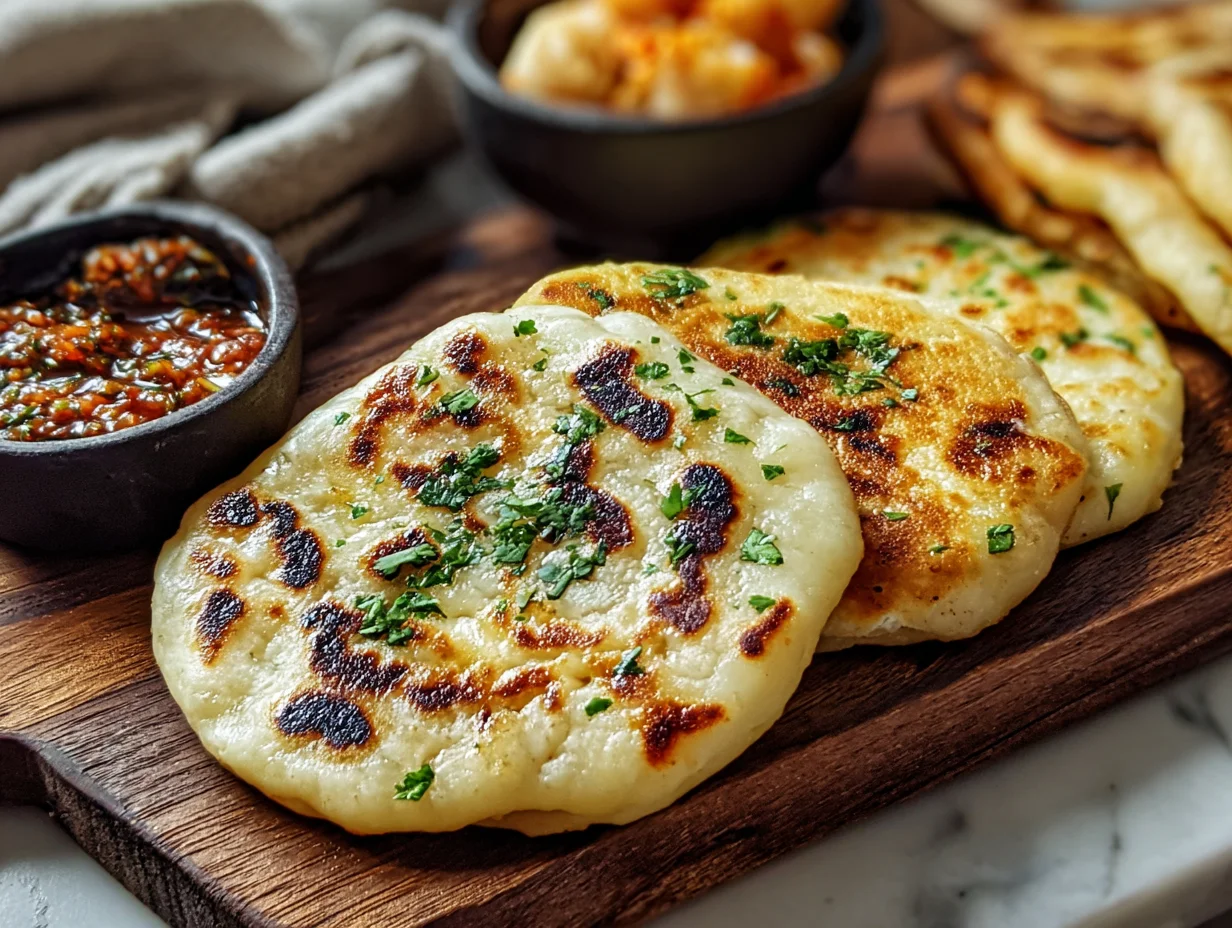
What really makes pupusas stand out is their texture: that perfect balance between a crisp exterior and a soft, pillowy interior. And when that warm cheese starts to ooze out just a little at the edges? Game over. You’ll want to make these again and again.
Even better, they pair beautifully with traditional sides like curtido (a vinegar-based cabbage slaw) and salsa roja, bringing a fresh, tangy contrast to every bite. I like to prep a big batch of curtido ahead of time and store it in the fridge—it keeps really well and adds an instant boost of flavor to any meal.
Ingredients You’ll Need
Let’s break down what you need for these homemade pupusas. The dough is made from masa harina, which is a special type of corn flour—not to be confused with regular cornmeal or cornflour. It’s the same kind used to make tortillas and tamales, and you can find it in the Latin section of most grocery stores.

For the Dough
2 cups masa harina (corn flour)
1 ½ cups warm water
½ teaspoon salt
For the Filling
1 ½ cups shredded mozzarella or quesillo cheese
Optional: ½ cup refried beans or finely chopped cooked chicharrón (seasoned pork)
If it’s your first time, I recommend starting with just cheese—it melts beautifully and gives you that signature pupusa flavor. But don’t be afraid to get creative later!
STEP-BY-STEP: How to Make Pupusas
Step 1: Make the Dough
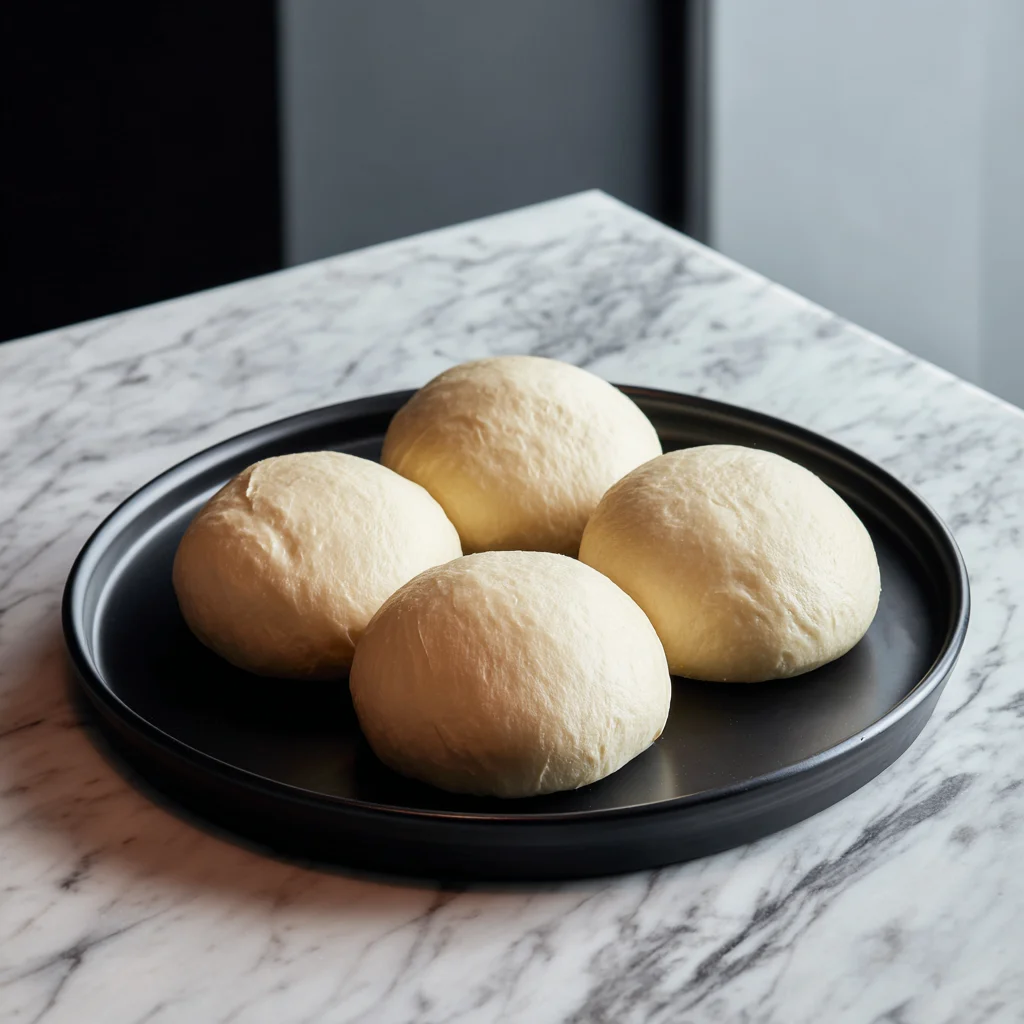
Start by grabbing a large mixing bowl. Combine the masa harina and salt, then slowly pour in the warm water, mixing as you go. Use your hands to knead the dough until it feels soft and smooth—think playdough texture. It should be pliable but not sticky. If it feels too dry, add a tiny splash of water. Too wet? Sprinkle in a bit more masa.
Once the dough is ready, cover it with a damp towel and let it rest for 10 minutes. This helps it hydrate evenly and makes shaping easier.
Step 2: Divide and Shape
Now comes the fun part! Divide your dough into eight equal portions and roll each one into a ball. Flatten each ball slightly with your hands to form a small disk about 3 inches wide.
Tip: Keep a bowl of water nearby and lightly wet your hands as you work. This prevents sticking and helps smooth out the dough.
Step 3: Add the Filling
Spoon about 2 tablespoons of cheese (or your chosen filling) into the center of each disk. Carefully fold the edges of the dough over the filling and pinch them together to seal it inside. Then gently flatten the ball into a thick disk, about 4-5 inches wide.
This part might take a bit of practice—but don’t stress if a little filling peeks out. That just means extra crispy bits when it hits the skillet!
How to Cook Pupusas Like a Pro: Crispy, Cheesy, and Absolutely Irresistible
Now that your pupusas are shaped and filled, it’s time for the best part—cooking them up until golden and delicious. If this is your first time making pupusas, don’t worry. It’s a lot like making pancakes, just a little thicker and way more satisfying.
There’s something so comforting about the sizzle when that dough hits the hot skillet. The outside gets lightly crisped, the cheese melts into gooey perfection, and the whole kitchen starts to smell incredible. If you’ve ever bought pupusas from a street vendor or small family restaurant, this is your chance to recreate that same flavor at home.
And if you’re planning ahead? I’ve got you covered with tips on freezing, reheating, and even fun ways to mix up the filling.
Step 4: Heat the Skillet
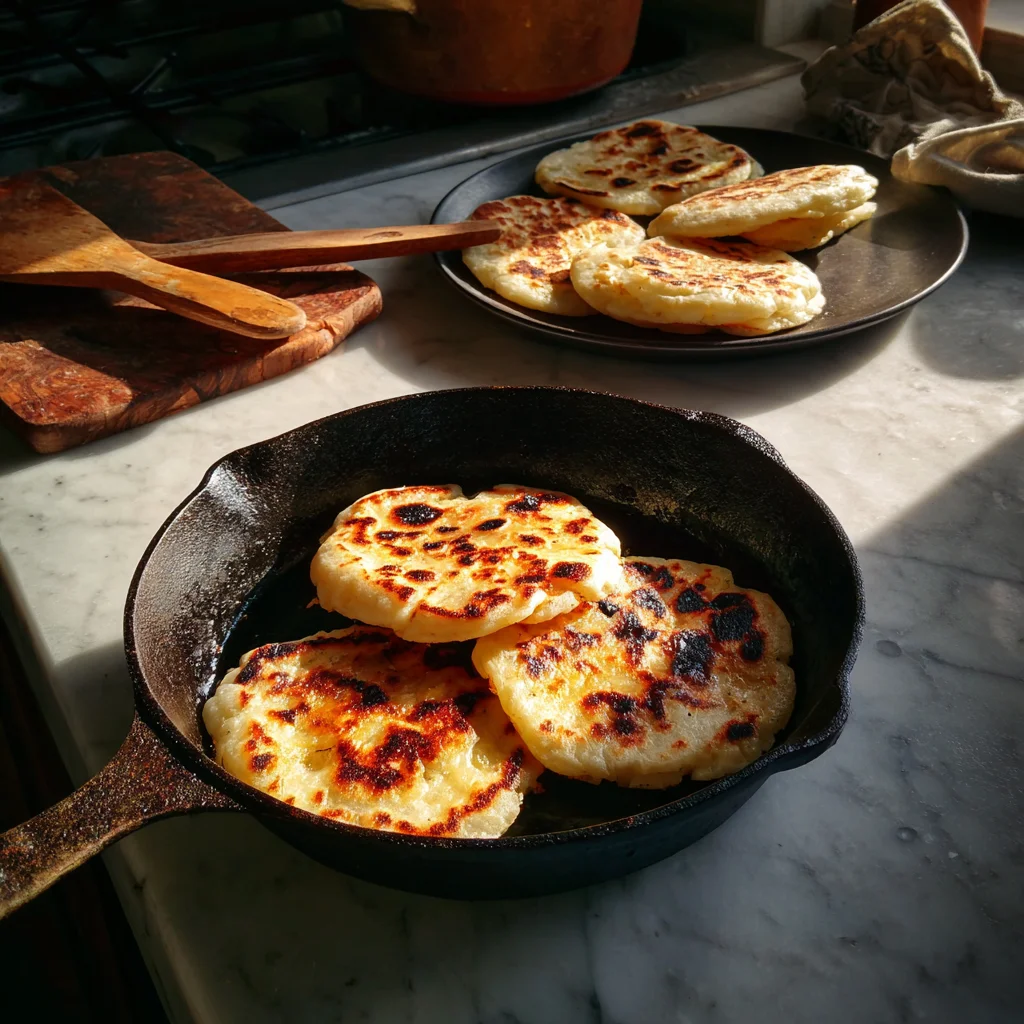
Grab a large non-stick skillet or cast iron pan and heat it over medium heat. You want it hot enough to give your pupusas a nice golden crust, but not so hot that they burn before the inside gets melty.
Lightly oil the surface of your skillet. You don’t need a lot—just enough to keep them from sticking. I usually use a neutral oil like vegetable or canola, but you can also use a light brush of olive oil if that’s what you have on hand.
Step 5: Cook Until Golden and Bubbly
Place a few pupusas onto the hot skillet, leaving space between them so they’re easy to flip. Cook for 3 to 4 minutes per side, pressing down slightly with a spatula if needed to ensure even cooking.
You’ll know they’re ready to flip when you see a deep golden color and hear a gentle sizzling. If any cheese starts to leak out—that’s a win! Those crispy cheese bits are some of the best parts.
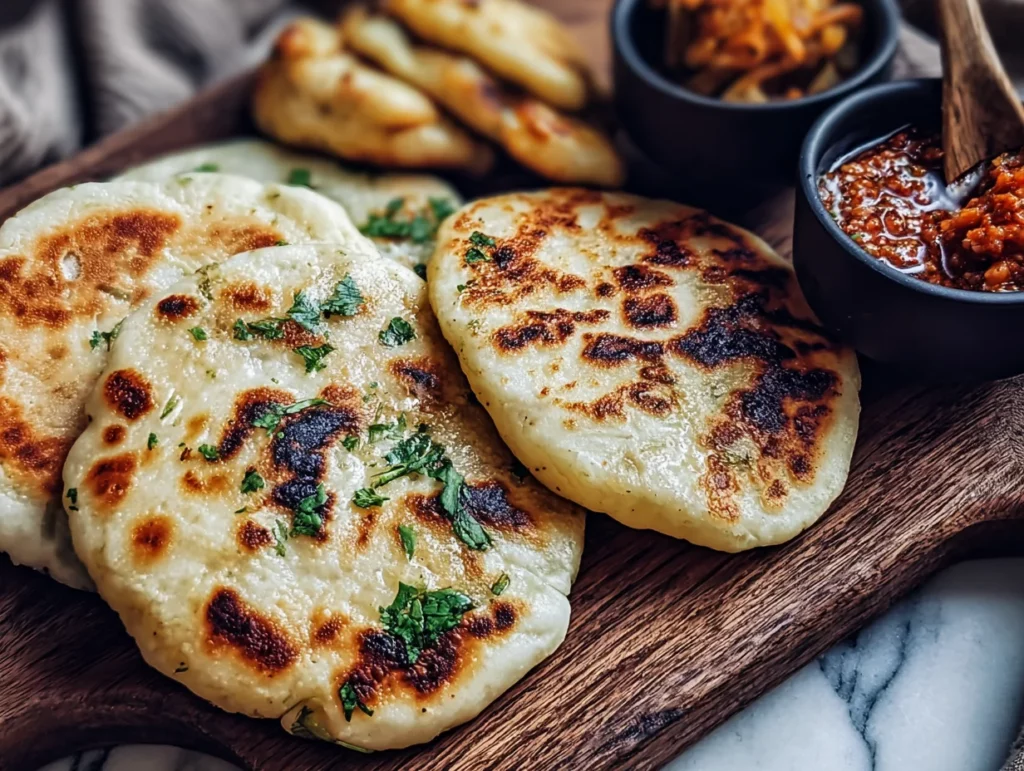
Once both sides are golden and the pupusas feel slightly firm to the touch, they’re ready to serve.
Serving Suggestions: Make It a Full Meal
In El Salvador, pupusas are traditionally served with two essential sides: curtido and salsa roja. Trust me—you don’t want to skip these. They bring freshness and a little kick that balance the richness of the pupusas perfectly.
Curtido is a lightly fermented cabbage slaw with carrots, onions, and a vinegar-based brine. It’s tangy, crunchy, and just the thing to cut through the melty cheese.
Salsa Roja is a simple tomato-based sauce, lightly spiced and blended until smooth. It’s poured over the pupusas or served on the side for dipping.
If you’re short on time, you can make a quick curtido by tossing shredded cabbage, grated carrot, and thin-sliced onion with apple cider vinegar, salt, oregano, and a bit of hot water. Let it sit for at least 30 minutes before serving.
Tips for Success
1. Don’t Overfill
It’s tempting to pile on the cheese, but too much filling makes it hard to seal the dough and can cause leaks. Stick to about 2 tablespoons per pupusa.
2. Keep Your Hands Damp
Wet hands = easier shaping. A small bowl of water nearby makes this process much smoother and prevents sticking.
3. Patch Any Cracks
If your dough starts to crack or tear while shaping, no worries. Just pinch it back together or use a little extra dough to patch it.
4. Customize Your Fillings
While cheese is the go-to, you can also use:
Refried beans for a creamier texture
Chicharrón (finely chopped seasoned pork) for a savory, meaty option
Jalapeños or loroco (a Salvadoran edible flower) for added flavor
5. Freeze for Later
One of my favorite things about pupusas is how well they freeze. Shape them as usual (uncooked), lay them flat on a baking sheet, and freeze until solid. Then transfer to a zip-top bag and store for up to 2 months.
When you’re ready to eat, cook them straight from the freezer—no need to thaw. Just add a couple extra minutes to each side in the skillet.
How to Reheat Pupusas
Have leftovers? Reheating is easy. You can:
Reheat in a skillet for 2–3 minutes per side over medium heat.
Warm in the oven at 350°F for about 10 minutes.
Avoid microwaving if possible—it makes the dough rubbery and loses that crisp edge.
Pupusa Perfection: FAQ and Final Thoughts
By now, you’ve shaped, filled, cooked, and maybe even tasted your first pupusas—and I hope you’re loving every bite. Whether you stuck with the classic cheese filling or went a little bold with beans or pork, you’ve created something truly special. And while pupusas are incredibly simple in their ingredients, they’re rich in culture, comfort, and flavor.
Before we wrap things up, let’s answer a few of the most common questions people have when making pupusas at home. Whether it’s your first time or your tenth batch, these tips can help make your pupusa-making experience even better.
FAQ: Common Pupusa Questions Answered
1. What is masa harina, and can I use regular cornmeal instead?
Masa harina is a finely ground corn flour made from nixtamalized corn, which means it’s been treated with lime water. This gives it a distinct flavor and texture that’s essential for making pupusas, tortillas, and tamales. Regular cornmeal or corn flour won’t work the same way, so make sure to use masa harina (brands like Maseca are easy to find in most grocery stores).
2. How do I keep the pupusas from tearing when shaping them?
If your dough is cracking or tearing, it may be too dry. Try adding a bit more warm water to the dough and keep your hands damp while shaping. Also, don’t press too hard when flattening the filled pupusa—gentle pressure works best to avoid leaks.
3. Can I bake pupusas instead of frying them?
Pupusas are traditionally cooked on a griddle or skillet, and that’s how you get the signature texture—crispy outside and soft inside. Baking won’t give you the same result. If you’re trying to avoid oil, you can use a dry non-stick skillet with no added oil, but frying with a small amount of oil really gives the best flavor and texture.
4. How do I store and reheat leftovers?
Cooked pupusas can be stored in an airtight container in the fridge for up to 3 days. To reheat, place them in a skillet over medium heat for 2–3 minutes per side. You can also reheat them in the oven at 350°F for about 10 minutes. Avoid microwaving if you can—it tends to make them rubbery.
5. What’s the best way to freeze pupusas?
Shape your pupusas (uncooked), then place them in a single layer on a baking sheet. Freeze until solid, then transfer to a zip-top bag. You can cook them straight from the freezer—just add an extra 2–3 minutes per side during cooking.
6. Can I make pupusas without cheese?
Absolutely! While cheese is a popular and traditional filling, you can make pupusas with refried beans, seasoned mashed vegetables, or chicharrón. Just make sure whatever filling you use is thick and not too runny, so it stays sealed inside the dough.
7. What sides go well with pupusas?
Pupusas are traditionally served with:
Curtido: A tangy cabbage slaw that adds crunch and acidity.
Salsa Roja: A smooth, tomato-based sauce with just the right amount of spice.
You can also serve them with avocado slices, sour cream, or even a fried egg on top for a fun twist.
Conclusion: Time to Make Pupusas at Home
And that’s it—you’re now officially a pupusa pro! This traditional Salvadoran dish is one of those recipes that’s simple at heart but full of soul, and once you get the hang of the shaping and filling, it becomes second nature.
Whether you’re making them for a family dinner, sharing with friends, or freezing a batch for busy nights, pupusas are a delicious way to bring something new and satisfying to the table. Don’t forget to serve them hot, with plenty of curtido and salsa on the side.
Print
Pupusas
- Author: Andrew Recipes
Description
Pupusas are a traditional Salvadoran dish made from a thick corn tortilla stuffed with a variety of savory fillings, most commonly cheese, refried beans, or seasoned pork. Crispy on the outside and soft on the inside, pupusas are best enjoyed hot off the griddle and served with curtido (a tangy cabbage slaw) and salsa roja. Simple yet deeply flavorful, they are a staple in Salvadoran cuisine and beloved for their comforting texture and hearty fillings.
Ingredients
For the dough
2 cups masa harina (corn flour)
1 ½ cups warm water
½ teaspoon salt
For the filling (basic cheese pupusas)
1 ½ cups shredded mozzarella or quesillo cheese
Instructions
In a large bowl, mix the masa harina and salt. Gradually add warm water and knead until a smooth, soft dough forms. The texture should be pliable but not sticky. Let the dough rest for 10 minutes covered with a damp towel.
Divide the dough into 8 equal portions and roll each into a ball. Flatten each ball slightly in your hands to form a small disk.
Place about 2 tablespoons of your chosen filling in the center of each disk. Carefully bring the edges of the dough up around the filling and pinch to seal. Gently flatten the stuffed ball into a thick disk, being careful not to let the filling spill out.
Heat a lightly oiled skillet or griddle over medium heat. Cook the pupusas for 3 to 4 minutes on each side, or until golden brown and slightly crispy.
Serve hot with curtido and salsa roja for a traditional presentation.
Notes
Pupusas can be made with a variety of fillings including jalapeños, loroco (a Central American edible flower), or a combination of cheese and beans. Be gentle when flattening to avoid tears in the dough. Keep a bowl of water nearby to wet your hands—this helps keep the dough from sticking while shaping. You can also freeze uncooked pupusas for later use; just cook them straight from the freezer with a few extra minutes on the griddle.

